As per the title, I tackled this job this morning so thought why not take some pictures and create a DIY guide as it seems a common issue.
N.B: I tried posting this in the '700/900 articles' section but unfortunately was met with a message stating that I don't have permission? If a mod could possibly move this there if possible that would be great....
Step 1.
Decide you'd like to replace your crankshaft (Pulse) sensor. This could be for simple preventative maintenance, because of a no start condition or because you've found the wiring to be damaged like mine...
 Step 2
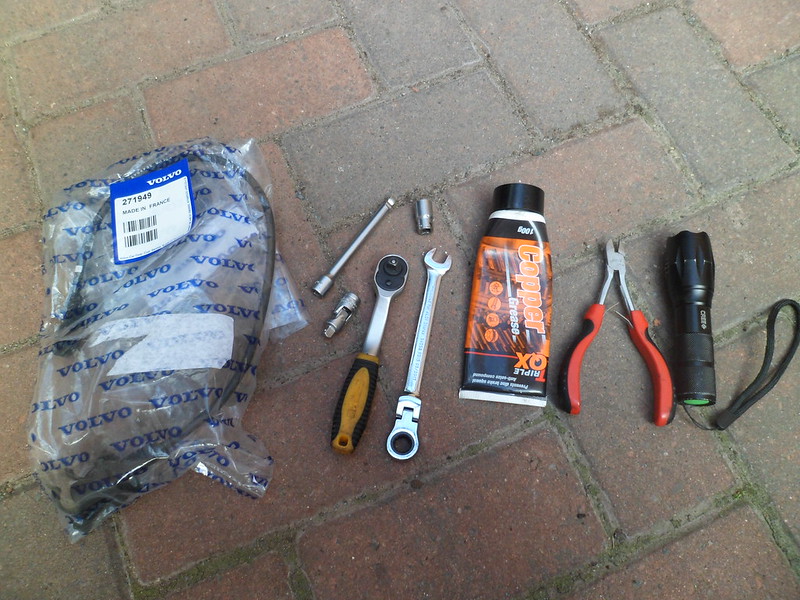
Gather the bits you need...
1. New sensor (Mine was just under £40 trade price from Volvo)
2. 10mm ratchet spanner
3. Assortment of ratchet/10mm socket/extensions/uj's
4. Copper grease
5. Electric contact cleaner spray
6. Snips
7. Cable ties.
8. Torch
 Step 3
Disconnect the cable tie harness fitting from the firewall by simply lifting it free of the tab it sits on at the back and then look at it, there's a little lever that when pushed allows you to open the cable tie section to make it loose and withdraw the wiring/loom. This allowed me so remove the old CPS without destroying it's wiring completely so as I can keep it as a spare just in case.
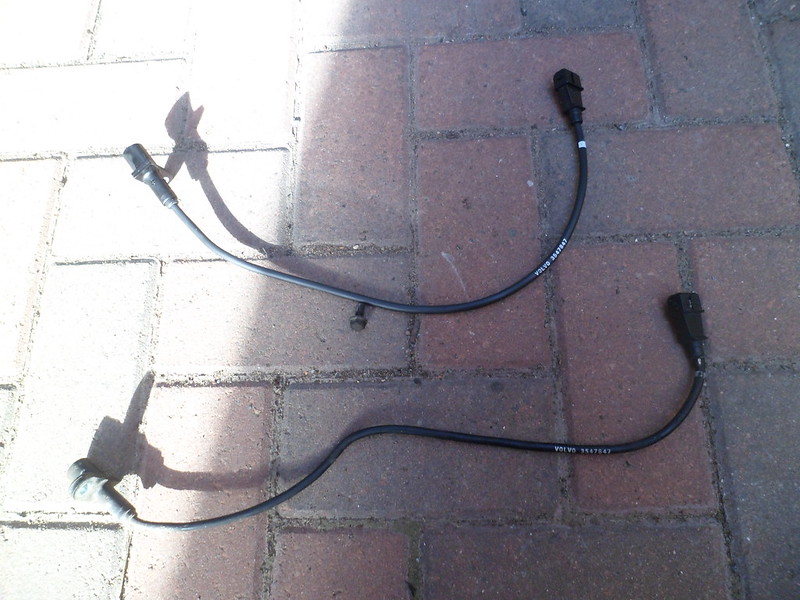
Once you've done this you simply need to follow the wire from the plug down to the bellhousing, there you will find the sensor (Arrowed in green) It's a bit fiddly but is only held on by one 10mm bolt.
 Step 4
Undo the 10mm bolt, remove the clips holding the wiring to other stuff along it's course and unclip and remove the plug. Remove the sensor and wiring from the car and compare it with your new part to ensure they match...
 Step 5
Spray inside the plug fitting from the loom with contact cleaner to ensure a good connection, lightly cover the end of the bolt with copper grease and re install everything in the reverse order of removal. The bolt does not need to be too tight, DON'T STRIP IT!!!! Re-seat the loom support/cable tie to the firewall with loom in place and perhaps tidy up the extra wiring from the newly installed sensor with a couple of extra cable ties.
 Step 6
Stand back and feel satisfied that the job is complete. it took me 20mins at a very relaxed pace and that included time to take pictures. In the end I didn't use the socket set and TBH could have done without lots of the gear pictured. At a push all that's needed is some snips and a 10mm spanner.
HTH.
Original Topic for discussion:
Here