
|
|||||||
| PV, 120 (Amazon), 1800 General Forum for the Volvo PV, 120 and 1800 cars |
 Information
|
|
1968 US Combi Being Outfitted with Vintage Performance PartsViews : 14833 Replies : 87Users Viewing This Thread : |
 |
|
|
Thread Tools | Display Modes |
 Jul 14th, 2016, 14:57
|
#21 | ||
|
Member

Last Online: Nov 11th, 2023 13:34
Join Date: Jul 2016
Location: Brattleboro, VT
|
Quote:
Quote:
Ron, I am a young 61 years young and have been involved with prewar cars since I was three years old w/my late father. First started the shop forty years ago in 1976 after setting off on my own and moved to Vermont (much like the UK) from Terryville, CT, 20-miles west of where you are located. Don't mean to blow my own horn and I do not need any work, but after treating client's fairly and doing the best work possible for years, finally about 30-years ago the effort really took off. I was fortunate to meet and work for some of the top collectors in New England that led to meeting more at concours and vintage races w/the cars I had prepared. Have had mutible cars for clients in both the Pebble Beach and Amelia Island Concours and in vintage races on most of the US race tracks and at the Goodwood Festival of Speed in England. I also am the editor of TheOldMotor.com a busy daily vintage car internet magazine. You can get a look at the shop at theoldmotor.com/?page_id=29926 Coverage of my involvement w/Volvos and detailed articles and photos about this 220 Estate project can be found at: theoldmotor.com/?s=volvo+122 |
||

|

|
| The Following 2 Users Say Thank You to Vintagewrench For This Useful Post: |
|
Jul 15th, 2016, 00:55
|
#22 |
|
Member
Last Online: Nov 11th, 2023 13:34
Join Date: Jul 2016
Location: Brattleboro, VT
|
[QUOTE=Saner;2139123]
Sander, Thanks for posting the photos of your 122 sedan and the engine compartment, although both of them seemed to have disappeared. What is the device near the carb and just to the front of it? The carb usually bolts directly to the intake manifold, did yours need to be set up on a riser because of the RHD? I have a PDF of the complete Holley 1904 15-page service manual if you think it would help you. If so send me a PM w/your email address and I can share it with you. |
|
|
|
| The Following User Says Thank You to Vintagewrench For This Useful Post: |
|
Jul 15th, 2016, 09:56
|
#23 |
|
Member
Last Online: Jul 10th, 2023 15:43
Join Date: Aug 2010
Location: Bracknell
|
New picture hosting website which I still haven't sussed explains the picture disappearance.
You are correct with your observations. The cannot bolt directly to the Supercharger due to the clutch cylinder being in the way. Therefore an adapter had been machined to raise and rotate the carburetor slightly to allow fitment. https://goo.gl/photos/L3UVNuWZZriwxnFq5 As you have previous experience of these, what kind of usage do you get of the MMO? I have the original oiler 'jar' and use about half a jars worth for every 150 miles, These seems excessive but it is set to original drip feed specifications. The service manual would be greatly appreciated, I shall PM you my E-Mail address. Last edited by Saner; Jul 15th, 2016 at 10:03. |
|
|
|
|
Jul 15th, 2016, 12:09
|
#24 |
|
VOC Member

Last Online: Yesterday 12:32
Join Date: Jul 2006
Location: Chatham
|
Note that Saner's car has a B16 engine. The small carb will be more suited to this than a B18.
I think that Marvel Mystery Oil MMO is essentially the same as Redex so that would be an easier to find lubricant in the UK. What is the manifold inlet size for the carb on yours VW and the distance between the studs? Looks as if a Weber 34ICH would suit. They come in 25, 27 and 29mm choke sizes with the 29mm one being spec'd for Land Rover 2.2l so might be a good one for the B18 in this set-up. 25mm good for 1.5l I have a 29mm one going begging if there is any interest. |
|
|
|
| The Following User Says Thank You to Derek UK For This Useful Post: |
|
Jul 15th, 2016, 13:21
|
#25 |
|
Member
Last Online: Jul 10th, 2023 15:43
Join Date: Aug 2010
Location: Bracknell
|
Thanks Derek re Redex, the MMO is difficult to source in the UK.
To replace or not replace the carburetor on mine has been a conundrum. One argument is that if the Holley was fine at the time, why not now? Mine also has a Simons exhaust, and is pushing alot of air out. Making me wonder if I would benefit from a wider diameter exhaust and freer following manifold. |
|
|
|
|
Jul 16th, 2016, 17:40
|
#26 | |
|
Member
Last Online: Nov 11th, 2023 13:34
Join Date: Jul 2016
Location: Brattleboro, VT
|
Quote:
I did not pick up on the fact earlier that you car was a B16. Knowing now that it is a 1600, if by some chance it has the later Holley 1904 carb w/a 27/64ths or 11mm throttle bore it may be to large for it. I don't know the throttle plate diameter of the carb Judson provided w/the B16 kit when new. If someone in the past changed the carb and but on a generic 1904 w/different sized jets that could also be problem. If the pulley sizes have been changed it could be under driven and that would lead to lack of performance. The single drive belt pulley on the B18 version is 4 3/4" OD and the crank shaft pulley OD is 5.5" and the blower is over driven. If the engine is in good mechanical condition w/good compression, the ignition is in perfect condition, there are no intake leaks, and the carb is working properly you should have a very noticeable amount of extra power. The car will also climb hills in high that used to require a down shift. I have included links below that will help you out. In cold weather keeping the radiator blind as closed as possible will provide warm engine compartment air which the Holley likes. If not make something adjustable that will duct warm air to the carb. Your PM has not come through yet so I can't send you the PDF of the Holley Carb Manual. 10 weight detergent oil can also be used and I have heard the some use synthetic two-stroke oil in the oiler which may be the best, but I have not tried it. 500-miles to the quart is on the rich side and 1000-miles to the quart the minimum. Best to stay to stay close to the 500 mile figure. You no doubt know the premium fuel is required and keep in mine that to much of an oil feed will lower the octane level of the fuel charge. A compression ratio of 8.5 to 1 is about right for the supercharger. Hope all of this helps out. B16 Installation instructions: http://www.thesamba.com/vw/archives/...structions.pdf Magazine road tests that contain information on the performance increases and drivability: http://www.thesamba.com/vw/archives/...mags/index.php Last edited by Vintagewrench; Jul 16th, 2016 at 17:49. |
|
|
|
|
| The Following User Says Thank You to Vintagewrench For This Useful Post: |
|
Jul 16th, 2016, 19:00
|
#27 |
|
Member
Last Online: Nov 11th, 2023 13:34
Join Date: Jul 2016
Location: Brattleboro, VT
|
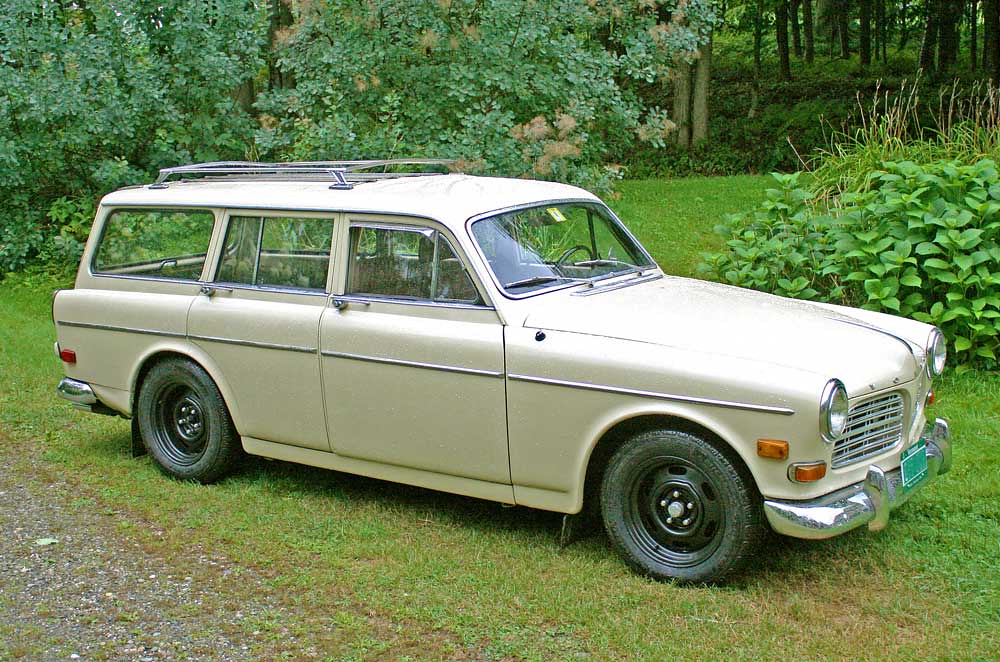
Here are a few more photos and more information on this exceptional original car. The original paint color (one recent repaint due to the original paint chalking) is #97 that I believe Volvo called it Arabian Sand. In person it is a very pleasing creme-colored hue w/a hit of yellow.
 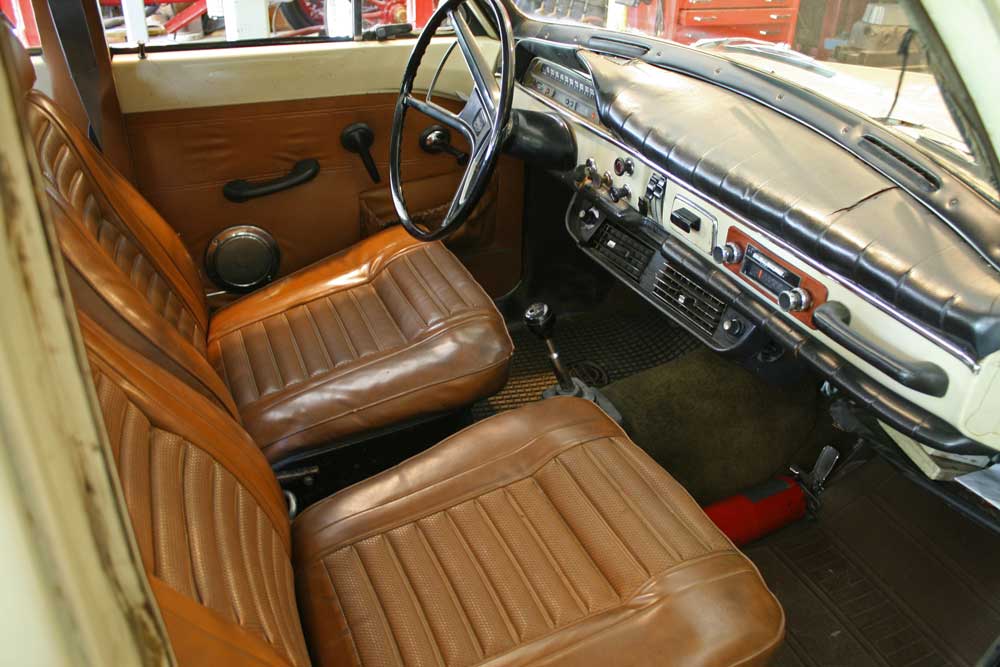 The excellent original interior is saddle-colored with all US spec. 1968 only safety improvements including the under dash pad. It has a dealer installed (when new) Volvo approved FridgKing air conditioning unit. It needs a clean up campaign and a new dash pad will be going on soon and the AC unit will be restored. The only non-original parts (as purchased) on the car are a replacement J-type overdrive w/a later extended shifter with the OD switch on top of the knob (installed in the late-1970s). When the transmission is rebuilt soon the pre-1969 P1800 shifter below will be substituted and a right-hand steering column overdrive switch will be installed so it can be operated w/out taking your hand off the wheel. 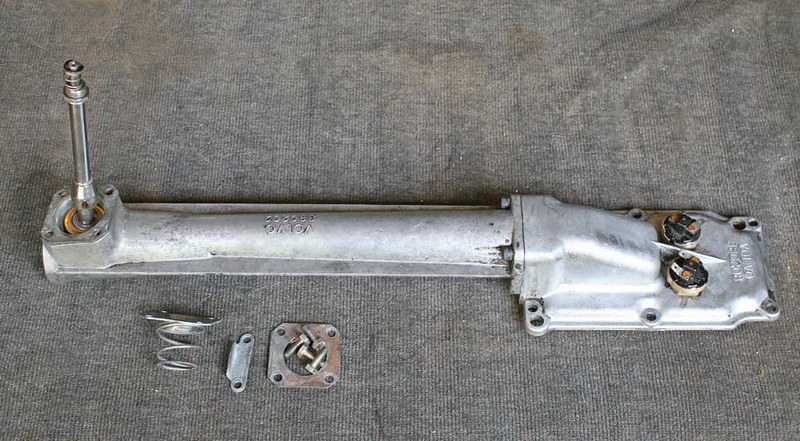 It was only a two-owner car before my friend Jon (a Volvo collector) bought it in Atlanta, Georgia. It spent it's early years in Orlando, Florida (inland) and Atlanta, and because of it survived almost completely rust free, other than small rust bubbles in the bottom of the tailgate caused by water getting in via a bad gasket for the handle, and the license plate assembly. I have since found a rust free lower tailgate from the desert area of California and with be painting it to match and will be installing it in soon. I purchased it from him in April, 2016 after a wait of 35-years. All of the original paper work below including the original invoice has survived, along the title from the second owner (an airline pilot), who traded it into Cars International (a Volvo dealer) in Atlanta on a new car; I have the key fob from them when it was delivered. The total cost including trade in of a 1966 220 was $3628.16, a considerable amount of money at the time. 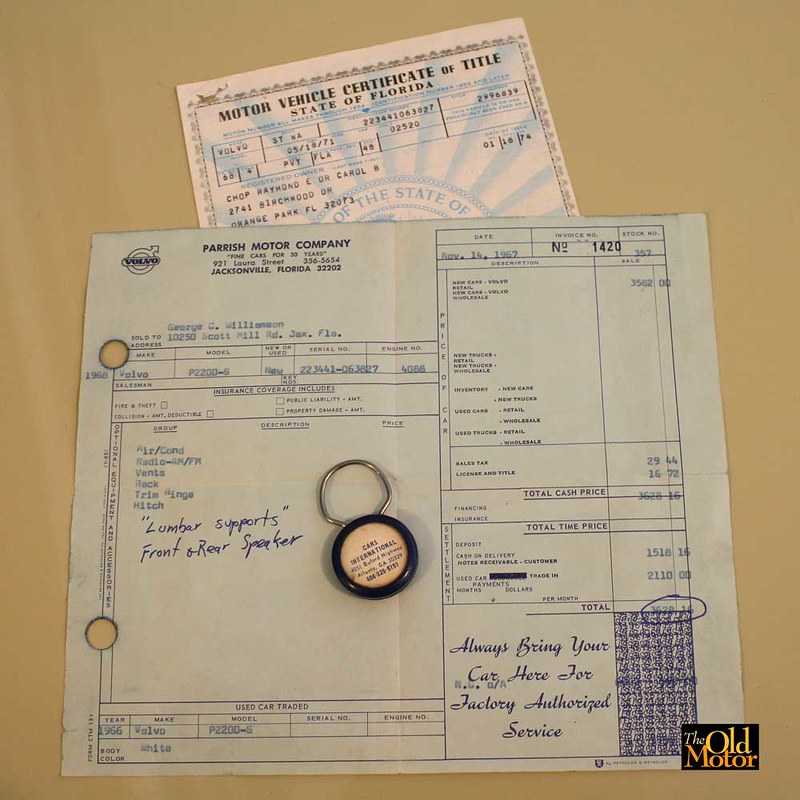 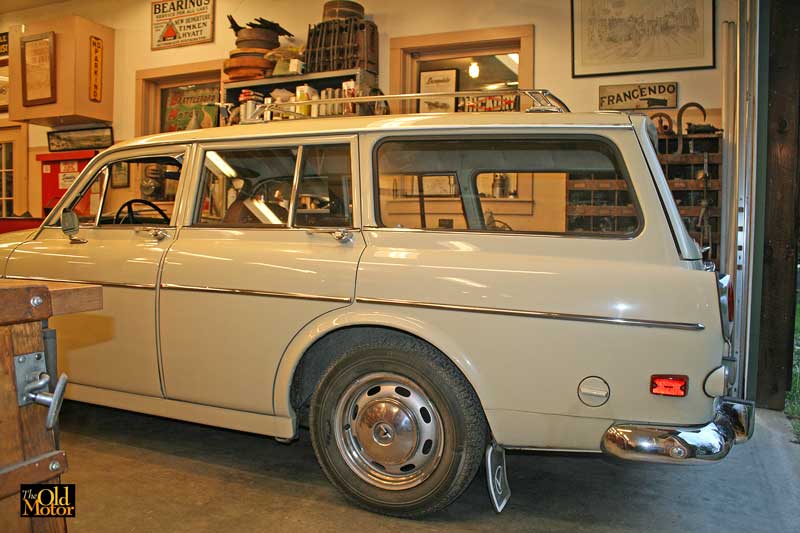 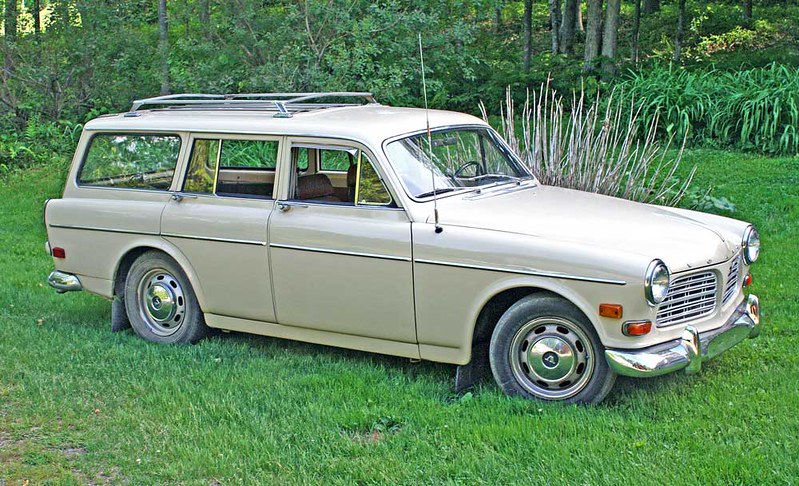
Last edited by Vintagewrench; Jul 16th, 2016 at 19:16. |
|
|
|
| The Following 6 Users Say Thank You to Vintagewrench For This Useful Post: |
|
Jul 28th, 2016, 14:31
|
#28 |
|
Member
Last Online: Nov 11th, 2023 13:34
Join Date: Jul 2016
Location: Brattleboro, VT
|
Saner, did the Holley carb manual I sent to you for your Judson supercharger come through OK?
|
|
|
|
|
Jul 31st, 2016, 17:14
|
#29 |
|
Member
Last Online: Nov 11th, 2023 13:34
Join Date: Jul 2016
Location: Brattleboro, VT
|
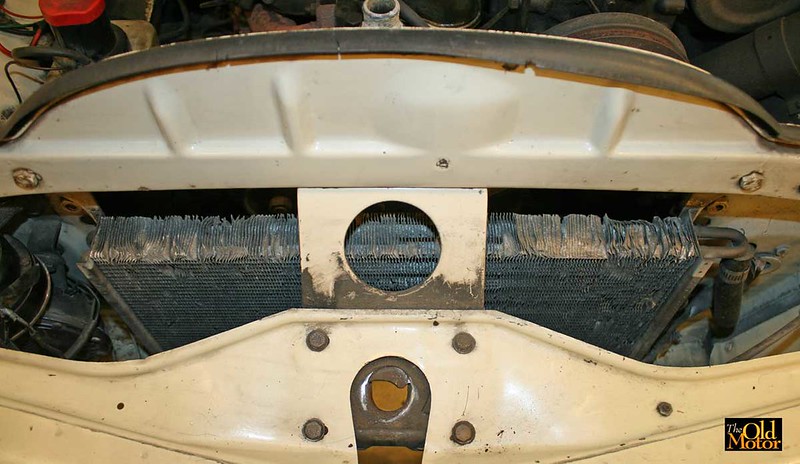 Have run the "Peach" during the last two weeks on a number of test drives after having gotten a lot of routine repairs finished. The wheels have been painted and have it up on some good old style Michelin XZX tires until deciding what wheels and tires will go on it a bit later down the road. The air conditioning is going to be restored for this car over the winter, but the first part was to remove the entire system from the car starting w/the condenser seen in front of the radiator. 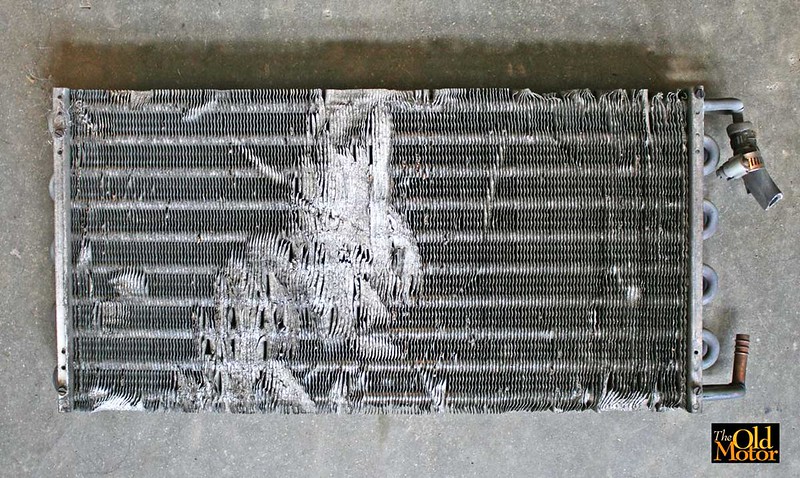 The space between the condenser and radiator contained a lot of debris that blocked off about 30% of the air flow. In addition, 25% the fins on the backside were folded over adding to the loss of air flow thru the radiator. No wonder it was running on the warm side and getting hot sitting in traffic with the temperature in the low 90s. 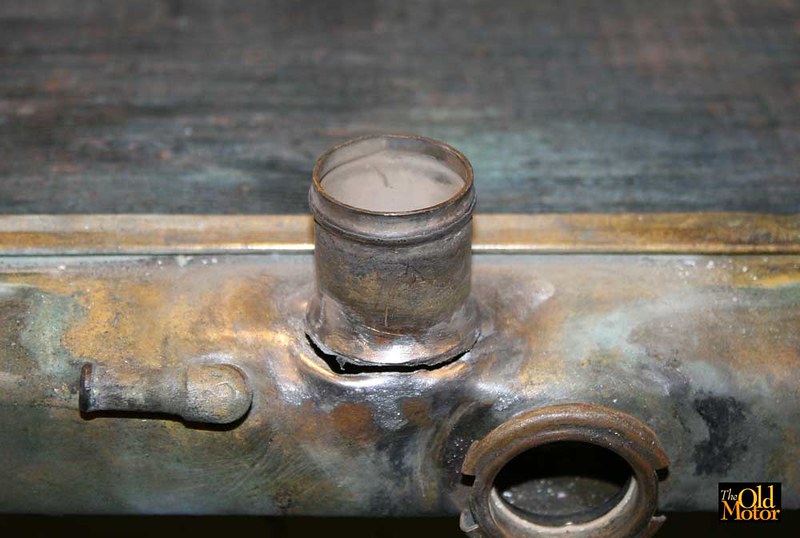 The radiator top hose connection had cracked, which is common on these cars after a lot of mileage, and it had been soldered in the past by a repair shop and opened up again. This is what it looked like after all the old solder was removed and the stress left in the remaining part of the connection opened it back up. If clamped down and soldered again it would just crack again in the future. The connection was entirely taken off, the edges smoothed out and fitted back together again, but this time, w/lead-tin solder containing 1% silver. I have found over time that this alloy works the best for connections that are under constant stress and shock forces like this due to the standard Jello-like rubber Volvo used for the motor and trans mounts. 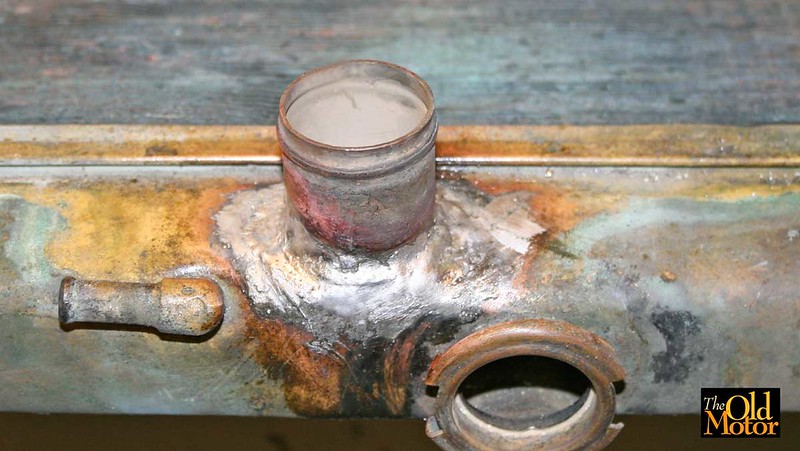 The connection after being soldered together again. 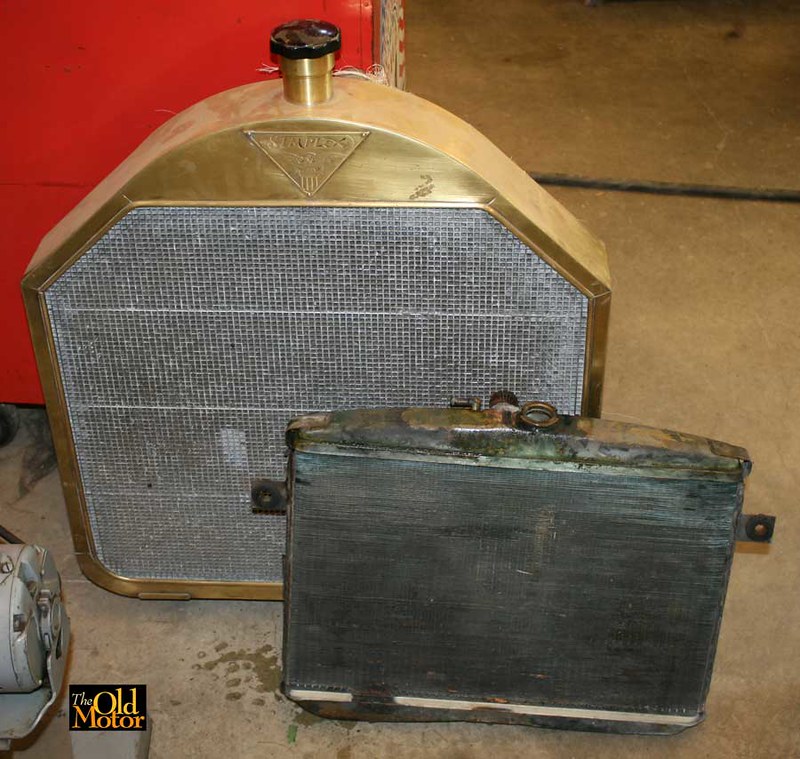 The radiator after blowing out all of the dust, dirt and debris between the fins and tubes w/compressed air. It is now back in the car, and the temp gauge runs 25% lower, and only gets up to the 3/4's mark on the gauge w/the temp. in the 90s while stuck in traffic. It runs much cooler now and lower than the halfway point on the gauge when out on the road and up to speed with the temp. in the lower 80s. A new thermostat is going in very soon to get it back up into the zone where the engine will run more efficiently. In the meantime the bottom 25% of the core is blocked off with cardboard. It sure is nice to work on a radiator that can be picked up w/one hand, compared to the truck-sized units that are on most of the early cars that come thru the restoration shop for rebuilds and weigh 100+ pounds. |
|
|
|
| The Following 6 Users Say Thank You to Vintagewrench For This Useful Post: |
|
Aug 14th, 2016, 17:30
|
#30 |
|
Member
Last Online: Nov 11th, 2023 13:34
Join Date: Jul 2016
Location: Brattleboro, VT
|
 It has been a very busy summer here in the shop preparing early racing cars for clients, but a number of the needed repairs have also been accomplished on the 220 and it is now licensed, has passed state inspection and is up on new wheels and tires. Back from a test drive in yesterday's rain are the new period looking Michelin Premier performance touring 195/65/15 tires up front that are mounted on Chrysler 15"x6" wheels w/ventilated slots much like those that Volvo used, and 205/65/15's on the 15"x7" rear rims. The difference between the previous Michelin 165/SR/15 tires on 4.5" standard Volvo wheels is remarkable. 75% less lean in corners, a much smoother and quieter ride, less steering effort and a phenomenal amount of grip during cornering. The wheels will be painted w/a period looking silver semi-gloss wheel paint and small polished stainless steel hub covers with emblems be installed in the wheel's center holes soon. 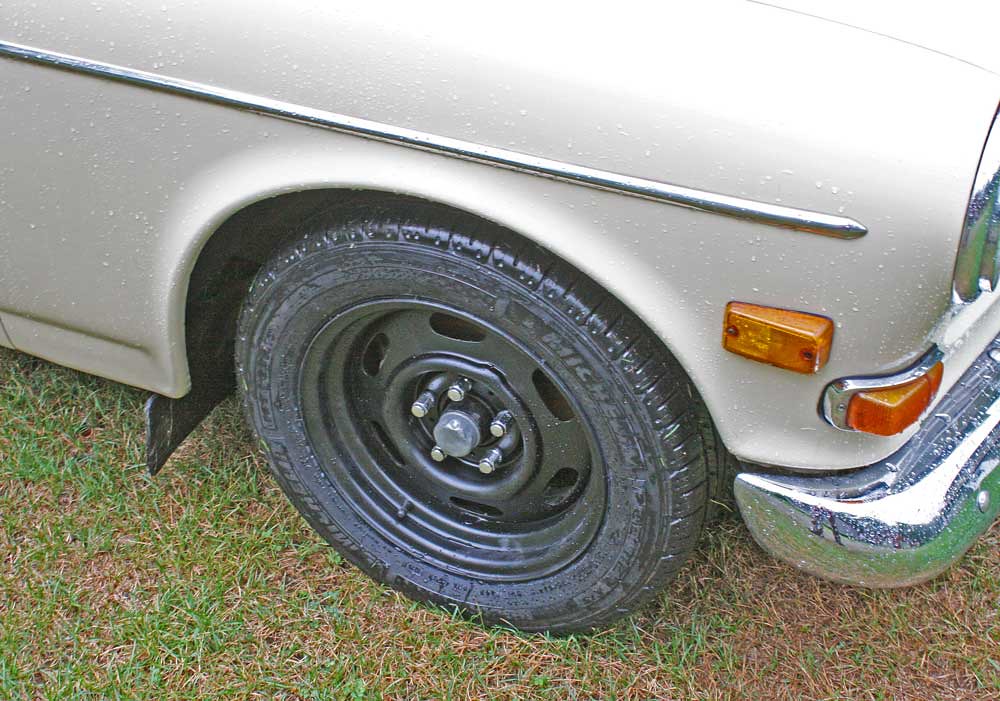 Front and rear the wheels and tires fill up the fender openings nicely, and the 3.75 and 4-inch back spacing of the rims locates the wheels close to the hubs center. This keeps the loading on the spindles and front and wheel bearings no higher than what they were originally engineered for.  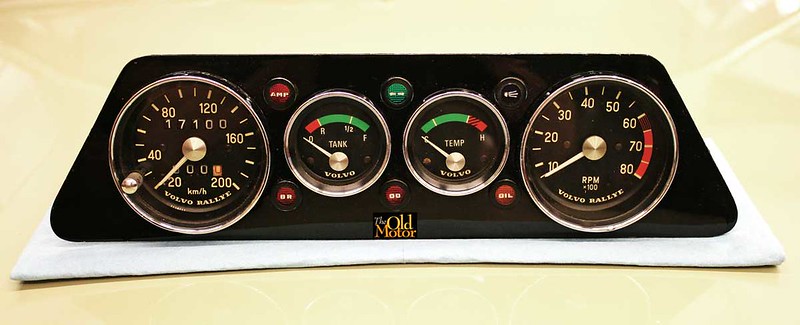 northNH drove here for a visit recently w/his really nice 220, and he was nice enough to sell me this 122s gauge panel w/ VDO Volvo Competition Services gauges and warning lights he bought from an enthusiast in Germany. It is going to find a new home in the dashboard in the car soon, when I have the time to devote to it and also put on a new dash pad at the same time. 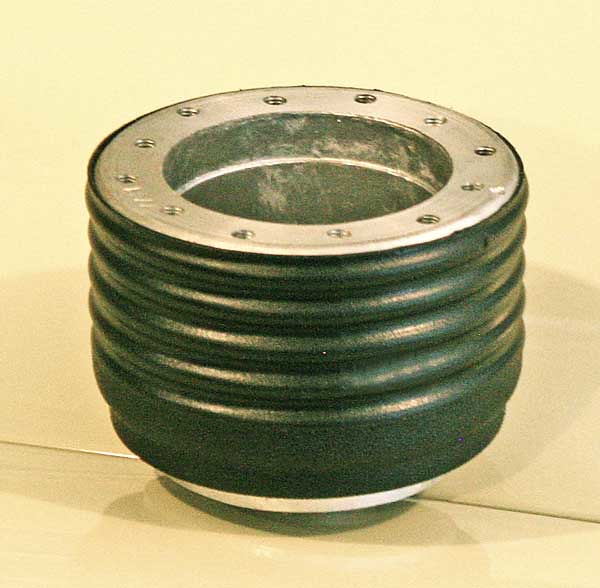 After a 6-week trip on a slow boat from Italy is an original adaptor for an attractive Italian Nardi mahogany-rimmed steering wheel with thee tapered and polished aluminum spokes that hopefully will be arriving soon. An photo below taken in the spring for a comparison. You can view much of the earlier story about this car and it's history @ theoldmotor.com/?s=volvo+122 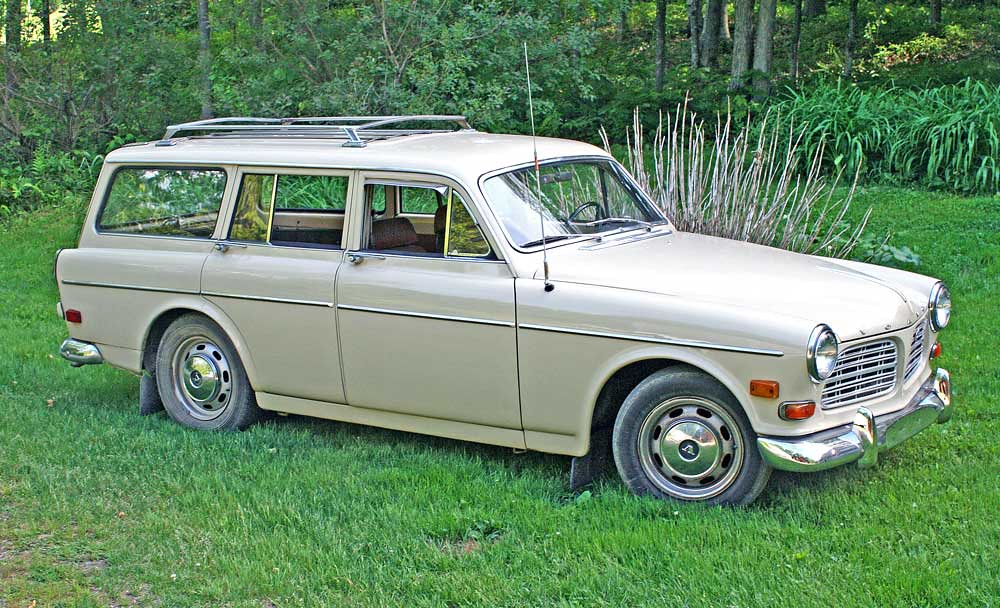
Last edited by Vintagewrench; Aug 14th, 2016 at 17:53. |
|
|
|
| The Following User Says Thank You to Vintagewrench For This Useful Post: |
|
| Currently Active Users Viewing This Thread: 1 (0 members and 1 guests) | |
|
|


 Linear Mode

