
|
|||||||
| PV, 120 (Amazon), 1800 General Forum for the Volvo PV, 120 and 1800 cars |
 Information
|
|
Paul & Stephanie Rowlands 64 P1800 (Project Saint Marie)Views : 13774 Replies : 63Users Viewing This Thread : |
 |
|
|
Thread Tools | Display Modes |
 Aug 25th, 2011, 09:43
|
#41 |
|
Junior Member
Last Online: Jun 1st, 2016 14:42
Join Date: Dec 2003
Location: Dublin
|
I sense sock-puppetry at play.
|

|

|
|
Aug 25th, 2011, 16:28
|
#42 | |
|
Trader

Last Online: Aug 1st, 2014 05:07
Join Date: Feb 2011
Location: Madill
|
Quote:
__________________
Robert Jackson Classic Auto Glass Innovations Flush Mount Glass Classicautoglassinnovations.com |
|
|
|
|
|
Aug 25th, 2011, 16:58
|
#43 | |
|
Junior Member
Last Online: Jun 18th, 2019 16:41
Join Date: Aug 2011
Location: Camas, WA
|
Quote:
Sorry if I hijacked the thread. Any updates on the car? How do you plan on stripping the car, dip or blast? |
|
|
|
|
|
Aug 26th, 2011, 10:16
|
#44 | ||
|
Senior Member

Last Online: Mar 3rd, 2022 14:20
Join Date: Oct 2009
Location: Edinburgh
|
Quote:
Quote:
|
||
|
|
|
|
Aug 26th, 2011, 18:37
|
#45 | |
|
Trader
Last Online: Aug 1st, 2014 05:07
Join Date: Feb 2011
Location: Madill
|
Quote:
Dipping, is really hard to neautralize the acids in the inner structure and crevises, so I dont do that one at all. Soda Blasting has some of the same issues as dipping when it comes to neutralization of the soda. Vinegar and Water solution and other solutions will neutralize it, but again it is hard to get it all out. Sand Blasting is way too harsh if your guy doesnt know what they are doing.. It can generate alot of heat and pressure, which causes warpage. We do blast the hard to get area's like the jambs and window channels. So if we have a fairily solid car, and the materials on the car arent out of hand, we like to strip it by hand. It is alot more work, but you can avoid alot of potential problems later.. If we see areas that need a bit of extra attention, we will blast those areas for sure. All the window channels, door jambs, inner grill, etc, will be lightly blasted, we just dont like working on large panels with the blasting if it can be avoided. Would rather put a bit more effort in stripping, then cause more work and the need of more materials later. Here are some preliminary naked pics of Saint Marie. Being it is a daily driver, we are not going to completely strip the bottom of the car.. We are going to take off all that is loose, repair any issues, and re-coat the bottom with a newer modern coating.. Of course there are some issues here or there after stripping, but this car is very solid in all the right places.. We had a bit of patch work here or there, but luckily none of it was in any boxed area's, so the back side of the repairs can be sealed up also. After we get all the repair area's tacked in, we will do all the finish welding and grinding to remove any holes are pits.   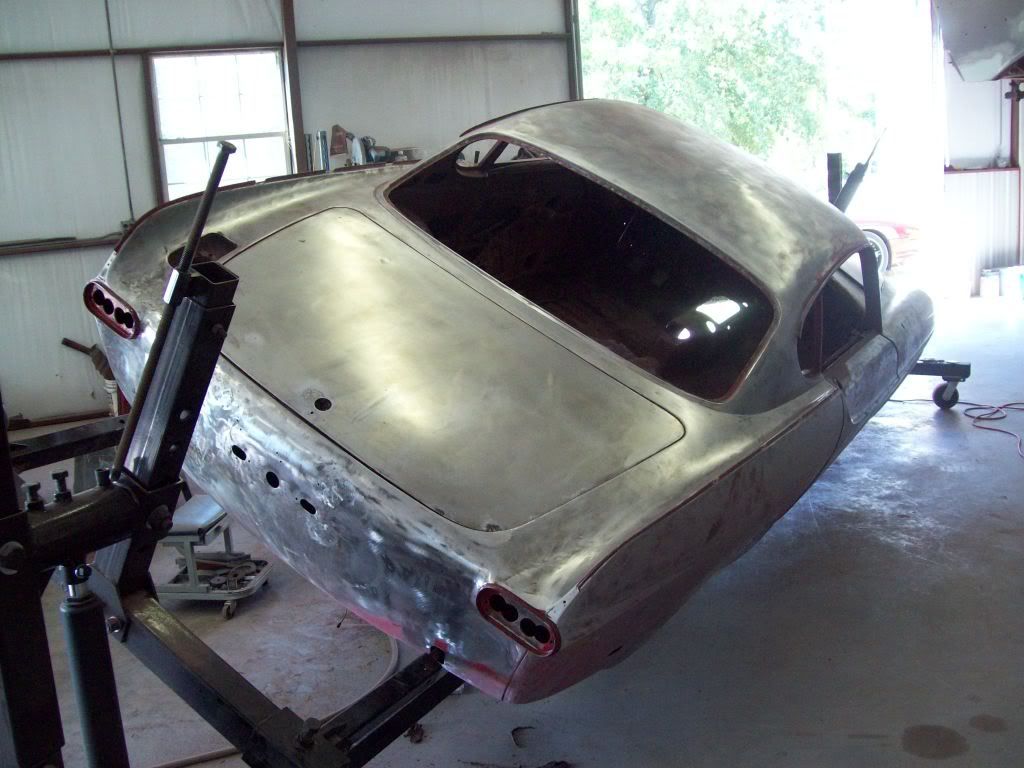  Here is some of the basic rust repair, I really think we are getting off luck with this bit. Mr. Rowlands also wanted the side bullet marker lights removed, so we are welding them up also.. There was some holes drilled from previous repairs, and they will all be welded in also. The finish welding on the patches hasnt been done yet, but the pits and pin holes will be completely filled in, and sealed from the back side.    The drivers fender was previously replaced, and not done to well. The previous repair screwed the fender at the A-Pillar and lower Rocker, these will be removed and welded properly. Also, we will have to address the welding of the fender below the windshield on the cal panel, because it is warped and way too low. If we dont cut it loose, and redo it, there will be WAY too much filler in this area and potential problems later.. It needs to be cut loose and hammered out properly, then re-welded  If you look at that spotting on the door and other area's, you can see where the corrosion was starting behind the filler. This is why it is extremely important to take the car down to metal and seal properly before body work begins. The older materials, just didnt have the sealing capability of today. So even if you use the best material over the older materials, you will still have issues later.  
__________________
Robert Jackson Classic Auto Glass Innovations Flush Mount Glass Classicautoglassinnovations.com Last edited by Iamtheonlyreal1; Aug 26th, 2011 at 18:51. |
|
|
|
|
| The Following User Says Thank You to Iamtheonlyreal1 For This Useful Post: |
|
Aug 31st, 2011, 21:46
|
#46 |
|
Trader
Last Online: Aug 1st, 2014 05:07
Join Date: Feb 2011
Location: Madill
|
Here are some pictures after the sealer/primer stage before body work begins.. Once you strip one down, any moisture or hand oils will cause corrosion in no time.. Once this starts, it is hard to get it neutralized after it starts, so it is best to get it sealed up as fast as possible.. Sure we will removing some of it as the necessary welding and body work is getting done, but it will quickly be re-sealed..
   
__________________
Robert Jackson Classic Auto Glass Innovations Flush Mount Glass Classicautoglassinnovations.com |
|
|
|
|
Sep 26th, 2011, 22:56
|
#47 |
|
Trader
Last Online: Aug 1st, 2014 05:07
Join Date: Feb 2011
Location: Madill
|
Here is an update on Project Saint Maries body work.. I will have the car back
at my shop for suspension, motor, and trans fitment in the next couple of weeks. I like to get restorations up to atleast the second parts alignment and blocking stage before I get to heavy into the other work.. By doing this, you allow time for the primers, glazes, and sealers to cure out properly while you are doing other work necessary.. Alot of builders will get all the fab stuff done first, and get the car running, before they start on the body work.. Then once they are to that body work stage, they get it done with out necessarily think about cure time and material shrinkage. There was alot of hammering and pulling to the body here or there, but it is much better to get all the low areaa you can get out, rather increase the filler thickness.. There is really nothing wrong with larger blending patches, versus thicker smaller patches.. Larger thinner patches will actually flex with the body and cause no issue.. It isnt until the filler gets past a certain thickness it loses its flexibility property's and will potential problems. As you can see in some of the pics, guide coating is very very important. We will guide coat and prime several times before final blocking, just to ensure the body lines and panels line up and blend properly. The even during final blocking, we will guide coat a few more time.. It really helps to find any low areas, warpage, or imperfections you cant see due to the dull finish of the primers.. So many times the body work looks great in the primer stage, but once you add the gloss paint to it, all the imperfections stand at attention. As far as the inside surfaces that are left untouched at this point, they will be addressed when the car goes back to the body shop for final blocking and painting. They will not be completely strip, because there is a time and place for Sand Blasting, Media Blasting, and chemical striping.. If the cars paint and sealers are so far gone, it is best to start all over, those are your options.. If you have a fairly solid car, and the factory surfaces are still decent, those options are sometimes the worst thing you can do.. If the inside coating/paint is still good, sandblasting is one of the worst things you can do. If you can prep the factory finish for the applications of the new sealers and paint, you are far far better off. This is because you are less likely to miss areas where factory material was removed with the recoat of new material. So if you remove all the areas where factory material has let loose, and you leave the good factory coating, you are less likely to overlook anything. Small areas where the factory paint is corroded will be lightly blasted, but other than that, all the other area will be prepped for sealers and a sound deadening coating.. We will also be adding the sound deadening matting to the inside of the car also. We will be addressing the bottom of the car and engine bay, once the car has had all the suspension and drivetrain components fitted. After that is done, the car goes back to the body shop for final blocking and paint work. Then it will come back to the shop for final assembly.. Alot of People dont realize, you will actually build and disassemble the car several times over during the process.. The car will be painted in peices to ensure coverage of all areas..             
__________________
Robert Jackson Classic Auto Glass Innovations Flush Mount Glass Classicautoglassinnovations.com Last edited by Iamtheonlyreal1; Sep 27th, 2011 at 00:33. |
|
|
|
|
Oct 7th, 2011, 20:31
|
#48 |
|
Trader
Last Online: Aug 1st, 2014 05:07
Join Date: Feb 2011
Location: Madill
|
Well, Saint Marie made it the 7 miles back to our shop.. She is really in the 2nd blocking stage right now, but that is the perfect time to do Suspension, Rear End, Drivetriain fitment, along with the rest of the parts fitment like the trim and accessories, etc... While we are doing all of that, the first stages of bodywork and sealers have time to cure out before we add more sealers and primers to be blocked out. The final paint stage will lock in harmful reactions and shrinkage, if you dont give enough breathing time, so it is best to space everything out in the proper order...
We will also be installing the door and trunk weatherstrip, to insure there are no issues with sealing or not letting parts like the trunk fully close for a flush fit.. I am sure we have all seen the cars that had nice body work, but once the weatherstrip is installed, it has panels like the trunk held up too high. I like a true and flush fit, so it worth the time to work with these items before paint... After we sort that out a bit, the door/trunk/hood gaps will be evened out via welding or grinding. I dont think I have seen any of these cars with uniform gaps, but this car will have them, along with flush shutting doors/trunk/hood. There is a bit of work to be done on the lower doors to Rocker Panel gap, but again, we have to wait till the car is on the ground and weatherstrip is in.       
__________________
Robert Jackson Classic Auto Glass Innovations Flush Mount Glass Classicautoglassinnovations.com Last edited by Iamtheonlyreal1; Oct 7th, 2011 at 20:35. |
|
|
|
|
Oct 8th, 2011, 04:36
|
#49 |
|
Trader
Last Online: Aug 1st, 2014 05:07
Join Date: Feb 2011
Location: Madill
|
Here is what I am talking about when it comes to gaps... This is one of my previous builds to market some other products, and the Camaro's are really no better for factory fitment.. Go to your local car shows, and if you look, you will see some out of line panels and un-even gaps on most..
If you look at the door gaps and door closing positions here, you will see a flush and level fit, along with even gaps all the way around the panel. It is a bit more work, but it does make a difference.. I had to add (Weld) material to the door and fender edges, in order to be able to get even gaps.. The hood/cowl/fender gaps are the same situation.. 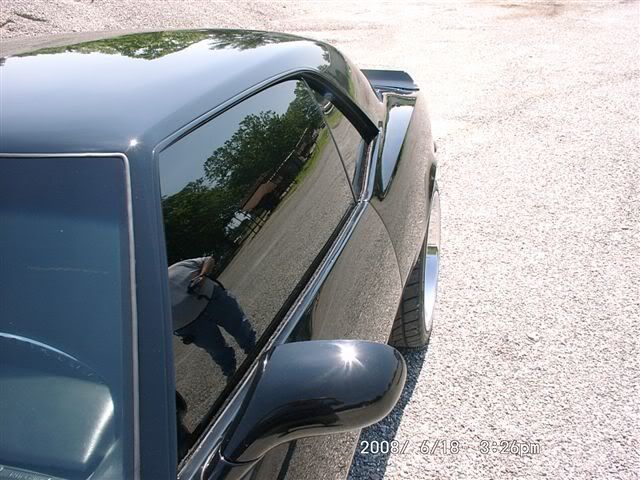 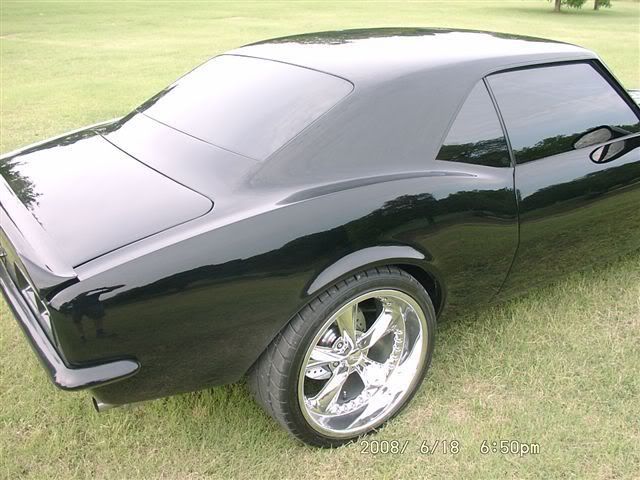 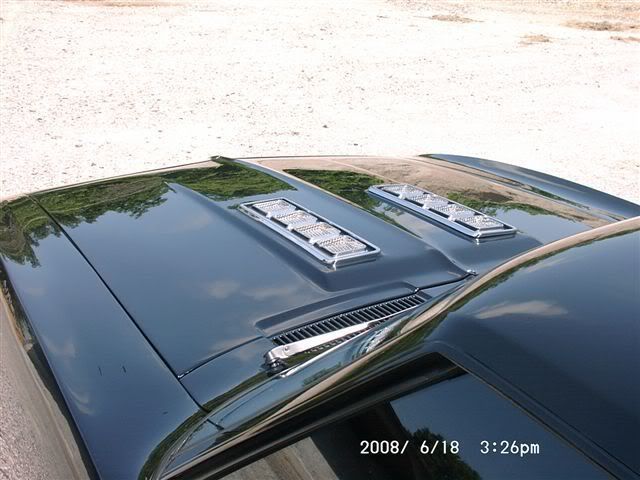  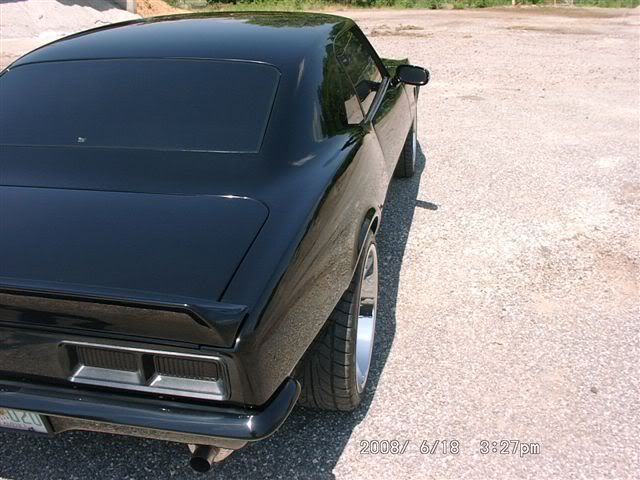
__________________
Robert Jackson Classic Auto Glass Innovations Flush Mount Glass Classicautoglassinnovations.com Last edited by Iamtheonlyreal1; Oct 8th, 2011 at 04:42. |
|
|
|
|
Oct 15th, 2011, 17:36
|
#50 |
|
Trader
Last Online: Aug 1st, 2014 05:07
Join Date: Feb 2011
Location: Madill
|
Now that Saint Marie is temporarily back from the body shop, we are starting some of the rework and parts fitment... I starting on the transmission tunnel mod, and working on keeping like it could have been factory.. We are taking extra care to remove factory parts, to relocate them, and adding some replacement factory parts for bracing..
As you can see, the underside of this car is in great shape for a 64 model, or really any model.. After we get all the under carriage mods done, we will clean and prep the bottom of the car for a finish of factory style undercoat. I needed to remove the factory Transmission Crossmember brace to a more rearward postion, that way it would look like a factory attachment.. I drilled out the spot welds (which is is very tricky to find them all), because this will allow me to save the part and not butcher up the surface I am removing it from. Also by doing this, it will let me put it back in what will appear to be a spot weld pattern. I am using a replacement outer front body brace as a replacement, because it looks like it could have been a continuation of what was already on the opposite side of the unibody frame. More than likely, I will also build a brace that will connect the passenger and driver side like the original crossmember did. This brace will bolt in, and wrap around the bottom of the trans, and should put back the support that was there from the factory. I am waiting for the new Bell Housing for the Keisler Rallye Sport 5-speed, that way I can get the exact front to rear postion I am looking for.. As you can see, I only trimmed out the original tunnel itself, so the trans is a fairly close fit.. It probably would have worked out, but for some reason the Volvo Transmission Tunnel narrows as it reaches the floor board. It is actually wider at the center to top, than it is from the center to bottom.. I am debating on just reworking the original tunnel, and putting it back in. It would really only need to have its base widened a bit, by flexing the walls. And maybe just a ping or two to the side for a dimple type releif.. Here is where I am at so far...        
__________________
Robert Jackson Classic Auto Glass Innovations Flush Mount Glass Classicautoglassinnovations.com |
|
|
|
|
| Currently Active Users Viewing This Thread: 1 (0 members and 1 guests) | |
|
|


 Linear Mode

