
|
|||||||
| 850 / S70 & V70 '96-'99 / C70 '97-'05 General Forum for the 850 and P80-platform 70-series models |
 Information
|
|
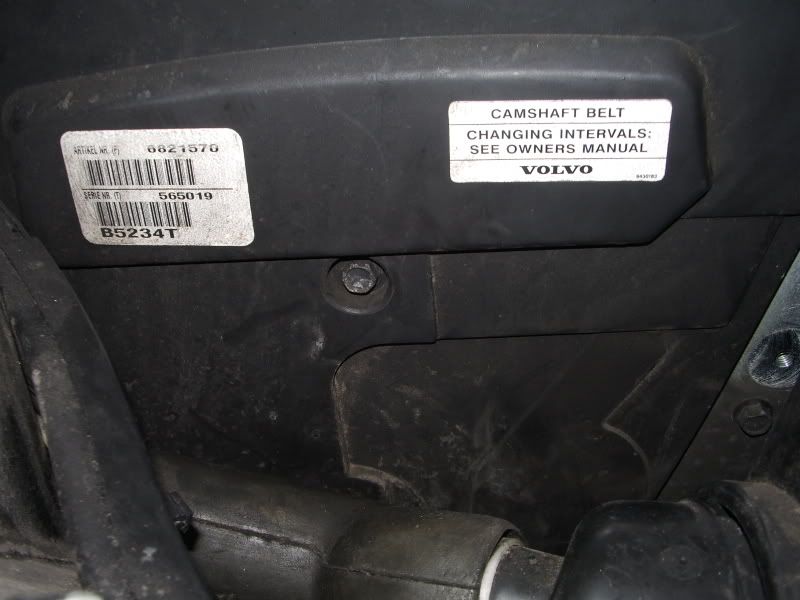
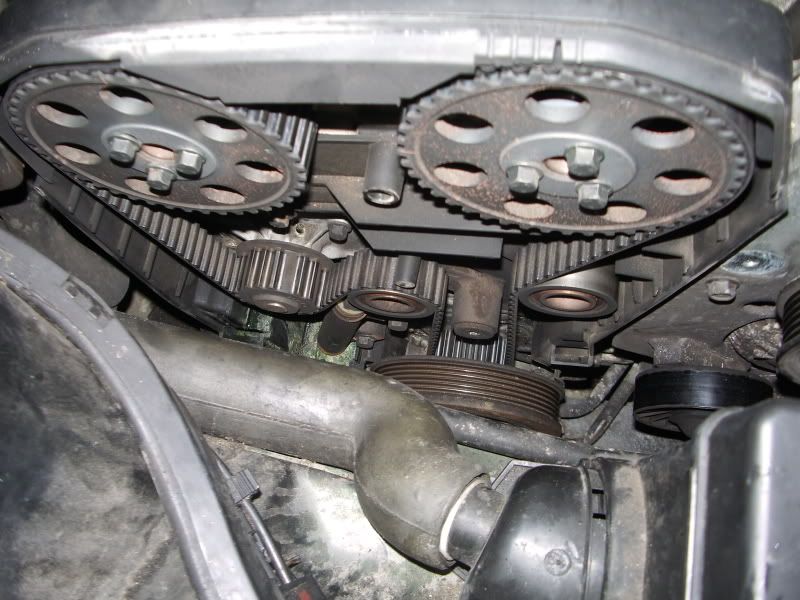
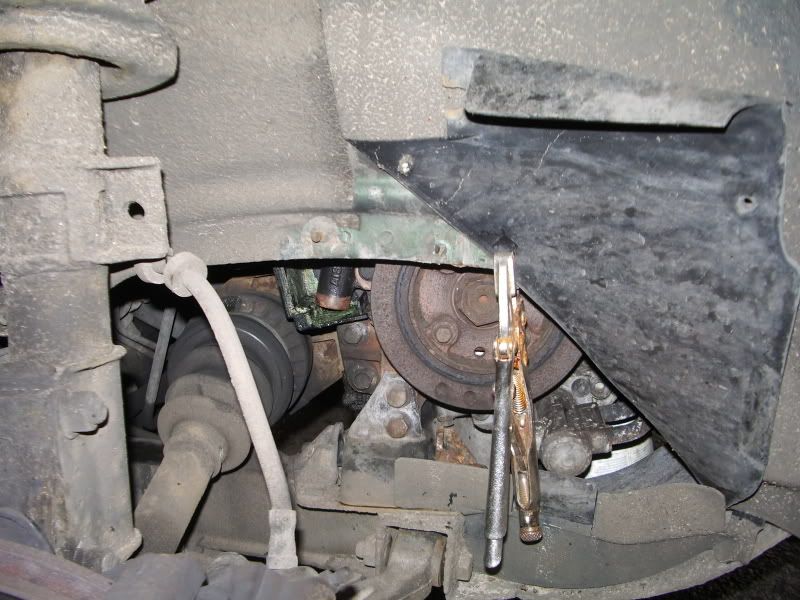
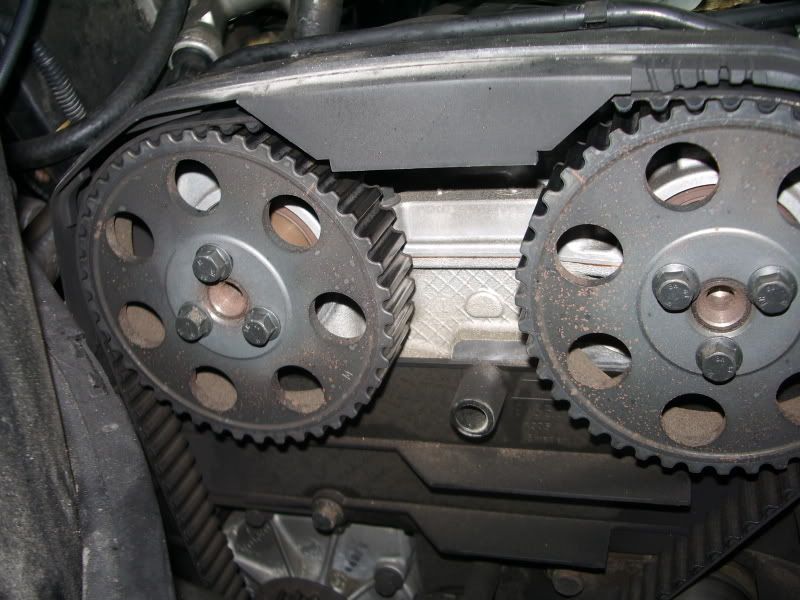
How to replace your Cam/Timing beltViews : 19408 Replies : 48Users Viewing This Thread : |
 |
|
|
Thread Tools | Display Modes |
 Jul 20th, 2007, 08:13
|
#41 | |
|
Phoenix from the ashes

Last Online: Apr 24th, 2024 01:05
Join Date: Jan 2006
Location: Finchingfield
|
Quote:
cheers jod
__________________
Dum Spiro Spero VOC 20419 |
|

|

|
|
Oct 3rd, 2009, 13:56
|
#42 |
|
Junior Member
Last Online: May 9th, 2010 17:12
Join Date: Feb 2009
Location: Kent
|
Any idea how this works with the non hydraullic tensioner? - The kit i got has an auto tensioner with the allen key adjuster. From what I've found out the little metal tab lines up with a marker on the engine but just wondered if anyone had photos of this in action for this engine?
|
|
|
|
|
Oct 4th, 2009, 01:25
|
#43 | |
|
Phoenix from the ashes
Last Online: Apr 24th, 2024 01:05
Join Date: Jan 2006
Location: Finchingfield
|
Quote:
lost.... non-hydraulic tensioner? tensioner does what exactly..... Jod
__________________
Dum Spiro Spero VOC 20419 |
|
|
|
|
|
Oct 4th, 2009, 09:45
|
#44 | |
|
VOC Member

Last Online: Feb 7th, 2024 07:36
Join Date: Sep 2007
Location: Sutton Coldfield
|
Quote:
|
|
|
|
|
|
Oct 4th, 2009, 11:11
|
#45 | ||
|
Junior Member
Last Online: May 9th, 2010 17:12
Join Date: Feb 2009
Location: Kent
|
Quote:
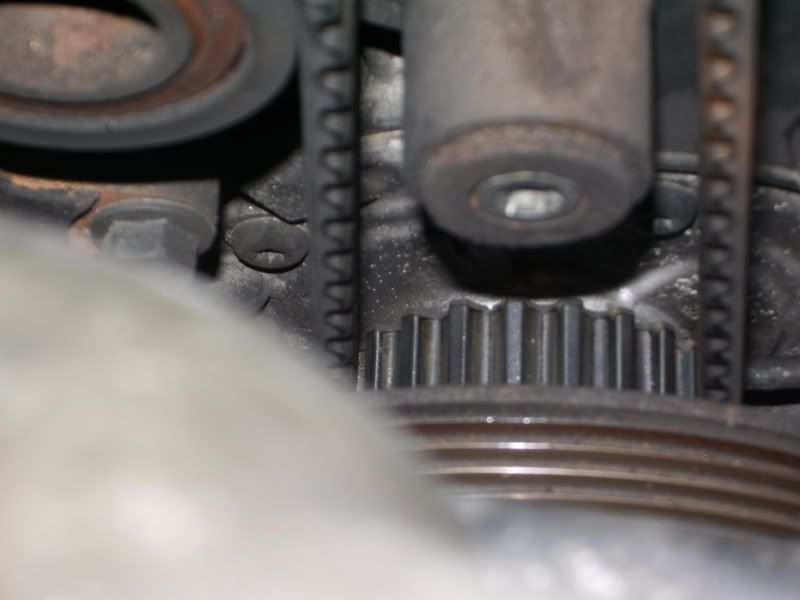
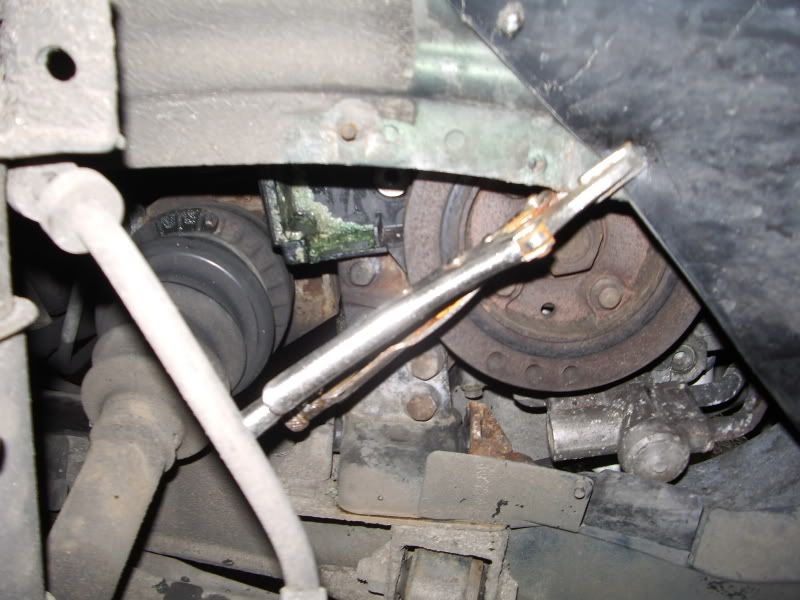
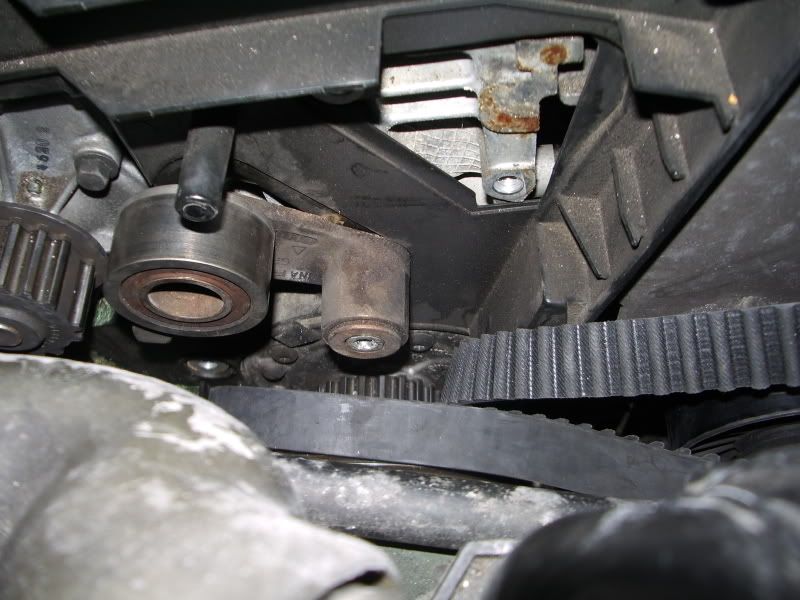
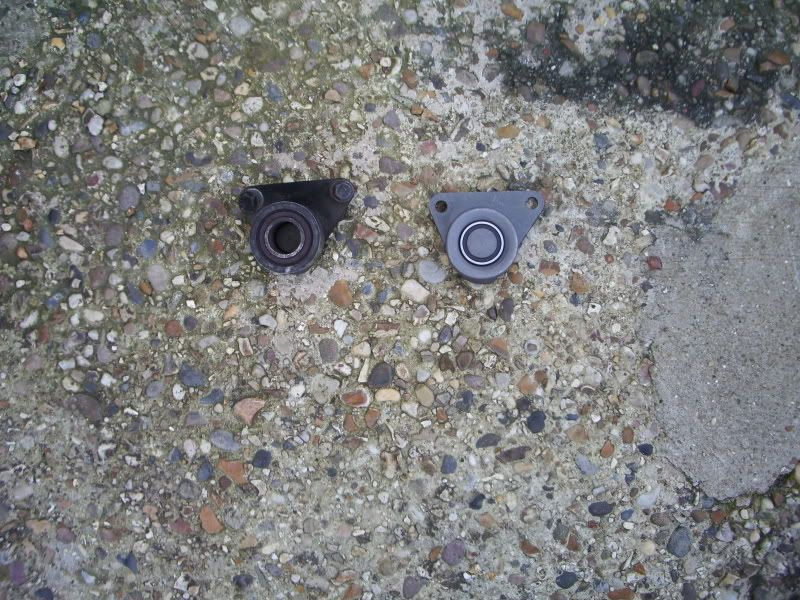
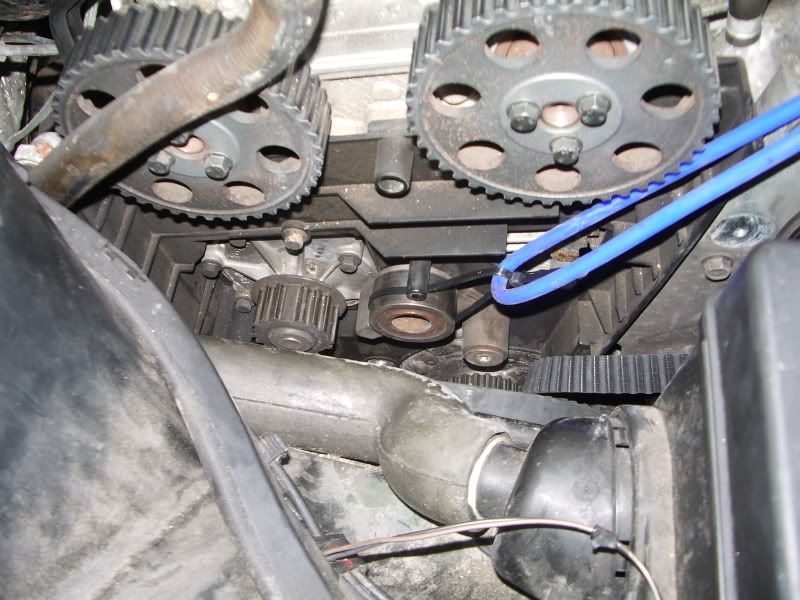
There are 2 versions of this engine and tensioner - one which has the tensioner on the hydraulic piston as shown at the beginning of this thread, one with a normal tensioner with the off centered hole. This might just be a quirky Renault setup though. It's similar in looks to this one (but not exactly the same):  When fitted it looks similar to this:  Reason I thought I'd ask was I wasn't sure if this was a Renault modification to the volvo engine (you can never tell with Renault they're an odd bunch) or if its a volvo design where they used both hydraulic AND non hydraulic tensioners. Quote:
Was just wondering if anyone had any pics of the non-H version if its a volvo thing and not Renault? |
||
|
|
|
|
Apr 13th, 2013, 18:42
|
#46 | |
|
New Member
Last Online: May 9th, 2021 19:10
Join Date: Apr 2013
Location: nuneaton
|
Quote:
|
|
|
|
|
| The Following User Says Thank You to buickwal For This Useful Post: |
|
Aug 3rd, 2013, 17:24
|
#47 |
|
New Member
Last Online: Aug 3rd, 2013 21:51
Join Date: Aug 2013
Location: houston
|
hello,
I really like this post it was very specific and very detailed. I tried all the steps as specified on the post, everything is marked correctly but it does not want to start and it does not seem to have compression for some reason please let me know what I can do. |
|
|
|
|
Aug 3rd, 2013, 17:36
|
#48 |
|
Premier Member
Last Online: Jun 5th, 2024 17:42
Join Date: Dec 2002
Location: Renfrewshire
|
Do all the timing marks still line up if you turn the engine crank round by hand? Are you getting spark and fuel pressure?
__________________
Tek-Emo Villis Emo Bis V70 SE NAV 1.6 D2 2015MY POWERSHIFT, D4162T, 93000miles, RED. /VOL FCR/PEPER OBD2/Acron 9135 OBD2/L.E.D Flasher/VDASH/ANCEL BA301/Topdon Top Scan Last edited by ShadeTek; Aug 3rd, 2013 at 17:38. |
|
|
|
|
Aug 5th, 2013, 13:23
|
#49 |
|
Premier Member
Last Online: Jun 5th, 2024 17:42
Join Date: Dec 2002
Location: Renfrewshire
|
If you are in Houston, Renfrewshire and you're still having problems, gimme a shout as I am just along the road.
__________________
Tek-Emo Villis Emo Bis V70 SE NAV 1.6 D2 2015MY POWERSHIFT, D4162T, 93000miles, RED. /VOL FCR/PEPER OBD2/Acron 9135 OBD2/L.E.D Flasher/VDASH/ANCEL BA301/Topdon Top Scan |
|
|
|
|
| Currently Active Users Viewing This Thread: 1 (0 members and 1 guests) | |
|
|


 Linear Mode

