
|
|||||||
| PV, 120 (Amazon), 1800 General Forum for the Volvo PV, 120 and 1800 cars |
 Information
|
|
, valve coverViews : 1981 Replies : 21Users Viewing This Thread : |
 |
|
|
Thread Tools | Display Modes |
 May 3rd, 2015, 13:53
|
#11 |
|
VOC Member

Last Online: Yesterday 17:06
Join Date: Jul 2006
Location: Chatham
|
A good quality impact glue like Evo-Stik will do the job but prep is the main thing to consider. Remove any old gasket cement and wipe down with brake cleaner. Use a new gasket. Apply thinly to both the the cover and the gasket. Leave to dry till there's just a hint of tackiness. Quickly, carefully, accurately attach the gasket to the cover. Make sure everything is all in line, including the bolt holes. Place on a flat surface, cover upwards and leave overnight. You can add some extra weight on to if you like, evenly spaced. Make sure there is no glue on the outer face of the gasket or you might tear it off again when you lift it up again in the morning. The glue is just for alignment not as a seal but it will also act like one if it's applied thinly and evenly. You should only have to take it off now and then for valve clearance checks/adjustments and it should stay in place for at least 2-3 of those. Wipe round the mating face of the head with brake cleaner before fitting after scraping off any dirt and gasket cement residue. Don't over tighten the fixing screws. Finger tight and a bit more, but check every few months, as the gasket will compress a bit.
|

|

|
| The Following 3 Users Say Thank You to Derek UK For This Useful Post: |
|
May 3rd, 2015, 20:33
|
#12 |
|
Senior Member
Last Online: Feb 18th, 2017 15:16
Join Date: Mar 2014
Location: essex
|
This black crackle finish looks nice.
|
|
|
|
| The Following 2 Users Say Thank You to Hat For This Useful Post: |
|
May 3rd, 2015, 23:20
|
#13 |
|
VOC Member
Last Online: Yesterday 17:06
Join Date: Jul 2006
Location: Chatham
|
Crackle is nice until it gets dirty............
|
|
|
|
|
May 4th, 2015, 00:57
|
#14 |
|
Senior Member
Last Online: Feb 26th, 2024 03:10
Join Date: Jun 2013
Location: Sweden
|
The ones the OP started the thread with look nice...that's it..apart from they quiet down the valvetrain a tad too. Expensive bit of kit needs good excuses LoL
If the original is ok there's no problem with them, and the cork gaskets fine, never had a problem with mine. I just sanded mine then sprayed it with silver wheel paint. 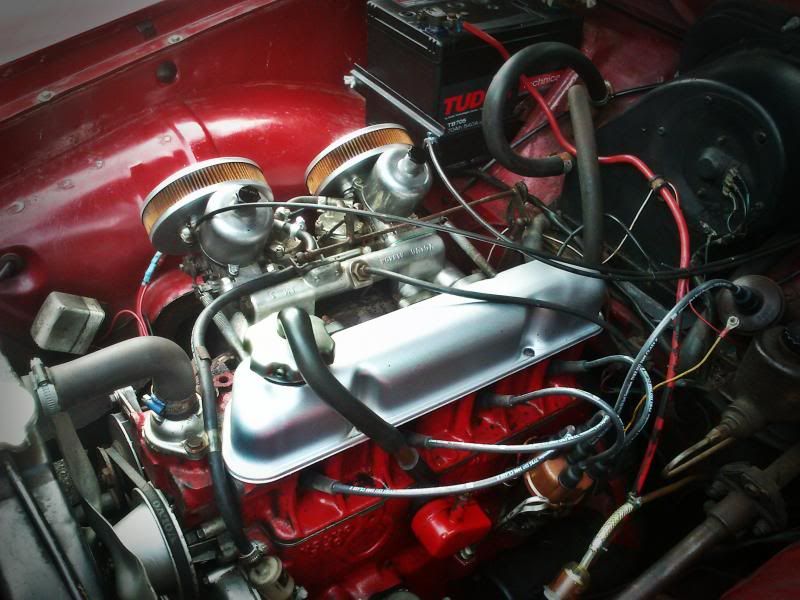
|
|
|
|
| The Following 3 Users Say Thank You to Amma122s For This Useful Post: |
|
May 4th, 2015, 21:36
|
#15 |
|
amazon1954
Last Online: Mar 10th, 2021 20:19
Join Date: Dec 2002
Location: Bath
|
Thanks to everyone for their help
I bid for the IPD Volvo one but lost, all went a bit crazy and I got carried away....as you do, or at least I did. So back to being rational, I think I will spray my original one having followed Derek's directions on cleaning up etc and use the metal holders down and a new cork gasket, at least until the car is so together and I don't know what to spend my money on and maybe I could get one of those very nice VOLVO valve covers. Meanwhile I need to save to buy sound deadening and insulation and a carpet....and so it goes on thanks again... Jamie |
|
|
|
|
May 4th, 2015, 22:38
|
#16 |
|
Member
Last Online: Jan 23rd, 2024 07:52
Join Date: Nov 2010
Location: Cape Town
|
Instead of those special force spreaders mentioned by Ron Kwas I use plain (round) washers - 14½ mm diameter and 1½ mm thick on my OE sheet metal cover. They are small enough to fit in the recesses of the cover.
While that doesnt seem to be much bigger than the screw heads (11½ mm diameter), do the math and you will see that it increases the area that presses down on the cover by over 80%. Works well for me. |
|
|
|
| The Following User Says Thank You to simonvolvo For This Useful Post: |
|
May 4th, 2015, 22:43
|
#17 |
|
Member
Last Online: Jan 23rd, 2024 07:52
Join Date: Nov 2010
Location: Cape Town
|
Ignore - double posting
|
|
|
|
|
May 5th, 2015, 11:43
|
#18 |
|
Bigbunt
Last Online: Apr 17th, 2024 22:13
Join Date: Apr 2014
Location: Guilford, Connecticut
|
I had pretty good luck with the IPD force spreader "thingies" after cleaning and straightening the cover. I also sealed up the fuel pump, which was really leaking quite a bit, using Permatex gasket maker. Now the only real leak I have is weeping oil from my number two plug hole., does that make sense? Might that indicate worn valve guides or...? I don't understand why oil coming from a plug. Haven't checked compression yet... I've pulled the plug and thoroughly cleaned the boot etc. so I'm at a loss. Really want that clean, leak free engine. Other than that it runs really well though!
|
|
|
|
|
May 5th, 2015, 11:53
|
#19 |
|
Premier Member

Last Online: Today 12:21
Join Date: Jul 2007
Location: Connecticut, USA
|
BB;
It may look like the source is a "plughole", but how can it be...there is no oil there...it's the combustion chamber!...and any oil there would be burned and turn to soot...it must be coming from elsewhere...nearest source is Valve cover...unless you have a porosity in the head (I meant the engine!)...I'd clean, drive a bit, then blot (not wipe) to try to locate. Good Hunting from just down the road! |
|
|
|
|
May 5th, 2015, 21:45
|
#20 |
|
Bigbunt
Last Online: Apr 17th, 2024 22:13
Join Date: Apr 2014
Location: Guilford, Connecticut
|
Ron, I totally agree and I've done multiple blots and plug pullings and cleanings and I still get this seepage apparently from the plug. Makes no sense to me either but it's a really good illusion! There is no evidence of oil above the plug, only below. I'll Gunk it again and see. I sure hope there isn't any porosity. Seems unlikely but one never knows...
By the way, do you know anybody on the Shoreline with an orange (I think?!) P1800 that might have been tooling around Guilford this weekend? That wasn't you was it? |
|
|
|
|
| Currently Active Users Viewing This Thread: 1 (0 members and 1 guests) | |
|
|


 Linear Mode

