
|
|||||||
| PV, 120 (Amazon), 1800 General Forum for the Volvo PV, 120 and 1800 cars |
 Information
|
|
HID light install into 1964 1800SViews : 1372 Replies : 6Users Viewing This Thread : |
 |
|
|
Thread Tools | Display Modes |
 Dec 17th, 2010, 23:20
|
#1 |
|
Member

Last Online: Aug 11th, 2019 22:13
Join Date: Oct 2007
Location: Island of Kauai
|
Aloha Guys,
Been out having so much fun cruising around in my 1800 that I haven't been on this forum in 6 months. Hope everyone is well.. I installed some of the "eBay HID" lights on my daily driver, a 2003 Toyota 4Runner. The lights were only $50 shipped to Hawaii, and they work great. I know that when I lived in the city I really did not like HID lights, as they seemed like overkill. But here on Kauai, there are almost no streetlights, and lots of empty dark roads at night. Plus for whatever reason, there's been a proliferation of aftermarket HID lights here on the island and now maybe 10% of all the cars have them. I have gone and checked my lights at night on the 4rRunner and can honestly say they are NOT blinding anyone at night and are 5000K color temp, so they are not some crazy blue or purple color, but rather a nice bluish white. (Audi, BMW, etc use a bulb that's 4500K..) So that got me thinking about putting a pair of these puppies into my 1800, which has long been plagued with dim lights. I had already upgraded to halogens, and they were pretty good, but I personally like the extra light the HID lights will provide. So I purchased a pair of Bosch-made H4 to sealed beam converter headlamps from eBay (about $40...). They are made of glass and should be able to withstand heat quite well. I then got 5000K H4 bulbs from eBay again for about $50. Here's the eBay items: http://cgi.ebay.com/ebaymotors/ws/eB...m=150514709850 and http://cgi.ebay.com/ebaymotors/ws/eB...m=300449892631 These HID kits come 1 bulb and 2 electrical boxes for each light. I know one box is a ballast, but not sure about the function of the other box. Everything is held together with nice polarized waterproof connectors. At one end is the classic 3-prong male plug that ultimately will connect everything to the Volvo. 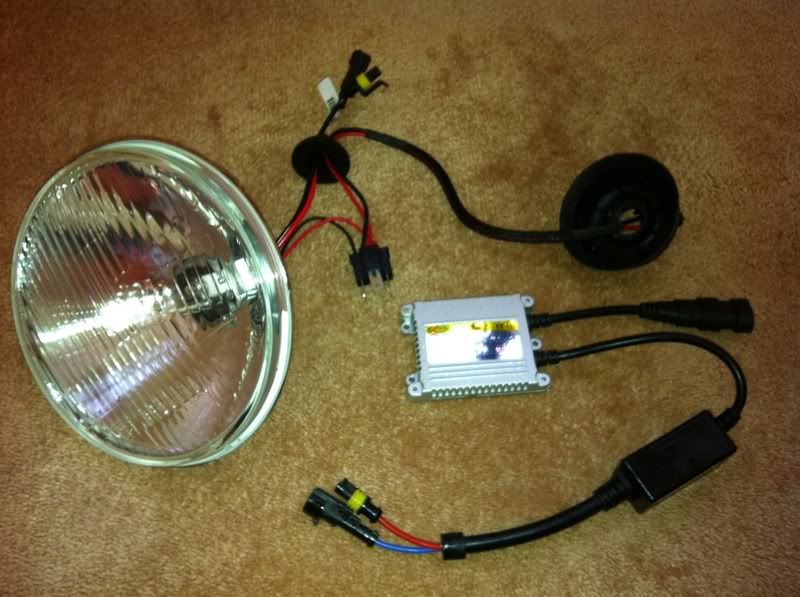 Also included were small mounting brackets, 2 sided tape and a couple small cable ties. Everything is pretty clear, but I will mention that if your HID kit doesn't work right at first, you might need to swap the polarity of the connectors (even the ones that have a lock out tab might need to be swapped to over-ride the tab). To fit the kit into the Volvo, we first assemble the light and HID components, then slightly modify the headlight bucket to accomodate the new wiring and ballast. Carefully open up the HID bulb from it's shipping tube (don't touch the bulb!) and put it into the H4 glass headlight housing. You have to muck with it to get it in and positioned correctly...it was a tight fit. Also I noticed that the H4 bulb comes with a small halogen bulb mounted next to the HID tube - I assume this is the high beam. (the 9005 bulbs in my 4Runner did not have this). Attach the spring clamps that hold the bulb in. I found I needed to remove both of the rubber "boots" that connected the wires together and might help seal out water in order to be able to thread them out of the headlight bucket. Be careful not to nick the wires as you do this. Next you have to remove the original headlight from the car. If you've never done this before, consult a manual and remove the trim ring, then the mounting screws (not the aiming screws) and pull out the bulb. You will also need to then remove the entire headlight bucket. Drill an extra hole (3/8" or so) in the upper part of the bucket to enable you to route the HID's electrical wires to the boxes that will be mounted under the front fender. Here's a photo of the bucket with the wires routed through and soldered.: 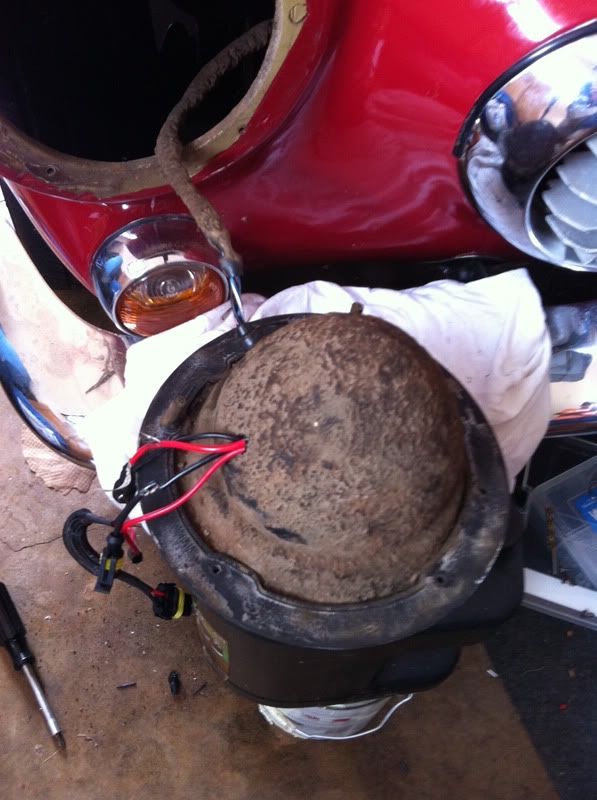 As you connect everything up, solder, etc. I suggest re-checking your lights to be sure they are working properly. You'll be mad if you get it all back together and discover one is no longer working. Here's a photo showing where I am at this moment..almost halfway done. Ignore the extreme blue tint shown in the photo as this is an artifact of the color balance of my cell phone camera. 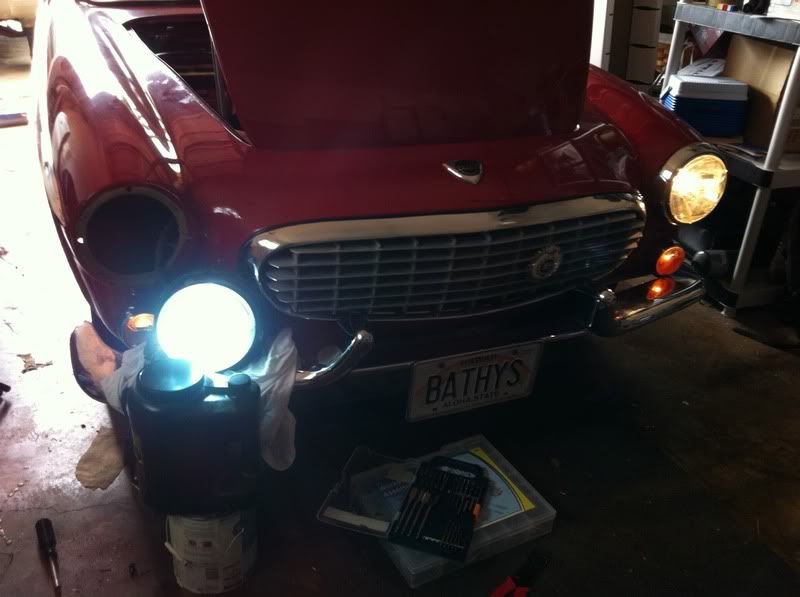 I plan to finish up later today - I need to devise a good way to solidly mount this ballast box to the area behind the grill. I'll post a follow up showing the completed job. Thus far there is no sign that the electricals are being stressed in any way by this upgrade, but I need to finish up and try it out for a while to be able say this with confidence. ps. I'm sure these HIDs would not pass many State's vehicle inspection (I'm not too familiar with the MOT, but I'm pretty sure they won't let things like this slide..). But here on Kauai things are a bit 'Third World' and the police here are unlikely to stop you over this type of modification...and the inspection takes all of 2 minutes and verifies your turn signals, horn, seatbelt, etc work...and that's it. Back when I lived in Texas, I bet the cops would've pulled me over within 1 hour. So consider your locale if you want to make this change..
__________________
"Relax in the safety of your own delusions." - JR "Bob" Dobbs Last edited by Kauai1800; Dec 18th, 2010 at 00:06. |

|

|
| The Following User Says Thank You to Kauai1800 For This Useful Post: |
|
Dec 18th, 2010, 05:32
|
#2 |
|
Member
Last Online: Aug 11th, 2019 22:13
Join Date: Oct 2007
Location: Island of Kauai
|
Well I got them in and they work/look great. One certainly could never again complain that their old Volvo's lights are too dim!
Here's what I look like coming at you now...  In the end I decided to zip-tie the ballast boxes to the bundle of 3 wires that come through the engine compartment into the wheel well. I didn't want to drill into the bodywork and there wasn't any other convenient piece of chassis to attach the boxes to. The ballast box is not heavy (3 oz?) and shouldn't be a strain on the wires. If I drove it in the rain very much I might look for a different solution to keep the boxes away from wheel spray, but I hardly ever get it wet. Truth is all the wires and connectors are from 1964 and wouldn't hurt to replace them (they look very old and beat on), but that's for some other day. I did take a voltmeter to them and they still do the job. I tried to take a photo but waited until it was simply too dark to see anything except the lights...lol. I'll try again tomorrow at dusk.
__________________
"Relax in the safety of your own delusions." - JR "Bob" Dobbs |
|
|
|
|
Dec 19th, 2010, 14:09
|
#3 |
|
Premier Member

Last Online: Today 11:51
Join Date: Jul 2007
Location: Connecticut, USA
|
Kauai;
...nice article... General Comments: If the insulation is intact and flexible, age is no reason to replace wires. Wires do not go bad or loose their ability to conduct . Terminations, crimps and switches on the other hand can develop resistance due to corrosion or having loosened...this resistance will result in a voltage drop when current is drawn, and this voltage will not be available at the intended load...slow motors, dim/yellow lights, etc., result. A hint of an unwanted voltage drop is heat...any heat at a connector, crimp junction is a sure sign of a voltage drop, wasted power, and should be eliminated! If you suspect a low voltage condition at a load like you lights, always verify voltage right at load with a voltmeter. Compare with voltage at battery. If there is a drop (of more than a few tenths of a volt), work back toward the supply and remedy...you will typically find the drop someplace where there is a termination of some sort...RARELY along an uninterrupted wire! The "ballast" in the case of your HID lights is a special case...it contains electronics which supply the high ignition voltages required to start the gasses in lamps conducting, then regulates the current...as such, it MAY generate some heat of its own...check for this after it has been ON for a minute or so...if you feel it heating, I suggest it must be mounted to vehicle sheetmetal to sink away this heat (with thermally conductive heat-sink grease), else they may overheat and be damaged and fail. This should have been mentioned in instructions if necessary. Cheers from Connecticut! |
|
|
|
|
Dec 19th, 2010, 23:24
|
#4 |
|
Master Member
Last Online: Nov 29th, 2021 23:46
Join Date: Jan 2009
Location: Dunedin
|
I looked at HUDs when I did mine. Decided I wanted to be legal though
 The Halogens use less power than the old sealed beams, and the HUDs 'should' use less power for the same output than the Halogens. Your cables should be fine for these. Thanks for the write up by the way. |
|
|
|
|
Dec 26th, 2010, 04:39
|
#5 |
|
Member
Last Online: Aug 11th, 2019 22:13
Join Date: Oct 2007
Location: Island of Kauai
|
Thanks for all the good info Ron and Asneddon! I'll check the boxes to see how hot they might be getting.
I wanted to post an update photo, but we've had rainy weather. Ideally, I'll post a sexy shot of the car at dusk where you can really see the lights..unfortunately right after I took this shot during the day I had some car trouble (see below). Though it's admittedly bright outside, I think you can see the nice blue/white color in the lights. Almost exact same color as daylight. 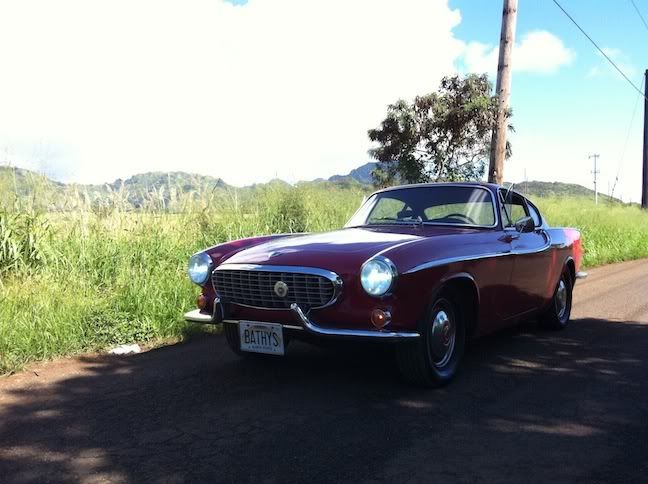 and one exposed a bit darker to see the lights better...  THEN THIS HAPPENED.... 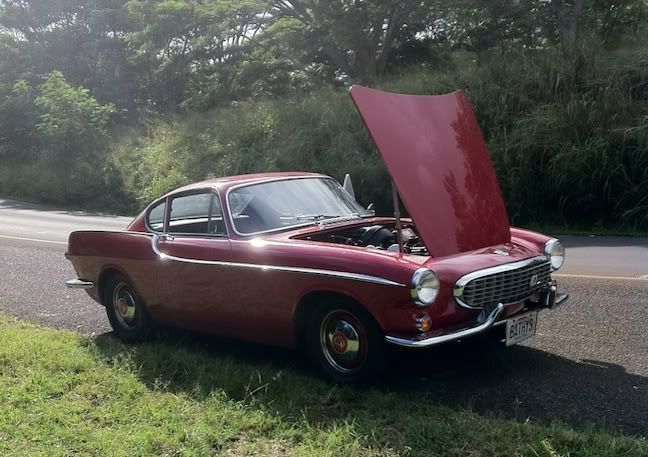 this is the result of me knowing I needed to replace the fan belt, trying at home several times to budge the bolt holding the alternator but being unable to, so I didn't replace the fan belt, followed by the a nice drive, then a loud squeal, then silence, then sitting by the road awaiting a tow truck.  Anyway, I had new front brake pads, rear drum pads, and stainless steel brake lines to put into the car and I don't do that myself. In the end, should get the car back a la new belt, and new pads/new lines all around. Still, probably like a lot of you, it irks me when I have to pay someone else to work on my car. But no worries..won't be too much $ and once it comes home I'll get the nice semi-dark photos I want.
__________________
"Relax in the safety of your own delusions." - JR "Bob" Dobbs |
|
|
|
|
Dec 26th, 2010, 15:42
|
#6 |
|
Premier Member
Last Online: Today 11:51
Join Date: Jul 2007
Location: Connecticut, USA
|
Kauai;
The car looks great...so do the lights...I request you post some pix of your car with a volcano in the background...only then will I believe you are located in Hawaii! ...sorry to hear about the fanbelt failure....I've never had a belt fail, but if I did, I'd probably go get one and repair it myself...that towing charge has to hurt... In looking at your post again, the second pic shows what looks to me like the red wires going directly and without protection, running through the sheetmetal of the headlight bucket...if that's indeed the case, I highly recommend a sleeve or grommet or both to protect the wires from vibe damage. The headlight circuit is not fused, so this is a real potential for a disastrous meltdown...protect that harness if not already! Cheers from Connecticut! |
|
|
|
|
Dec 27th, 2010, 04:37
|
#7 |
|
Member

Last Online: Apr 5th, 2013 22:17
Join Date: Dec 2010
Location: Hanford, California
|
Did you get a dual function HID? I've installed a few, and have learned a bit the hard way.
1 - EMD (Electromagnet discharge. Cheap unit for sale out there have little or no emd shielding. Effects radio mostly, but could affect other control items like upgraded computers. 2 - Most or single beam style. Now high beams. You would need to buy a dual function unit. Mostly, the high beam switch changes light position to give high beam. Getting both capabilities, gets pricier. Just a note.
__________________
Thanks, Dean two and a half 71 P1800E's |
|
|
|
|
| Tags |
| headlight, hid, lighting |
| Currently Active Users Viewing This Thread: 1 (0 members and 1 guests) | |
|
|


 Linear Mode

