
|
|||||||
 Information
|
|
Rear Discs, Pads and Shoes Replacement - GuideViews : 41315 Replies : 28Users Viewing This Thread : |
|
|
Thread Tools | Display Modes |
|
|
 Sep 14th, 2010, 21:02
|
#1 |
|
Master Member

Last Online: Feb 3rd, 2024 18:39
Join Date: Sep 2009
Location: Sunny Scotland
|
Guys - a quick guide...
Firstly - this post is provided as-is, It is YOUR responsibility to ensure that all work is carried out observing all required saftey precautions. Do not attempt any jobs like this unless you are fully aware of the risks and responsibilities. The replacement of the rear brake "consumables" is a very easy job, requiring basic tools and skills. if you have ever done this on another vehicle, you will be ok here. Ok, here is the basic setup if you have not looked before! (yes, ok, should have power washed the car first... look at all that mud...!) 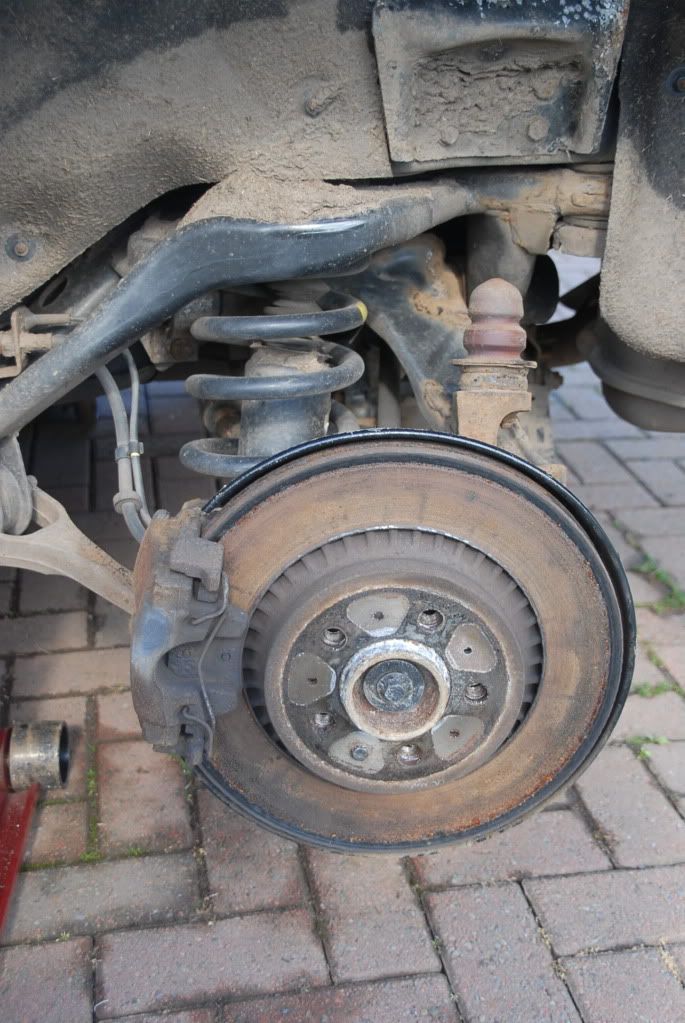 If you look closley to the edge of the disc, it is the only part of the disc that is providing braking contact... not good, and, the subject of many other threads on here. It is very common however on many marques. 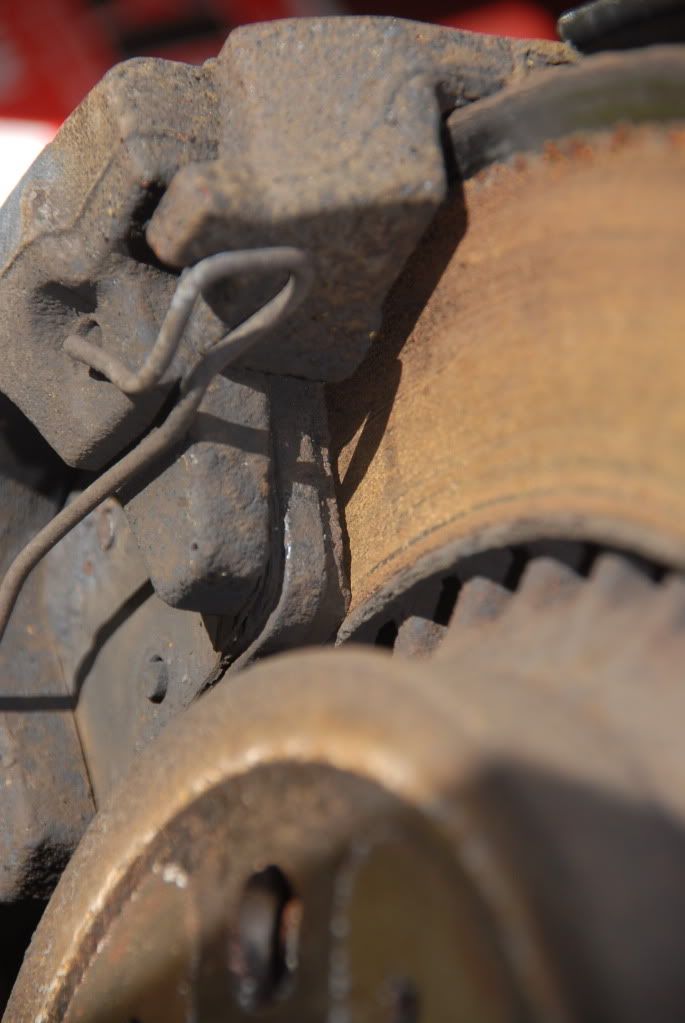 Ok - first off, you need to remove the caliper from the mounting bracket. This is done by the removal of two hex socked head pins that are under the two plastic caps - 1 shown in the picture below - you will see the other lower down behind the disc. 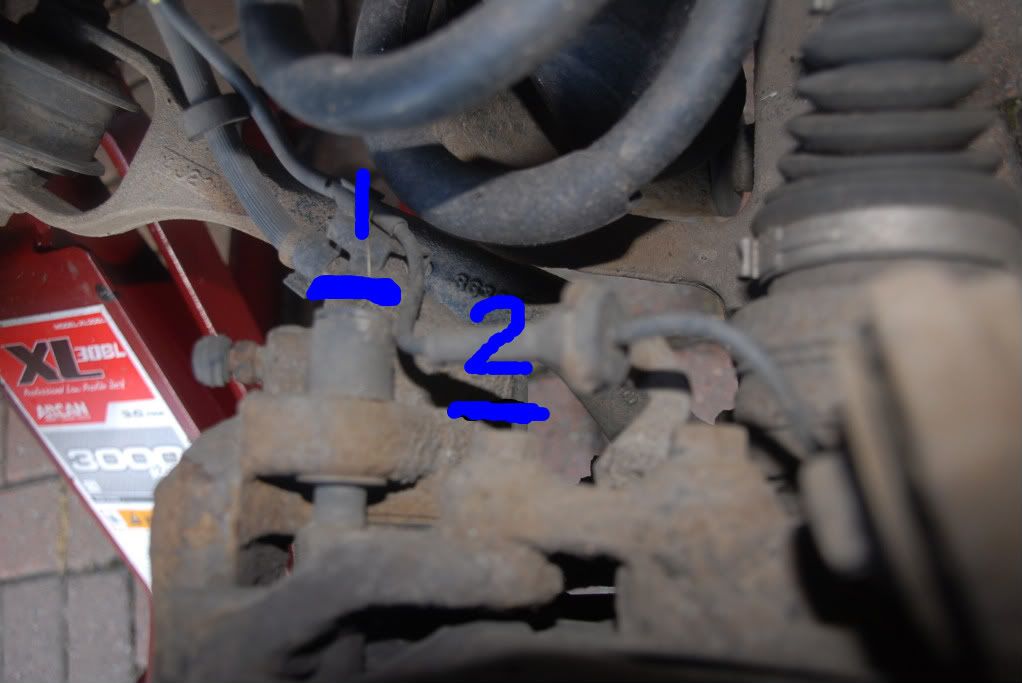 When you remove the caliper, either suspend it from the road spring by a bungee cord, or lay it on the rear suspension arm out of the way, ensuring that the rubber hose is not under any stress or twisted. The caliper bracket is removed once the bolt marked 2 in the above picture is removed- the other bold is below the first and is really obvious. Removing the above hex pins and bolts is a very tight job, and you cannot get in with a typical socket set. The setup is very compact, which is surprising for the size of the vehicle. I used a 10mm spanner with hex bit to undo the pins, and the longest ring spanner I could find to undo the bolts. You can see here how tight this is.. that 1/2" drive hex holder is nearly touching the roadspring. The bolts are not torqued up very tight, but as they are in with some threadlock, they have a very good grip of the threads, hence they are tight to remove. 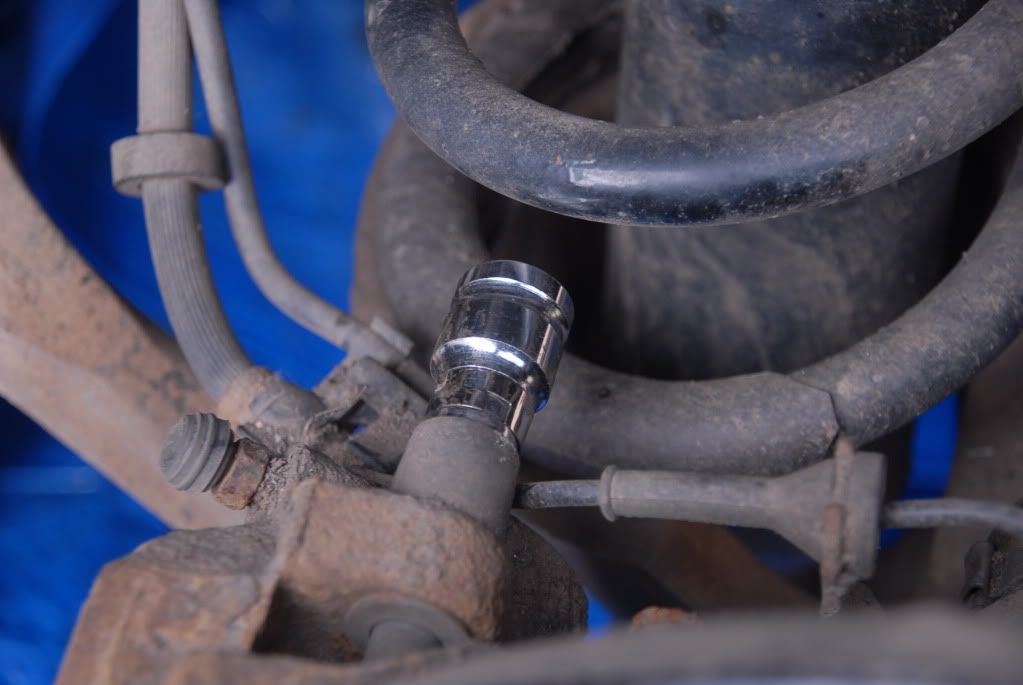 You can see the two hex pins here... 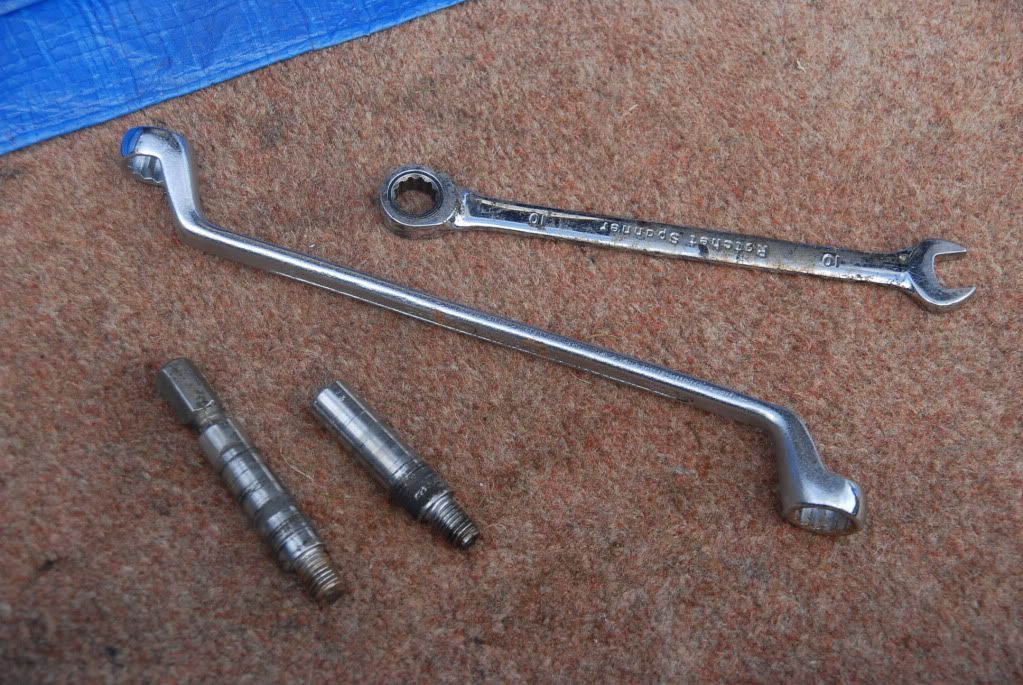 Now, if, having checked that the front wheels are chocked and ensured the gearbox is in gear or in Park, you can release the handbrake. With the caliper and bracket removed, you can undo the single 10mm bolt on the disc. You can also see in the picture some white corrosion on the hub centre. This is from the alloy, and needs to be cleaned up before you remove the disc. A wee wire brush is excellent for this. Remind yourself to apply some coppaslip to this centre before you refit your wheel! 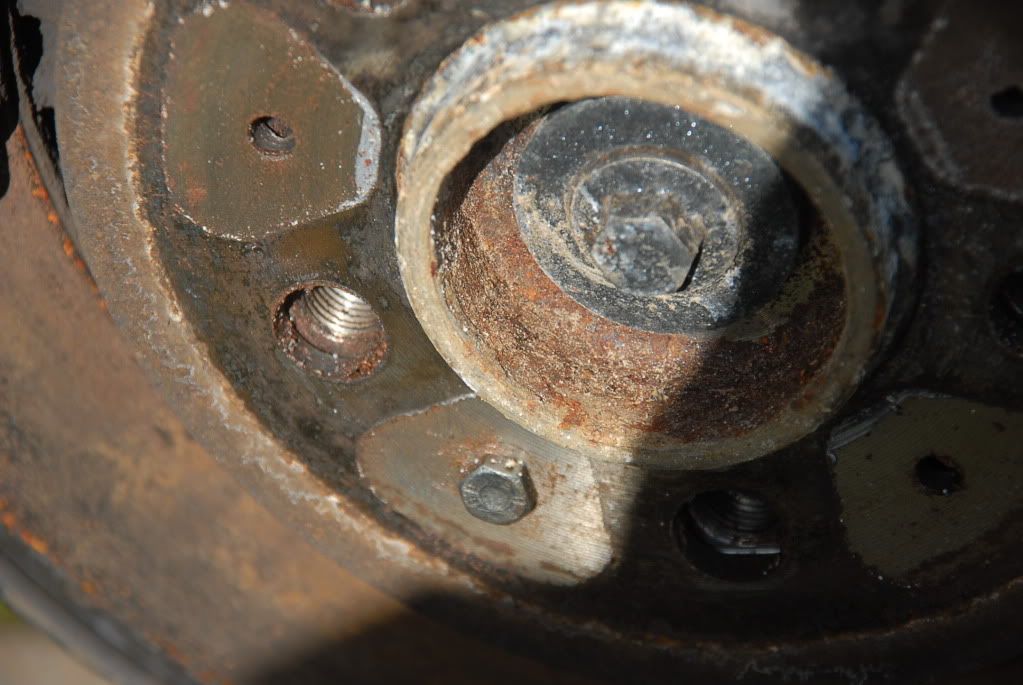 When the handbrake is released, I found it easy to remove the disc from the car. You may need to wiggle the disk somewhat but dont be tempted to get too violent as the small brackets that the show retaining springs atach to on the brake backplate can come off... not good, as they require welded or replaced to fix. The picture below shows these brackets with the discs and shoes removed. 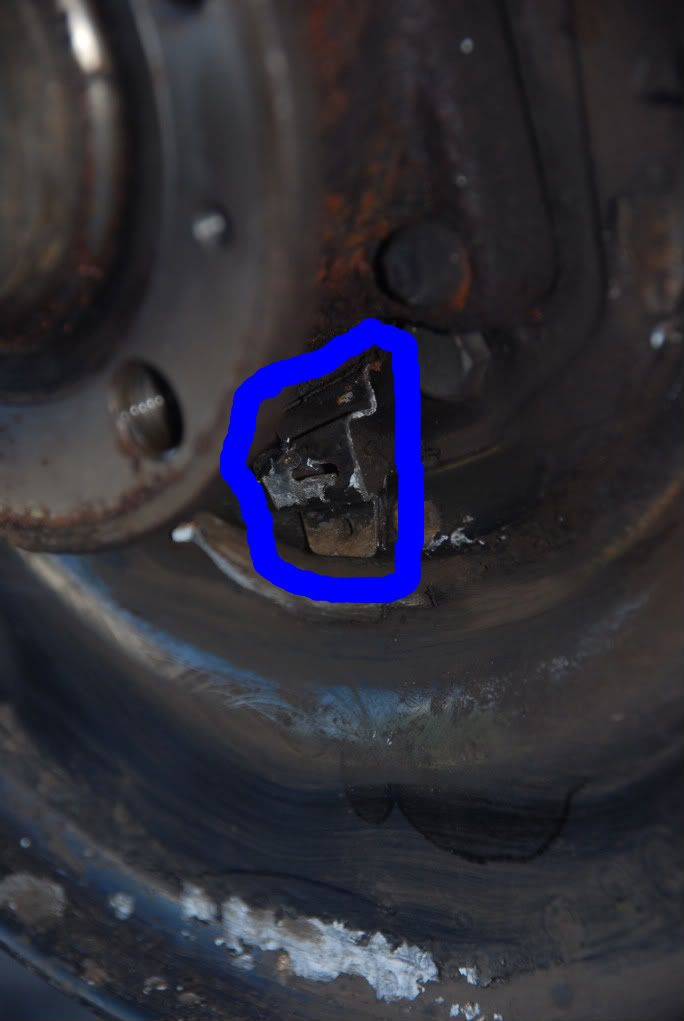 With the disc removed - you have this... 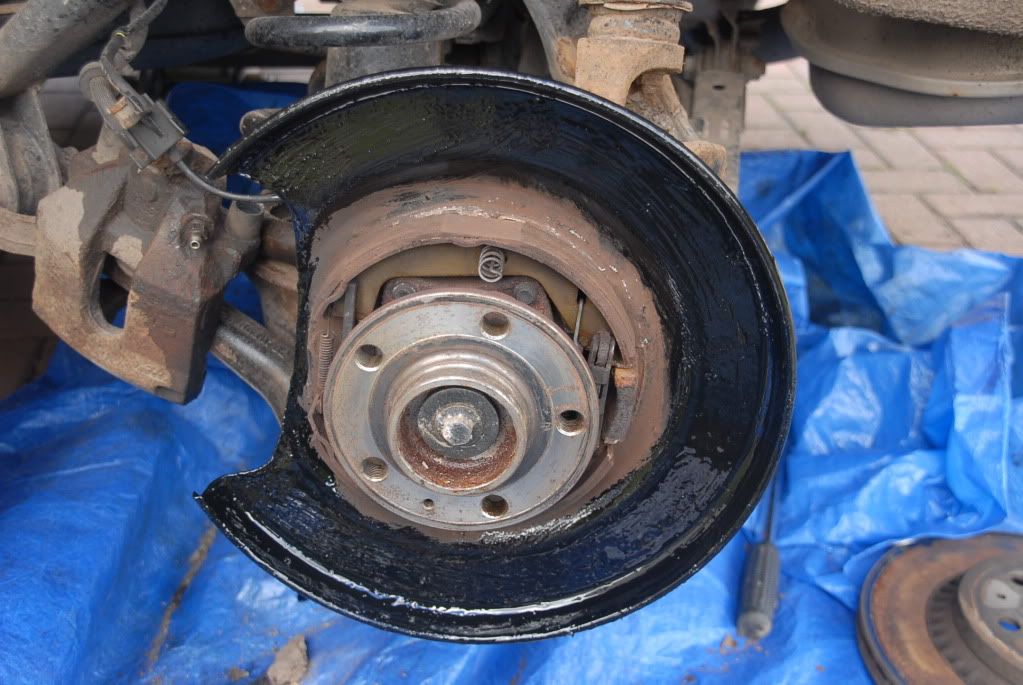 The shoes are now easily swapped, using some small pliers to remove the springs. You may want to replace the springs as Volvo suggest, but in my experience, they appeared perfectly reusable. You can also see I took the oportunity to wire brush the backplate and give it a hit of black smoothrite paint before changing the shoes. Back to the pads - you can see here just how badly they were worn, and should really have been changed some miles ago. The old pad is at the top, sitting on the new one.  I also took the chance to paint the new discs the day before fitting so they were ready to go on... Dont worry about getting paint on the braking surface - you actually do WANT to go over onto it sothat you get a proper edge and no visible rust when used. The excess paint dissapears after a few miles. 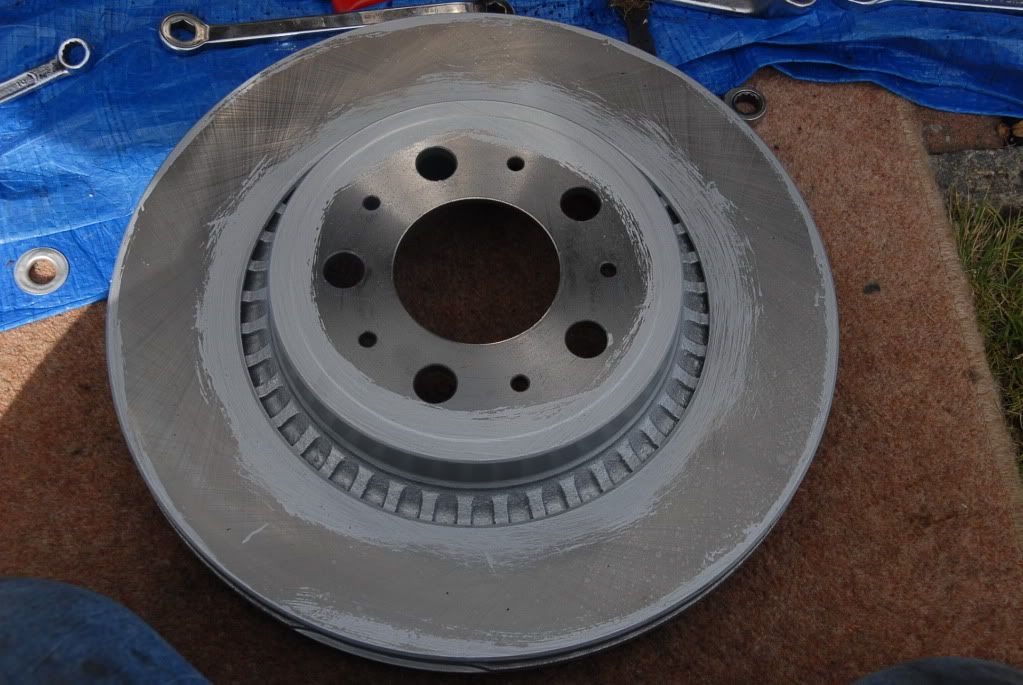 Before you replace the caliper bracket bolts, I suggest you clean the threads with a wire brush to remove the old threadlock. Also, use new threadlock when you replace them and torque to the correct setting. You may struggle getting any torque wrench in there however... 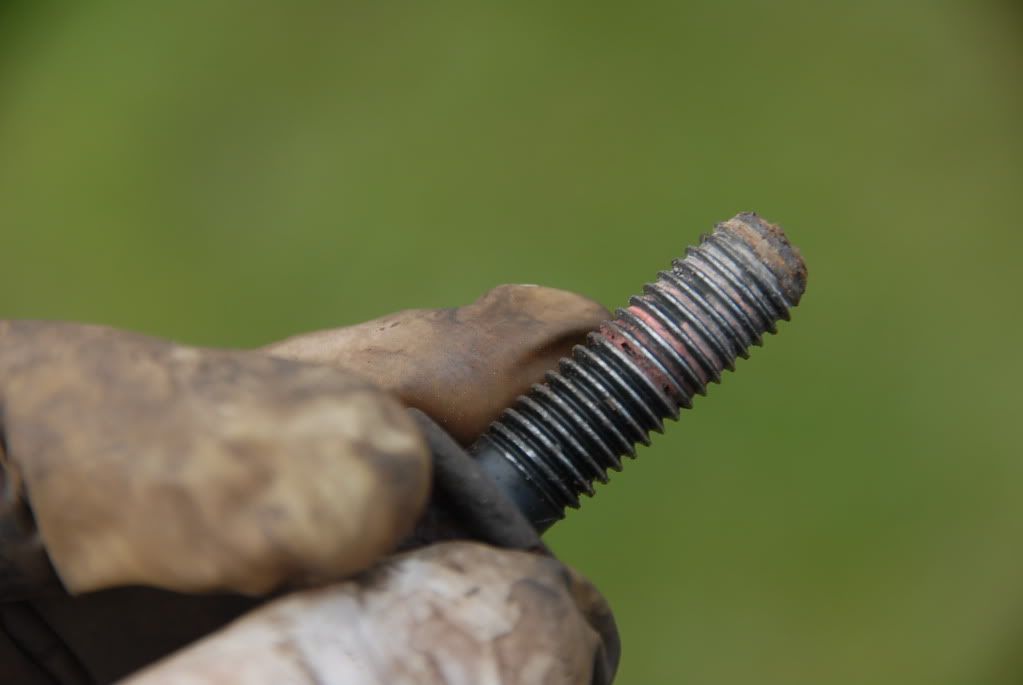 Anyway - before you fit the new disc, make sure that the hub surface that it mates to is totally clean with no grease or dirt/grit in there - if it does it wont mate and you will very likley end up with warped discs shortly after fitting them. So, get the disc and caliper bracket back on. I did not have to adjust the handbrake - the disc went straight back on without any fight. 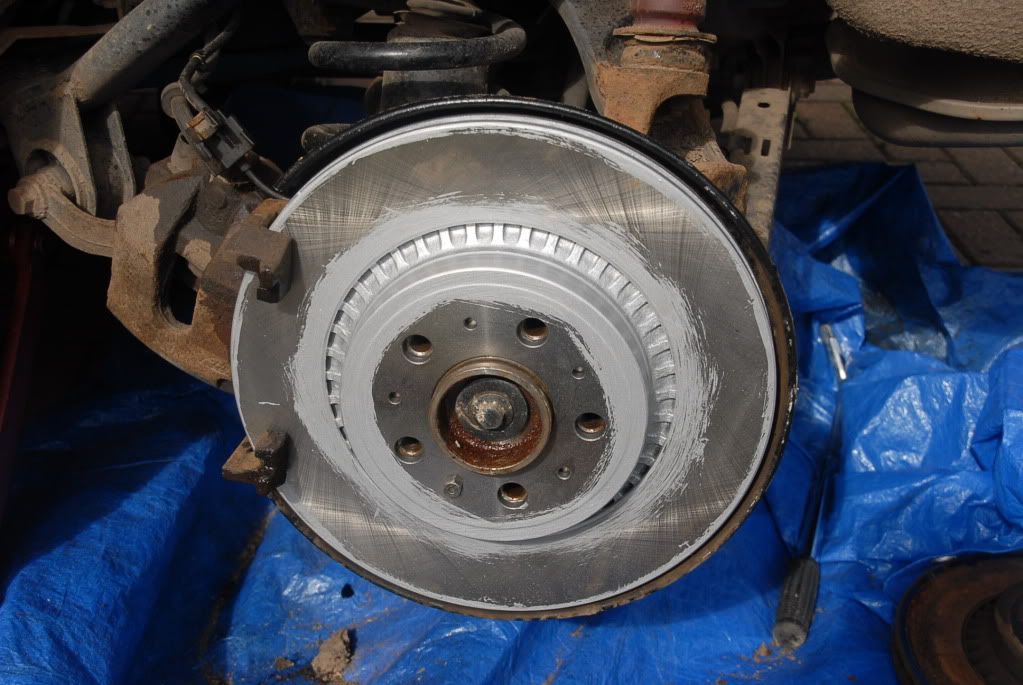 Before fitting the pads, you need to push the piston back into the caliper. It is best practice these days with cars with ABS to undo the bleed nipple slightly and push the piston back in. This ensures that undue reverse pressure is not applied to seals in the ABS unit, risking damage. Its easy to releasethe bleed nipple and catch the small amount release with a cloth. If you are uncomfortable with this, take it easy pushing them back in, and, watch that the master cylinder reservour under the bonnet does not overflow as the excess fluid returns home. Here is the nipple, with its plastic cover removed. Given that these corrode in, apply plenty of release oil... and take it easy. Also, clean up the sliding caliper pins so that any old brake dust etc is completely removed. 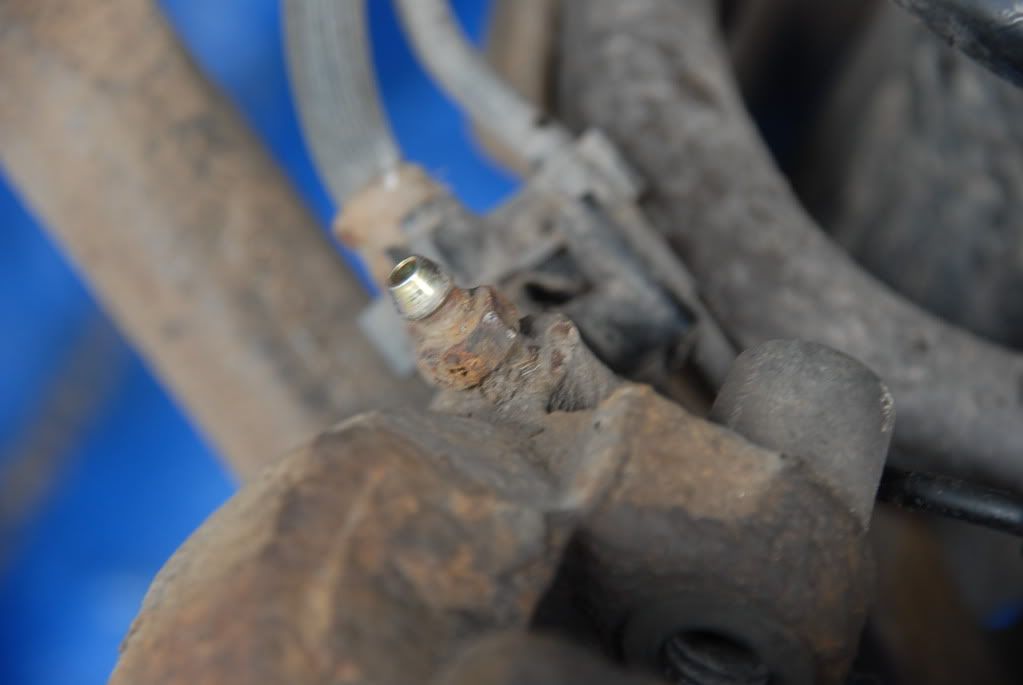 Next, you can fit the pads and replace the caliper. It is sensible to apply some coppaslip to the mating (sliding) surfaces on the caliper bracket. I also completed the job by painting the cleaned caliper and bracket, providing a nice clean finish! 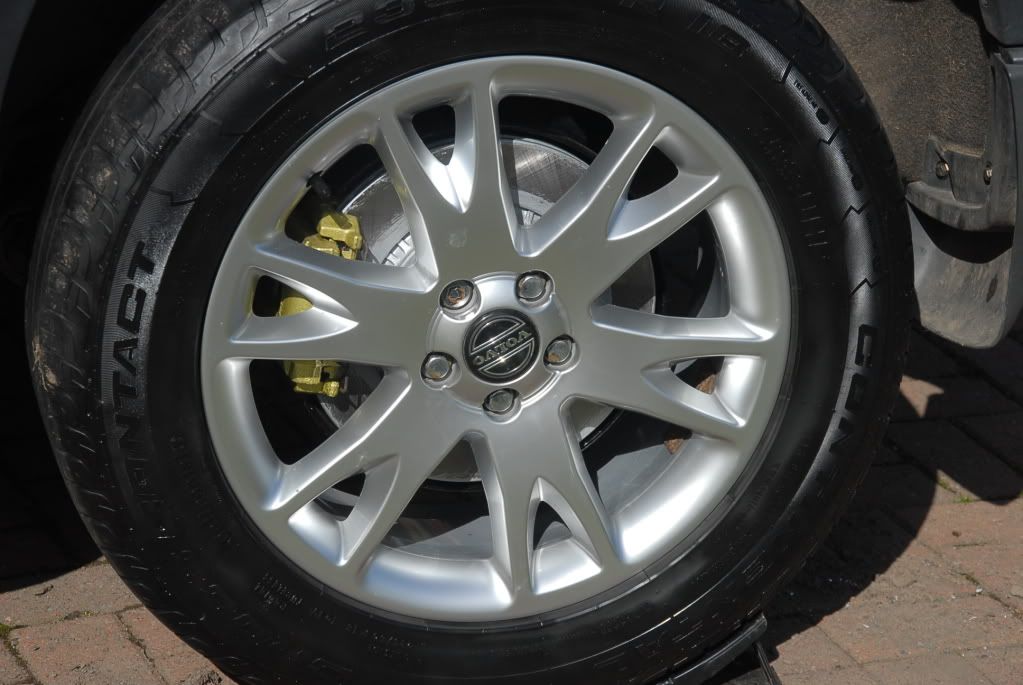 And the front ones, so they match!  So - I hope that quick guide helps someone. David Last edited by BestGear; Sep 14th, 2010 at 21:47. |

|
| The Following 32 Users Say Thank You to BestGear For This Useful Post: | 400-ascona, ascender, Beavis, bellabid1, BigVolvoJon, bobdabuilda, chb, clarkesta, coachie, D5Gill, dave johnstone, DBAS, EKB, Funky Diver, galloot633, Grandad Roger, hids4u, ian ferguson, ianu, In Reverse, jaguarmanuk, joe70, kentishdriver, lexington, marlonjd, NCS XC90, owenfackrell, robg8070, Ron_XC90, RoscoMac, scottyjohn, XC90caravanpuller |
|
Sep 14th, 2010, 21:53
|
#2 |
|
Member
Last Online: Apr 24th, 2024 11:54
Join Date: Oct 2009
Location: Kent
|
Not a job I am likely to do on the XC90 unless I buy it off the business when I change. But excellent and informative post, and thankyou for taking the time. Photos particularly useful in the event I have to do any fault tracing myself.
|
|
|
|
Sep 14th, 2010, 21:55
|
#3 |
|
Master Member

|
Great write-up, thanks David!
Would it make sense (for forum admins) to put these diy-guides in a separate area within the XC90 forum, so they are easy to find and don't get lost in the masses of other posts?
__________________
Chrysler Grand Voyager 2.8 CRD Limited 2010 XC90 D5 SE Geartronic, MY2008 (Now sold) Mitsi Pajero 2.8TD Super Exceed '96 (My Toy)  Member of the Gloucestershire & Worcestershire 4x4 Response group. www.gw4x4r.co.uk Member of the Gloucestershire & Worcestershire 4x4 Response group. www.gw4x4r.co.uk
|
|
|
|
Sep 14th, 2010, 22:02
|
#4 |
|
Master Member
Last Online: Feb 3rd, 2024 18:39
Join Date: Sep 2009
Location: Sunny Scotland
|
Thanks for the complements Guys.
Some half deceint pictures always help envisage the job... glad I'm not wasting my time doing it as it fair adds to the time to do the job! David |
|
|
|
Sep 14th, 2010, 22:05
|
#5 | |
|
Master Member
Last Online: Feb 3rd, 2024 18:39
Join Date: Sep 2009
Location: Sunny Scotland
|
Quote:
I have actually PM'ed a mod to see if some of these are worthy of going in the articles section, rather than sticky them or something else... and as you say, they may end up being burried and lost forever! The articles section would, to me, be an ideal home for articles/posts like these and possibly a mod only posting section. We just need to get a few more done! I will try, when I do a job to take some pictures and do a wee write up - I may not be a paid up member of the club, but am happy to give something back if and when I can. David |
|
|
|
|
Sep 14th, 2010, 22:54
|
#6 |
|
Master Member
|
I think it's a good idea, my (photo) instructions for the Ipod integration are still out there somewhere as well, which might help people, if not for the same install, then at least on how to dismantle part of the centre console...
__________________
Chrysler Grand Voyager 2.8 CRD Limited 2010 XC90 D5 SE Geartronic, MY2008 (Now sold) Mitsi Pajero 2.8TD Super Exceed '96 (My Toy) Member of the Gloucestershire & Worcestershire 4x4 Response group. www.gw4x4r.co.uk
|
|
|
|
Sep 15th, 2010, 07:19
|
#7 |
|
Master Member
Last Online: Dec 22nd, 2023 10:53
Join Date: Dec 2006
Location: Leeds
|
Really useful post. I have this job to do in the next month, so the pics were helpful.
What specific paint did you use for the disc? I had never thought of painting this (or the stone guard) but its an excellent idea. |
|
|
|
Sep 15th, 2010, 12:57
|
#8 | |
|
Master Member
Last Online: Feb 3rd, 2024 18:39
Join Date: Sep 2009
Location: Sunny Scotland
|
Quote:
Check this post: its kinda burried under the side step thread! (which contains some other, similar discussion). http://www.volvoforums.org.uk/showpo...4&postcount=20 |
|
|
|
| Currently Active Users Viewing This Thread: 1 (0 members and 1 guests) | |
|
|


 Hybrid Mode
