
|
|||||||
| 850/x70 S1 Articles How to's and step by step guides on a specific repair or modification to a Volvo 850/70 car. |
 Information
|
|
Curing Siezed Rear Wiper ArmViews : 5748 Replies : 0Users Viewing This Thread : |
|
|
Thread Tools | Display Modes |
 Nov 3rd, 2007, 15:13
|
#1 |
|
Phoenix from the ashes

Last Online: Apr 3rd, 2024 01:16
Join Date: Jan 2006
Location: Finchingfield
|
Over the last few months i have, as have others too had a problem with my rear screen wiper not working...realising that it had seized i have not used it for months not wanting to burn out the motor...finally the ability not to be able to look out of my back window, pursuded me to have a look at the situation and complete a basic fix....
Stage 1....remove the tail trim panel as per bay 13 recomendations...this is the most difficult part and i broke the handle surround slightly but repaired it with some araldite...the art i now realise is to use a tool bent so that when you press the handle toward the tailgate it forces the surround away from the trim if that makes sense...., alternatively place two wallpaper scrapers together between the surround and trim, slide a large flat headed screwdriver between and twist to part the scraper ends under the surround... http://volvospeed.com/Repair/tailgate_trim.php... you will notice that even the legend that is bay 13 did not succeed in the outer surround removal without damaging some of the inner surround fixings..lol Stage 2....Remove the rear wiper, inspect the removable, rubber circular sealing ring that the spindle protrudes through, below the sealing ring can be seen to have split allowing crud up the spindle and causing my issues.... 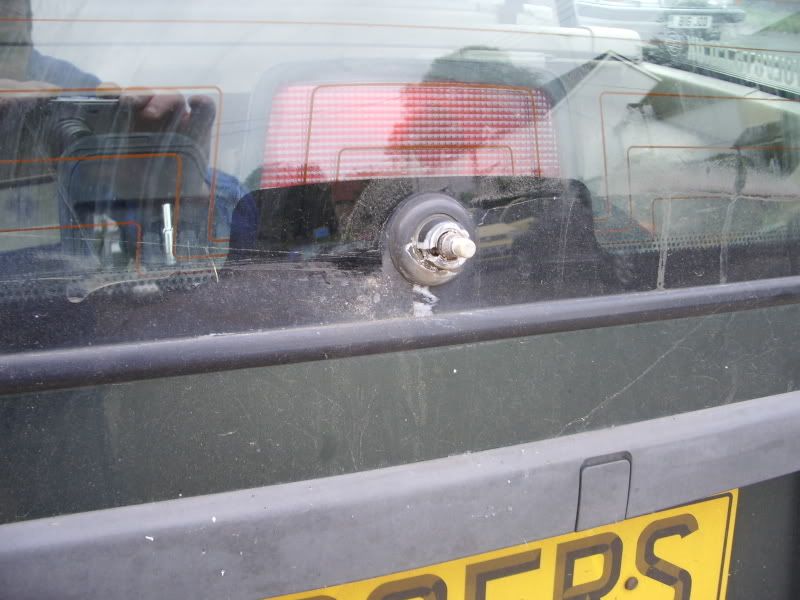 Stage 3....with the trim panel removed undo the 3 10mm retaining bolts, the electrical connector and remove the motor and linkage frame for inspection.., mine shown below looks spotless on one side...Note how the linkage is secured to the bracket 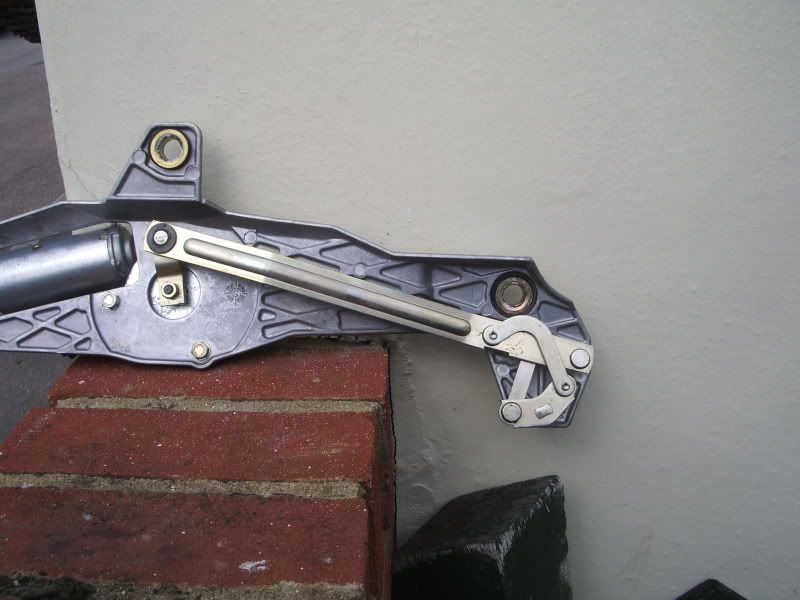 but spot the problem on the other side.... 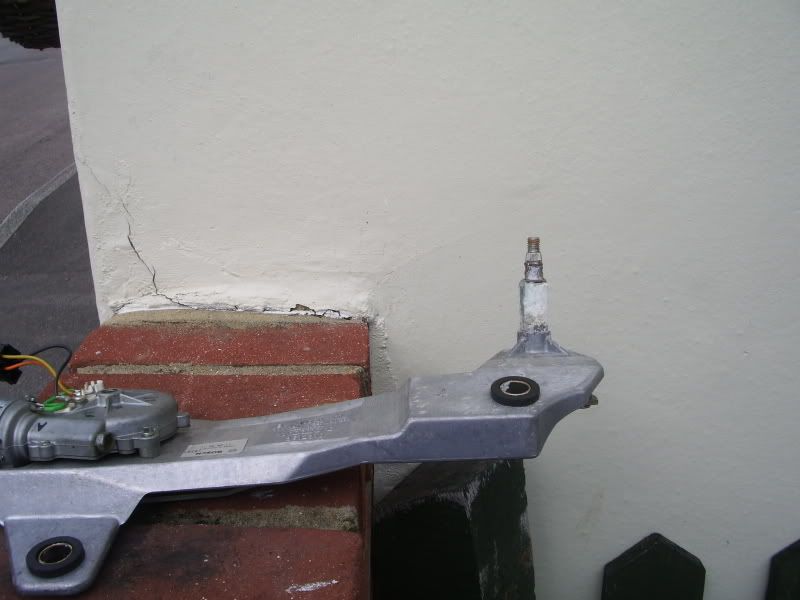 Stage 4....IMPORTANT mark the position of the linkage arm where it goes onto the motor spindle...note the exact position by scoring a line with a screw driver up the side of the part of the linkage that goes onto the motor spindle, marking a line along the bracket plate.... 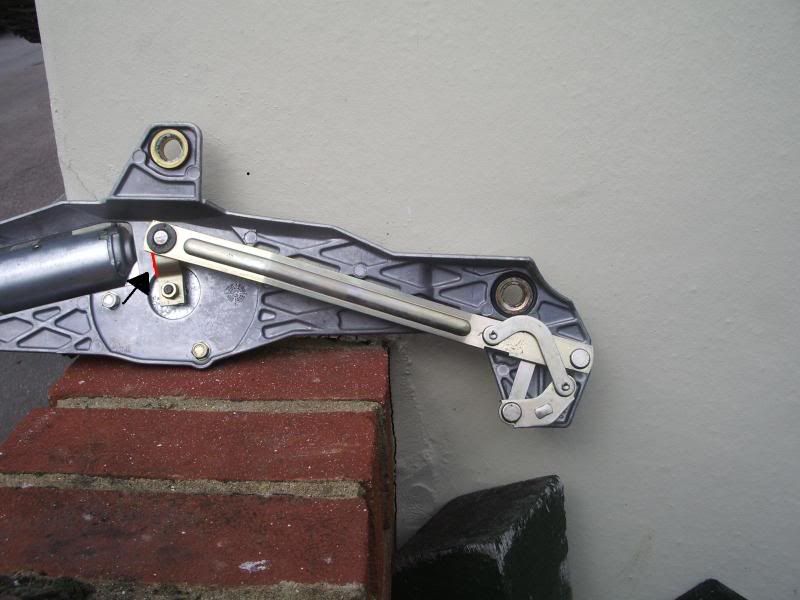 Stage 5.... Remove the nut holding the linkage arm to the motor and the circlip and washer that hold the other end linkage spindle to the bracket.... 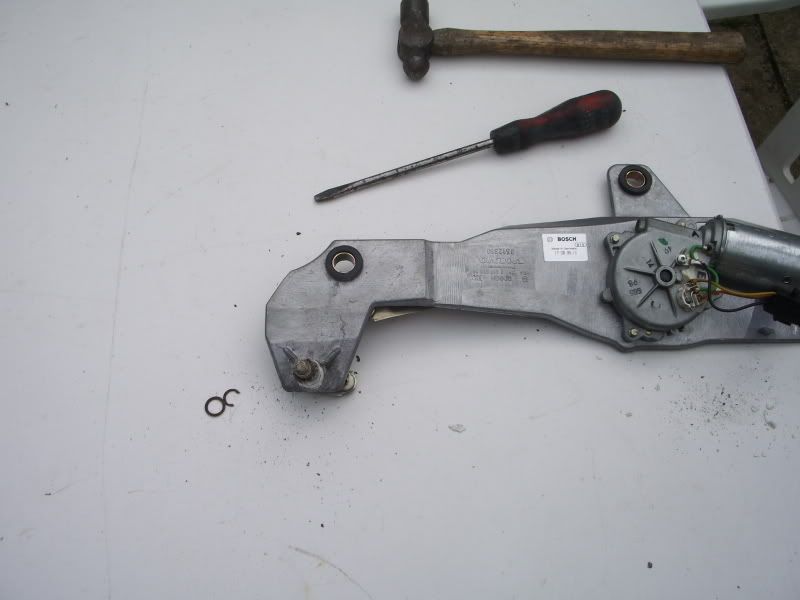 Stage 6....The spindle was so jammed that however much i tried i could not free it by hand so i replaced the wiper retaing nut (to prevent me boogering the spindle threads) and whacked the top of the spindle a couple of times... once there is a fraction of movement you can spin the spindle by holding the bracket and turning the linkage from the motor end...eventually the spindle will free itself and can come out of the bracket....there is a metal circular sleeve/spacer to look out for, it may be stuck round the spindle or stuck up the bracket spindle tunnel Stage 7....Thoroughly clean the spindle and the bracket where the spindle passes through...i used a fine sandpaper for the spindle and a round file (like this one http://cgi.ebay.co.uk/8-200MM-ROUND-...QQcmdZViewItem) for the spindle tunnel 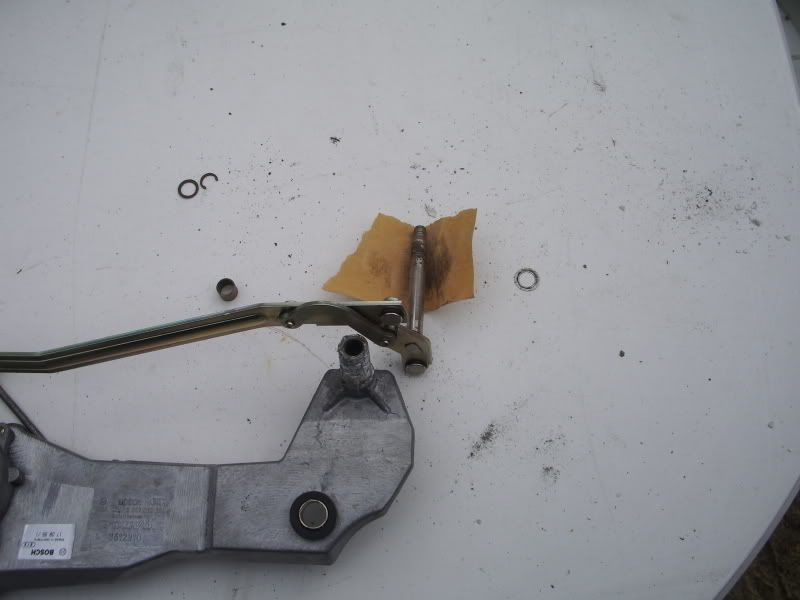 Stage 8.... When you are satisfied all elements are as clean as they can be replace the sleeve into the bracket 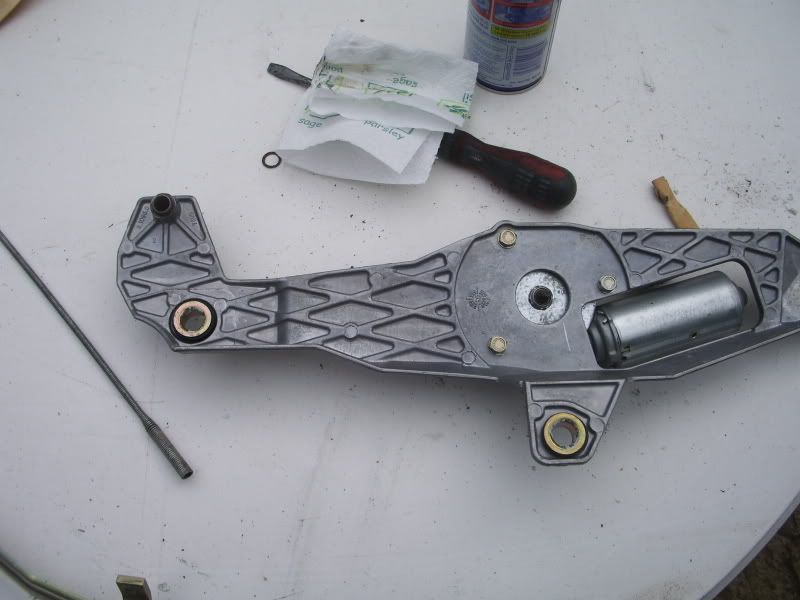 Stage 9.... Using as much copper slip as you can refit the spindle, washer and circlip...then you can refit the linkage to the motor using the markings you made earlier as the guide.... 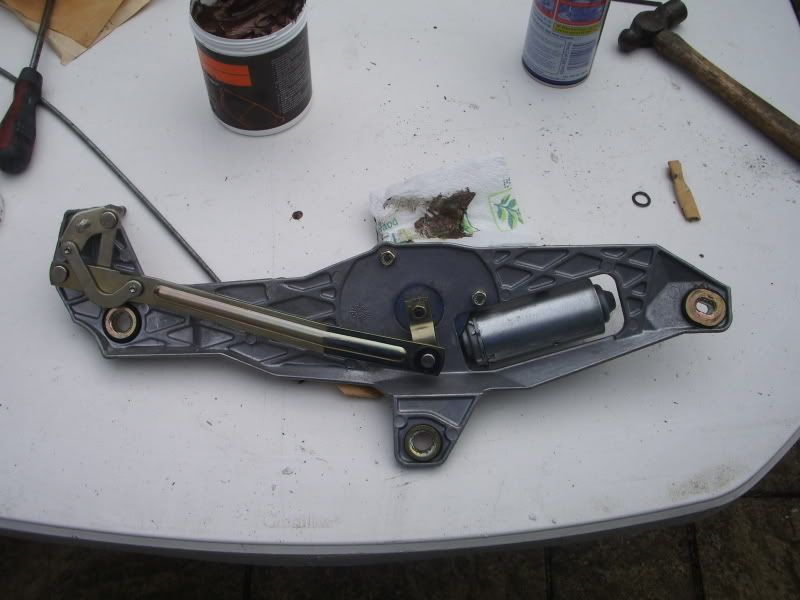 Stage 10.... Before you put the unit back you will need to repair or replace the sealing ring..this is removed by pressing it from the outer side of the tailgate glass though to the inner.... i taped mine with some serious strength tape.... 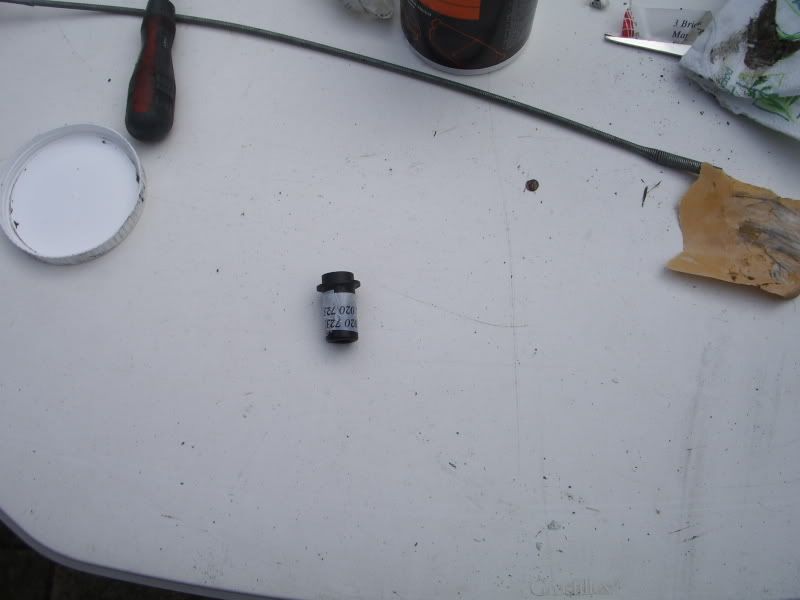 and then made it asthetically pleasing by painting it black.... Stage 11.... Refit the unit and electrical plug...., refit wiper arm and nut...Test everything is positioned correctly and check the wiper covers the glass correctly.... Stage 12.... Refit the trim panel making use of the repair kit from nordic that you have had sitting around for a couple of years and could never get round to using..lol 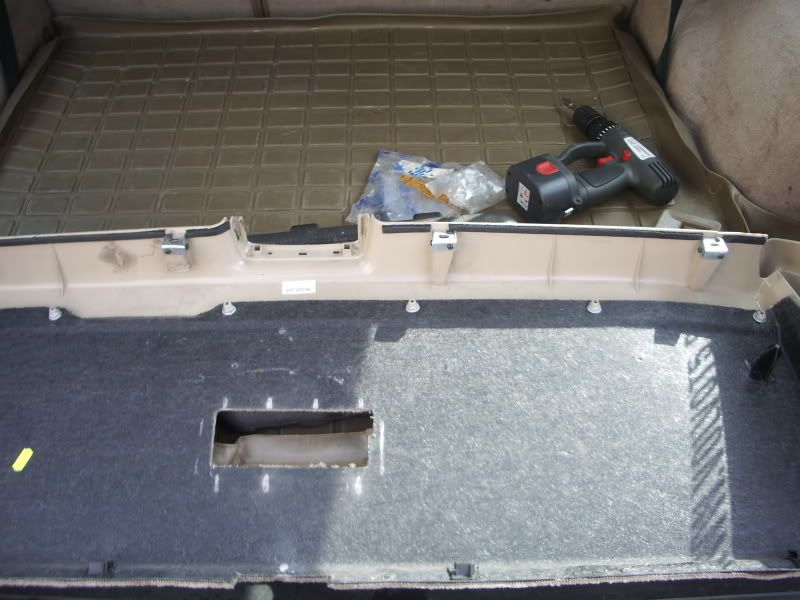
__________________
Dum Spiro Spero VOC 20419 Last edited by Jod T5; Nov 29th, 2007 at 22:49. |

|
| The Following 14 Users Say Thank You to Jod T5 For This Useful Post: |
| Currently Active Users Viewing This Thread: 1 (0 members and 1 guests) | |
| Thread Tools | |
| Display Modes | |
|
|


 Linear Mode

