
|
|||||||
| 200 Series General Forum for the Volvo 240 and 260 cars |
 Information
|
|
Fuel filler neckViews : 1160 Replies : 12Users Viewing This Thread : |
 |
|
|
Thread Tools | Display Modes |
 Jan 16th, 2023, 07:33
|
#1 |
|
Premier Member
|
Good morning.
I fitted a new fuel tank (not genuine Volvo), but I'm a bit confused about the filler neck fitment and Google seems to have very few photos showing this in detail. 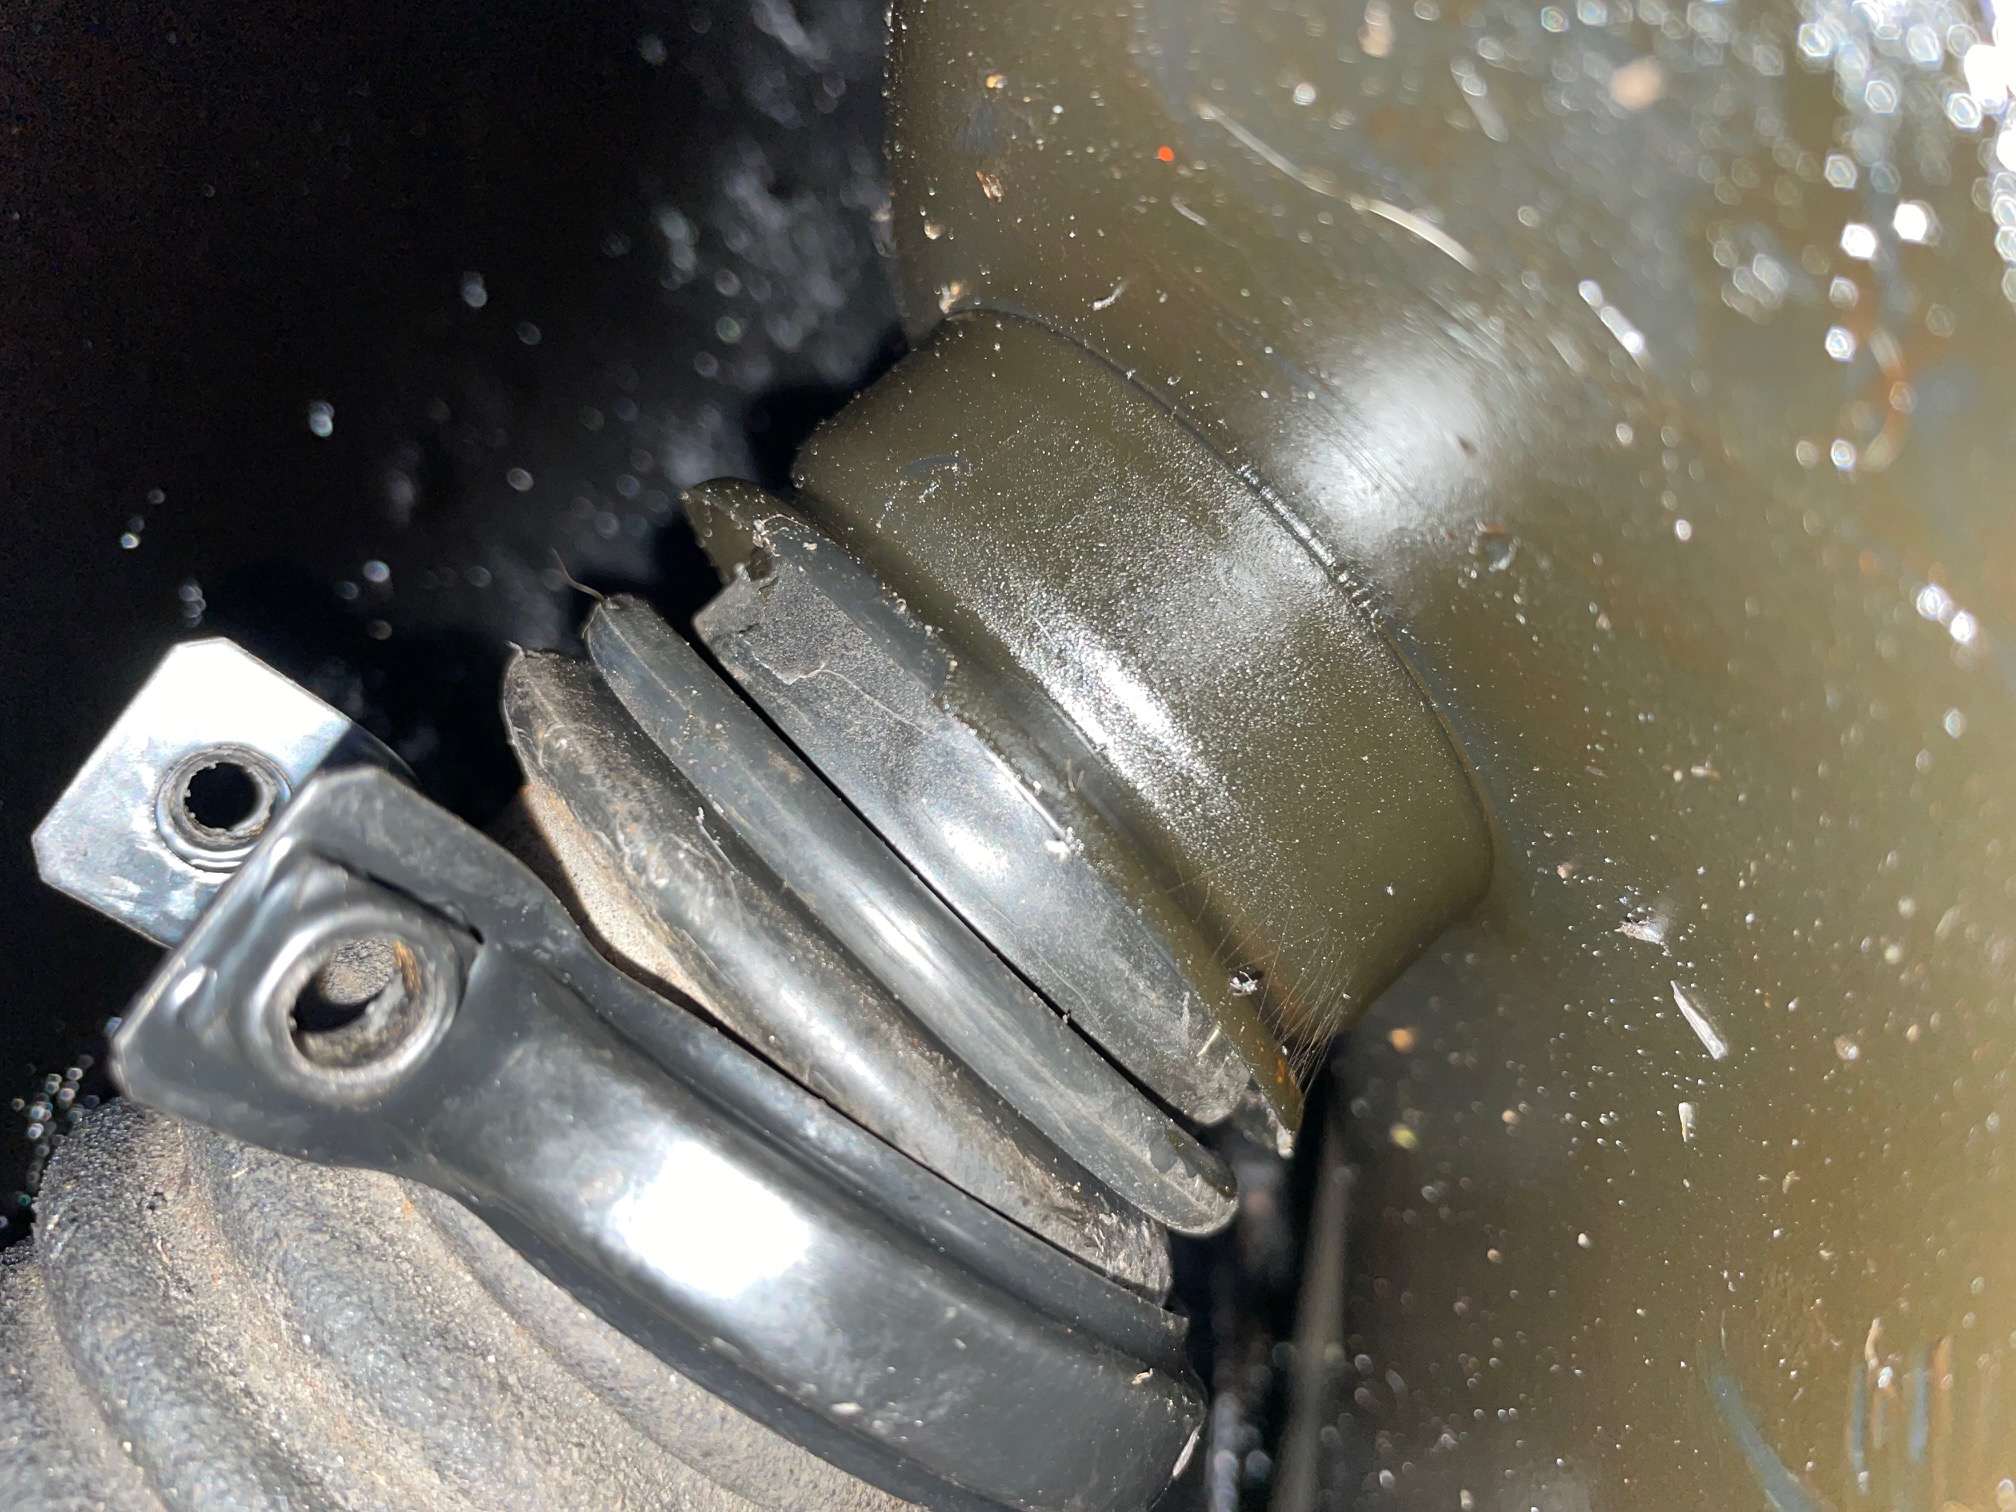 It the last bulge on the tube not meant to butt up against the tank inlet? I'm only guessing but annoyingly didn't check when I took the old one out. P.S. Just been on the phone to Brookhouse where I bought they'd never heard of the problem. The tank can't really move when fitted and I didn't have the neck off and it doesn't appear to be movable anyway. Thanks Henrik
__________________
--- '89 Volvo 240GLT B230E/AW70 '14 Volvo V70 SE D4/M66 FWD '70 Chevrolet Chevelle Malibu '95 Saab 9000 CSE 2.0 Turbo Auto Last edited by morsing; Jan 16th, 2023 at 09:29. |

|

|
|
Jan 16th, 2023, 09:19
|
#2 |
|
Not an expert but ...
Last Online: Yesterday 14:48
Join Date: Dec 2001
Location: Boncath
|
Haynes describes two kinds - earlier and later, with diagrams.
There's a note that the tanks were different and only the later type is now available, so "several modifications may be involved". The later type appears to just have a joint like an exhaust pipe, with a clamp holding the two sections together. I've found it very difficult to secure a leak-proof joint, and it recently started leaking. I stopped it by plastering body filler over the joint. |
|
|
|
| The Following User Says Thank You to Clifford Pope For This Useful Post: |
|
Jan 16th, 2023, 09:27
|
#3 |
|
Premier Member
|
Hi Clifford,
I'm pretty sure my one is the later type. And my Haynes manual doesn't cover tank replacements. Did you look at the photo? Do you see the 1-2cm distance missing I am talking about? EDIT: Sorry, I always forget the forum software prefixes the URL field http:// P.P.S. How on earth did you get your fingers in there to put filler around it? Regards, Henrik
__________________
--- '89 Volvo 240GLT B230E/AW70 '14 Volvo V70 SE D4/M66 FWD '70 Chevrolet Chevelle Malibu '95 Saab 9000 CSE 2.0 Turbo Auto Last edited by morsing; Jan 16th, 2023 at 09:51. |
|
|
|
| The Following User Says Thank You to morsing For This Useful Post: |
|
Jan 16th, 2023, 11:59
|
#4 |
|
Not an expert but ...
Last Online: Yesterday 14:48
Join Date: Dec 2001
Location: Boncath
|
Is that first bulge a separate distance piece (like exhausts sometimes have to join two female ends) or part of the pipe from the filler?
It was very hard to see what mine has (fitted before my time, probably original) but it doesn't look like a separate ring. As I often find with exhausts, the clamp even when fully tightened doesn't really pull the ends together to seal the joint. PS. Smallish hands and fingers I suppose. I dolloped a lump of filler with a spatula at the furthest point I could reach, and then smoothed in over the bit at the back with my fingers. I then worked filler into a strip of loosely woven rag and pulled it tight around the whole joint. |
|
|
|
| The Following User Says Thank You to Clifford Pope For This Useful Post: |
|
Jan 16th, 2023, 12:03
|
#5 | |
|
Premier Member
|
Quote:
Suppose I'll have to live with only filling the tank up 3/4? Thanks, Henrik
__________________
--- '89 Volvo 240GLT B230E/AW70 '14 Volvo V70 SE D4/M66 FWD '70 Chevrolet Chevelle Malibu '95 Saab 9000 CSE 2.0 Turbo Auto |
|
|
|
|
| The Following User Says Thank You to morsing For This Useful Post: |
|
Jan 16th, 2023, 13:39
|
#6 |
|
Senior Member
Last Online: Yesterday 23:12
Join Date: Sep 2020
Location: Falkirk
|
I wonder if the part where it goes through the boot floor is perhaps not aligned properly?
I've had my tank and filler neck off completely to weld up the area around the boot floor, and I had to re-fabricate the hole where the neck goes down to the tank. I managed to get this slightly wrong and now the filler neck sits at an angle into the tank, meaning I get a small leak whenever I fill it to the brim. You are right in thinking it should fit closer into the spout of the tank. There is a rubber seal that should fit tightly in there to prevent the leak I just mentioned. |
|
|
|
| The Following User Says Thank You to Juular For This Useful Post: |
|
Jan 16th, 2023, 14:59
|
#7 | |
|
Premier Member
|
Quote:
Ok, you've prompted to tell the whole story! Last summer, the car when in for welding and rust fixing. Part of this was removing the tank and putting new metal in the boot where the filler tube goes through! The first time I filled up the car, petrol poured everywhere! I though it was just because he hadn't tightened the clamp enough. So, sounds like, he put the hole slightly too high! Thanks, Henrik
__________________
--- '89 Volvo 240GLT B230E/AW70 '14 Volvo V70 SE D4/M66 FWD '70 Chevrolet Chevelle Malibu '95 Saab 9000 CSE 2.0 Turbo Auto |
|
|
|
|
|
Jan 16th, 2023, 15:17
|
#8 |
|
Senior Member
Last Online: Yesterday 23:12
Join Date: Sep 2020
Location: Falkirk
|
My plan is, once summer arrives, to drop the tank and enlarge the hole a fair bit.
You might be able to enlarge it in situ with some curved tin snips. Mine, I left the welds in place as I tend not to grind them back where they are invisible. So I won't be able to cut it without the grinder and potential fireball death. Hence dropping the tank. It may not need much. I reckon in my case I need to shave about 4mm off one side of the hole and it'll slot in nicely. |
|
|
|
| The Following User Says Thank You to Juular For This Useful Post: |
|
Jan 17th, 2023, 00:08
|
#9 |
|
Master Member
Last Online: Today 00:04
Join Date: Nov 2012
Location: London and Cambridge
|
Itll be very difficult to get that clamp in place with the tank and filler neck in the car. I replaced a tank on a car I used to own and put the filter neck on the tank with the clamp in place but only half tightened before putting the whole assembly into the car.
Some photos here: https://www.volvoforums.org.uk/showt...=268976&page=3 Cheers |
|
|
|
| The Following User Says Thank You to Bugjam1999 For This Useful Post: |
|
Jan 20th, 2023, 11:00
|
#10 | |
|
Premier Member
|
Quote:
I don't understand why that would be easier. Both parts are completely rigid, it either fits or it doesn't. I'm also mystified by that clamp screw, it's the same one I have, but it is far too long. Thanks Henrik
__________________
--- '89 Volvo 240GLT B230E/AW70 '14 Volvo V70 SE D4/M66 FWD '70 Chevrolet Chevelle Malibu '95 Saab 9000 CSE 2.0 Turbo Auto |
|
|
|
|
| The Following User Says Thank You to morsing For This Useful Post: |
|
| Currently Active Users Viewing This Thread: 1 (0 members and 1 guests) | |
|
|


 Linear Mode

