
|
|||||||
| x40 S1 Articles Article posts pertaining to x40 S1 Articles series Volvos |
 Information
|
|
Guide: removing the front bumperViews : 14663 Replies : 0Users Viewing This Thread : |
 |
|
|
Thread Tools | Display Modes |
 May 19th, 2012, 16:35
|
#1 |
|
VOC Member

Last Online: Apr 4th, 2023 18:13
Join Date: Apr 2010
Location: Oxford
|
Another guide to what will be, for many of you, far too easy a job to need a guide. It was the first time I'd done it and, though Haynes gives a pretty clear and accurate description, I would have welcomed more photos, as well as some guidance on how to undo the various different types of fastener and how the thing was actually held on, not least because right up until the end I was expecting it to crash down on my head at any moment.
So this is another attempt to make life a bit easier and less scary for people at my low level of skill and experience. This car is a Phase 1. What you need 10mm and 14mm sockets 12-inch extension bar flat-bladed and cross-headed screwdrivers Needle-nosed pliers How to do it 1. Jack up the front of the car and support it on axle stands. This makes access a lot easier. 2. The first job is to take off the front part (in my case, the only surviving part) of the plastic tray under the engine. This is held on by three sorts of fixings: (i) A series of bolts around the edge. A 10mm socket was what fitted mine. 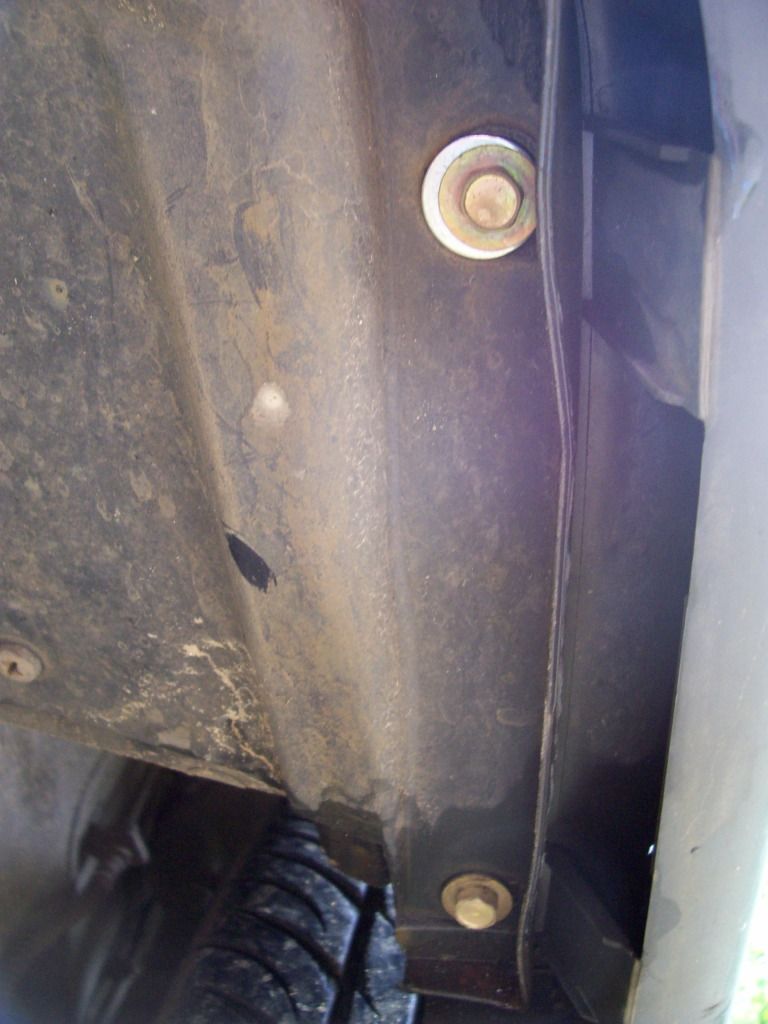 In my experience, these are either dead easy or completely impossible to remove, the variable being how old they are. With older cars, the metal fixings on the bumper that they screw into can become hopelessly rusted/loose etc with the result that the bolt just turns endlessly without ever being released. I had to have mine replaced, which is why they are so lovely and shiny  (ii) Six plastic push-rivets that go up into holes like the ones visible in the picture below. 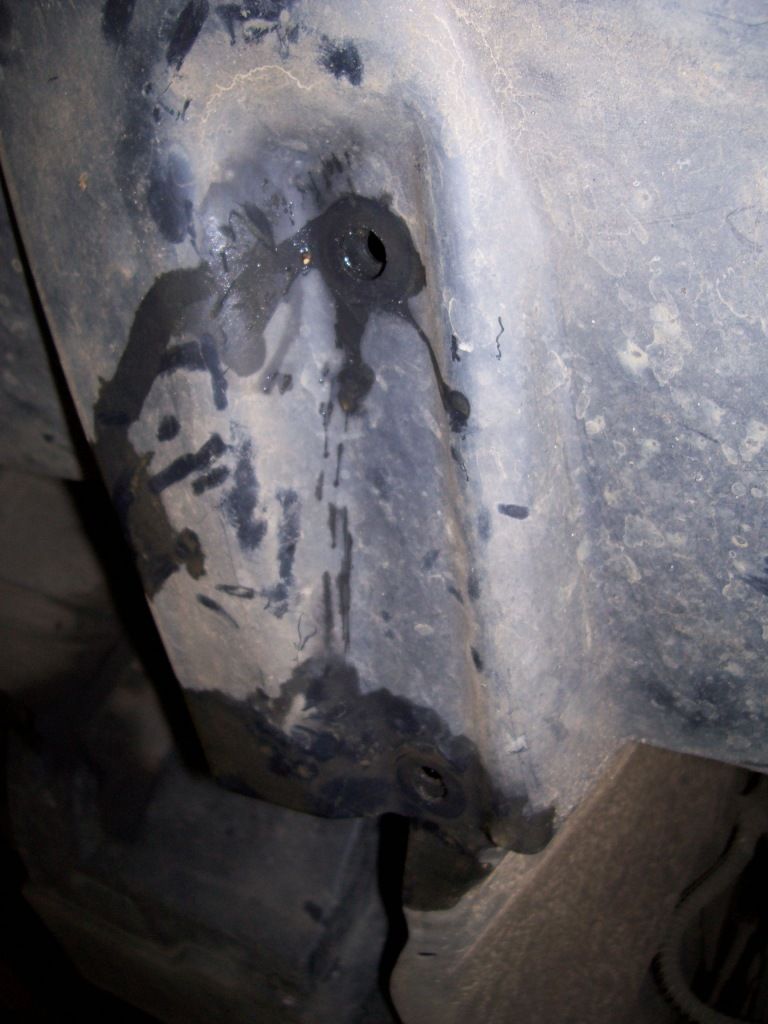 For these, you need to get a flat screwdriver to ease out the middle portion; then get the screwdriver under the edge of the outer part, and the whole thing can be withdrawn. When you get them out they look like this, which with any luck shows you how much you need to pull out the middle bit:  (iii) Two ordinary cross-headed screws that link the undertray to the wheel arch liners – one on either side. With all those removed, the tray just drops to the ground, and you deserve a cup of tea. 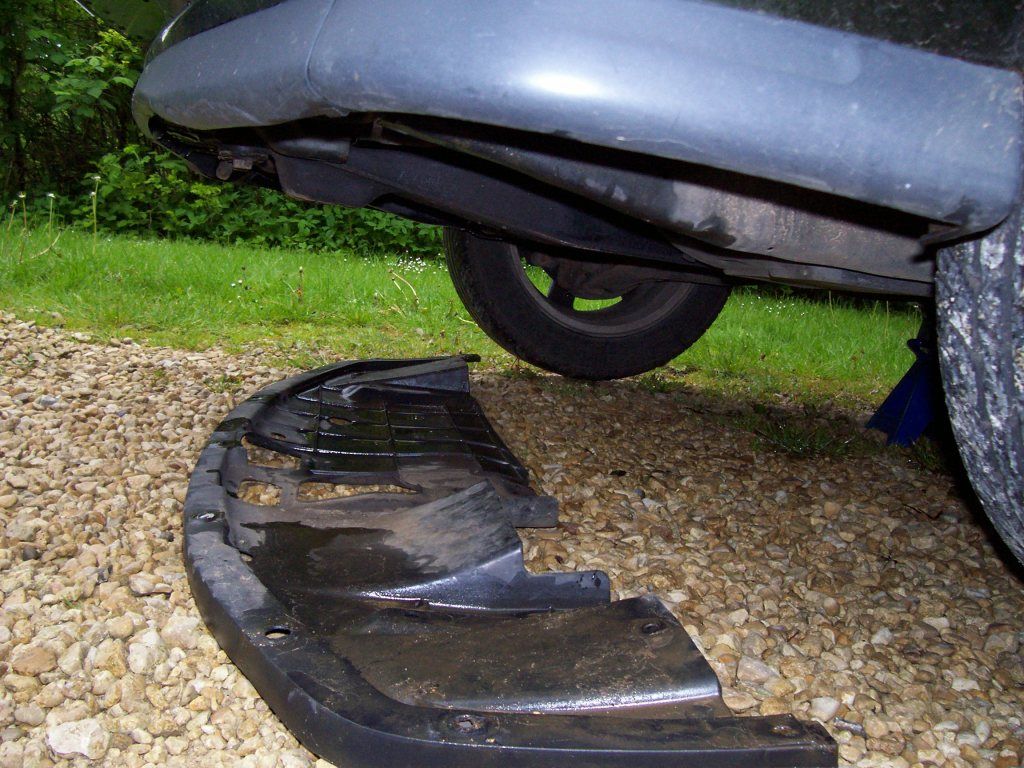 Now the real fun begins. 3. Undo the fixings that hold the wheel arch liner to the bumper. These are directly in front of the front wheels of the car – one on either side. On my car it's another plastic rivet arrangement, this time with a metal screw in the central part. To get access with your screwdriver, you may need to turn the front wheels. Make sure the steering lock is disengaged and you can just push them with your hands. (What could be more fun for the novice home mechanic than to watch the steering wheel magically turn all by itself inside the car as you twist the front wheels of the car from outside?! If you have small children, call them outside to share your wonderment at this point in proceedings.) 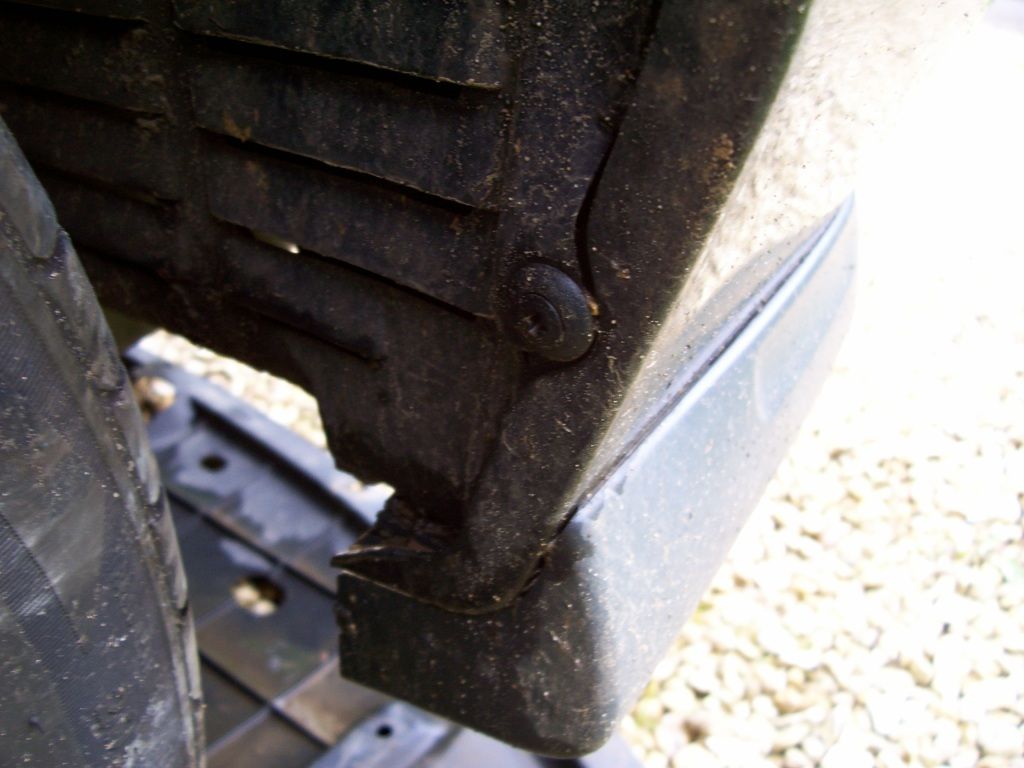 In my experience the screws in these rivets don't come out easily so you have to get a bit aggressive with a flat-bladed screwdriver to assist them, as shown below. 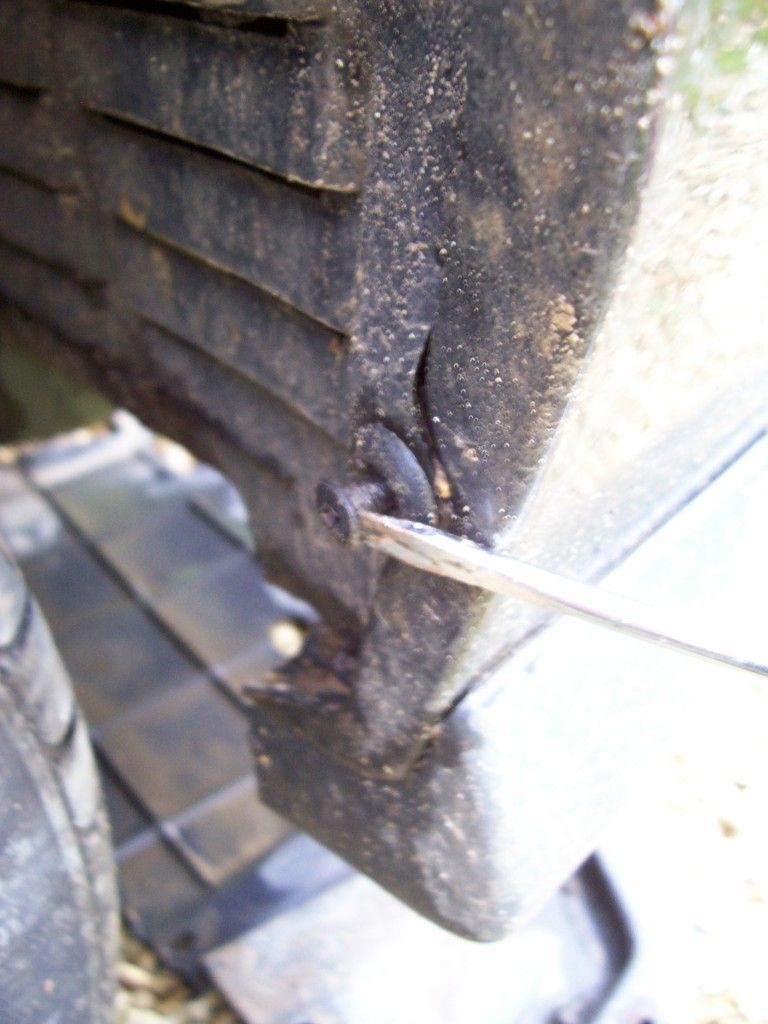 4. Remove the cross-headed metal screw that goes up from the top of the bumper in the wheel arch into the front wing of the car on either side. 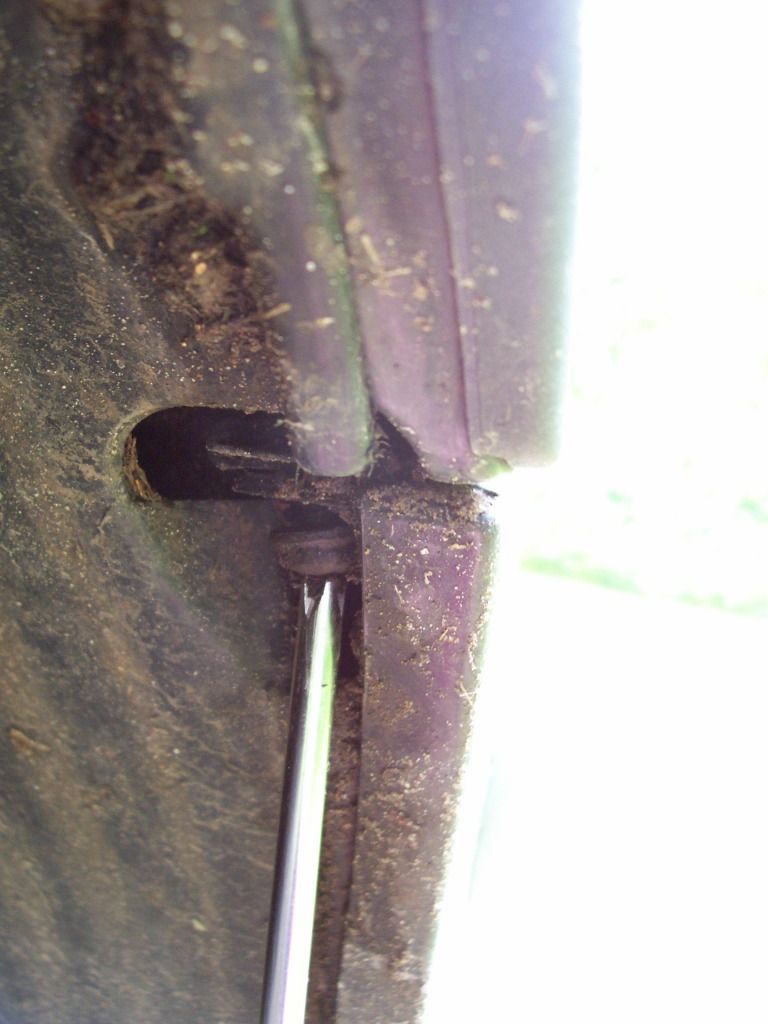 The rivet and screw from one side, removed: 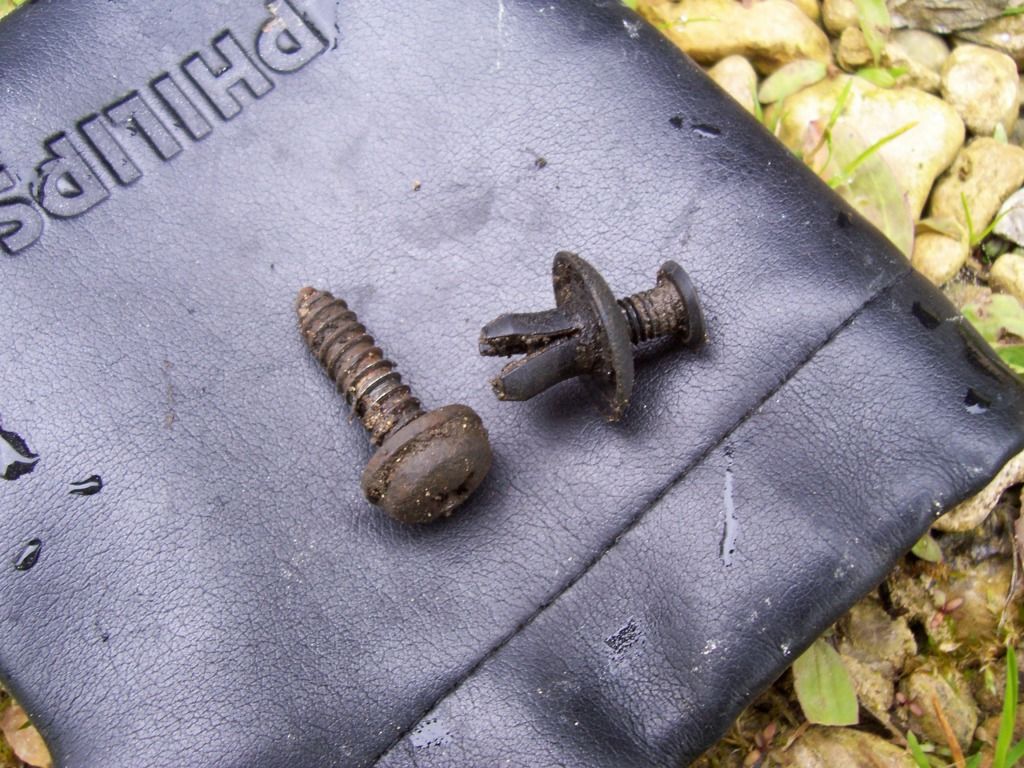 5. There are two further large plastic rivet-type fixings under the front edge of the bumper that have to be removed. 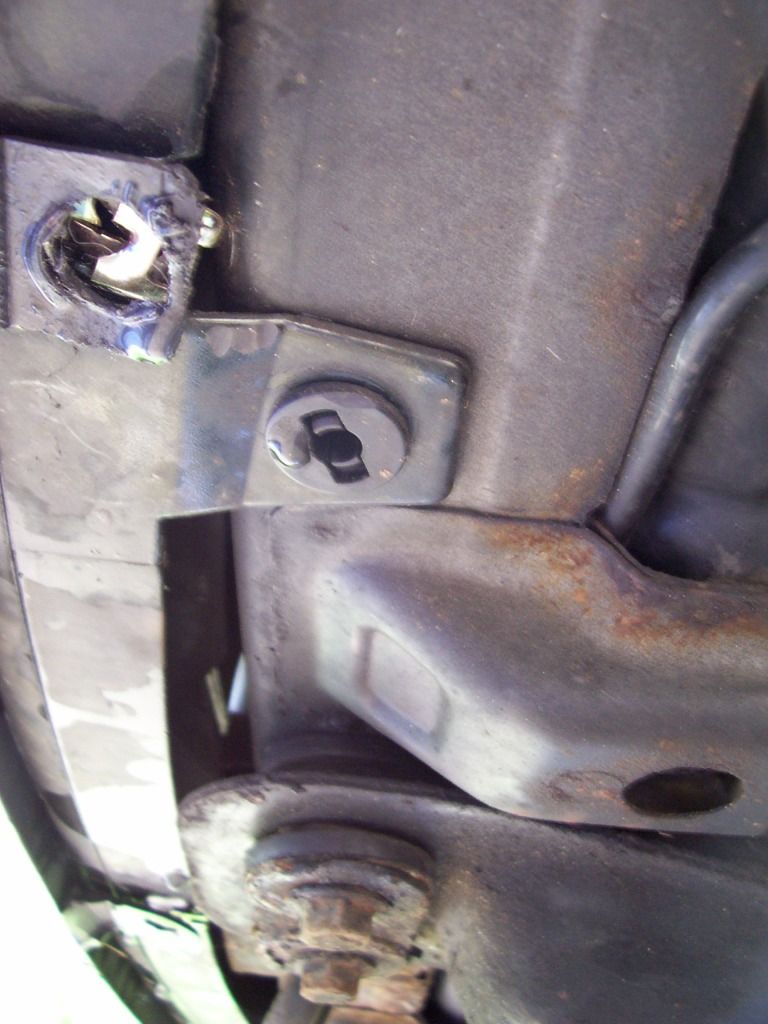 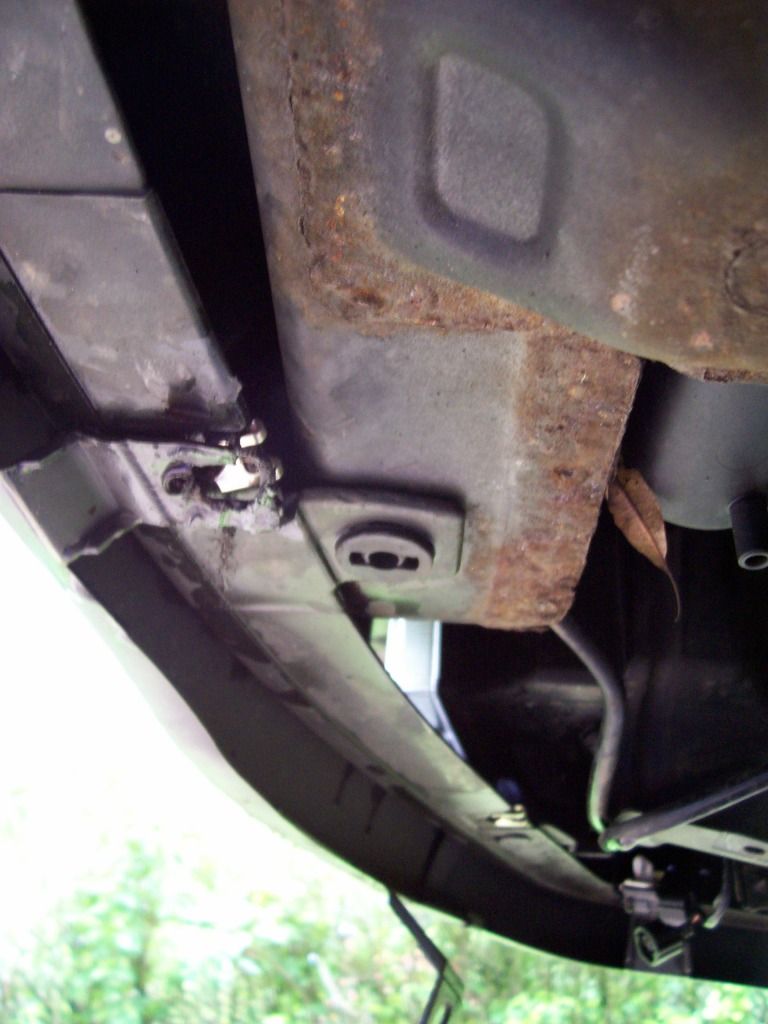 These are quite strongly and sensibly designed and easy to remove. You squeeze the two plastic bits in the central hole together with needle-nosed pliers and the whole thing can be pulled out. Here's what they look like. 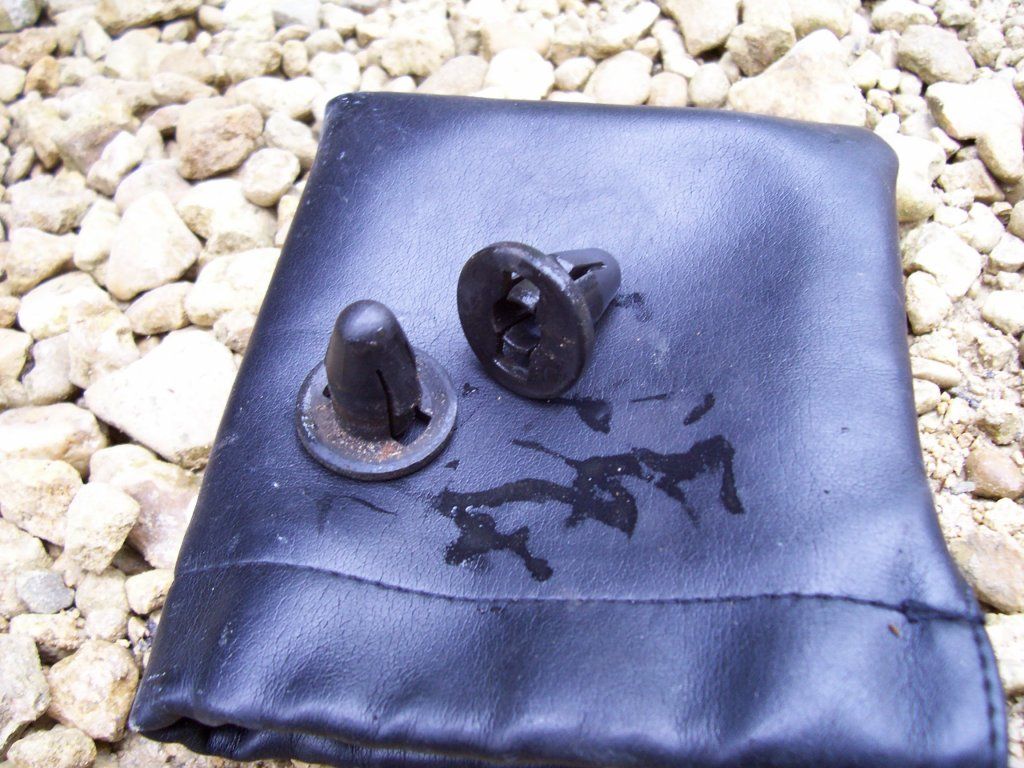 Wiring, next: 6. Disconnect the wiring from the foglights if you have them (an easy connector on the back of the foglight, on the side of the light that is nearer the centre of the car. 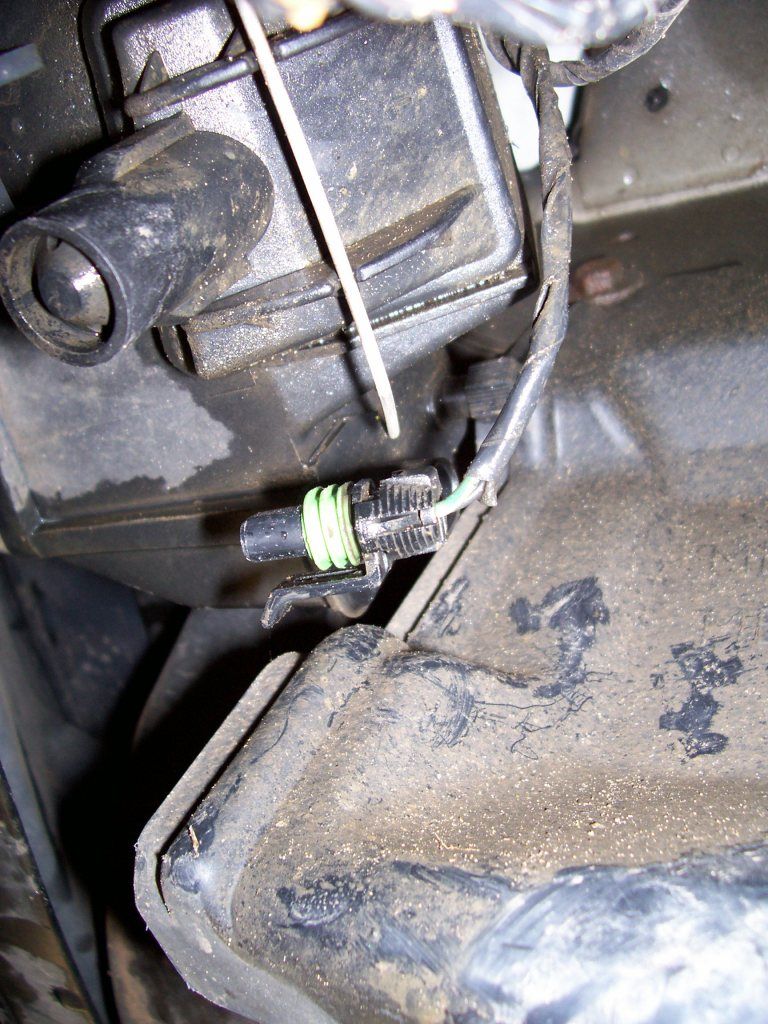 7. Disconnect the wiring for the bumper marker lights. The wiring connectors for these are clipped to holes in the plastic just inside the front lower edge of the bumper on the outside corners of the car. The picture below is of my nearside one. The hole in question is visible at the end of my middle finger. The white part of the connector that you can also see in the picture is what goes through the hole to keep it in place. You disconnect the two parts by squeezing down the hoop-shaped plastic tab on the part of the connector nearer my palm. Or it would be hoop-shaped if it weren't broken!! The two parts should then just pull apart. This one was a devil to undo, probably because of all the corrosion you can see on the inside. 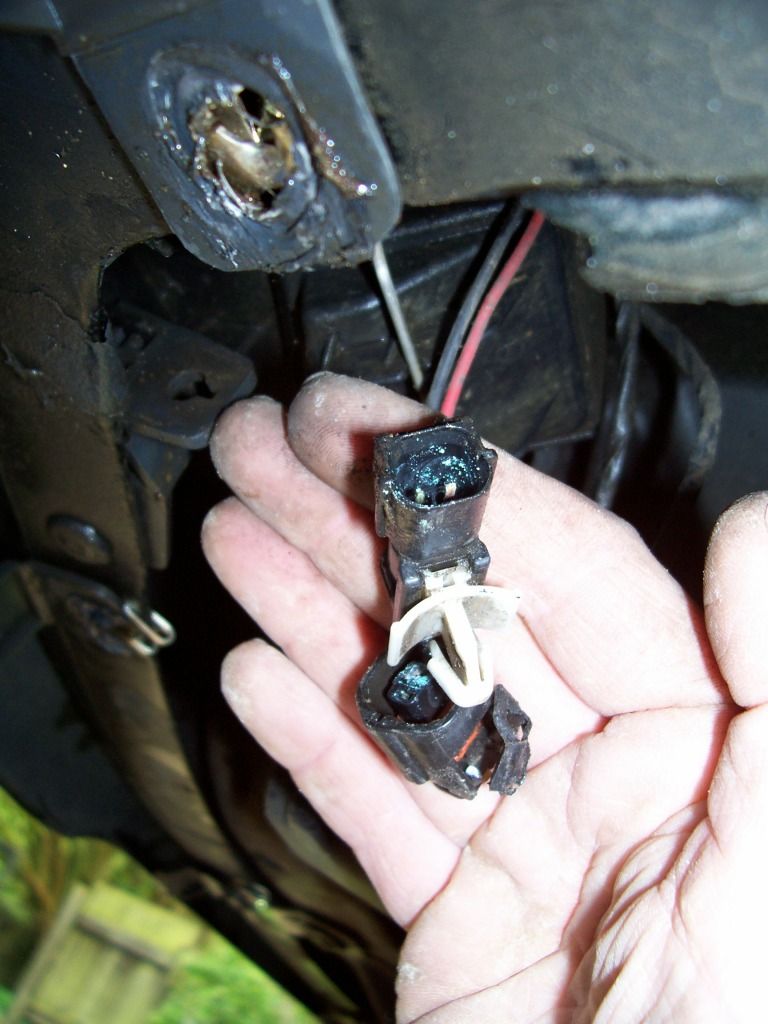 8. Ease the outside temperature sensor (if you have one) off its metal bracket on the upper edge of the big hole in front of the lower part of the radiator. 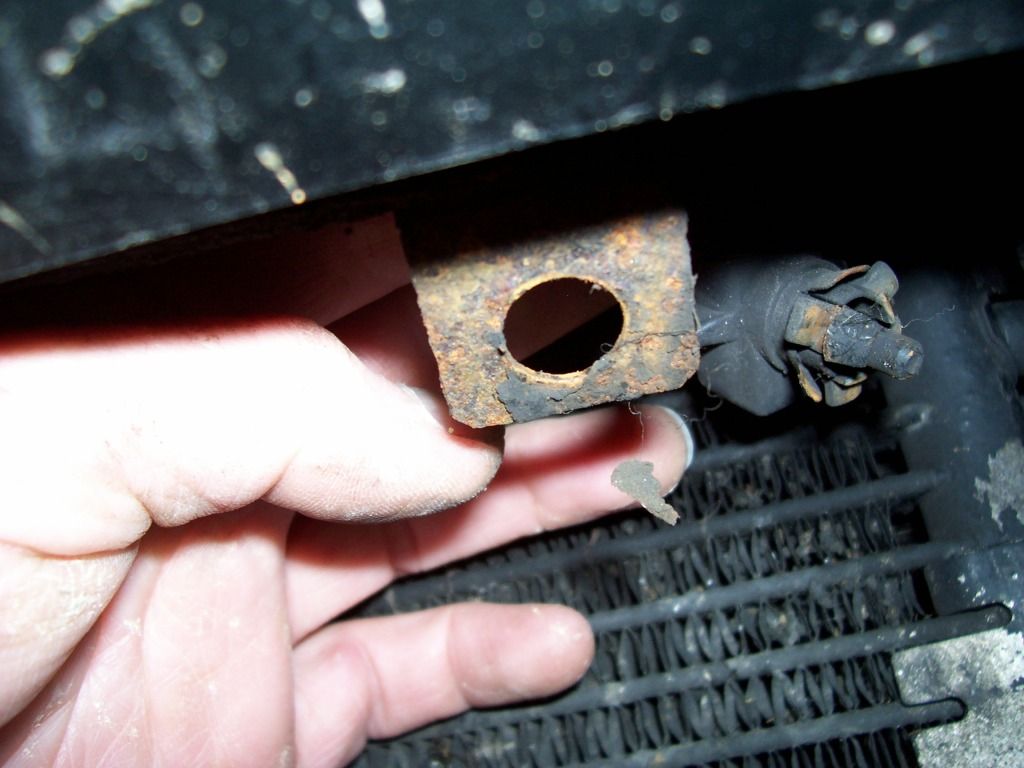 9. Open the bonnet and you will see that there is a bit of the wiring loom attached by clips to holes in the metal part of the bumper, just behind the horn. Ease (or in my case break) the clips out of the holes. 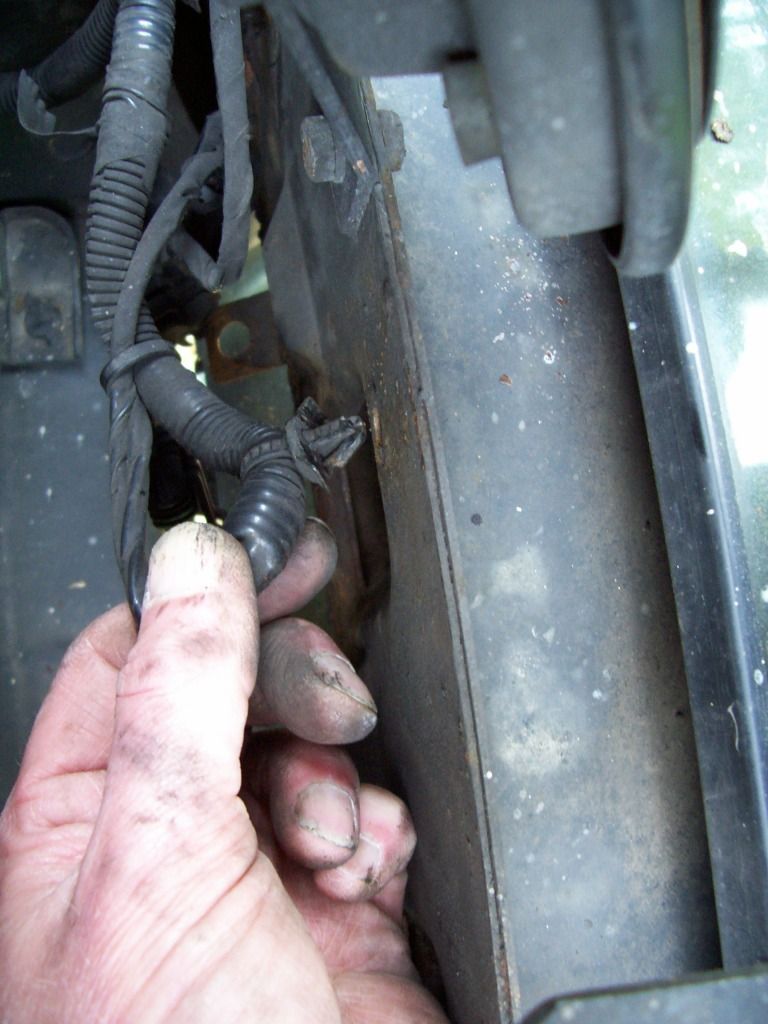 10. Disconnect the wiring connector to the horn. An easy one: just squeeze the metal clip at either end and the connector just pulls off.  11. Important: LEAVE the bonnet OPEN or the horn will be caught behind the bonnet edge and stop the bumper coming off. 12. Get under the front of the car again and look up and you can see the four 14mm bolts (two either side) that are the main things holding the bumper to the car. They go straight up from below, into the thick metal members that go in a front-to-back alignment behind the headlights. You need your foot-long extension bar here to reach them. Don't worry, the bumper will not fall on your head when you remove these bolts! Nearside:  , , Offside: 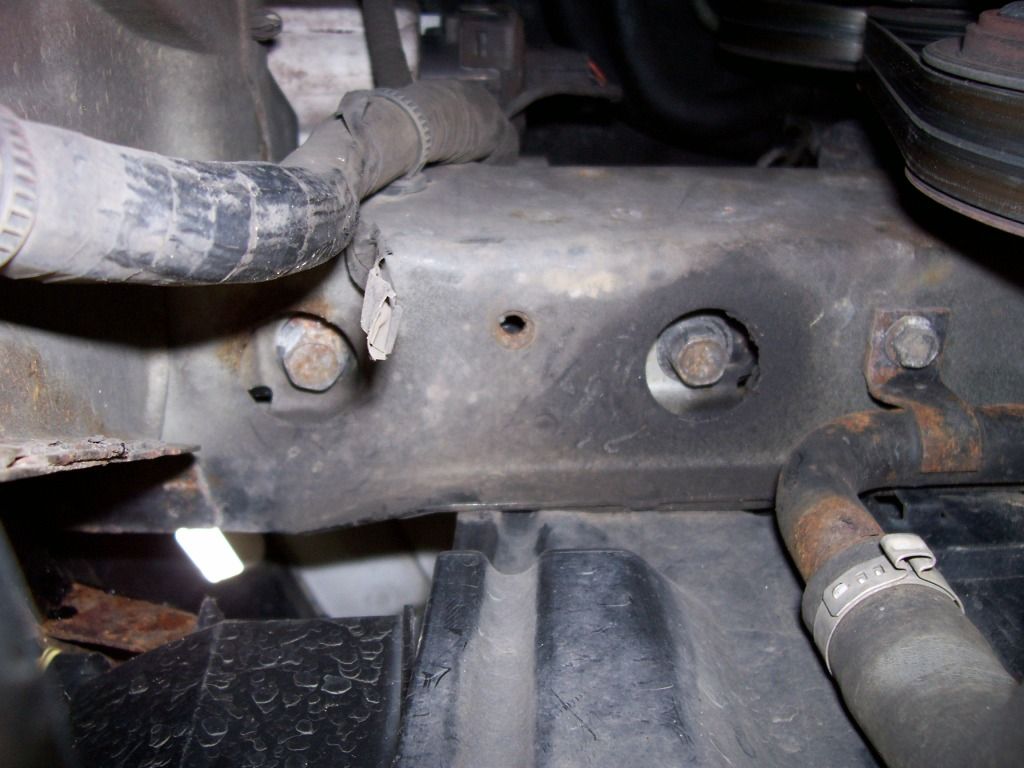 Here are the bolts, removed: 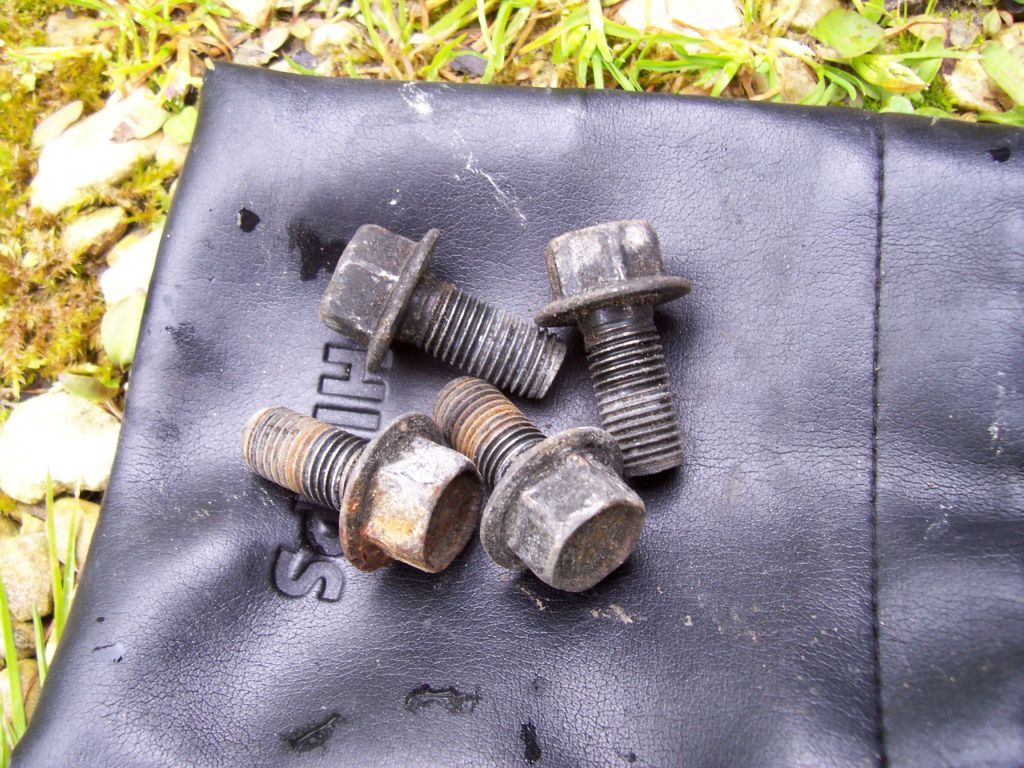 13. Ease the edge of the bumper off the wheel arch liners on both sides of the car – the edges of the two parts overlap in a fairly feeble attempt to keep wetness and mud where they ideally belong. 14. Then pull the bumper carefully forwards and it should come straight off the car quite easily. Do it slowly though, in case you have forgotten to undo some wiring. It'll be obvious if you have. This is the point where (if you are like me) you finally realise why there never was any danger that it would fall on your head. Those great big metal prongs on the back of the bumper go into the big holes in the metal frame now visible on the front of the car. Doh! 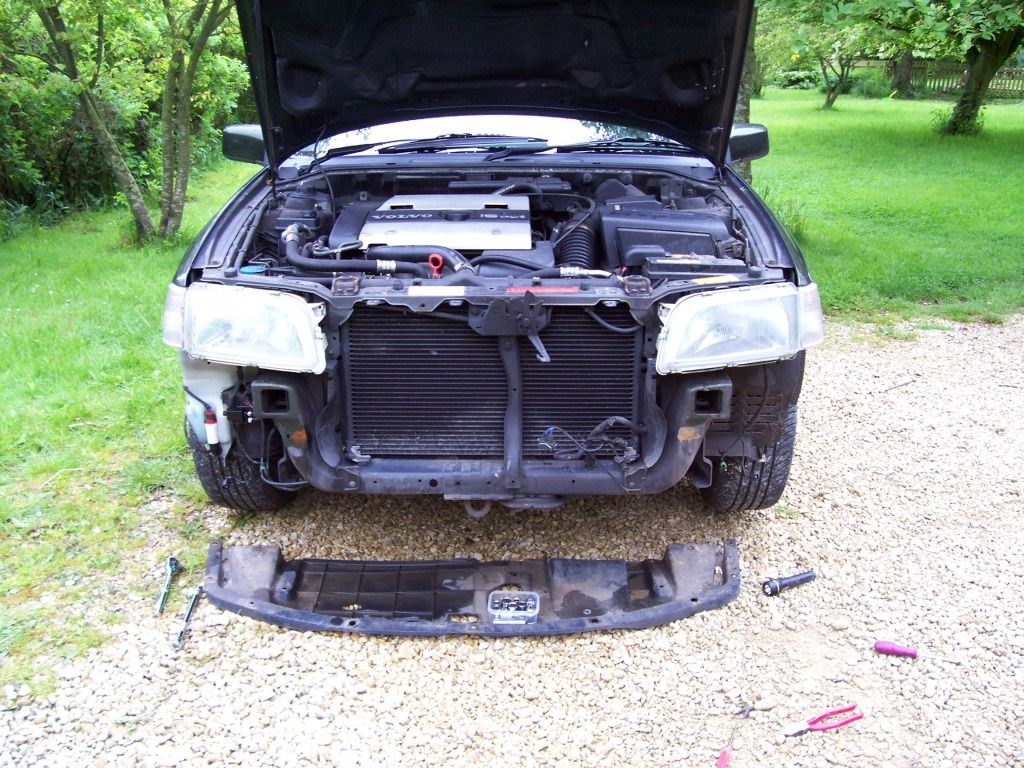 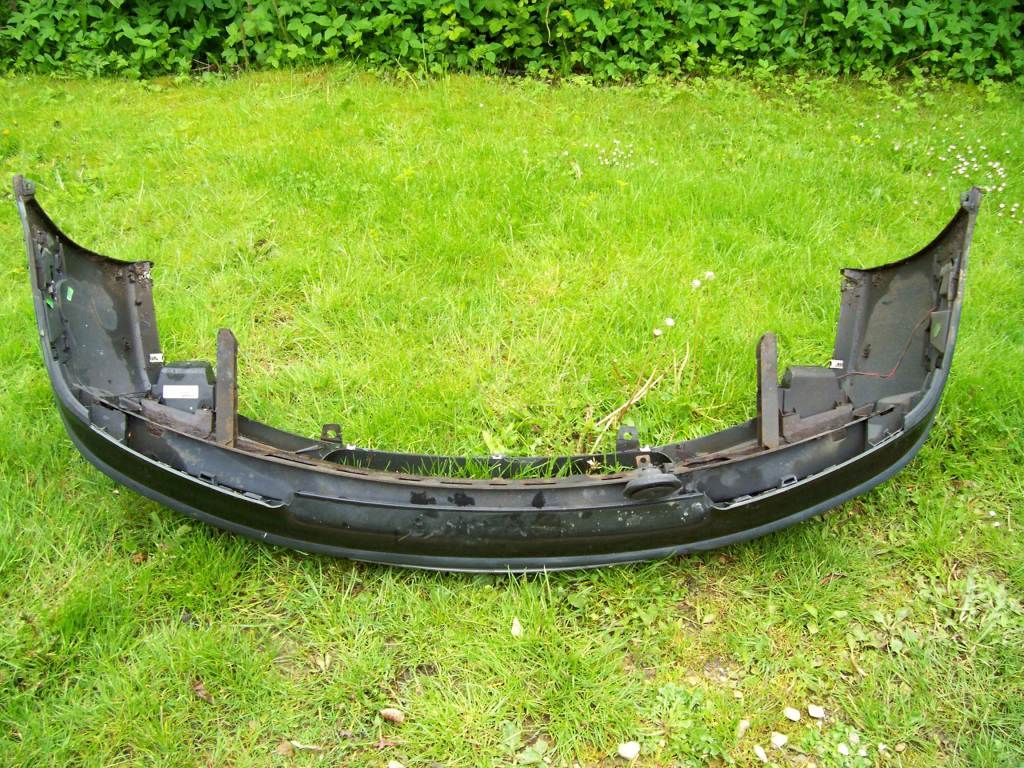 15. Refitting is (guess what) the reverse of removal. Tighten the four 14mm bolts to 40Nm. 16. More tea, or probably something stronger.
__________________
(Formerly) 1988 745 B230K (Phoenix) Last edited by CTCNetwork; May 20th, 2012 at 03:03. Reason: Images attached |

|

|
| The Following 29 Users Say Thank You to DWM For This Useful Post: |
|
| Currently Active Users Viewing This Thread: 1 (0 members and 1 guests) | |
|
|


 Linear Mode

