
|
|||||||
| XC90 '02'15 General Forum for the P2-platform XC90 model |
 Information
|
|
Rear Bumper Removal - GuideViews : 48289 Replies : 41Users Viewing This Thread : |
 |
|
|
Thread Tools | Display Modes |
 Sep 13th, 2010, 21:18
|
#1 |
|
Master Member

Last Online: Feb 3rd, 2024 18:39
Join Date: Sep 2009
Location: Sunny Scotland
|
Guys
Thought I would post this up as a nice and easy pictorial guide to removing the XC90 rear bumper. Firstly - this post is provided as-is, It is YOUR responsibility to ensure that all work is carried out observing all required saftey precautions A picture is worth a thousand words... so they say! I needed to do this to replace a rear parking sensor. First, remove the battery bracket and plastic cover - and also the foam "panels" on the inside rear of the boot - exposing some holes. (not easy at this angle to photo!) There is one panel at each side of the boot. 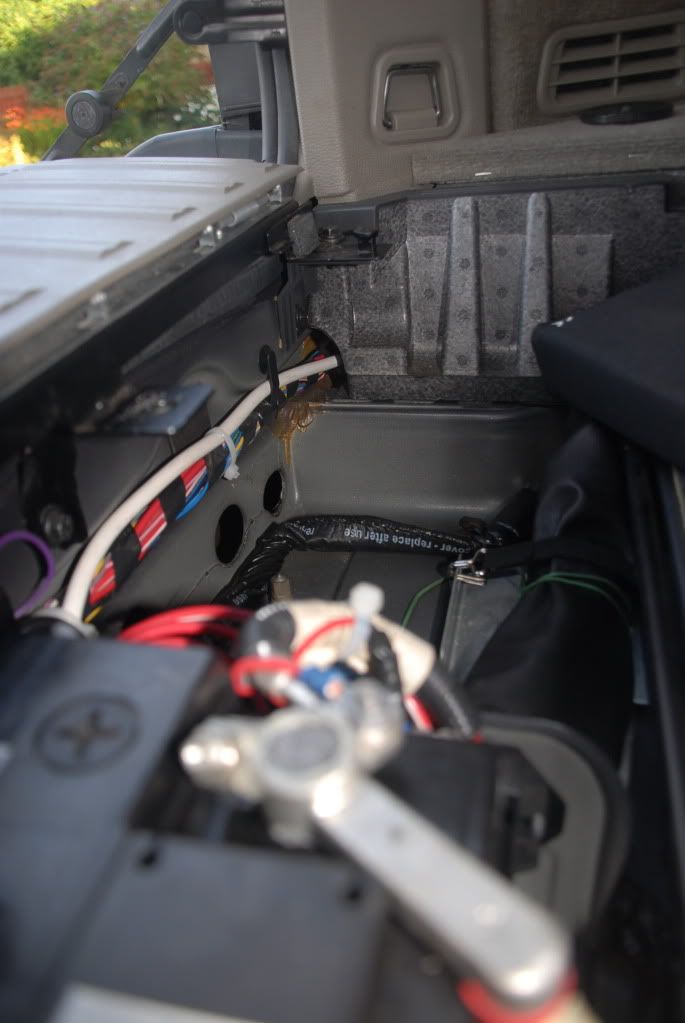 If your car has rear park assist, disconnect the wiring plug from the park assist module in the nearside boot trim panel - you will need to feed the cable through when you pull the bumper off later. 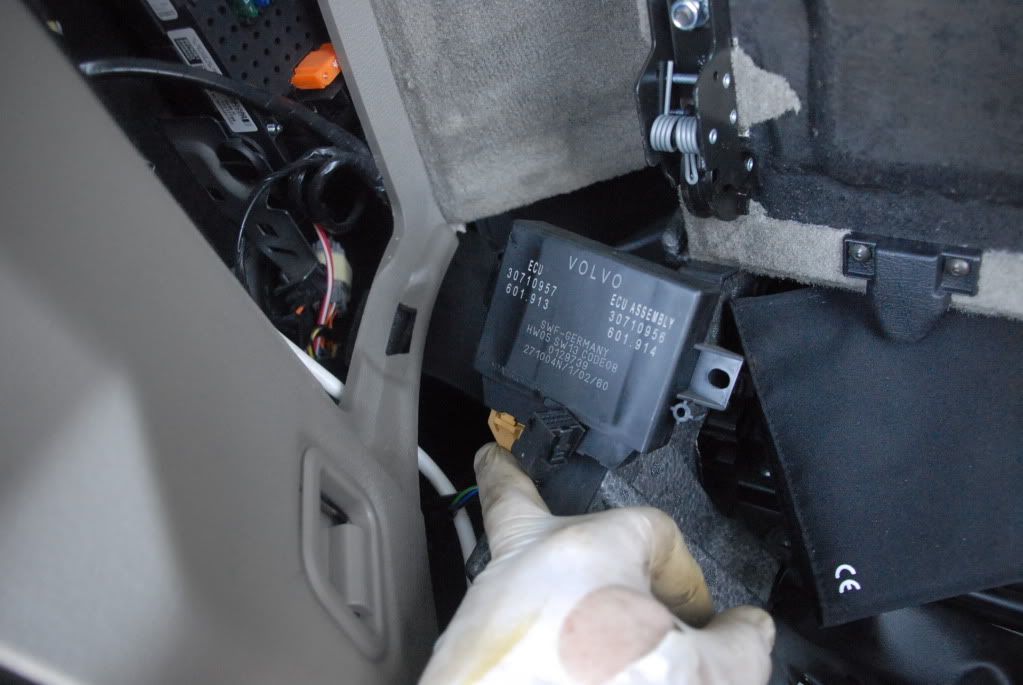 Undo the four nuts - I say nuts, but they are welded to sleeves.... as see here with a foam cover... I used a short extension and be careful - you dont want to drop the sleeves inside the chassis which is very piossible if you are clumsy when withdrawing them. 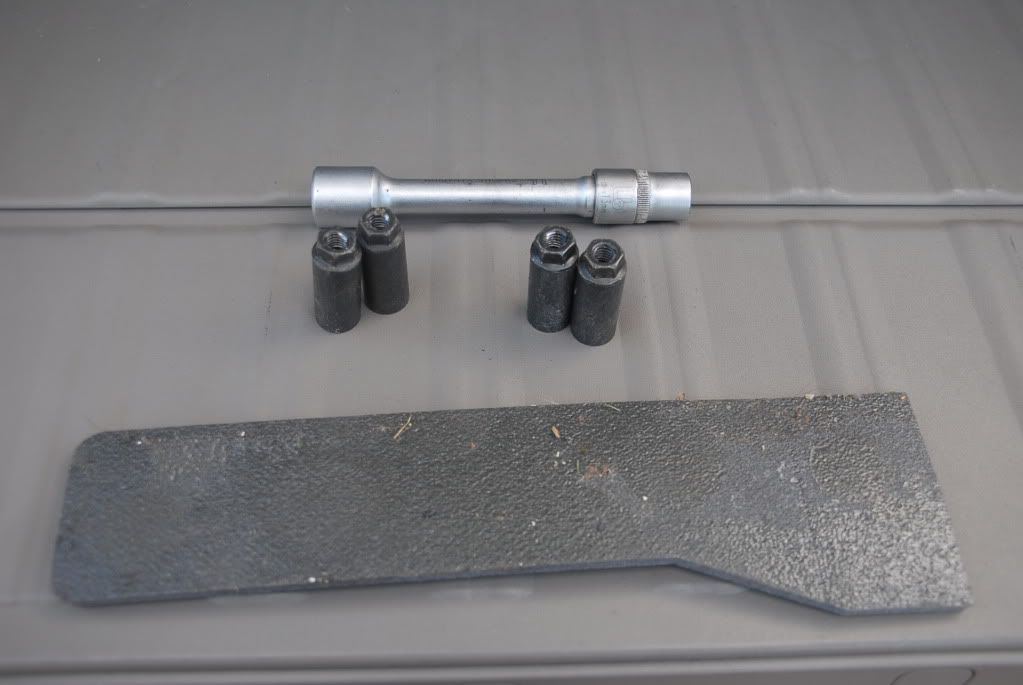 Next, drill out the pop rivet under the rear bumper where it attached to the bumper support bracket. These are right behind each rear wheel (one per side) 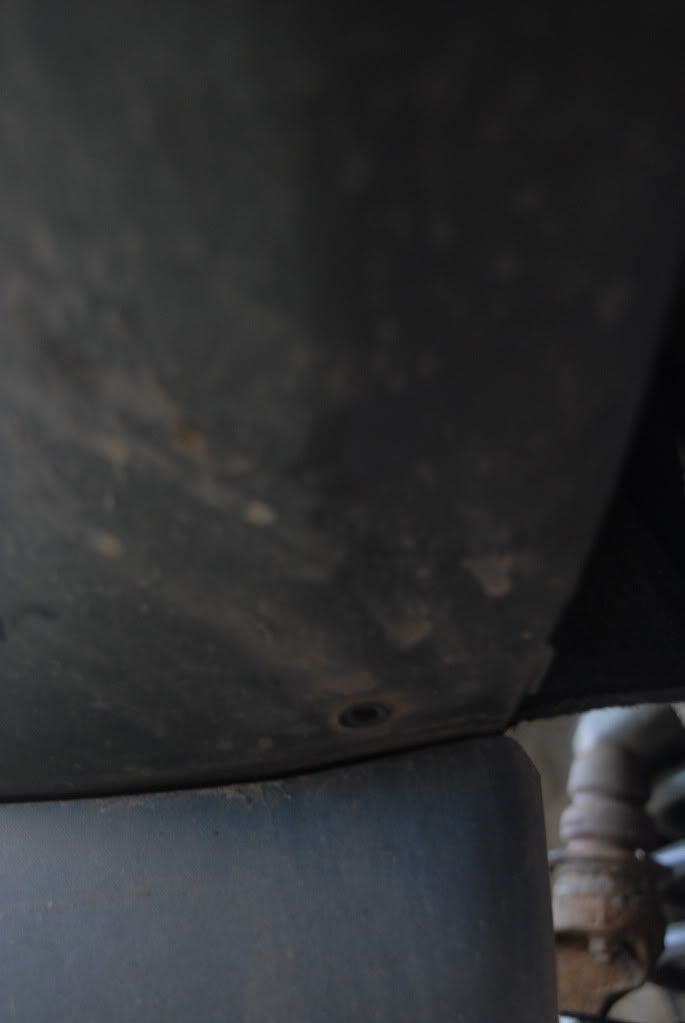 Next, I removed the two plastic trims under the rear lights.... these just pull off... and on the offside one (RHD) disconnect the light wiring.... 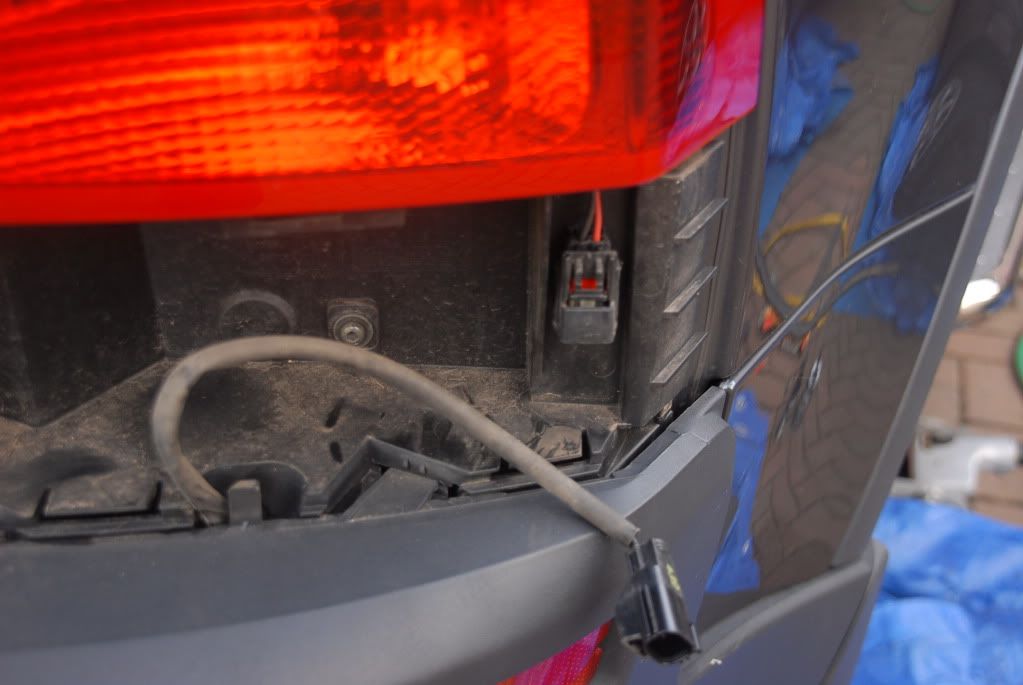 This picture shows the clips that attaches these trims - its easier to remove them when you know what the clips look like (this is the nearside trim). There are also two clips behind each panel that need released too - seen here. 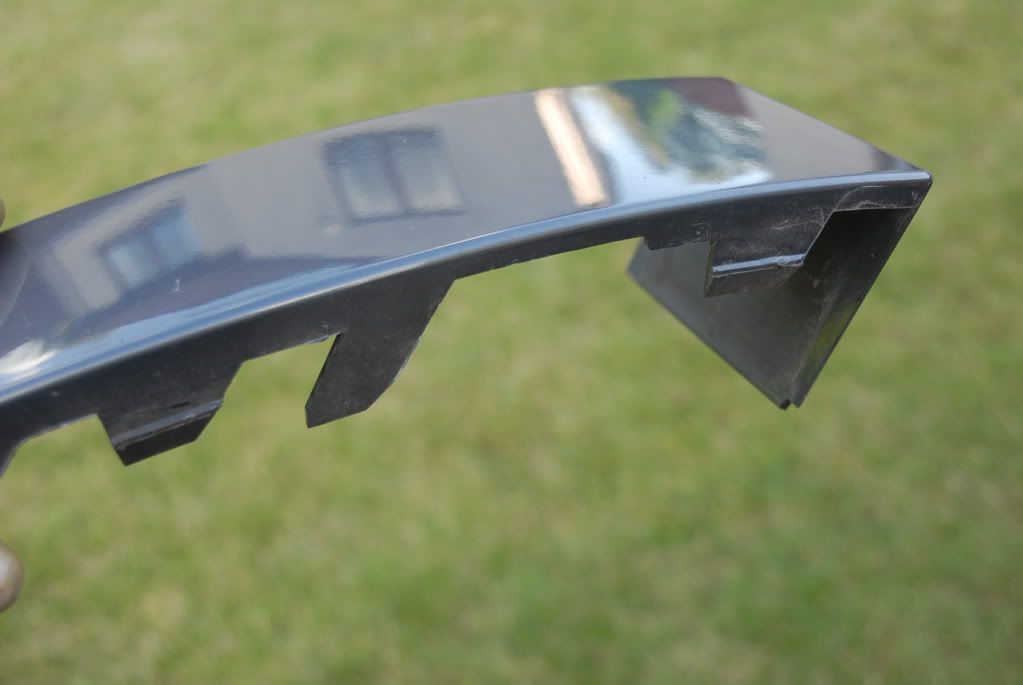 I also removed the rear mudflaps as they envelope the rear bumper and hamper its removal - guess if I was not in a hurry, I could have struggled a bit and left them attached... Once all that is removed, you can now simply unclip the sides of the rear bumper by pulling the bumper away from the car. This is not as easy as it sounds and requires strong fingers (or careful use of a trim tool as you WILL mark the arch trims!) Given that the side clips are unseen from the outside, here is a picture of the back showing you where they are. There are 4 along the top and three down the side. 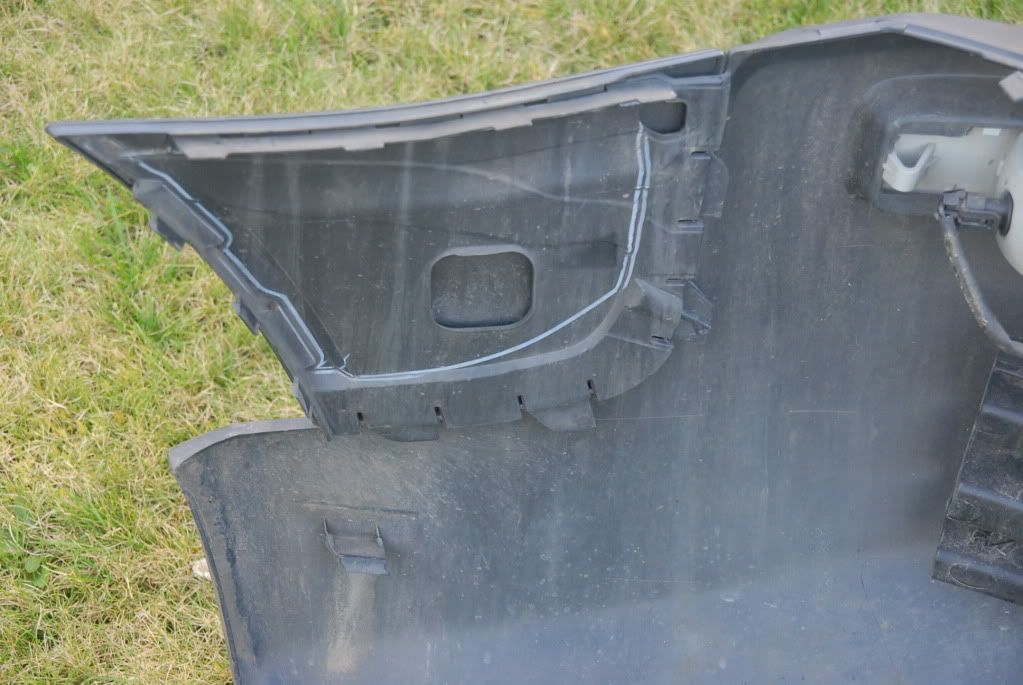 Once that is done, simply pull the bumper back off the car! 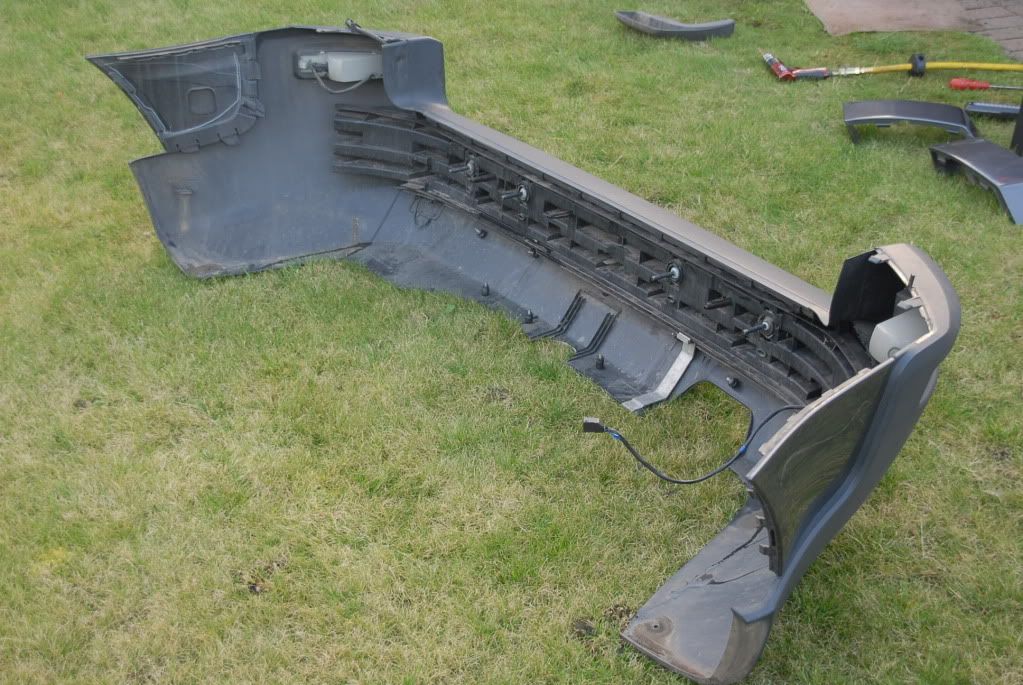 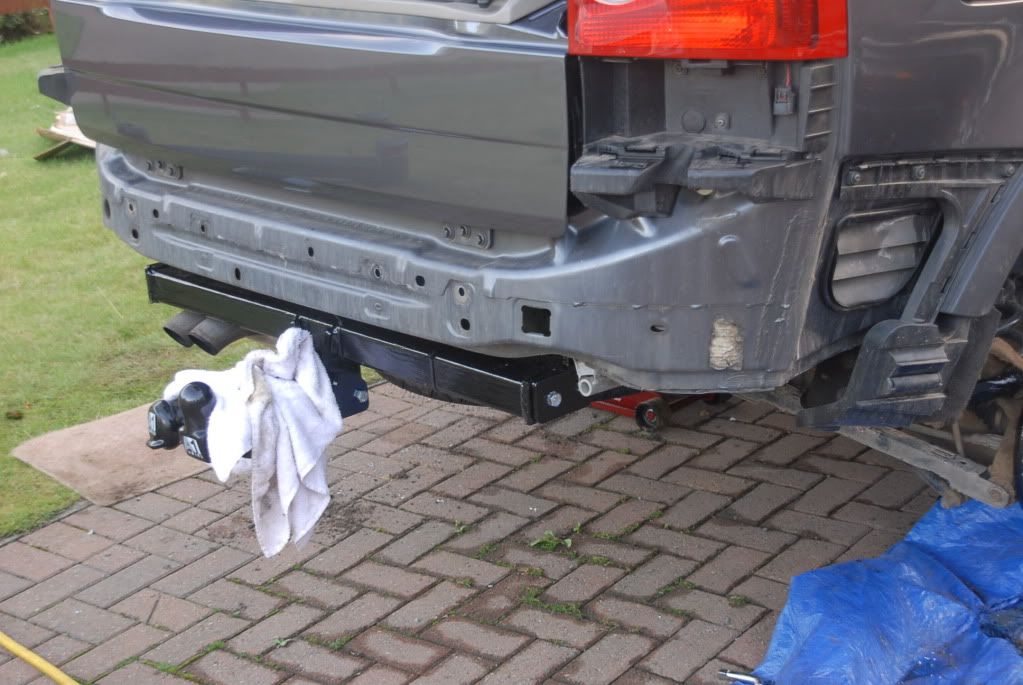 Assembly is reverse of removal - with the exception that I did not pop rivet the mudflaps or bumper back on - I used some stainless M6 20mm bolts with 15mm washers and some nyloc nuts.... you never know when you may be back in there...  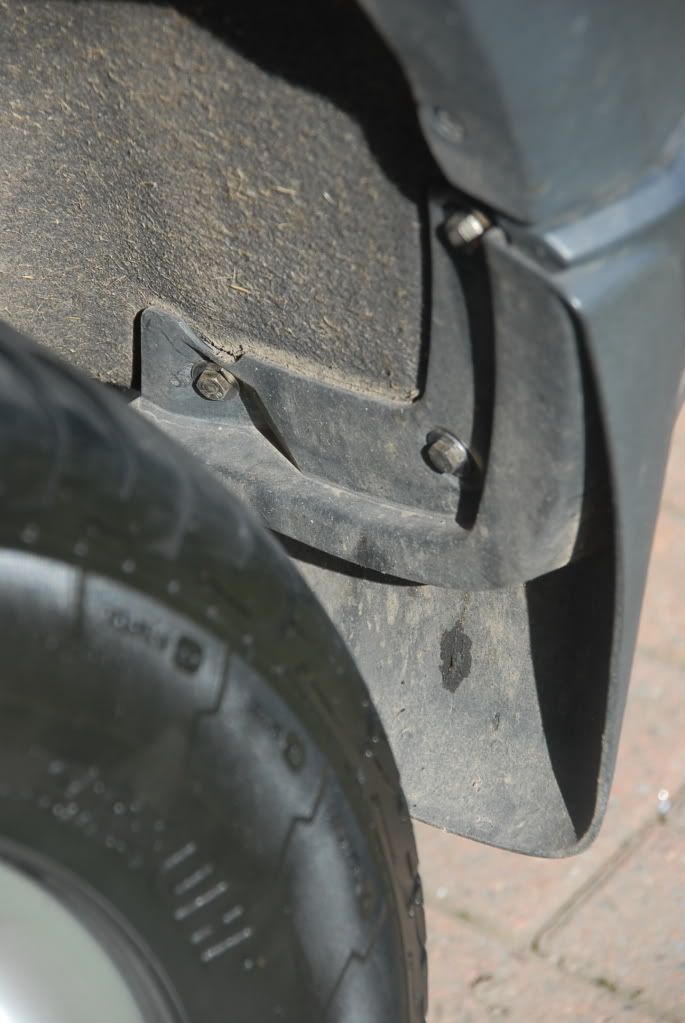 Hope that helps someone! David Last edited by BestGear; Sep 13th, 2010 at 21:56. |

|

|
| The Following 28 Users Say Thank You to BestGear For This Useful Post: |
|
Sep 14th, 2010, 09:31
|
#2 |
|
Master Member

|
Thanks David, these are great instructions.
I tried to get the bumper off to fit a towbar, in the end gave up on the bumper and fitted the towbar without removing it.
__________________
Chrysler Grand Voyager 2.8 CRD Limited 2010 XC90 D5 SE Geartronic, MY2008 (Now sold) Mitsi Pajero 2.8TD Super Exceed '96 (My Toy)  Member of the Gloucestershire & Worcestershire 4x4 Response group. www.gw4x4r.co.uk Member of the Gloucestershire & Worcestershire 4x4 Response group. www.gw4x4r.co.uk
|
|
|
|
|
Sep 14th, 2010, 12:18
|
#3 | |
|
Master Member
Last Online: Feb 3rd, 2024 18:39
Join Date: Sep 2009
Location: Sunny Scotland
|
Quote:
Yes, I fitted mine (a week) before removing the bumper just to replace the parking sensor. It is such a shame you cannot change the sensor without removing the bumper - these side clips are such a pain to undo. David |
|
|
|
|
|
Sep 14th, 2010, 13:16
|
#4 |
|
Master Member
|
You almost think they do this on purpose, what could be a 30 mins job to replace a sensor, now takes 3 hours... just think about the garage bill if you cannot do this yourself...
__________________
Chrysler Grand Voyager 2.8 CRD Limited 2010 XC90 D5 SE Geartronic, MY2008 (Now sold) Mitsi Pajero 2.8TD Super Exceed '96 (My Toy) Member of the Gloucestershire & Worcestershire 4x4 Response group. www.gw4x4r.co.uk
|
|
|
|
|
Feb 11th, 2011, 21:11
|
#5 | |
|
Experienced Member

Last Online: Today 11:26
Join Date: Jun 2007
Location: L/H side
|
Quote:
__________________
|
|

|
|
|
May 12th, 2011, 23:12
|
#6 |
|
Senior Member

Last Online: Mar 28th, 2024 15:34
Join Date: Feb 2010
Location: Aberdeenshire
|
My rear park assist has gone again - for good this time.
Sensor 2 is the culprit according to the code - REM-4F43 Park assistance sensor 2 faulty signal. So after a quote of £353 from the garage, I'm going to attempt this myself. £54 for the sensor (yikes) alone. The guide is brilliant, but the photo showing the bumper on the grass shows the 4 sensors from the back, can anyone help with how you actually swap one. Do you just pull it out and disconnect it? |
|
|
|
|
May 13th, 2011, 13:54
|
#7 | |
|
Master Member
Last Online: Feb 3rd, 2024 18:39
Join Date: Sep 2009
Location: Sunny Scotland
|
Quote:
Glad the guide is of help to you! The sensors remove from the rear... its an unclip jobbie - obvious once you are there! I need to do another too... pain in the butt job! David
__________________
My Weather Station |
|
|
|
|
|
May 13th, 2011, 17:50
|
#8 |
|
Premier Member

Last Online: Apr 1st, 2021 09:00
Join Date: Aug 2010
Location: Kent
|
I've asked the mods if we can transfer this valuable thread into the articles section to keep it accessible/easy to find.
I hope that's OK with everyone? 
|
|
|
|
| The Following User Says Thank You to JimG For This Useful Post: |
|
Mar 2nd, 2012, 19:58
|
#9 |
|
Member

Last Online: Today 11:30
Join Date: May 2007
Location: Bergen
|
And a big "THANK YOU" for this guide
 Replaced a faulty sensor today, took me somewhere between 2 and 3 hours. Next time (hopefully never) will be faster, as it is a pretty straight forward job. Replaced a faulty sensor today, took me somewhere between 2 and 3 hours. Next time (hopefully never) will be faster, as it is a pretty straight forward job.
__________________
'03 XC90 D5 AWD - Norway |
|
|
|
|
May 15th, 2012, 15:20
|
#10 |
|
Member
Last Online: Feb 8th, 2022 10:50
Join Date: Mar 2010
Location: Blantyre
|
Great write up! Many thanks, took me about 2 hours all-in. Forgot to take some pics, but for replacing the rear sensors, the renforcing/mounting bar needs to come off. It's just obvious clips along the top and about 1/3 up.
A little tip for the sleeves/nuts going back on is to use a magnet (I have one on a little exending pole). Was invaluable when I inevitably dropped the socket inside Part no for the newer type sensors on the Pre-Facelift models is 30765108 (replaces 30668100). The newer ones have black plastic where the connector goes, the old ones are white. Noticed that one of mine had been replaced previously. |
|
|
|
| The Following 5 Users Say Thank You to PsYcHe For This Useful Post: |
|
| Currently Active Users Viewing This Thread: 1 (0 members and 1 guests) | |
|
|


 Linear Mode

