
|
|||||||
| S40 / V40 '96-'04 General Forum for the Volvo S40 and V40 (Classic) Series from 1995-2004. |
 Information
|
|
GUIDE : Changing your brake padsViews : 6327 Replies : 18Users Viewing This Thread : |
 |
|
|
Thread Tools | Display Modes |
 Oct 1st, 2007, 13:24
|
#1 |
|
Senior Member
Last Online: Oct 20th, 2013 20:24
Join Date: Aug 2007
Location: Derbyshire
|
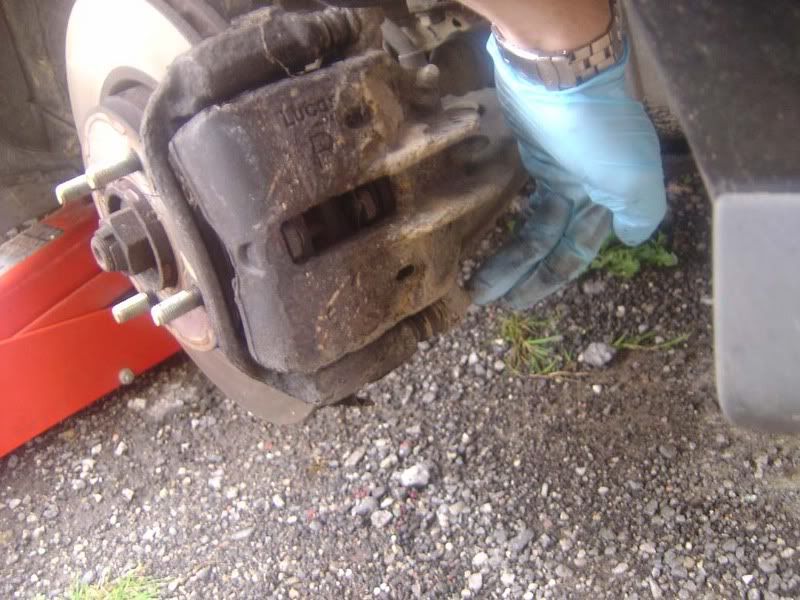
Step 1 - 'Crack off' the wheel nuts by about 1/2 turn
 Step 2 - Now jack the car up. We do this after cracking off the nuts so the weight of the car is stopping the wheel from turning while you apply pressure to the wheel nuts 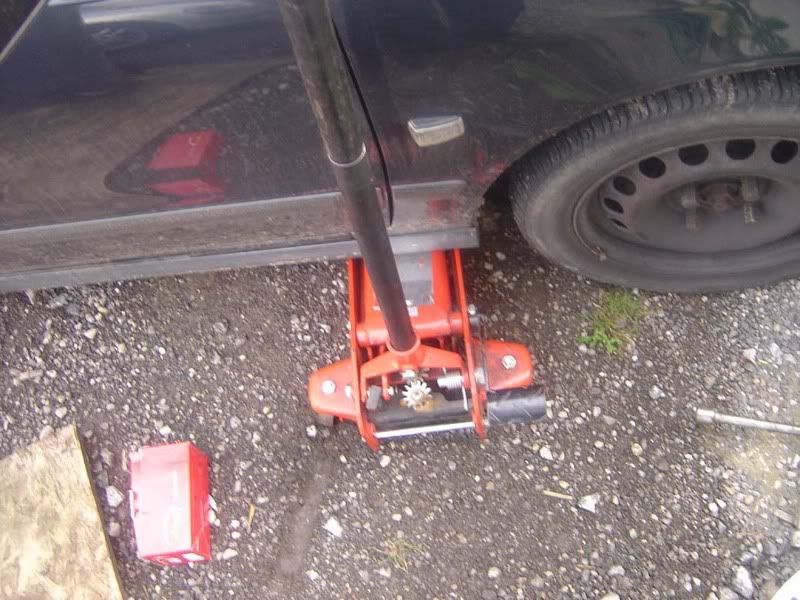 Step 3 - Now remove all the wheel nuts completely 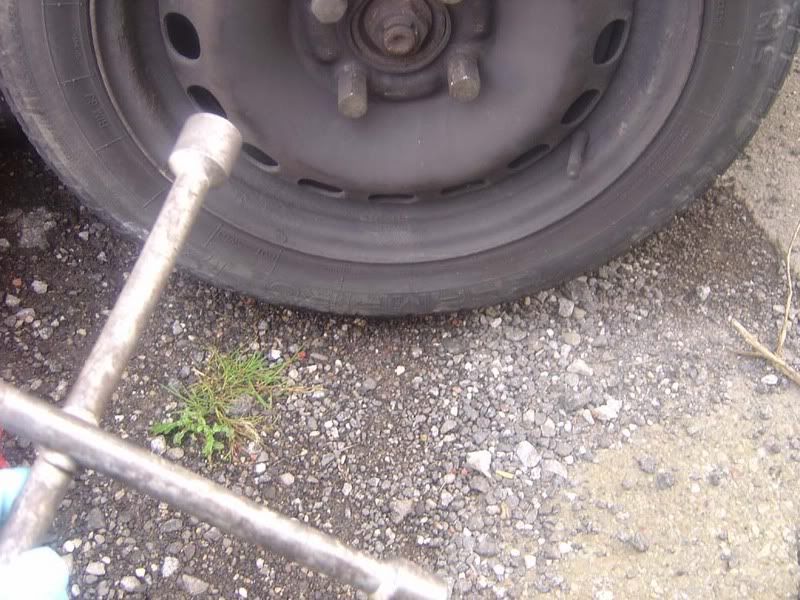 Step 4 - Remove the wheel to reveal the disc and caliper (the bit on the right that squeezes the pad on the disc) 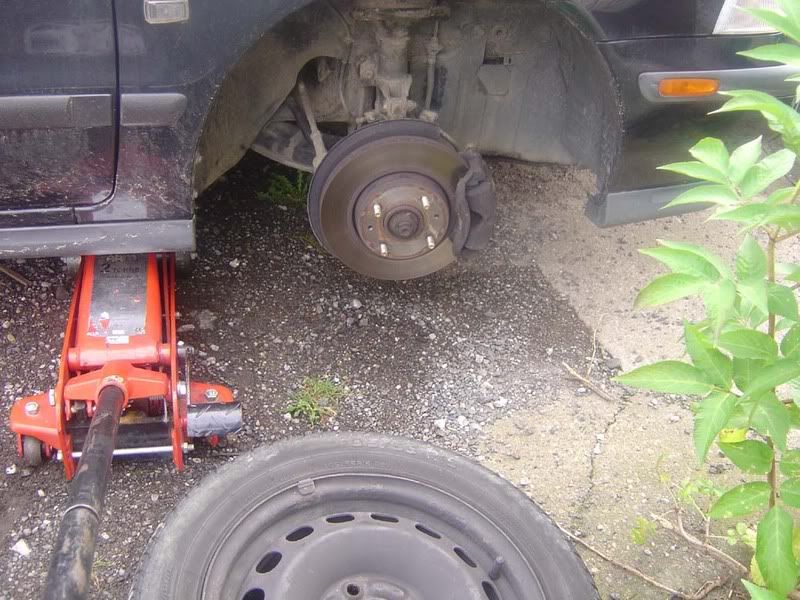
__________________
Click here for guides |

|

|
|
Oct 1st, 2007, 13:25
|
#2 |
|
Senior Member
Last Online: Oct 20th, 2013 20:24
Join Date: Aug 2007
Location: Derbyshire
|
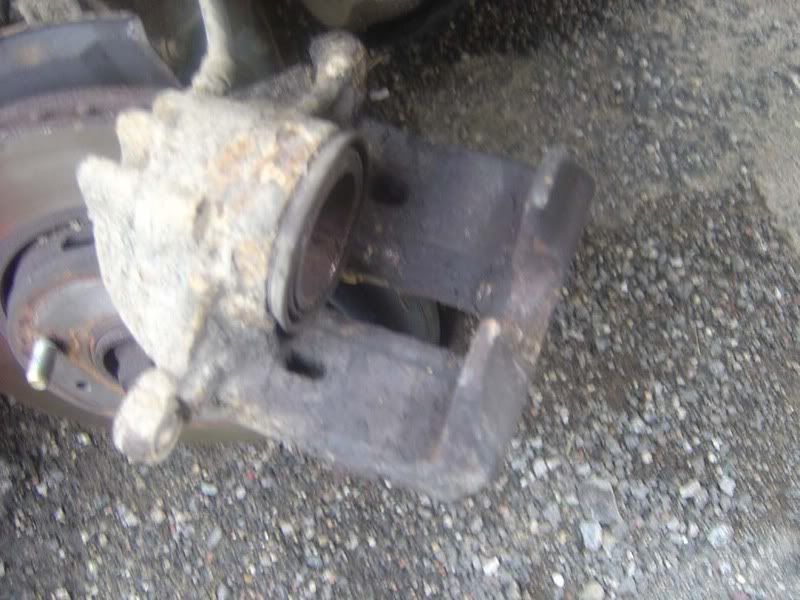
Step 5 - Remove the top and bottom 12mm nuts from the caliper
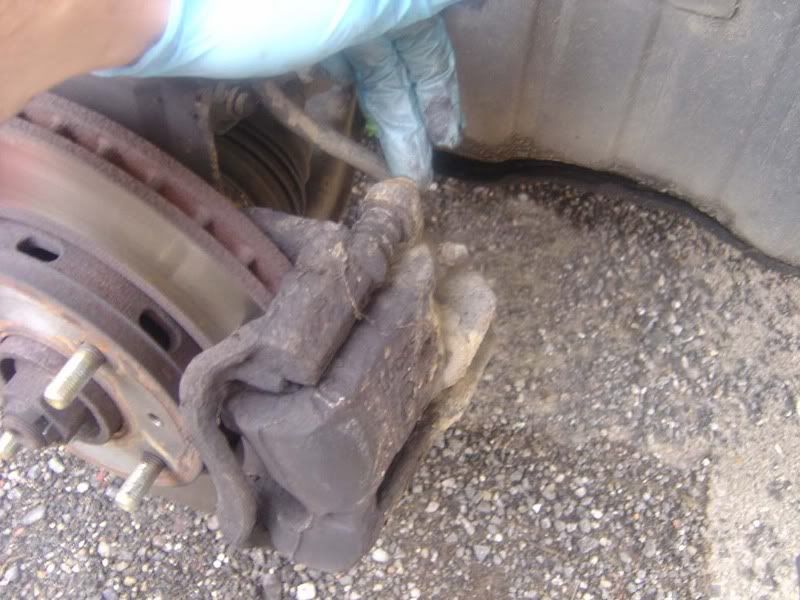  Step 6 - Now pull the caliper off the disc. To do this, get both hands on the caliper and try to wriggle it off. If it's really stuck then use the back of a claw hammer between the carrier (metal surround) and the caliper. 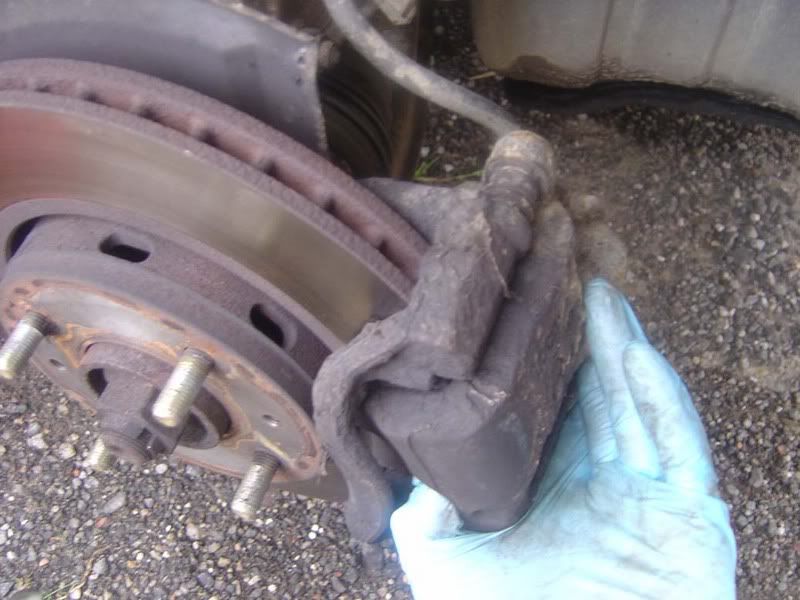 Step 7 - Tuck the caliper away on the top of the disc or somewhere that it won't fall off and stress the rubber brake hose. Try not to kink or twist the hose too much if possible 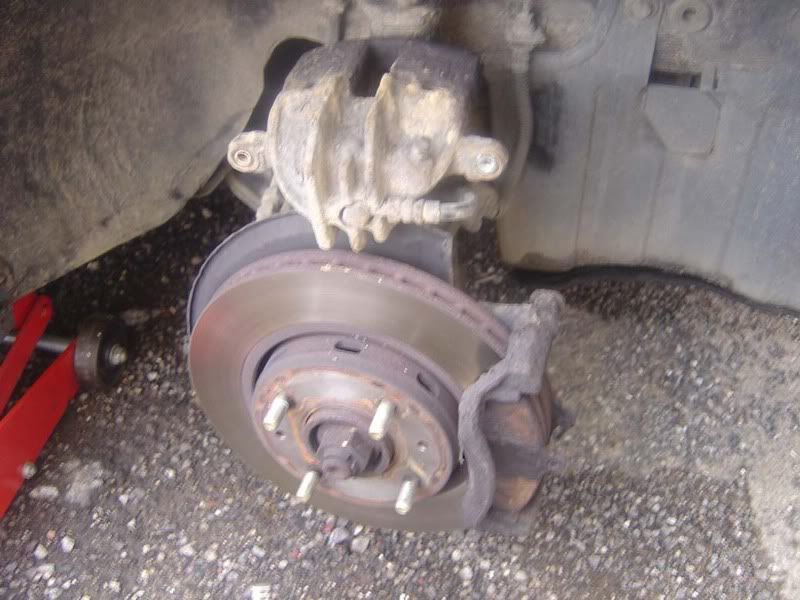 Step 8 - Now pull out the old brake pads using the protrusion shown in the picture. If they won't free off easily then tap this with a hammer, it's metal so can take the impact no problem. 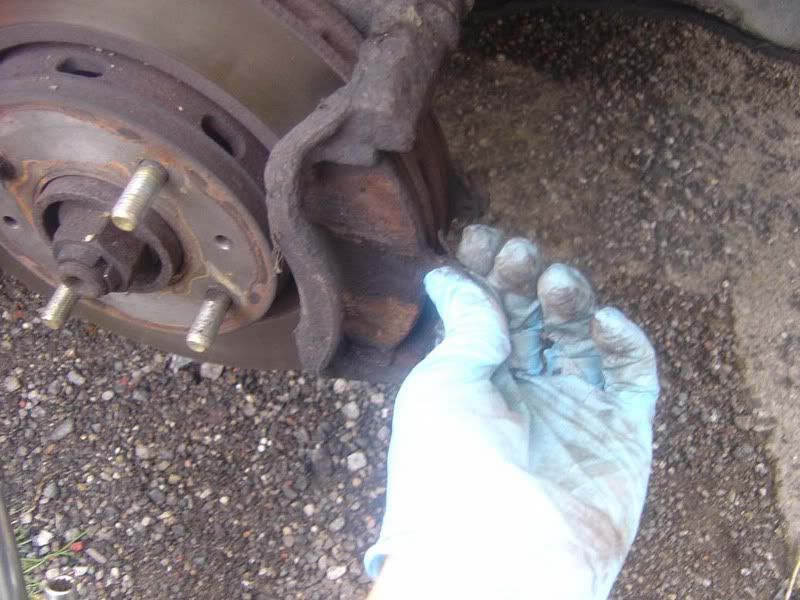
__________________
Click here for guides |
|
|
|
|
Oct 1st, 2007, 13:26
|
#3 |
|
Senior Member
Last Online: Oct 20th, 2013 20:24
Join Date: Aug 2007
Location: Derbyshire
|
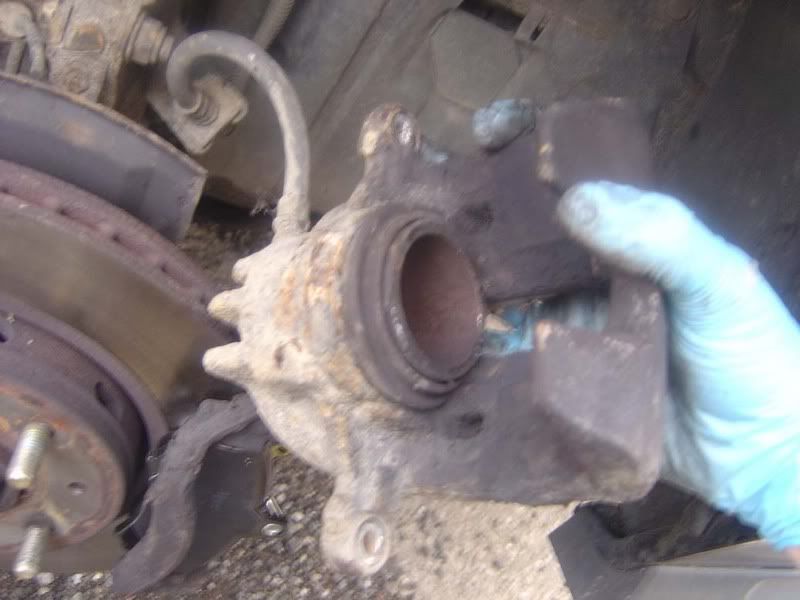
Step 9 - Now you're just left with the carrier and the disc (picture 1). If you want to change the disc too then remove the two 14mm bolts holding the carrier in place (picture 2). You should have a crosshead screw (or two) holding the disc in place (picture 3), you need to remove these.
It's very import you do these right because it's easy to destroy the head because they may be quite tight. The trick is to get all your weight behind the screwdriver and push it towards the disc so you apply maximum pressure on the screw and then use a smaller turning force to crack the screw off, the bulk of the pressure is pushing the screw towards the disc though and this will stop you from slipping off and damaging the head Finally you should now be able to pull the disc away from the hub (picture 4) 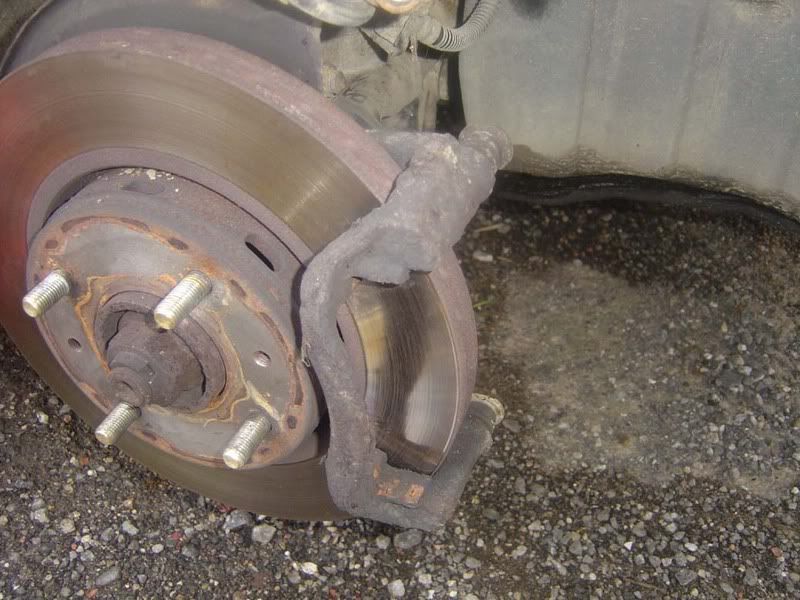 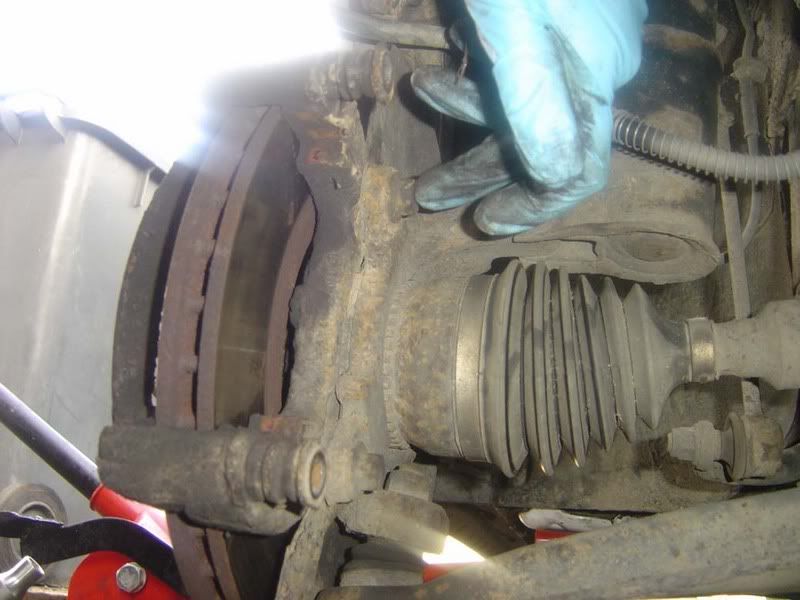 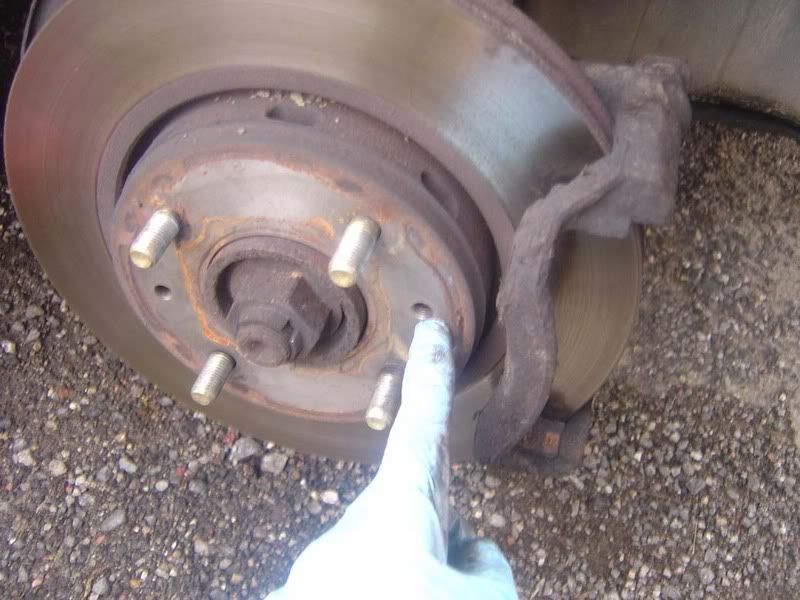 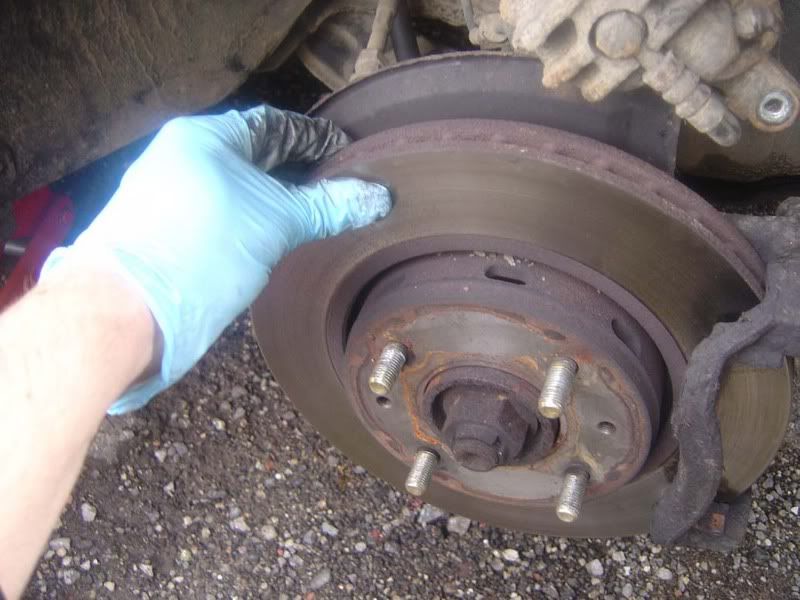 Step 10 - Now insert the new pads into the carrier against the disc. They may need a light tap to sit flush against the disc but if you align them properly then your fingers are usually enough to squeeze them together 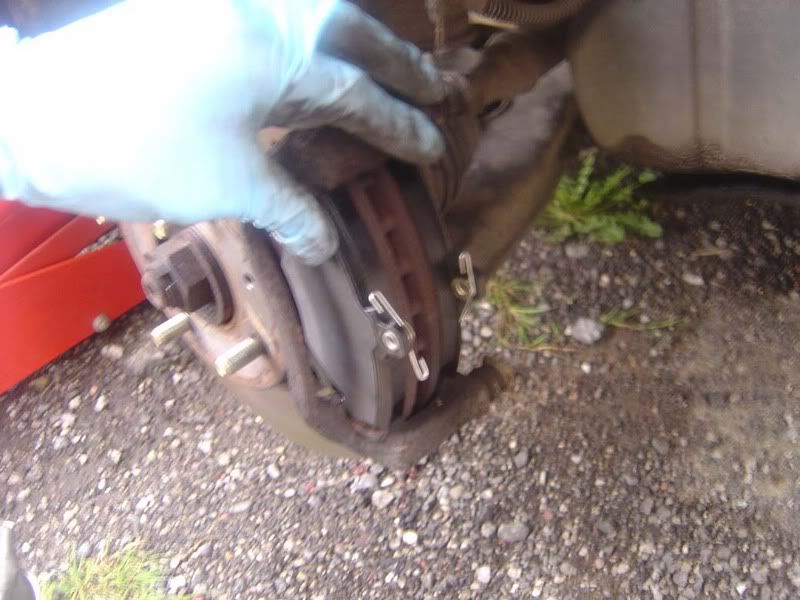
__________________
Click here for guides |
|
|
|
|
Oct 1st, 2007, 13:26
|
#4 |
|
Senior Member
Last Online: Oct 20th, 2013 20:24
Join Date: Aug 2007
Location: Derbyshire
|
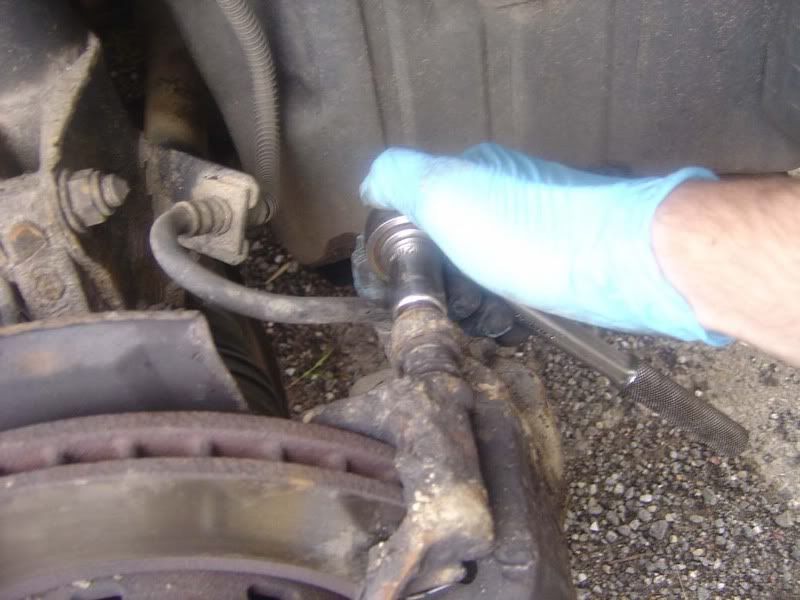
Step 11 - Now back to the caliper, spin this over so you can see the piston which is the big metal circle. When you press the brake pedal, this piston is forced out and pushes the pads into the disc. Check the dust seal around the piston isn't damaged and exposing rusty metal, assuming it's in tact (it probably will be) move on to step 12, if not replace it with a rebuild kit
 Step 12 - Loosen the brake fluid reservoir cap 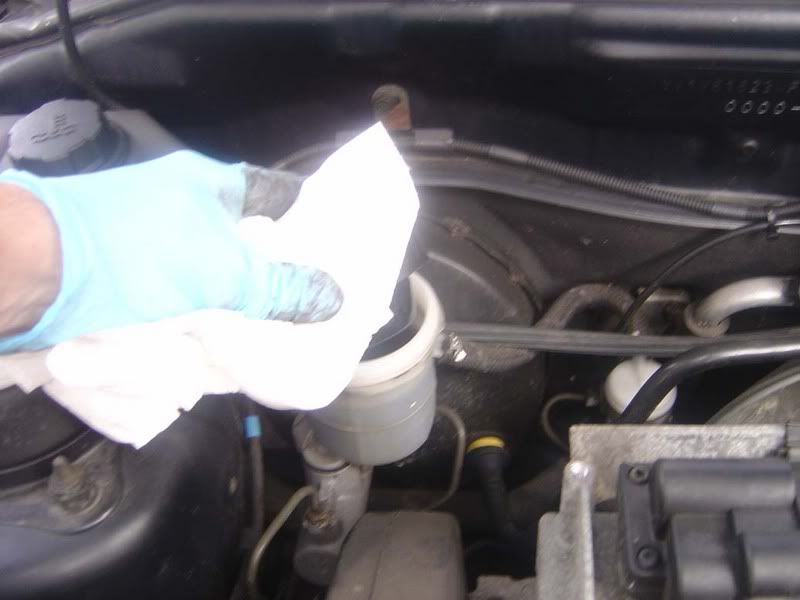 Step 13 - Tuck plenty of kitchen towel around the reservoir in case you need to catch fluid. The act of pushing the piston in the caliper back will force fluid into the reservoir. If your pads were heavily worn then the fluid level may have been topped up accordingly and this will overspill the reservoir when you retract the piston  Step 14 - Pop one of the old brake pads you are replacing into the caliper and use a g clamp to force the piston back in 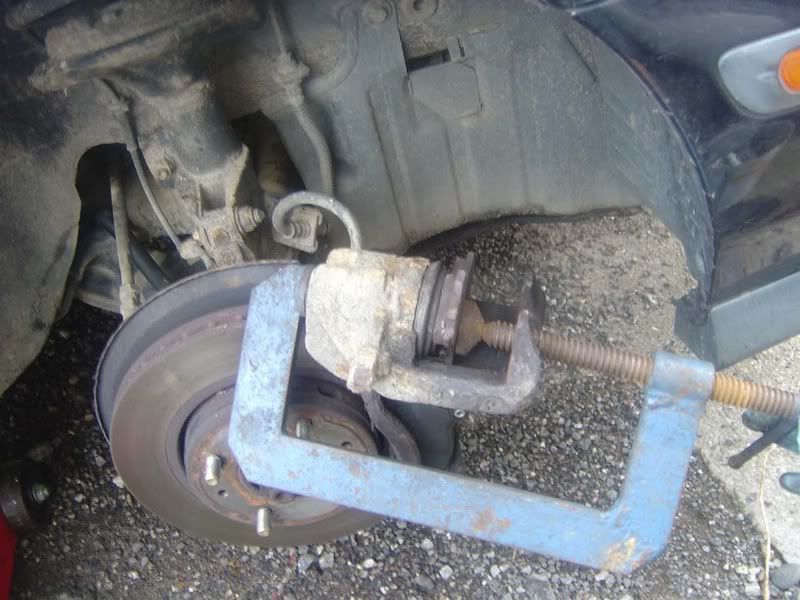
__________________
Click here for guides |
|
|
|
|
Oct 1st, 2007, 13:27
|
#5 |
|
Senior Member
Last Online: Oct 20th, 2013 20:24
Join Date: Aug 2007
Location: Derbyshire
|
Step 15 - Force the piston all the way back until it is flush as shown in the pictures. This should take a little force but if it is very stiff then look for signs of damage or split dust boots
  Step 16 - As you wind the piston back in, keep an eye on the fluid level and if it overflows, mop up the excess fluid and dispose of it immediately. Brake fluid contains nasty stuff that can damage paintwork and skin so be responsible with it 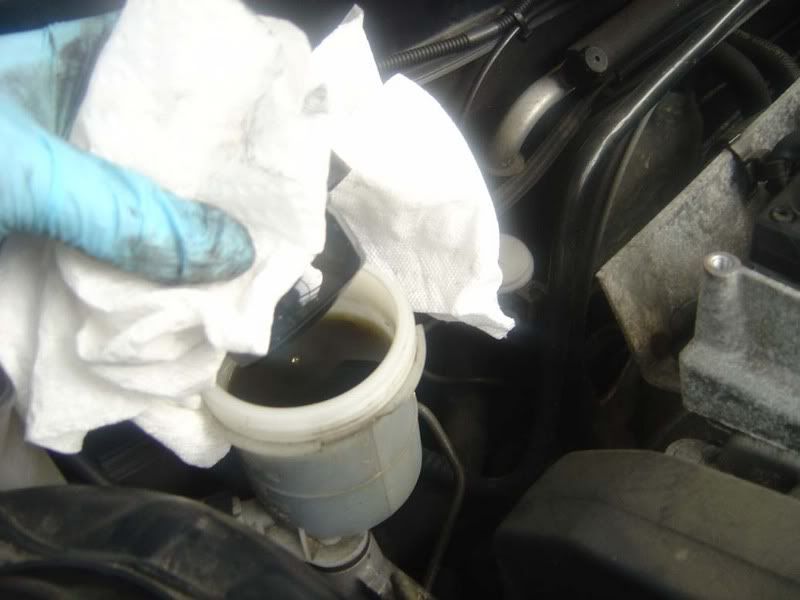 Step 17 - Now you've wound the piston all the way back you should find it slides quite freely over the new pads although some persuasion (gently) with a hammer may be necessary 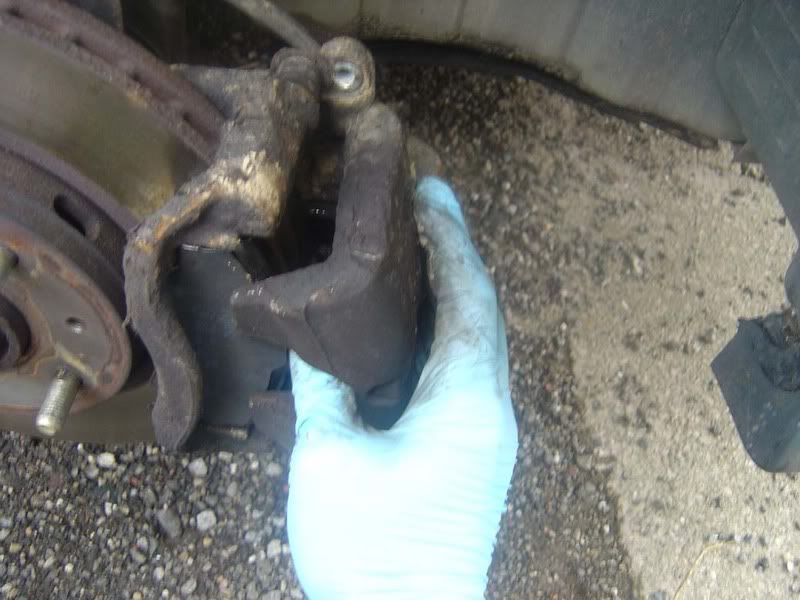
__________________
Click here for guides |
|
|
|
|
Oct 1st, 2007, 13:27
|
#6 |
|
Senior Member
Last Online: Oct 20th, 2013 20:24
Join Date: Aug 2007
Location: Derbyshire
|
Step 18 - Now re-fit the two 12mm nuts you removed from the caliper. You may well be given replacement nuts with your brake pads, if so use them
 Step 19 - Pop your wheel back on and tighten up the nuts by hand then nip them up gently with a wheel brace. Then lower the car and finish tightening the nuts, don't go crazy here - so many people use air guns and tighten them as much as they can, it just makes life harder next time you need to remove them. Use a torque wrench if you can't do this by hand but just tighten them enough to stop the wheel falling off! 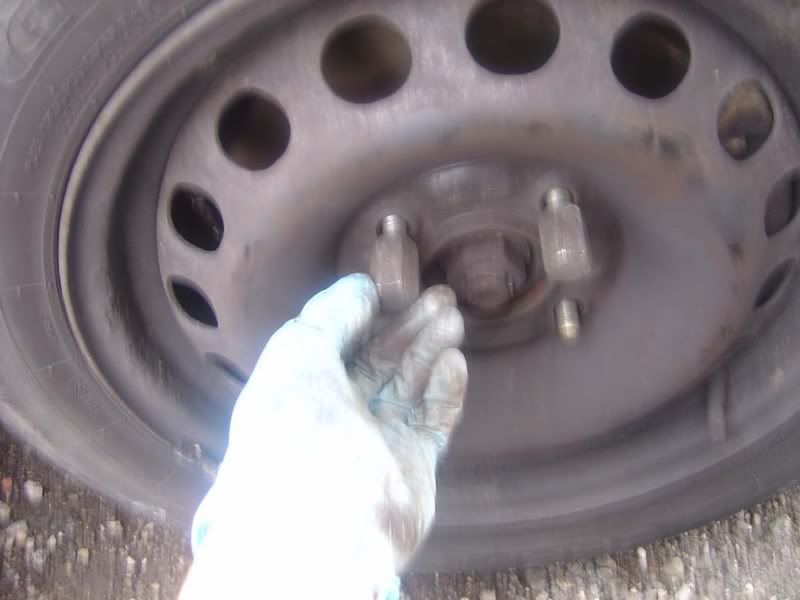 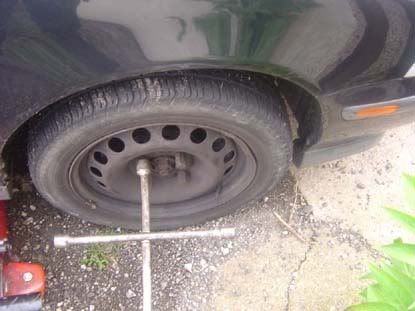
__________________
Click here for guides |
|
|
|
|
Oct 1st, 2007, 13:28
|
#7 |
|
Senior Member
Last Online: Oct 20th, 2013 20:24
Join Date: Aug 2007
Location: Derbyshire
|
Step 20 - Pop in the driver's seat and press the brake pedal 3-6 times until the 'squishiness' goes away, this is just the piston pushing back out to make
contact with the discs. Once this is done check the fluid level once more and top up/drain accordingly. The pictures show how to drain the fluid if you need to, just dip kitchen towel in and carefully remove quickly from the engine bay 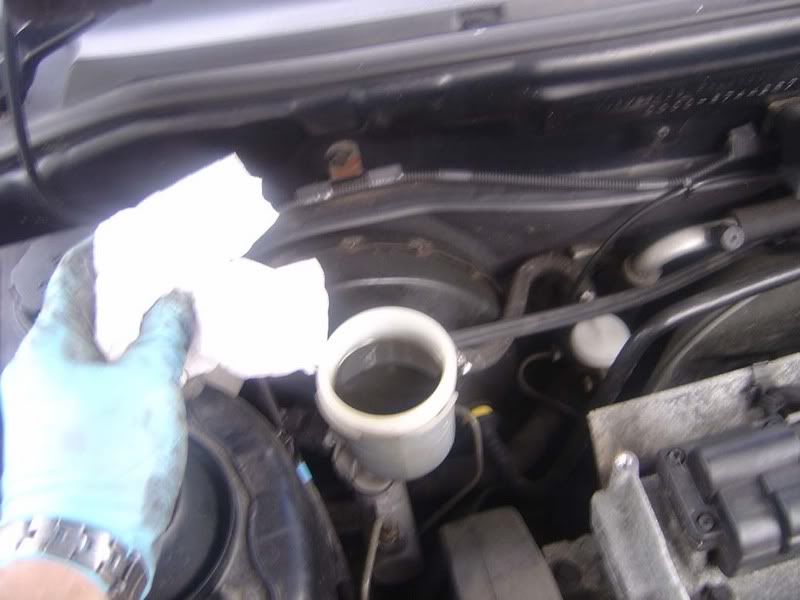 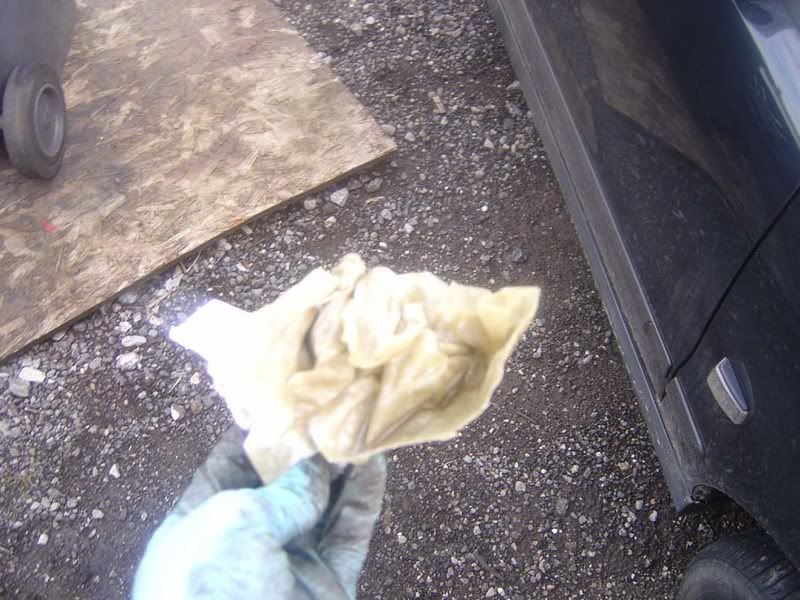  Step 21 - Refit the fluid reservoir cap. Note: brake fluid is hygroscopic which means it absorbs water. There is quite a lot of water in the atmosphere so if you leave the brake fluid reservoir cap off for a long time, the fluid will absorb some of this and degrade its function. So basically, take the cap off for a short time is possible, don't go and have your dinner half way through the pad change and not replace it! 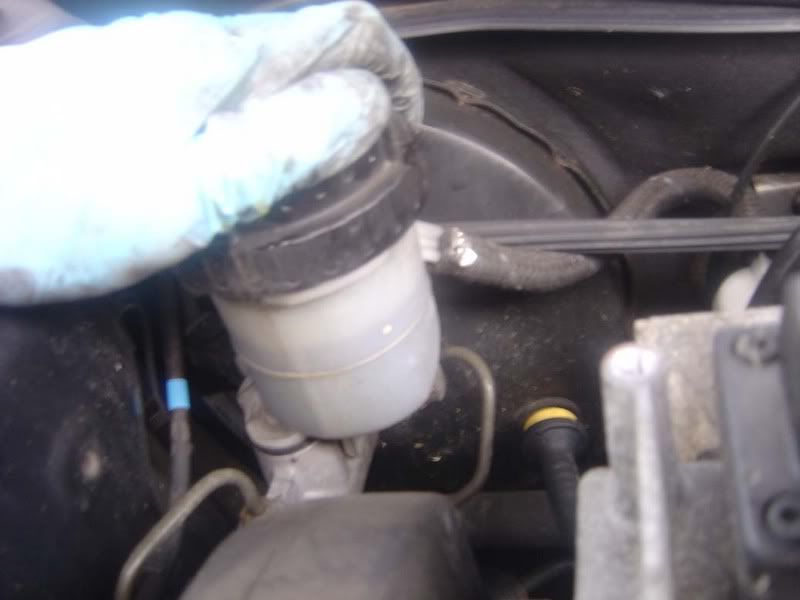 Step 22 - One final note, if you refit wheel trims make sure you align the valve (where you pump your tyres up!) with the cut out in your wheel trim. It's amazing how many people just try and bash the trims on without doing this and damage the trims. If you've got nice alloy wheels then you don't need to worry about this 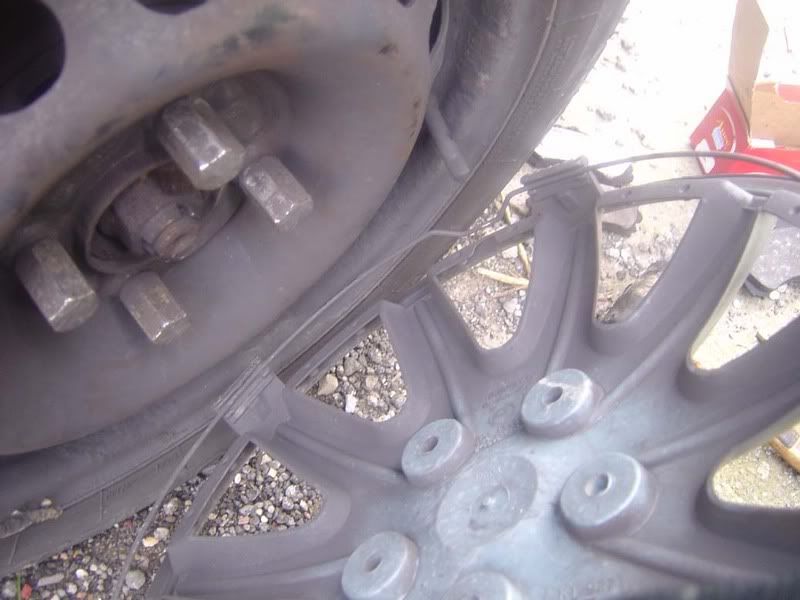
__________________
Click here for guides Last edited by JSeaman; Oct 1st, 2007 at 13:35. |
|
|
|
|
Oct 1st, 2007, 17:49
|
#8 |
|
Junior Member
Last Online: Aug 17th, 2008 11:01
Join Date: Aug 2007
Location: Reading
|
That's positively stunning!
Have do this job either tonight or tomorrow, this guide will make it all the easier, top stuff!! |
|
|
|
|
Oct 1st, 2007, 18:40
|
#9 |
|
Master Member
Last Online: Dec 29th, 2013 22:39
Join Date: Dec 2003
Location: Ashford
|
Nice guide. On a side note your brake fluid looks really dirty and may well need to be changed. Also when pushing the piston back in the caliper you should loosen off the bleed nipple as pushing fluid from the caliper back into the system can damage the abs sensor in the brake line if the fluid has dirt in it.
|
|
|
|
|
Oct 1st, 2007, 18:44
|
#10 |
|
Master Member
Last Online: Apr 28th, 2023 11:20
Join Date: Mar 2007
Location: Sc.unthorpe
|
I want to press thanks 80 times...
|
|
|
|
|
| Currently Active Users Viewing This Thread: 1 (0 members and 1 guests) | |
|
|


 Linear Mode

