
|
|||||||
| XC90 '02'15 General Forum for the P2-platform XC90 model |
 Information
|
|
Front Discs, Pads Replacement - GuideViews : 8380 Replies : 23Users Viewing This Thread : |
 |
|
|
Thread Tools | Display Modes |
|
|
 Oct 2nd, 2010, 21:29
|
#1 |
|
Master Member

Last Online: Feb 3rd, 2024 18:39
Join Date: Sep 2009
Location: Sunny Scotland
|
Hi Folks
Having replaced the rear brakes a few weeks ago, I decided to replace the fronts too. They were not too bad, but would need doing in a few months, so doing them now, meant that they did not need doing in mid-winter! Anyway - firstly, getting the right partnumbers for genuine or aftermarket pads and discs for the front was tricky, as several conflicting numbers appeared for the VIN... and when looking at the diameters and size of pads, they did not agree! Anyway - I was told that all UK XC90s have the same front discs and pads - I am not sure if this holds true for the 17" wheeled vehicles (mine is 18") but suspect it is. This is further confused by the fact Volvo seem to state 16" or 17" wheel son the boxes and listings! Anyway - these are the discs and pads... 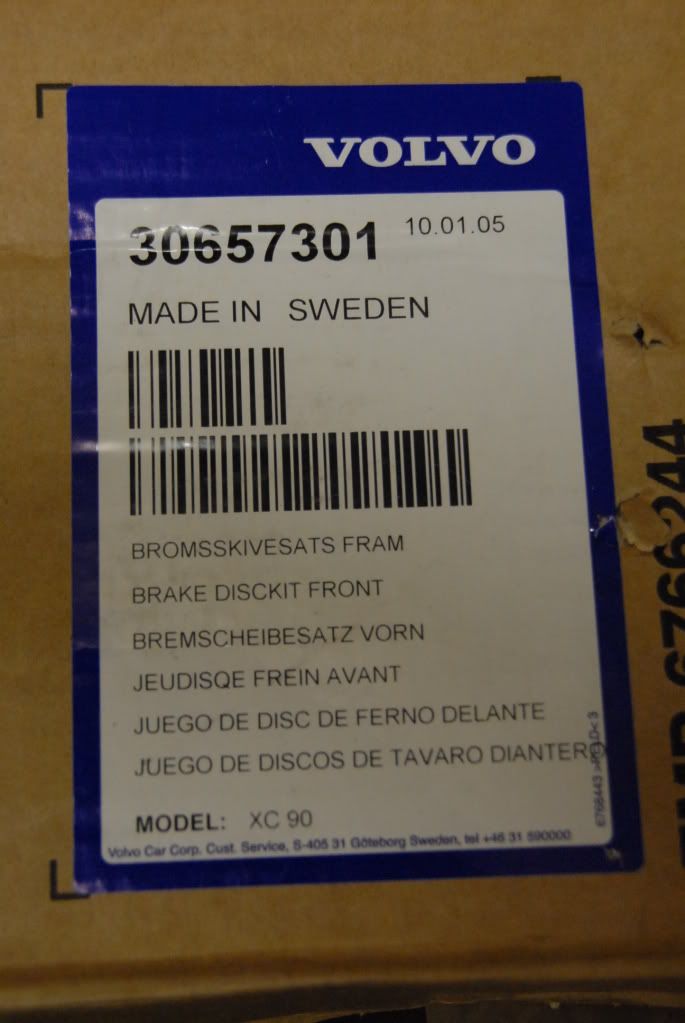 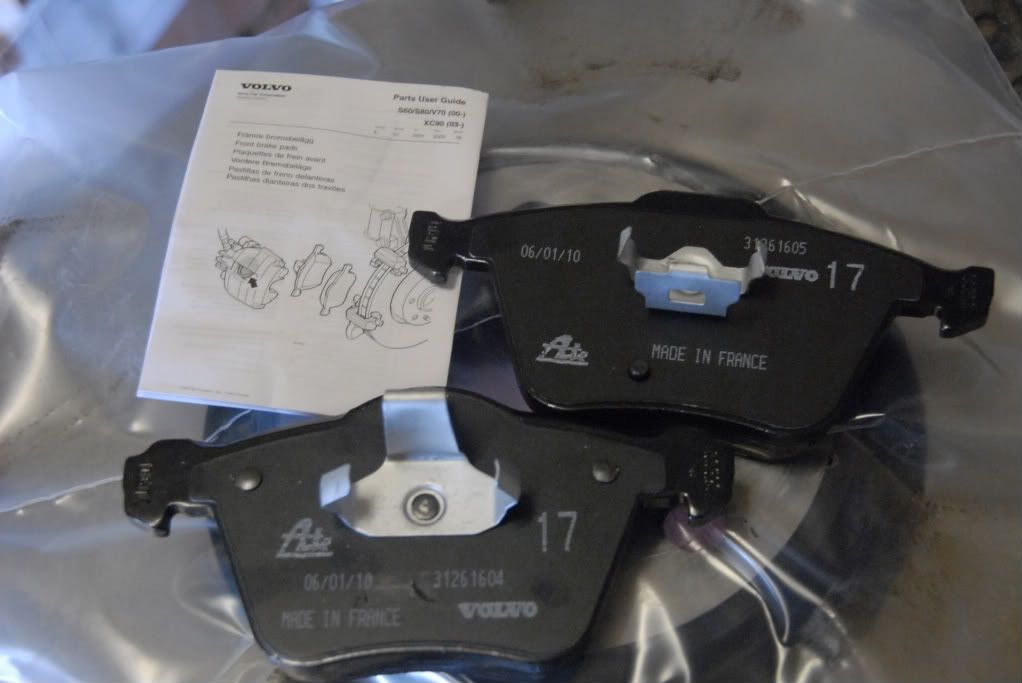 Have a close look at the pads - the upper pad (in the picture above) has a small rectangle cut on the pad bracket - this is the bracket that you see from the front of the caliper and it locks the caliper anti-rattle spring. 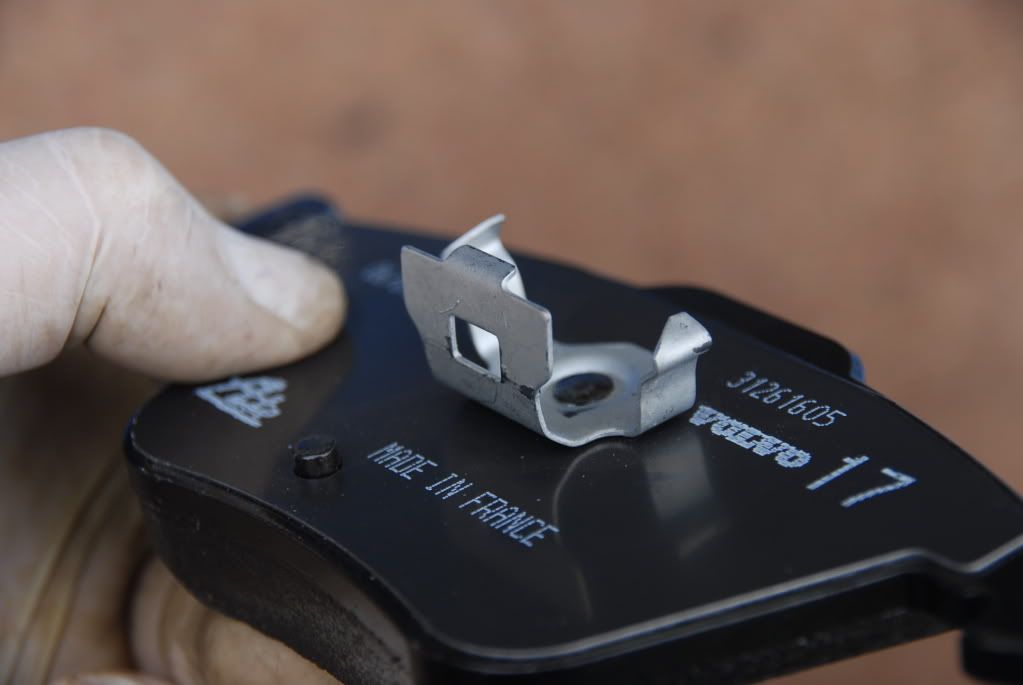 It is not obvious when you look, but you need to unclip the spring from this bracket when you start the job. The bracket you see below - at the left hand side is the pad bracket - this its easy to see how to release the spring. 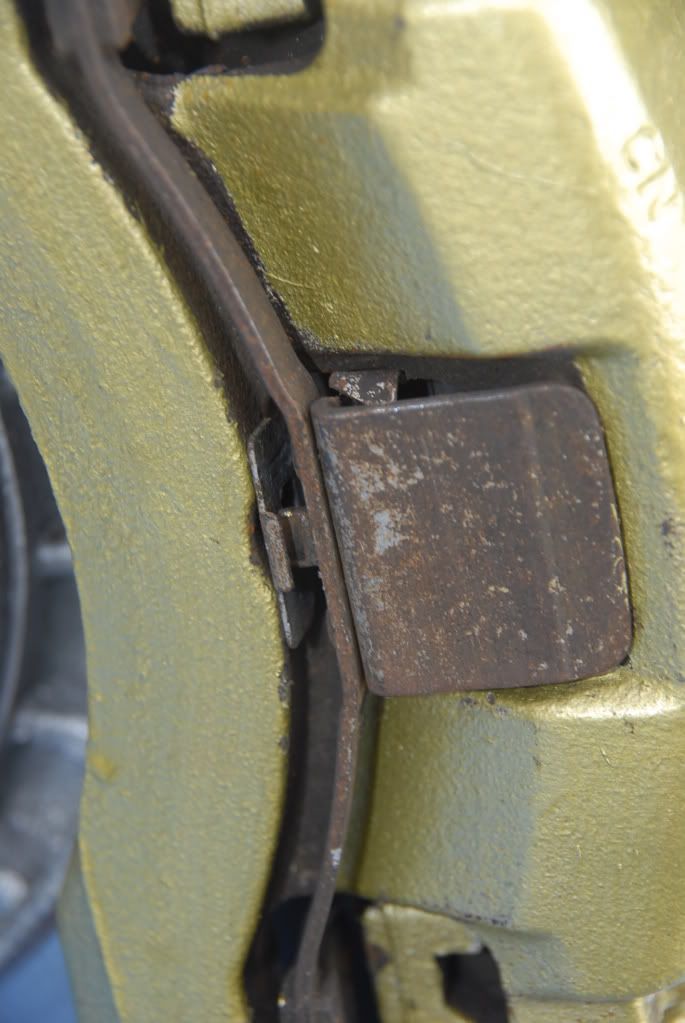 And..the spring when removed... 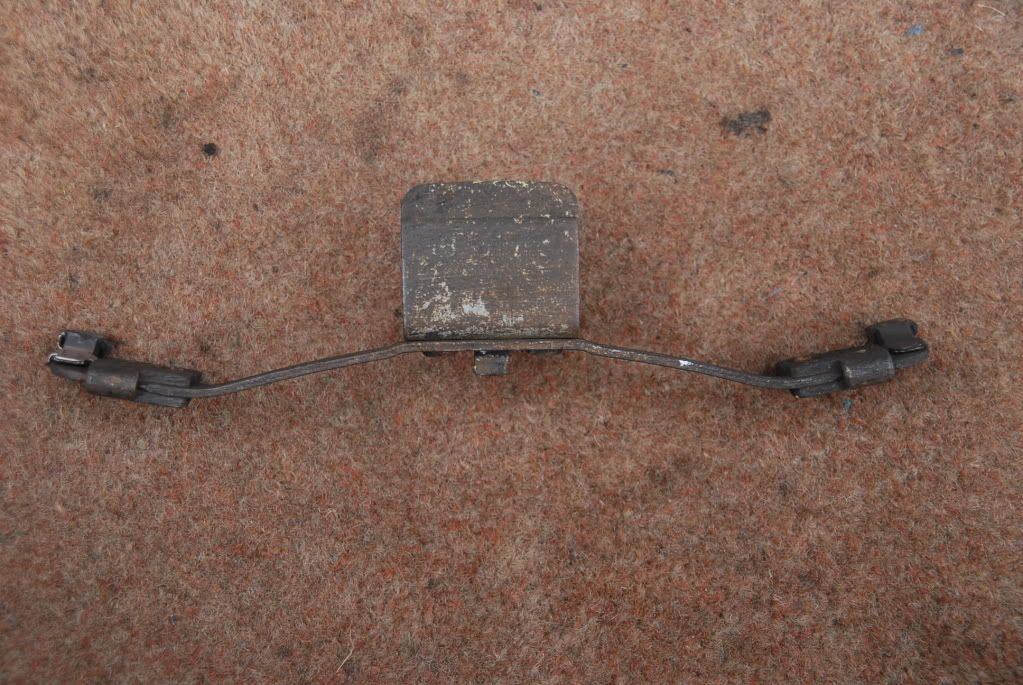 Anyway - when I first got the car, I thought it must have 2 or 4 pot calipers, given the size of the calipers - they are huge! They are however, single pot (piston), but are substancial. The good news is that removing them follows what has become standard practice on most modern cars. 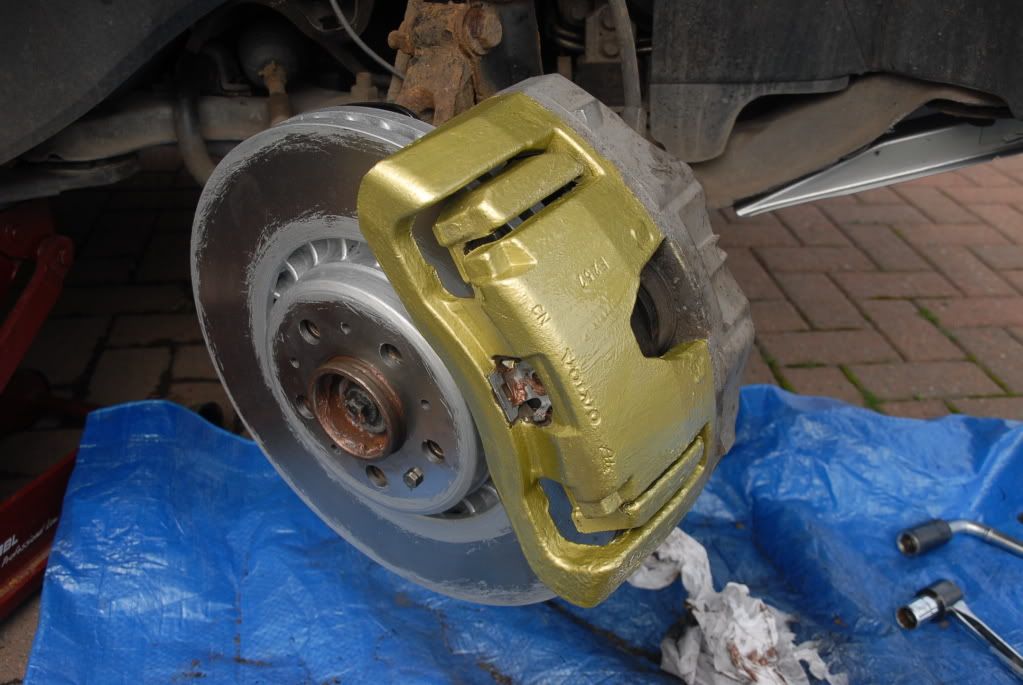 To remove the pads, you need to remove the two caliper slides. These are similar to the rear setup on this car - remove the two plastic caps (highlighted within the red ) then under them, two hex head pins - easy to remove and no threadlock so easy peasy. Take note - unlike the rears, these pins are of differing lengths - the longer one being fitted to the upper slide. 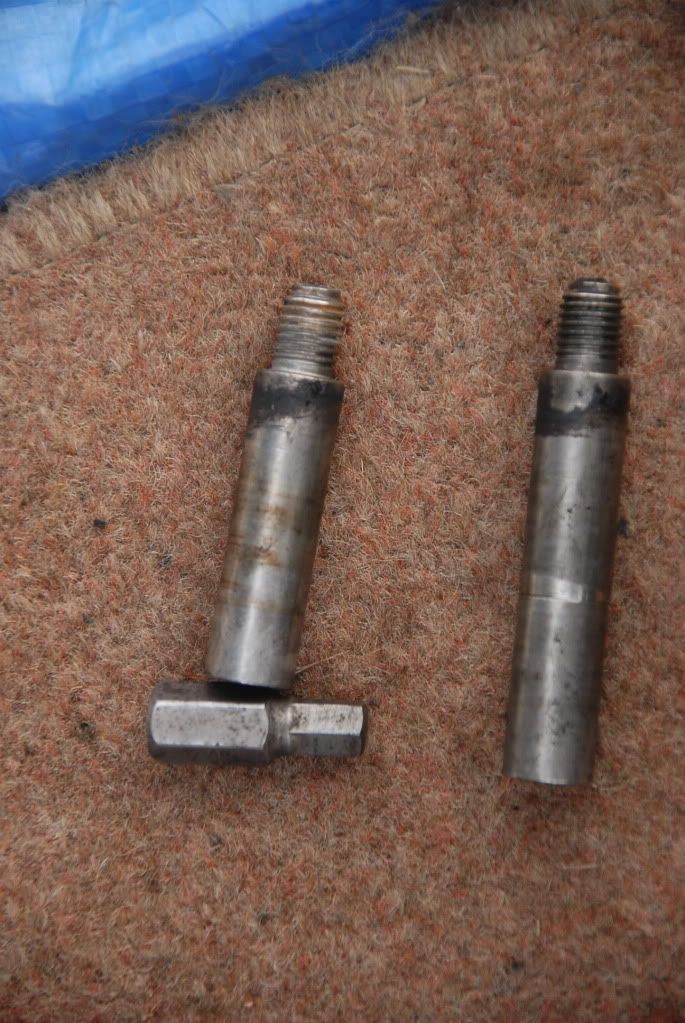 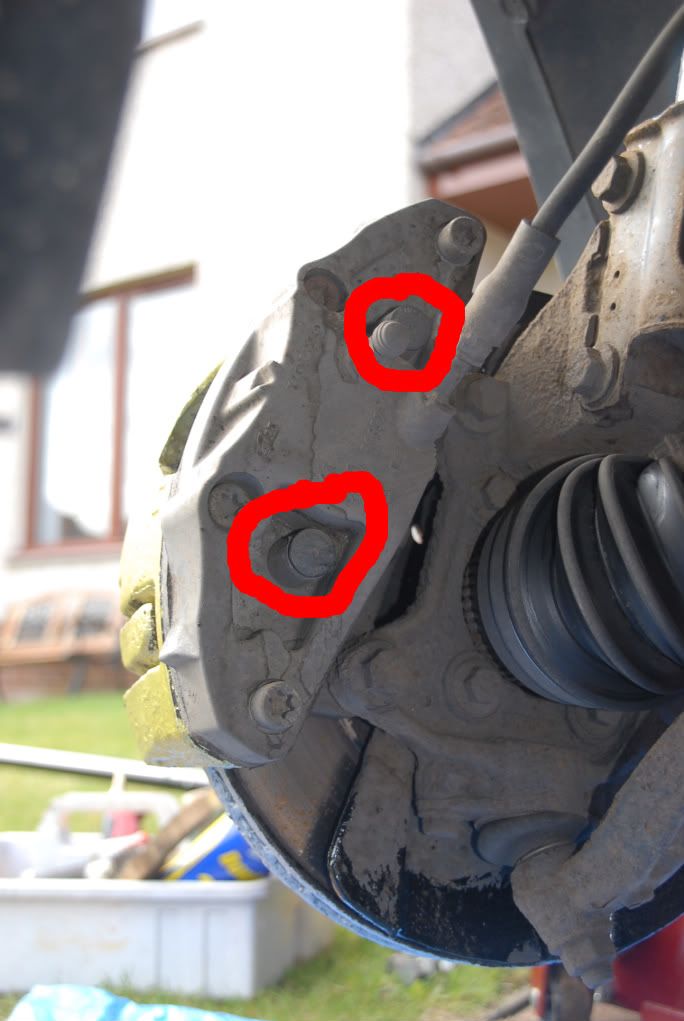 When the caliper is removed, remove the pads - one is clipped into the caliper front, and the other clipped into the piston. When removed, ensure that you support the caliper properly, and that the rubber brake hose is not being unduly twisted or under tension. Next - you need to remove the caliper carrier bracket. This is two bolts to the hub - shown below. These appear tight, but in reality, its just the threadlock holding them in.  Once the bracket is off, its a simple job of removing the centre 10mm bolt and removing the disc. If the disc is tight, give it a few hits from the rear to free it off. If its really stubborn, put some release oil through the wheel bolt holes aiming between the disc and hub - that usually does it. 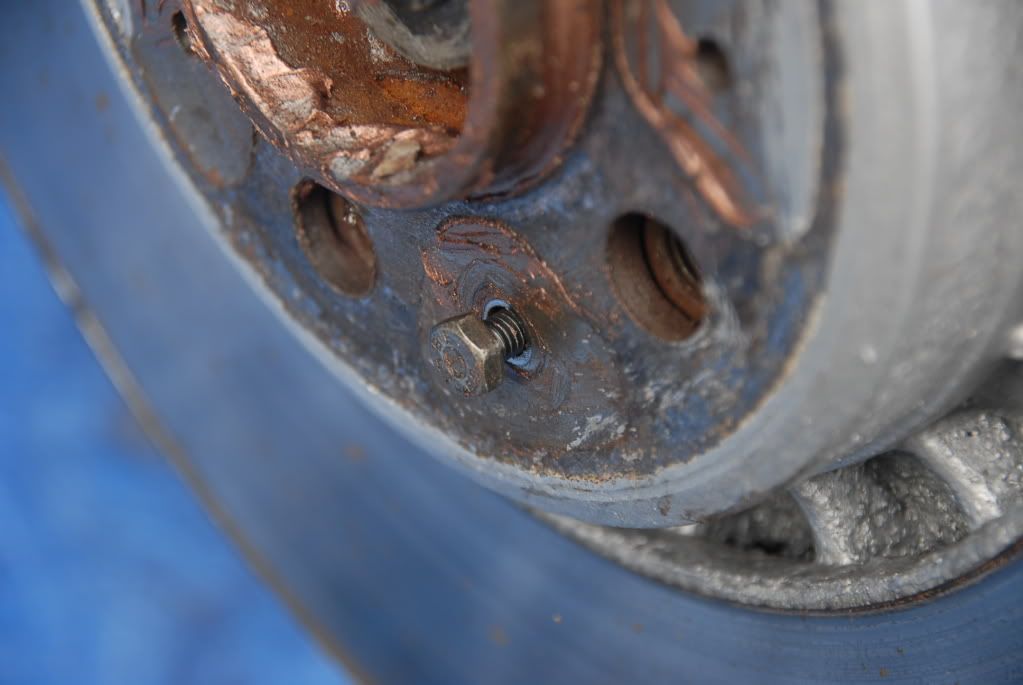 With the disc removed... 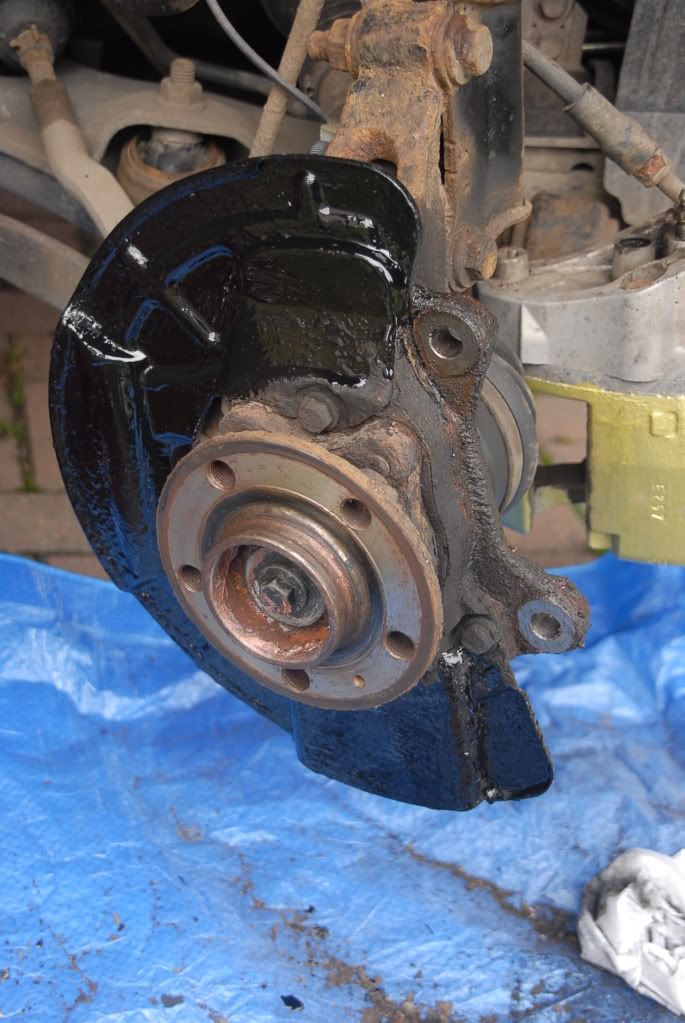 So - put it all back together! When refitting the disc, ensure that there is no debris between the hub surface and disc rear. Its usually advised these days, to loosen the bleed nipple on the caliper when pushing the piston back in to save any risk or reversing the direction of any seals within the ABS or master cylinder. Your call - just get it pushed back! Fit the pads to the caliper - both clip in. Refit the caliper carrier, having replaced the bolts or cleaned the threadlock out of the original bolts - remember to use threadlock when fitting (if the replacements dont already come with threadlock in the threads). 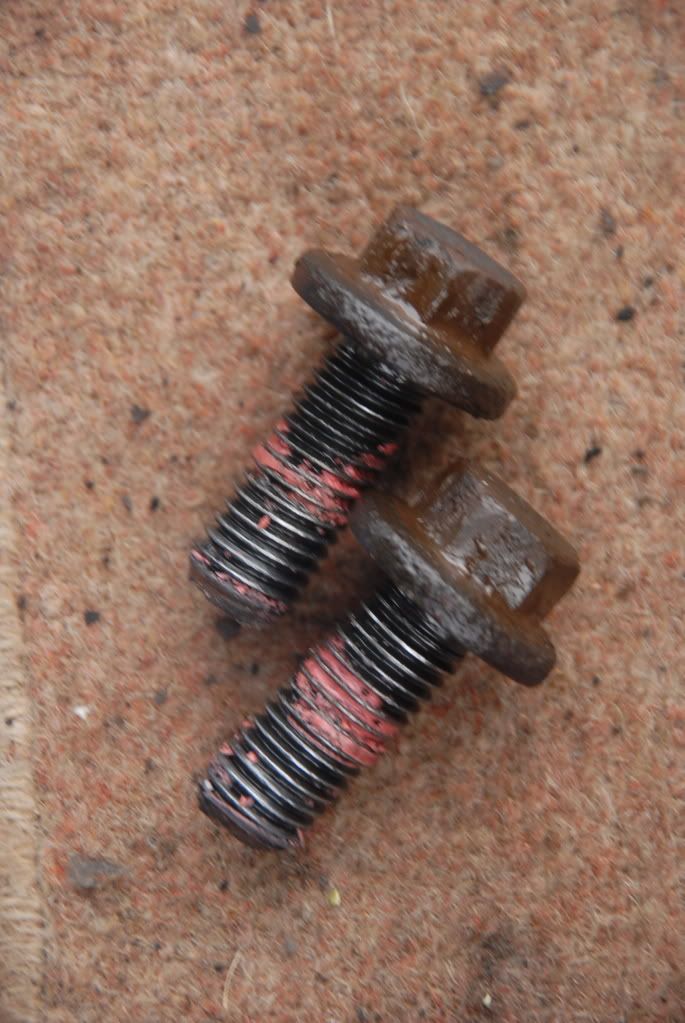 Now, get the caliper back on the disc and fit the two slide pins having cleaned them up first - remember to observe the long/short fitment. All that remains is to refit the spring - just the reverse of removal - this time clipping it into the pad bracket. Its sensible to put some coppaslip around the hub centre where the wheel locates, as they often corrode on. Thats it! David Last edited by BestGear; Oct 2nd, 2010 at 22:47. |

|

|
| The Following 17 Users Say Thank You to BestGear For This Useful Post: | 400-ascona, ascender, Balistaff, bobdabuilda, chb, DCO, Fika, galloot633, ianu, JIM C, JimG, Maxxypriest, mumblin, NCS XC90, Ron_XC90, staffy460, ted striker |
|
Oct 2nd, 2010, 21:37
|
#2 |
|
Master Member
Last Online: Dec 22nd, 2023 10:53
Join Date: Dec 2006
Location: Leeds
|
Excellent guide, and as a photographer can I congratulate you in the quality of the photo's....you must be using something half decent.
oh...and what gold paint are you using for the calipers? |
|
|
|
|
Oct 2nd, 2010, 22:43
|
#3 |
|
Master Member
Last Online: Feb 3rd, 2024 18:39
Join Date: Sep 2009
Location: Sunny Scotland
|
Hi
The camera is my trusty Nikon D200... a bit "old" by todays standards but a well made body. Lense is a 18-200, which equates to 28-300mm in old money. Its not always easy to get the right shots when you want to get the job done - so some shots could be much improved... Paint? - Hamerite smooth gold - and a 1/2" brush. I have always found you dont need to get every surface or indeed the whole caliper to look good.... which perhaps appears sloppy, but the end effect is good. Worth getting a tin of brake cleaner too - just to clean them up before painting. Smooth Gold Brake cleaner The brake cleaner is available from tyre typical high street car shop - usually in 300 or 500ml tins. David |
|
|
|
| The Following User Says Thank You to BestGear For This Useful Post: |
|
Oct 3rd, 2010, 08:18
|
#4 |
|
Master Member
Last Online: Dec 22nd, 2023 10:53
Join Date: Dec 2006
Location: Leeds
|
I have the same lens on my D80. Maybe we should be upgrading to D7000's
|
|
|
|
|
Oct 3rd, 2010, 11:20
|
#5 | |
|
Master Member
Last Online: Feb 3rd, 2024 18:39
Join Date: Sep 2009
Location: Sunny Scotland
|
Quote:
David |
|
|
|
|
|
Jun 24th, 2011, 17:32
|
#6 |
|
Member
Last Online: May 6th, 2013 10:22
Join Date: May 2009
Location: Scotland
|
Thanks for this guide, its spot on.
Just for info as I was caught out, the allen/hex key you need to get the hex head pins out is a 7mm. I seemed to have every size but the 7 so had to make a quick trip to B&Q. When replacing the pads with aftermarket ones, is it worth fixing the anti-noise shims to the back of them or not? |
|
|
|
|
Oct 13th, 2021, 13:50
|
#7 | |
|
Junior Member
Last Online: Mar 12th, 2022 18:43
Join Date: Aug 2016
Location: Holywood
|
Quote:
Ill need disks front and rear, and then 4 sets of pads. Is there any other consumables that Id need to avoid me having to make multiple trips? |
|
|
|
|
|
Oct 13th, 2021, 14:18
|
#8 | |
|
Petrolhead+Lots of Diesel

Last Online: Apr 25th, 2024 11:43
Join Date: Aug 2008
Location: Glasgow
|
Quote:
__________________
BMW X3 Msport MHEV 2020MY & VW Beetle Design 1.2Tsi DSG 2014MY Previous XC90 D5 SELux Geartronic 2009MY |
|
|
|
|
|
Oct 14th, 2021, 07:28
|
#9 |
|
Junior Member
Last Online: Apr 18th, 2024 03:06
Join Date: Aug 2018
Location: Brisbane
|
Caliper bolts are not TTY. They just have an angular torque setting, as do many other non-TTY bolts. Volvo may recommend you replace, but not due to plastic deformation.
Some TTY bolts may be reused (up to x times). Landrover 300 Tdi head bolts got 4 uses according to the factory manual. |
|
|
|
|
Oct 14th, 2021, 08:06
|
#10 |
|
Petrolhead+Lots of Diesel
Last Online: Apr 25th, 2024 11:43
Join Date: Aug 2008
Location: Glasgow
|
Hello dambat, Volvo say they are when I enquired however personally I would never reuse any TTY bolt ... why?
The main issue is with TTY bolts is that once you reach that Yield Point and return back to the elastic region, youve changed the crystal properties inside the steel and its permanently deformed, visually depending on the fastener used it can be obvious, others its not. However its a personal choice.
__________________
BMW X3 Msport MHEV 2020MY & VW Beetle Design 1.2Tsi DSG 2014MY Previous XC90 D5 SELux Geartronic 2009MY |
|
|
|
|
| Currently Active Users Viewing This Thread: 1 (0 members and 1 guests) | |
|
|


 Hybrid Mode
