
|
|||||||
| 700/900 Series Articles How to's and Guides for the P700/900 series. |
 Information
|
|
How to change the Heater Matrix on a 900 Series.Views : 41630 Replies : 21Users Viewing This Thread : |
|
|
Thread Tools | Display Modes |
 Sep 7th, 2007, 01:58
|
#1 |
|
Turbobricker

Last Online: Apr 14th, 2024 18:09
Join Date: Dec 2002
Location: Wellingborough
|
I just changed out the Heater Matrix on my 1996 940 with Aircon, and as i did so i took some photo's of most steps, so i thought i'd write a rough guide to doing this job.
It seems a daunting job but is actually not to bad a job just a few fiddly bits. Set aside about 3-4hours for the job. Most of this would also apply to some 700's particulary those with aircon. Anyway lets start, please note i took the pictures for this guide as i was reasemmbling it and i've also currently left my carpets out for the time being to allow the underlay foam further time to dry out properly, so thats why the carpets arent pictured. Starting on the drivers side, remove the front 2 trim covers on the door sill panel and remove the 2 screws. There is also a screw that holds a plastic cover over the seat mechanism, remove this screw and the cover as well. 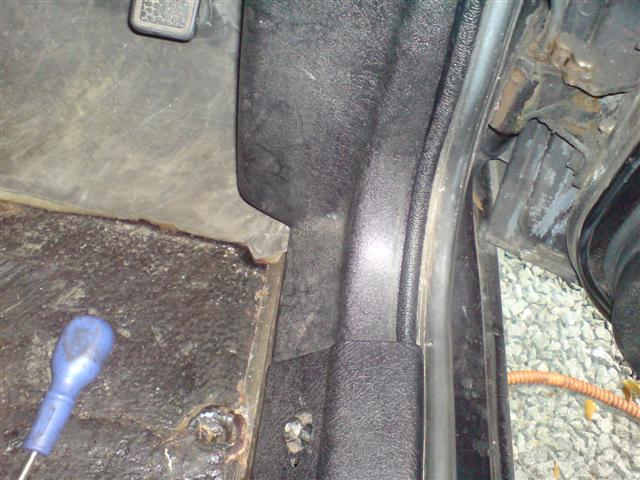 This will then allow you to remove the ECU cover panel in the drivers footwell thats just under the bonnet release. With that removed you can then undo the three screws that holds the panel just above the pedals. *******PICTURE REQUIRED HERE****** Moving over to the passenger side, remove the front 2 trim covers on the door sill panel and remove the 2 screws. There is also a screw that holds a plastic cover over the seat mechanism, remove this screw and the cover as well.  To remove the panel below the Glovebox, there are 3 trim screws, turn them 90 degrees with a flat head screwdriver and the panel should come off. 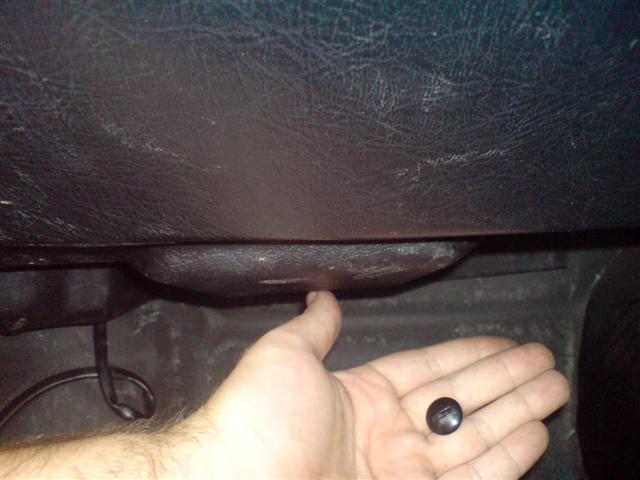 Remove the 2 screws that hold the side kick panel on and remove the panel. 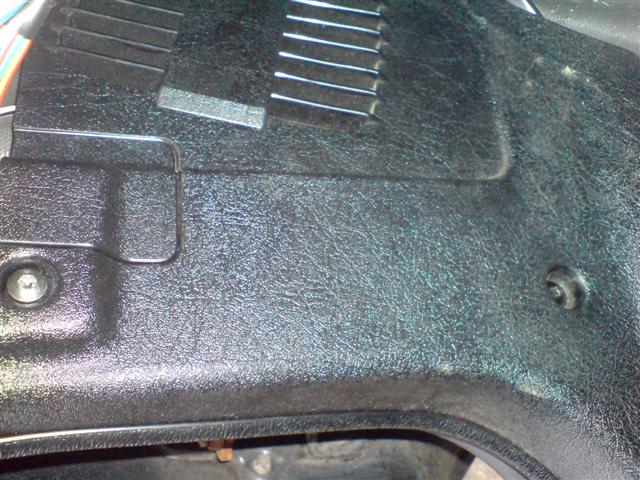 Now hop in the back seats and remove the rear ashtray. 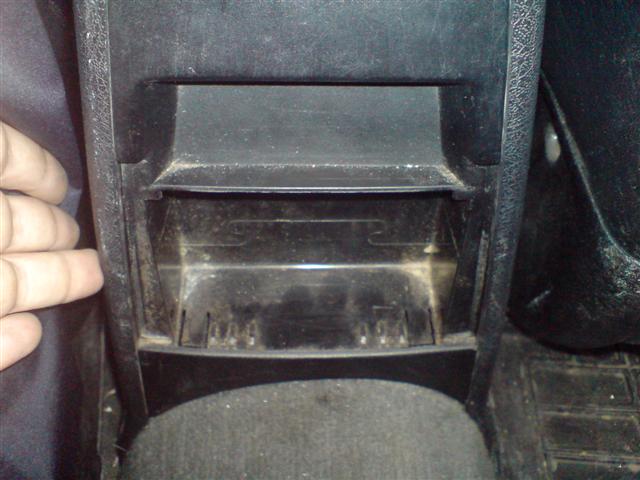 With the astray removed, using a flat blade screwdriver prise up the 2 clips at the bottom remove the panel and disconnect the light bulb there. You'll now see the handbrake adjuster. Moving back to the front of the car, Remove the Front ashtray and the fusebox cover. 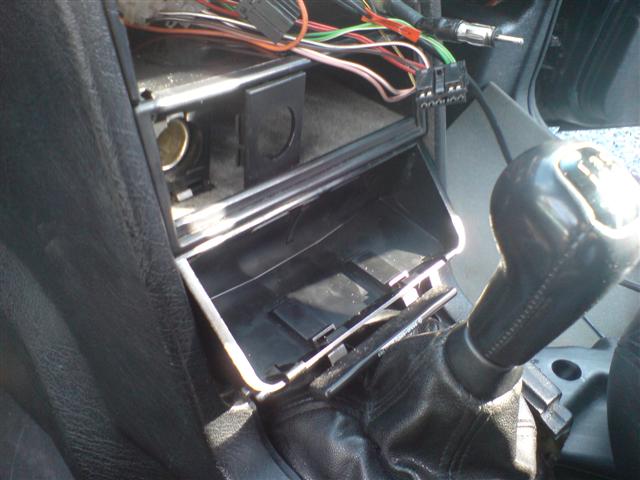 Then undo the 2 screws below the handbrake and remove the panel, Putting the car in 3rd gear will allow you to get the panel out, unplugging the heat seater switches as you remove it. 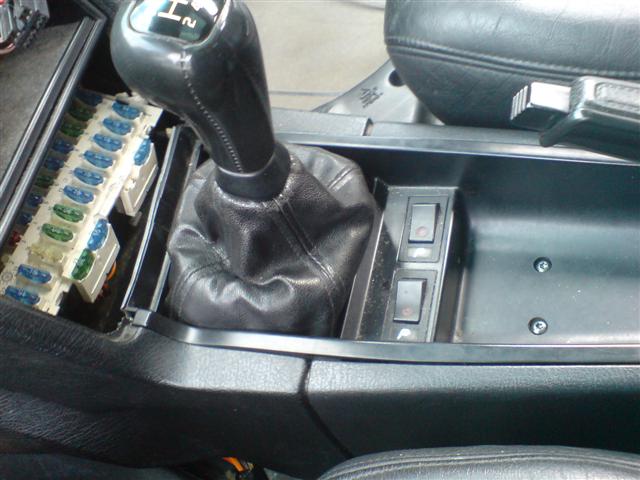 Now open your centre consol up and pry open the two covers below. One will reveal the OBD connector if your car has one and the other 2 screws. Undo the 2 screws and the whole centre consol should be lifted out the way, you'll have to unhook the obd connector from the centre consol as you lift. 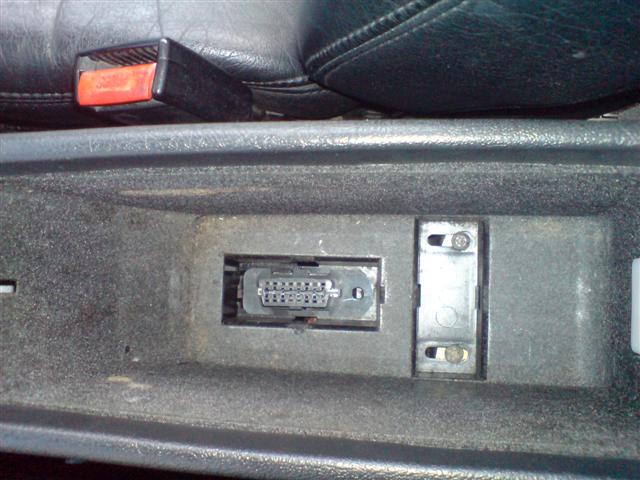 With the centre consol removed, and the seats moved as far back as possible, you should now be able to remove both front carpets. The carpets are only tucked up behind the side panels off the transmission tunnel. With the carpets removed and placed somewhere to dry we now need to remove the Glovebox. Open the glovebox and prise off the 2 cover plates to gain access to the 2 screws. remove these screws. 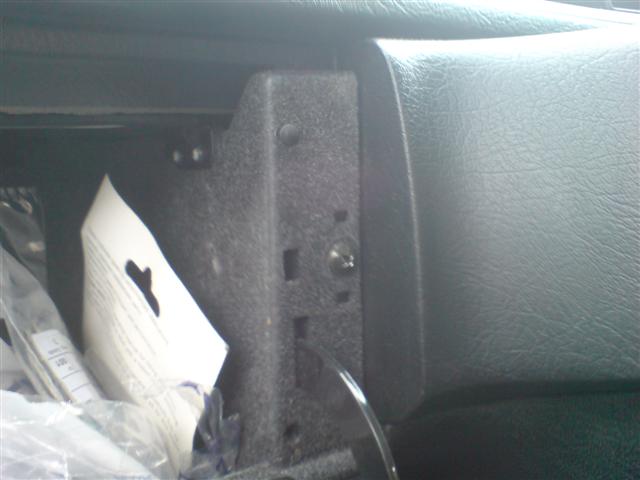 With those removed, at the bottom of the glovebox are 2 10mm nuts that hold the bottom of the glovebox in. Remove these 2 nuts and lift the glovebox out the way not forgetting to disconect the glovebox light wiring. 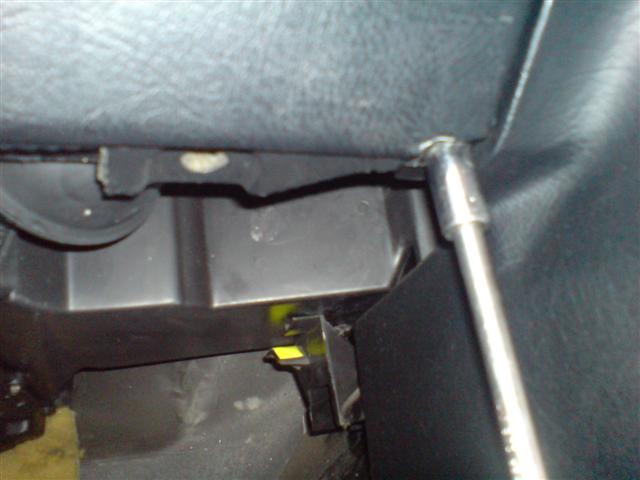 Ok now onto the the removal of the cubby hole where the cigarrette lighter is. remove the cover and undo the 2 screws, unplug the wiring to the lighter socket and remove the lighter and cubby hole.  Now we need to remove the trim around the heater controls. Using a flat blade screwdriver carefully prise if off around the heater trims and then it is then hooked in towards the steering wheel. (i've taken a pic with it off so you can see the clips) Disconnect the wiring to whatever switches you have fitted there. 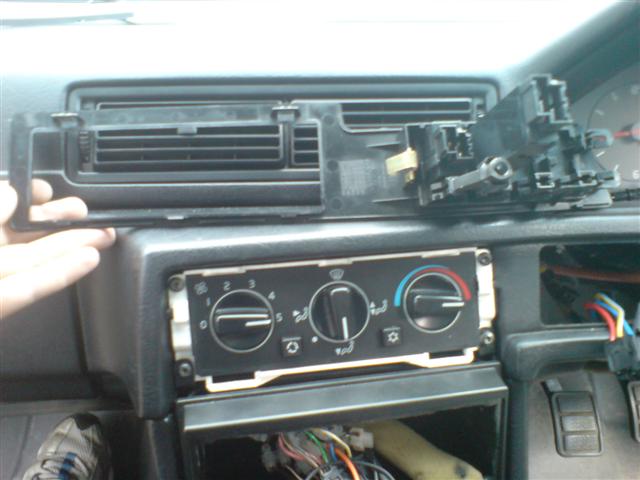 Now remove your Radio/stereo equipment from the panel. I have a aftermarket pioneer unit so with that removed i then had to unclip the adapator plate pictured below for single din size headunits. 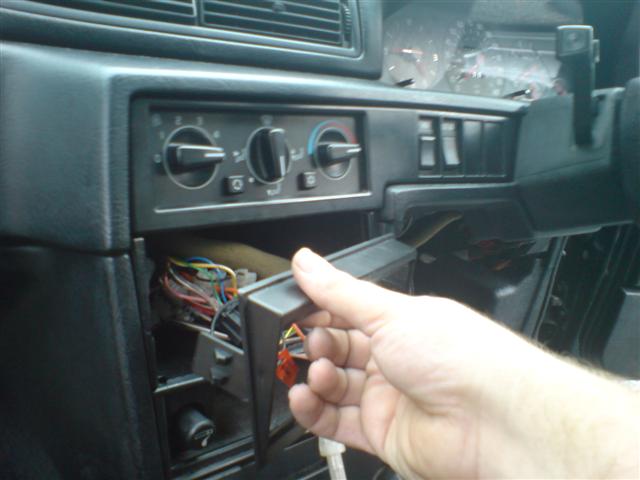 Now looking into the vacant place where the stereo equipment was there is two screws that hold the radio cubby hole in place. Remove these and the cubby hole. 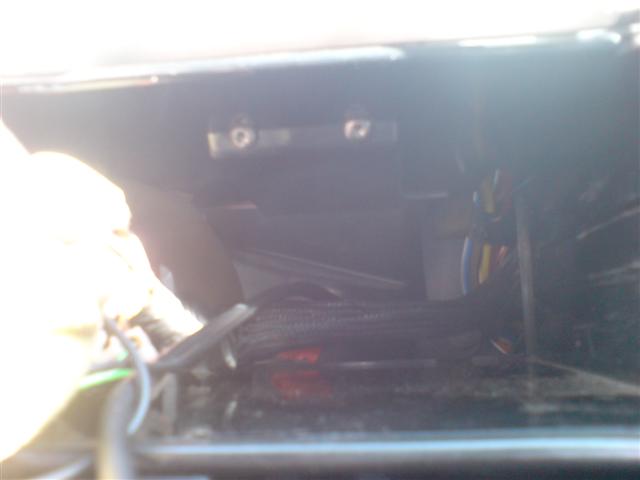 Now we can remove the 2 large panels either side. First remove the 12mm bolt in the footwell on both sides. 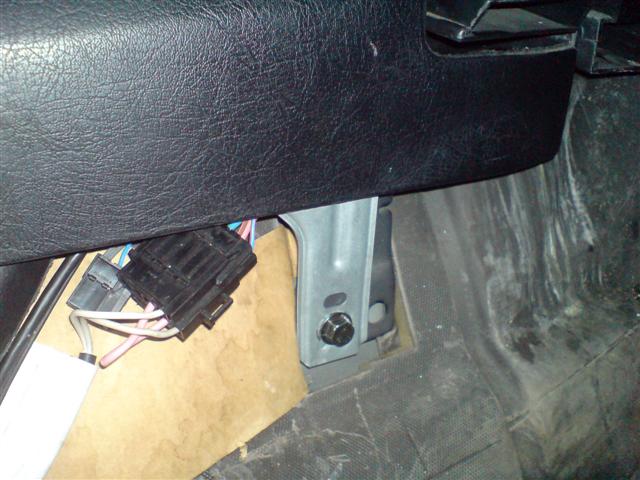 Then the 2 10mm bolts near the seats on both sides. 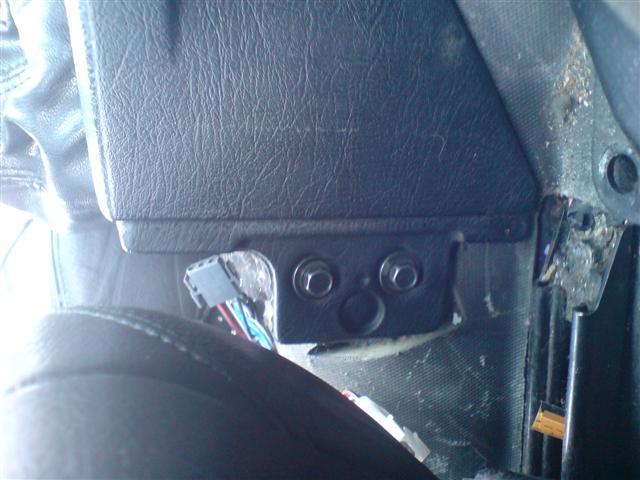 Then where you have just removed the radio cubby hole you will see another 2 10mm bolts on each side to remove. 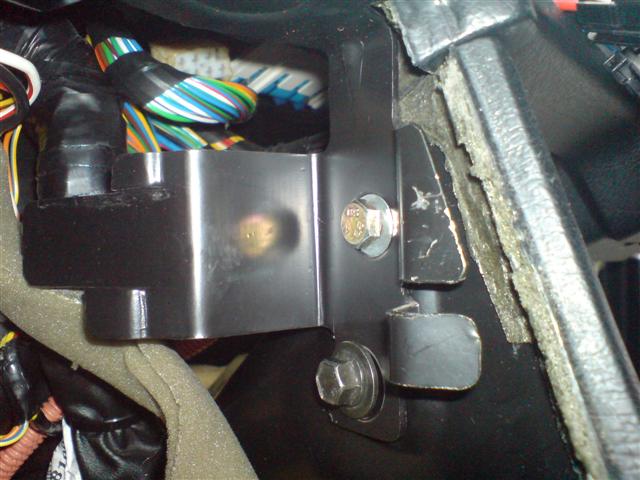 Now undo the 4 screws that hold the heater control panel and the lower bracket in place. You will have to disconectt all the wiring and vacumm pipes from it. 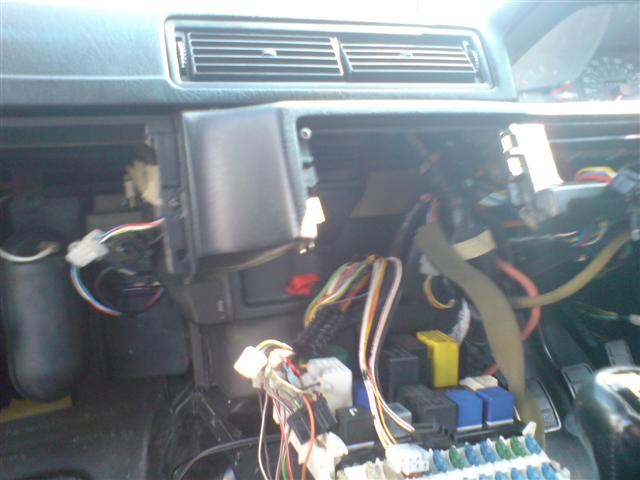 Now press the two clips at the front of the fuse board and lift the fuse board out and move it to one side. Undo the 3 nuts that bolt the White fuse board base to the transmission tunnell and remove from the car. ******Picture needed******* You now need to remove the 2 centre vents above the heater panel. Its best to push these out from behind. They are a very tight fit, you will also need to remove the 2 pipes that distribute air across to the vents at either side of the dashboard. You now need to remove the lower distrbution plastic part that sits on the transmission tunnel. You may need to remove the two pipes that go back underneath the seats to allow you to get it out. I loosened them and then prised them back and managed to slide the distribution unit out.  With that now removed, you need to undo the few 7mm bolts that hold the front distributiion panel onto the main air mixing unit. That was what several of the top hoses went to. 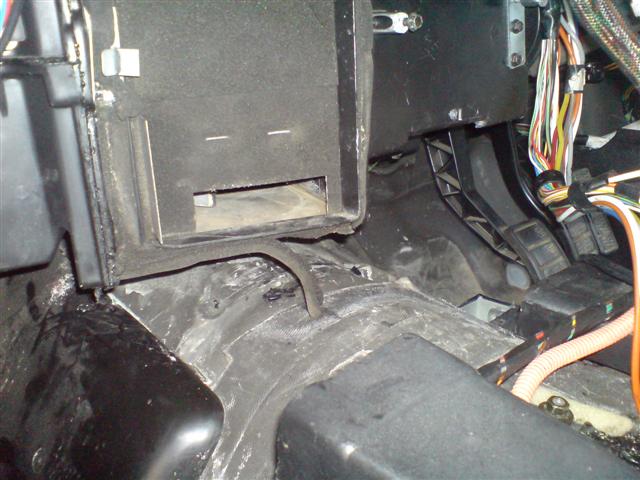 With it removed you can now see the main air mixing unit. This is held on with about 10 7mm screws all around the unit. Some are very tricky and you will curse out loud quite a lot gaining access to a few. Specially the ones at the top. With them all unscrewed. Disconnect the vacumm pipes on the side of the mixing unit, making a note which colour pipe goes to which vacumm switch. 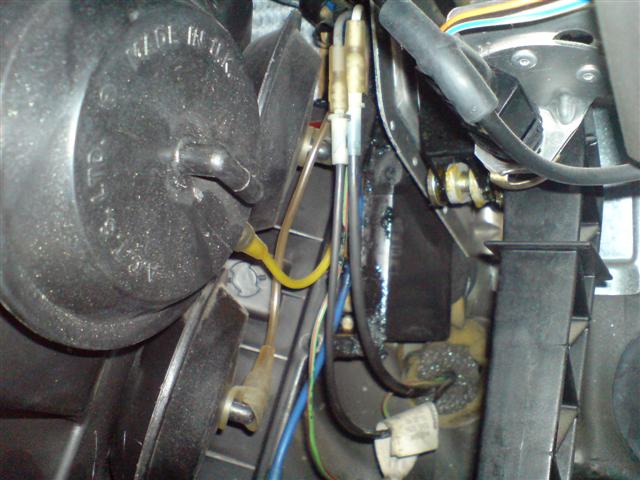 You will now be able to pull the entire mixing unit off and see your eventually goal the heater matrix!!!! 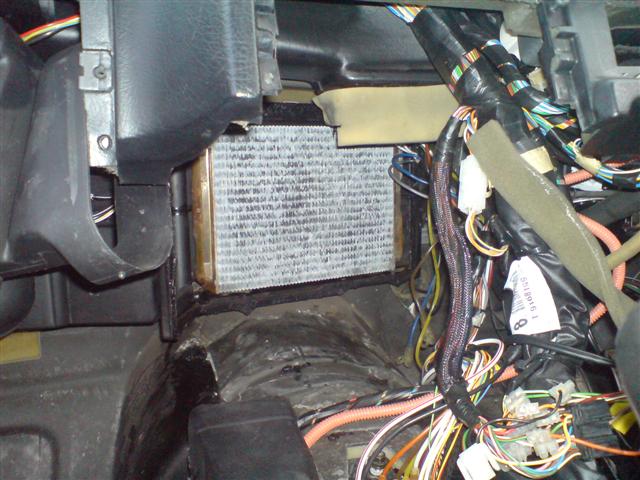 The matrix is held in by two brackets that are held by some more 7mm screws. Remove these and then open the bonnet. Undo the 2 hoseclips for the 2 hoses that feed the inlet and outlet of the matrix. Remove the hoses(use clamps if you don't wish to lose all your coolant) Now you can simply remove the heater matrix. 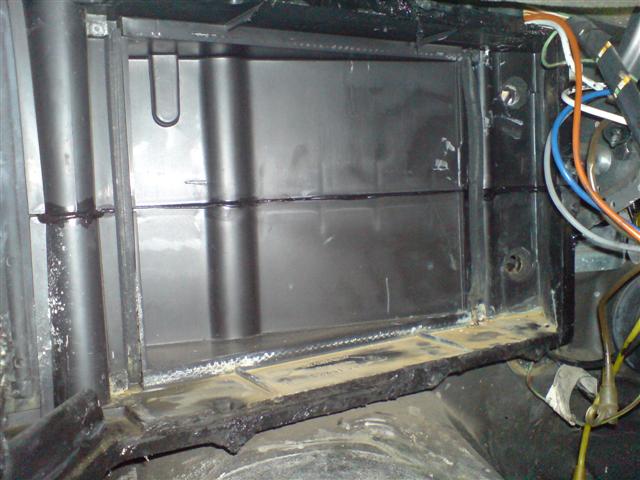 You can then go about fitting your replacement unit. I ordered a brand new unit from http://www.vehicleheaters.co.uk/menucat.asp?alpha=Volvo Mine was part number 020528 which according to them is 960 Only but as a late 940 is the same as 960 i can see why, but i did wait until the unit was out so i could measure up and order to be sure. With next day courier delivery the total cost was £75.20 all in. A hell of a lot cheaper than the £400!!!!!! the Volvo dealer wanted for the part. Here's some pics of the New and old Units side by side. 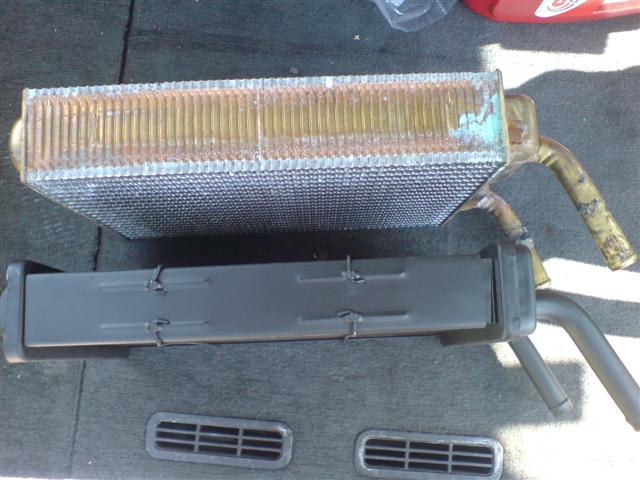 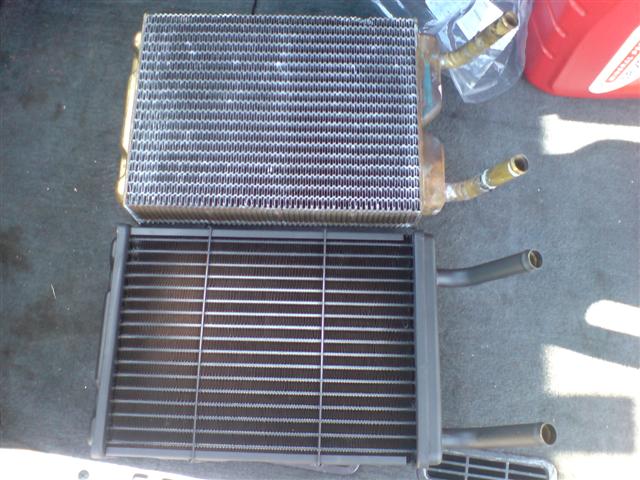 The new unit was slightly thinner in core thickness but the endtanks were the correct size so it fitted back in the car a treat. Refitting is just a reversal of the above stages. Anyway thats it for now, i'll add the extra pics in when i can take them. Last edited by CTCNetwork; Sep 19th, 2008 at 16:47. Reason: Un-stickied as now in Articles Section |

|

|
| The Following 30 Users Say Thank You to Chesh740R For This Useful Post: | 855 tdi, alex_plovdiv, captain_pugwash_20, CharlesStevenson, Chooch84, David Brennan, Flotown Tank, globetrotter, jackdw, jamrussell, jpliddy, lnparry, lobster740, loki_the_glt, martin calva, minesa240x3, mrmeringo, Orcadia, Paddy Wagon, paul foster, Penybryn, Steve 940, surrey_man, terry_cunnane, TheLeeds, Tim1980, Tulip0852, TurnipSpeed, Volvanman |
| Currently Active Users Viewing This Thread: 1 (0 members and 1 guests) | |
|
|


 Threaded Mode