

|
|||||||
| PV, 120 (Amazon), 1800 General Forum for the Volvo PV, 120 and 1800 cars |
 Information
|
|
Another one savedViews : 10476 Replies : 72Users Viewing This Thread : |
 |
|
|
Thread Tools | Display Modes |
|
|
#1 |
|
Junior Member
Last Online: Aug 29th, 2018 23:03
Join Date: Sep 2015
Location: North Wales
|
Strip down of the Kombi begun this week.
Apart form the back end, the rest was as expected... so far so good. Not pictured are the front door skins and frame and rear lower quarter. Fortunately the wings and front panel can be saved. 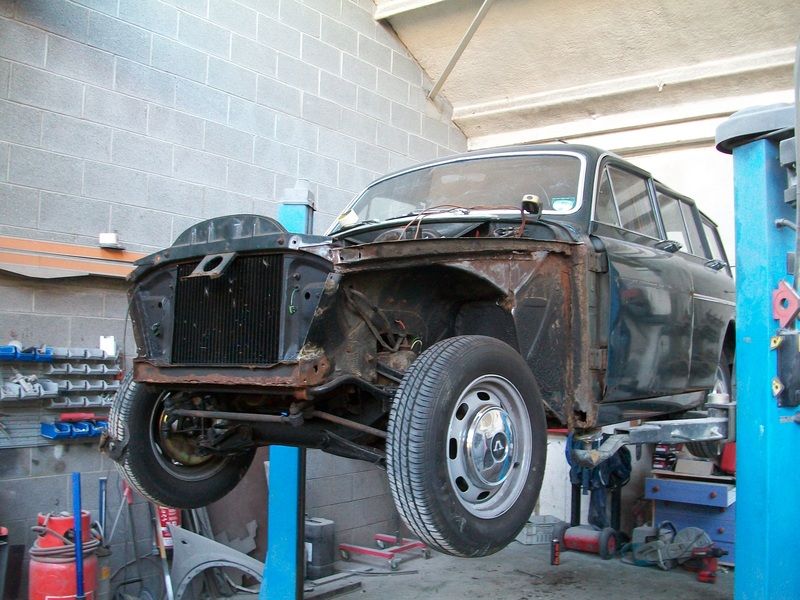 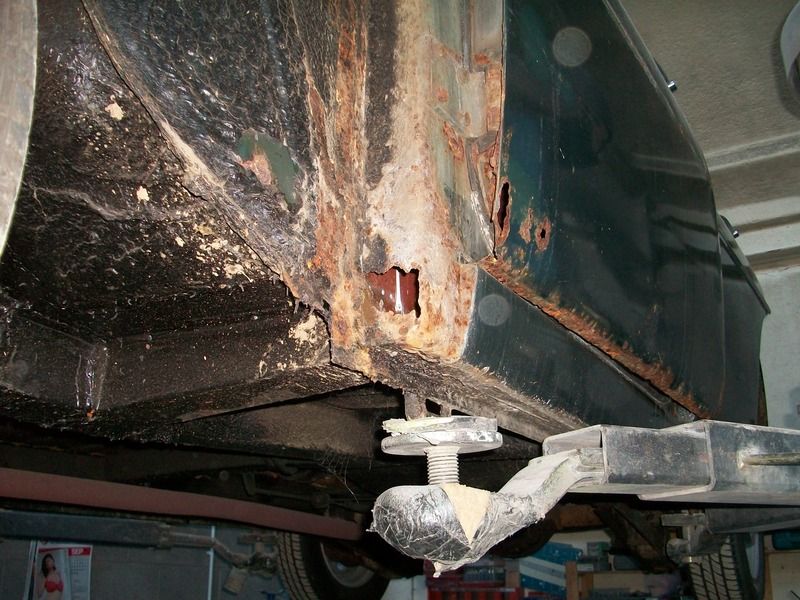 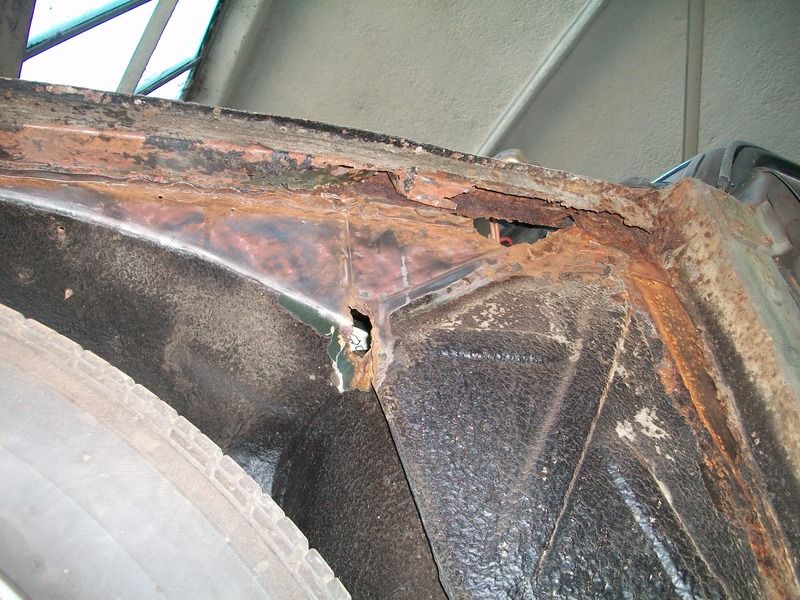 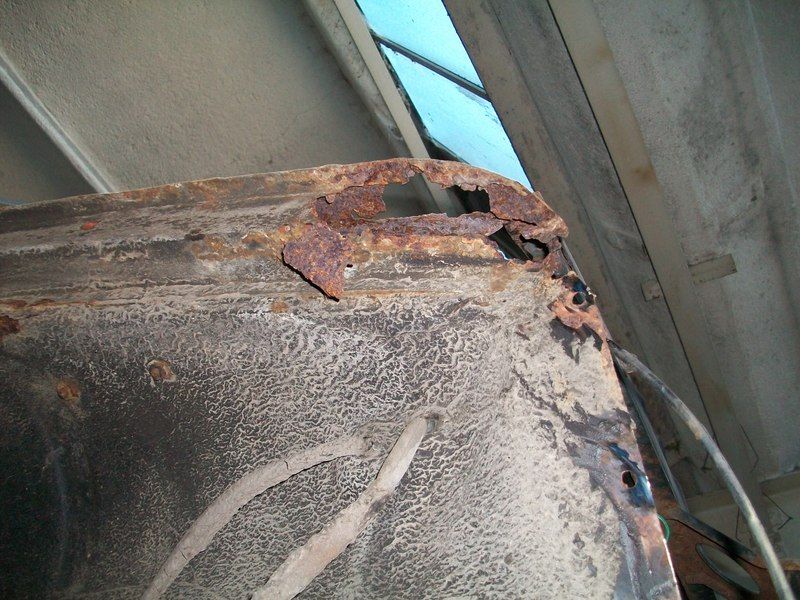 Rear end 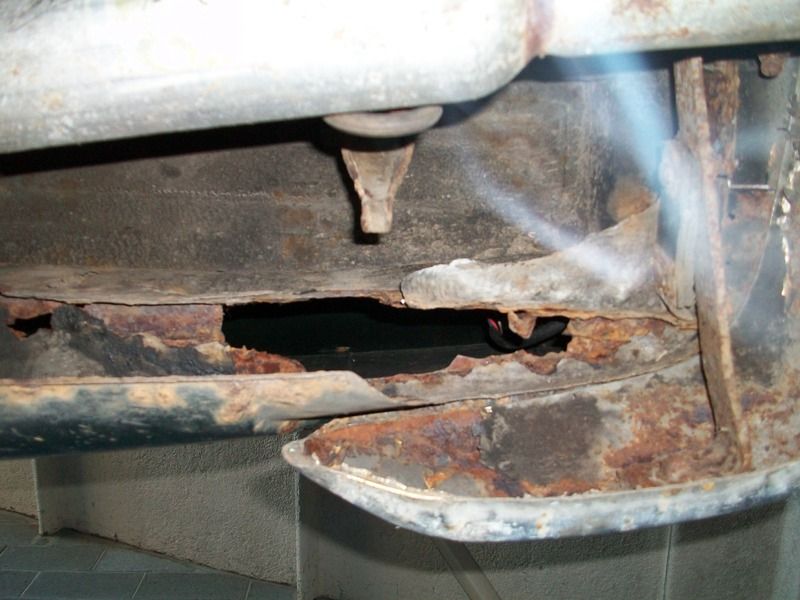 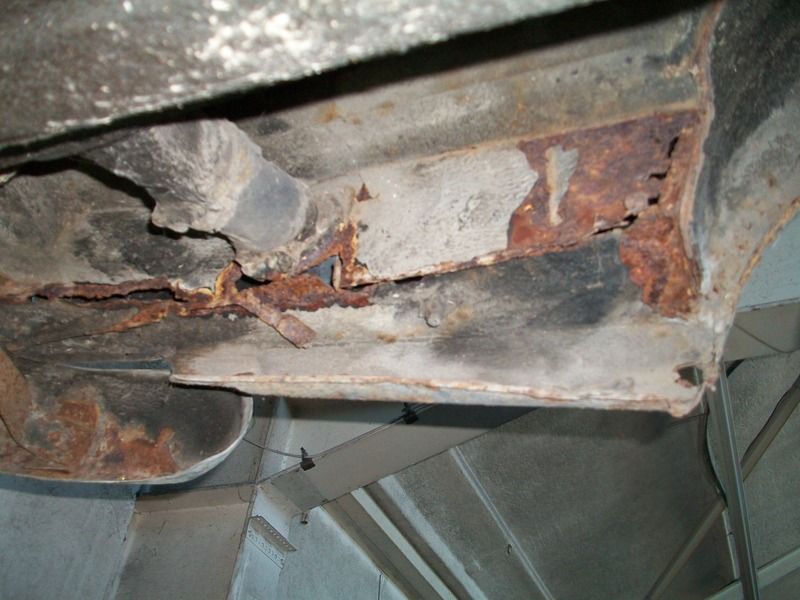 Had noticed the rear side windows where leaking, they didn't stand a chance down there. |
|
|

|
| The Following 8 Users Say Thank You to Palmer 221 For This Useful Post: |
|
|
#2 |
|
Master Member
Last Online: Mar 28th, 2024 14:15
Join Date: Apr 2012
Location: Droitwich
|
That looks horribly familiar - good luck.
|
|
|

|
|
|
#3 |
|
Chief Bodger
Last Online: Today 13:29
Join Date: Oct 2009
Location: Aberdeen
|
Good on you and all the best. They are the coolest car Volvo ever made, :-)
|
|
|

|
| The Following 3 Users Say Thank You to Burdekin For This Useful Post: |
|
|
#4 |
|
Junior Member
Last Online: Apr 23rd, 2018 11:31
Join Date: Sep 2015
Location: stoke on trent
|
palmer 221.... we are starting the same journey... I wanted a perfect example no work... I ended up with an abandoned project, 122. Just set up a facebook page to follow the restoration. hope folks will join as I will need lots of advice . good luck with the project looking forward to follow your prgress
|
|
|

|
|
|
#5 |
|
1800necwinner
Last Online: Apr 15th, 2024 22:26
Join Date: Oct 2008
Location: East Anglia ,Suffolk , uk
|
Hi ya
Go luck with the restro I will follow how you progress through the stages One bit of advice I can give you is take the car off that ramp you will do more damage on them style and two poster ramps they ok for modern cars but NOT classic cars you can twist the chassis and anywhere that's rotten will just give And those jacking points are well known from rotten internally so don't bank on them supporting car just seen it happen so many times even seen a garage put a mgb in air for it crumble within minutes and it was twisted up so bad it had to be jigged the owner was not happy I would imagine so four poster ramps are the way forward that's all I use and would never revert to anything else even with a modern as they can rust just as bad from what I have seen. Good luck and keep us posted Kind regards Robert.w
__________________
 I grew up on classic volvos hence my passion for them born and breed into the lifestyle ! |
|
|

|
| The Following User Says Thank You to 123GT-AMAZON For This Useful Post: |
|
|
#6 |
|
Junior Member
Last Online: Aug 29th, 2018 23:03
Join Date: Sep 2015
Location: North Wales
|
Good advice, and your quite right, I don't like relying on the jacking points.
Thanks for the encouraging words every one. and will of course be posting pictures as things progress. |
|
|

|
| The Following 2 Users Say Thank You to Palmer 221 For This Useful Post: |
|
|
#7 |
|
Senior Member
Last Online: Apr 9th, 2024 10:10
Join Date: Jan 2014
Location: stranraer
|
Good advice from Robert, I cringed when I saw the pics. Those jacking points even when new were only meant to provide short term lift for changing wheels individually. A body with that level of structural corrosion is best elevated on it's wheels or if necessary under front suspension and rear axle for inspection. The risk of damage is reduced a lot once the weight of the engine/gearbox, front and rear suspension have been removed.
|
|
|

|
| The Following 2 Users Say Thank You to Underdrive For This Useful Post: |
|
|
#8 |
|
Master Member
Last Online: Aug 29th, 2016 19:28
Join Date: Oct 2013
Location: Seattle
|
Big project! Do you plan to do your own welding?
|
|
|

|
|
|
#9 |
|
Senior Member
Last Online: Jan 17th, 2024 15:04
Join Date: Dec 2011
Location: Kenilworth
|
Repeating the above posts, just think of the jacking points as brackets to which nothing attaches!
....and that includes jacks!  Good luck with the rebuild. Ric
__________________
Been here longer than I care to remember. Sorry, got to go!! Amazon P122S - 1967 2-dr+B22+Dcam+J OD+HS6+Minilites |
|
|

|
| The Following 3 Users Say Thank You to Carlsson 986 For This Useful Post: |
|
|
#10 |
|
Junior Member
Last Online: Aug 29th, 2018 23:03
Join Date: Sep 2015
Location: North Wales
|
|
|
|

|
| The Following 7 Users Say Thank You to Palmer 221 For This Useful Post: |
 |
| Currently Active Users Viewing This Thread: 1 (0 members and 1 guests) | |
| Thread Tools | |
| Display Modes | |
|
|