
|
|||||||
| XC90 '02'15 General Forum for the P2-platform XC90 model |
 Information
|
|
Rear Tailgate Handle repair - GuideViews : 101992 Replies : 142Users Viewing This Thread : |
 |
|
|
Thread Tools | Display Modes |
 Oct 28th, 2010, 20:07
|
#1 |
|
Master Member

Last Online: Feb 3rd, 2024 18:39
Join Date: Sep 2009
Location: Sunny Scotland
|
Guys
There have been several posts pertaining to sticking rear XC90 tailgate handles, and the associated hassle that causes when locking/unlocking. I have not seen any permanent fixes - infact, the only "fix" has been the suggestion of lubricant, which is also what Mr Volvo seems to do. Anyway - the root cause is a short metal hinge "rod" within the rear handle. This rod rusts away, swells as it does, and as a result gets tight in its mounts. You can confirm this with the tailgate open, looking up into the handle. 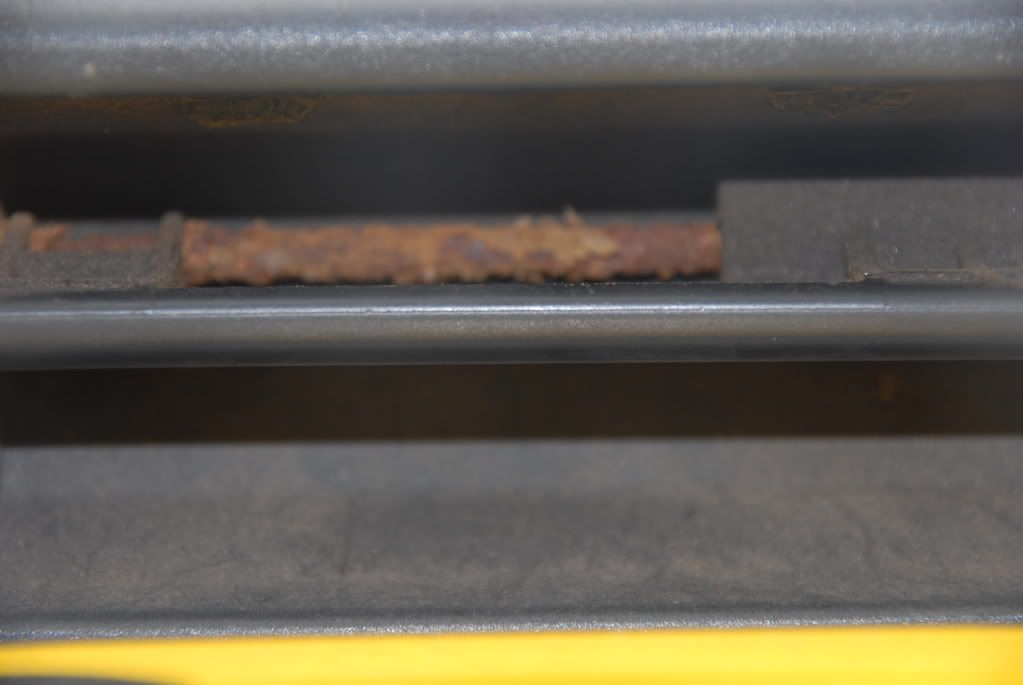 So - this guide presents a permanent fix, that will only cost you about £3-£4 and half an hours time. On a difficulty scale of one to ten, this job is probably a three. Access to the offending hinge requires removal of the rear tailgate trim panels. A full guide to this is within the Volvo instructions for fitting a rear view camera - but wire frame diagrams are not too easy to follow... so.... First, remove the grab handle - this is quick tricky, but is done by inserting a small flat blade sxcredriver in the slots and gently easing the handle out. 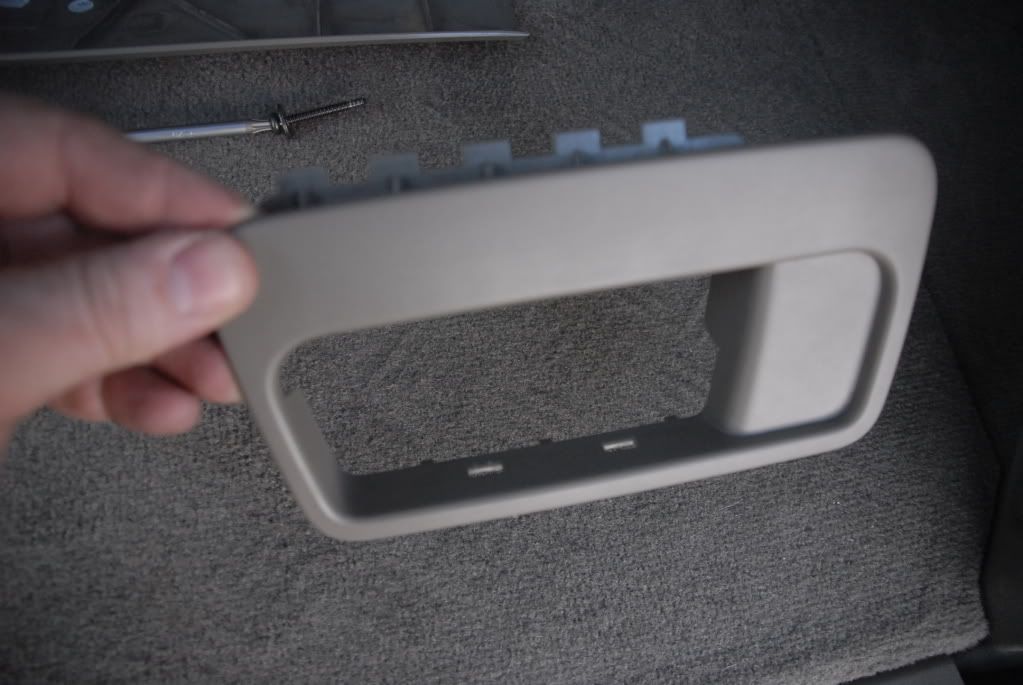 Once out, remove the screw, location shown in the bottom right of this picture. 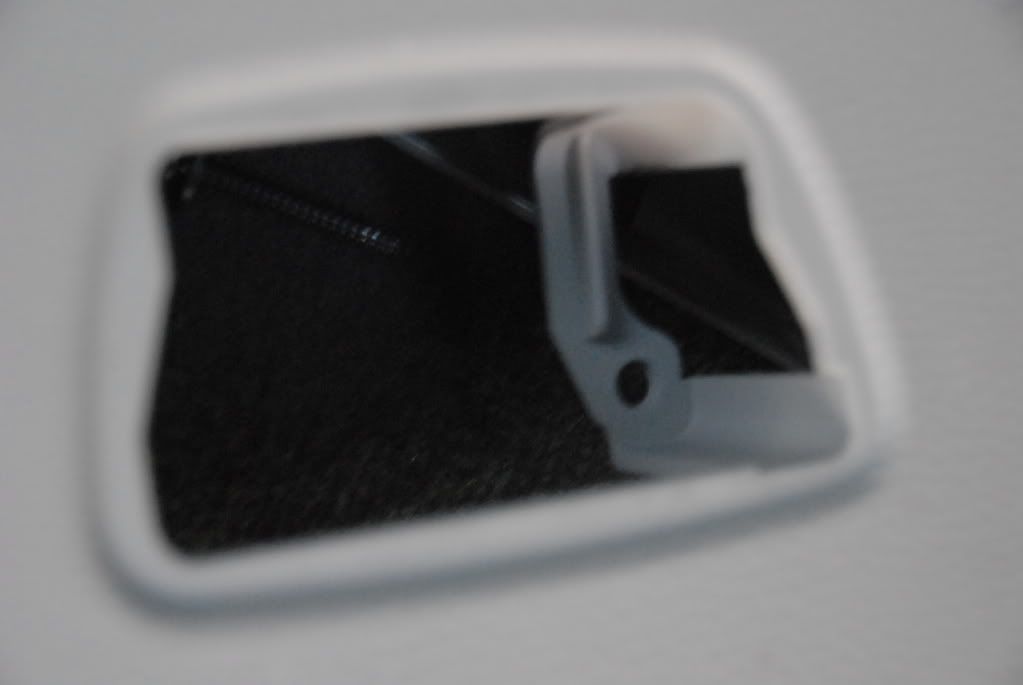 Next, the tailgate lamp. This is prised out carefully - you can see the retaining lugs here, so you know what you are aiming for. 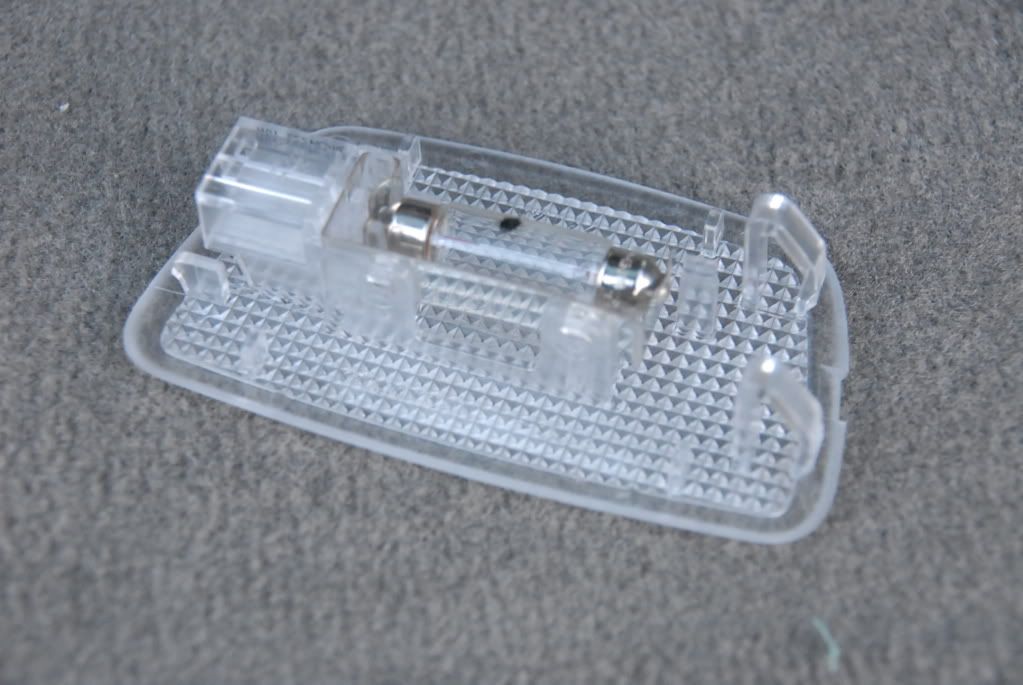 Again - when out, remove the screw... 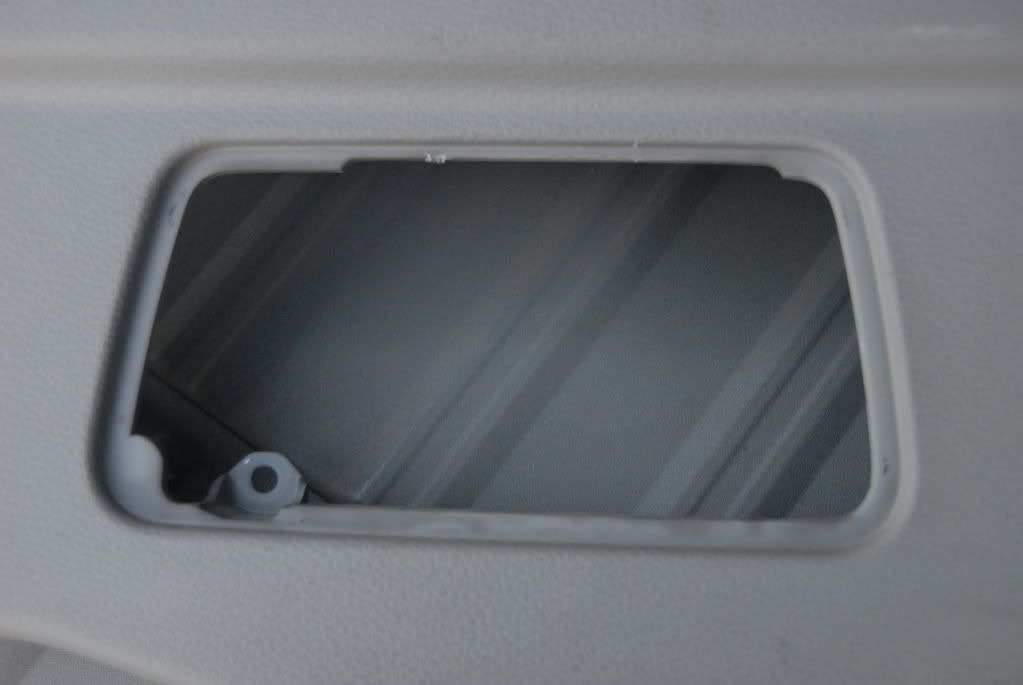 Next, work your way around gently pulling the tailgate trim away from the body... these are the clips that are holding it on.  Now - the lock etc...which, thankfully, you dont need to remove. 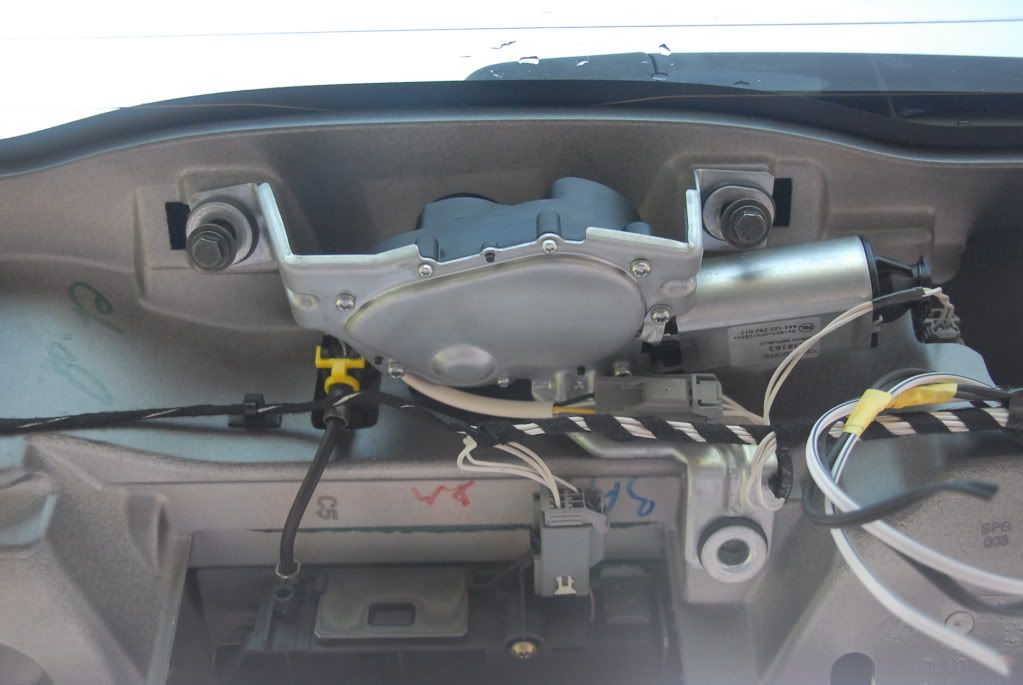 Next - carefully prise the cable from the lock to the tailgate handle out from its clip - this is tricky! Once you have the barrel end of the cable loose, you can unclip the yellow lock and pull the cable end free. This is the worst bit of the job! 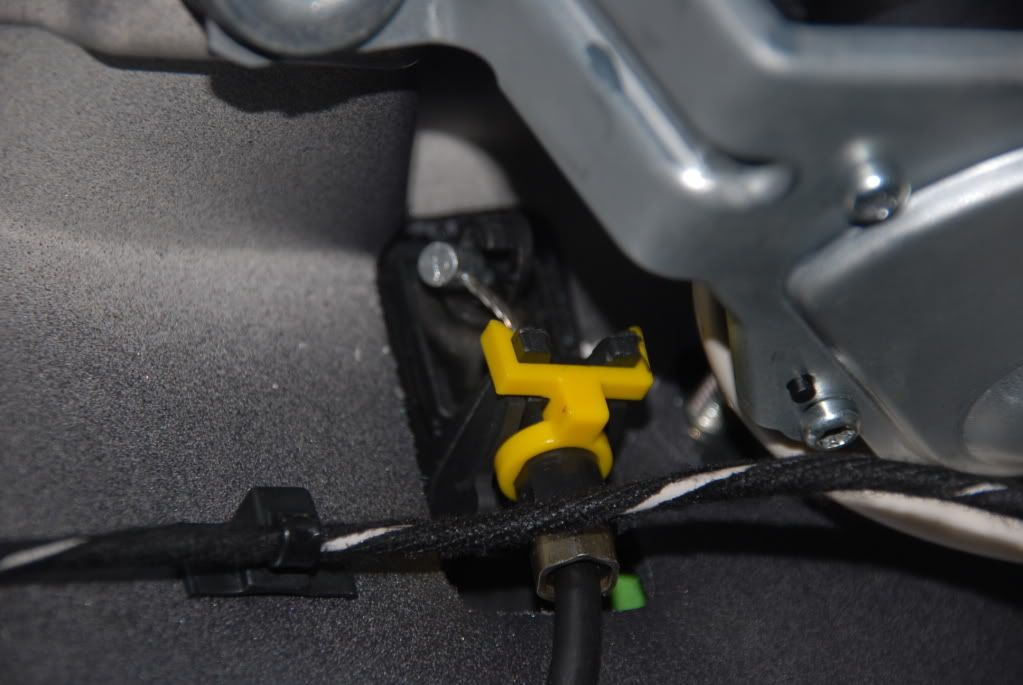 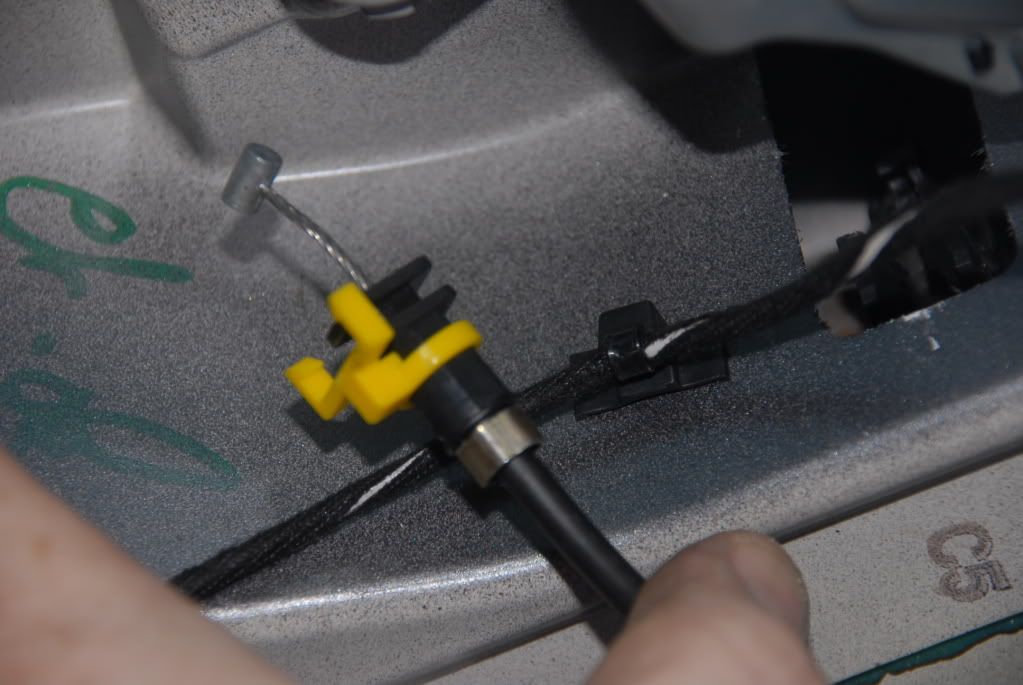 Ritey! - I found that removing the number plate lamps make the final stage easy, so its up to you if you struggle and risk damaging paint, or whip them out - its an easy one screw per side and lever them out.. 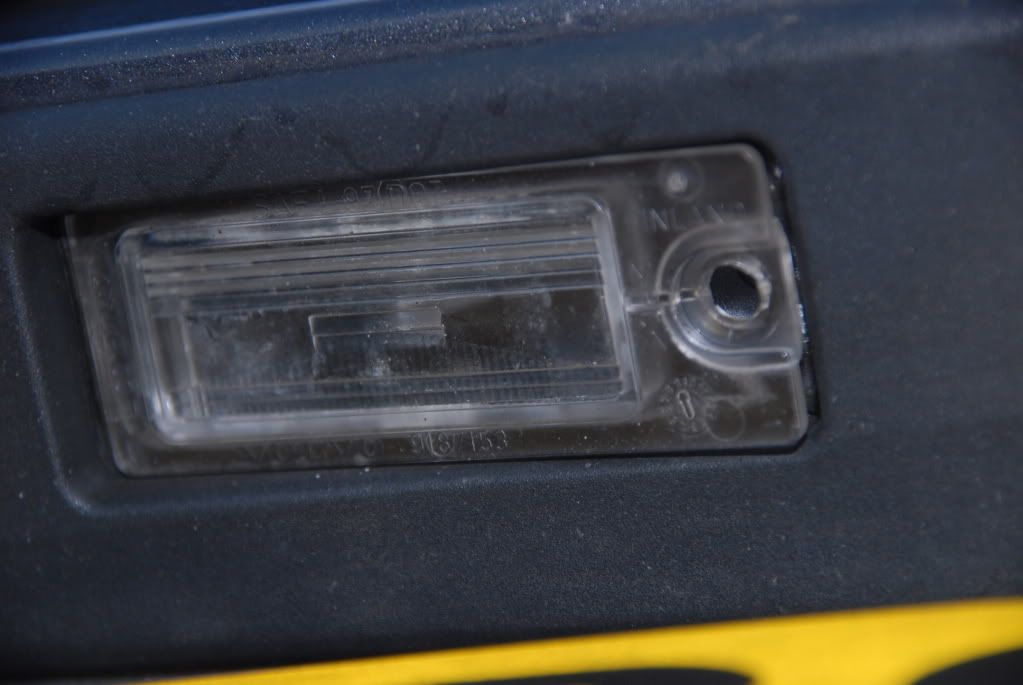 Unplug this connector, which feeds the rear number plate lights... 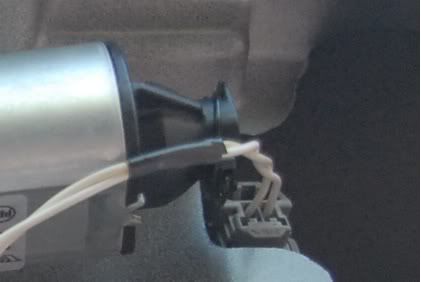 Lastly, remove the 4, 6mm (10mm head) nuts... you will probably need a deep 10mm socket to reach these.. 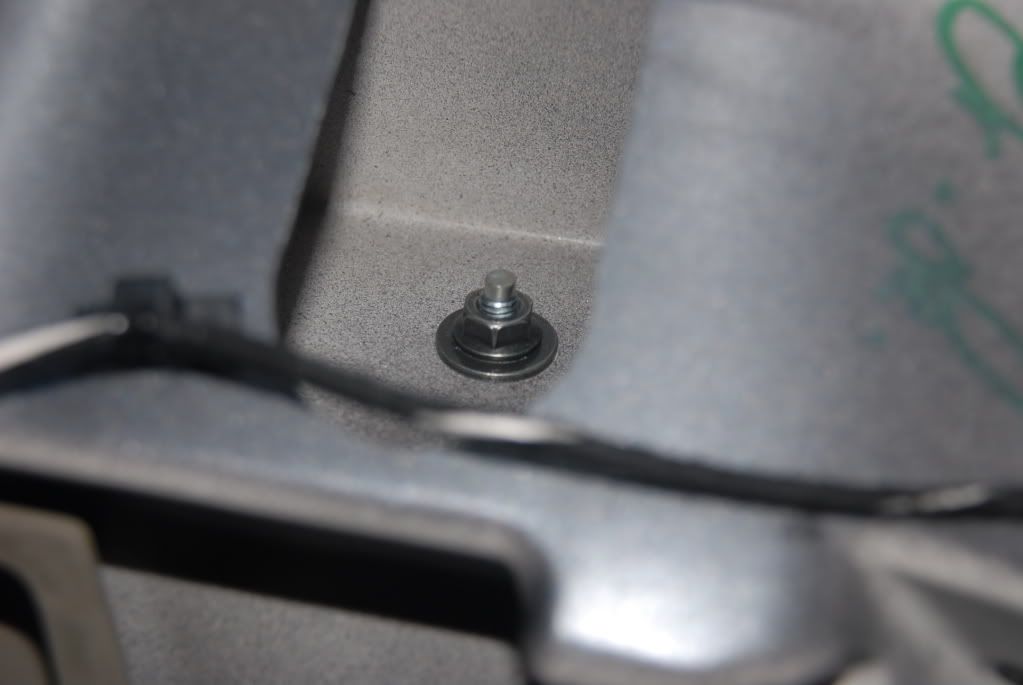 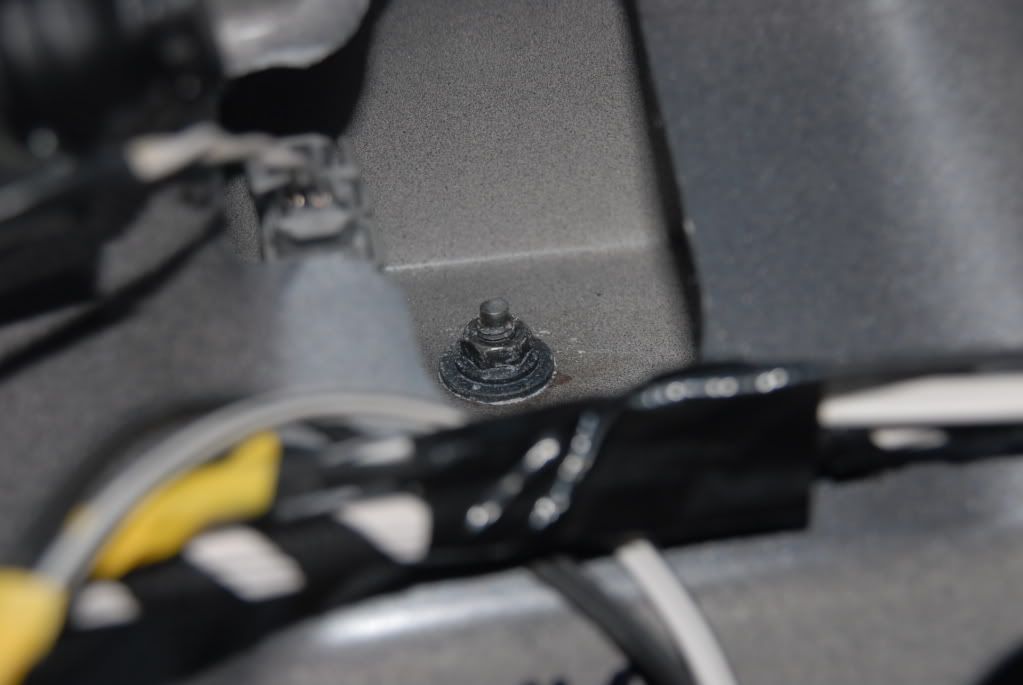 The central two nuts may need loosening of the rear wiper motor to gain access. If you do this, you dont need to remove it, just undo the three mounting bolts....these bolts can be seen in the lock picture above - with one bolt already removed. 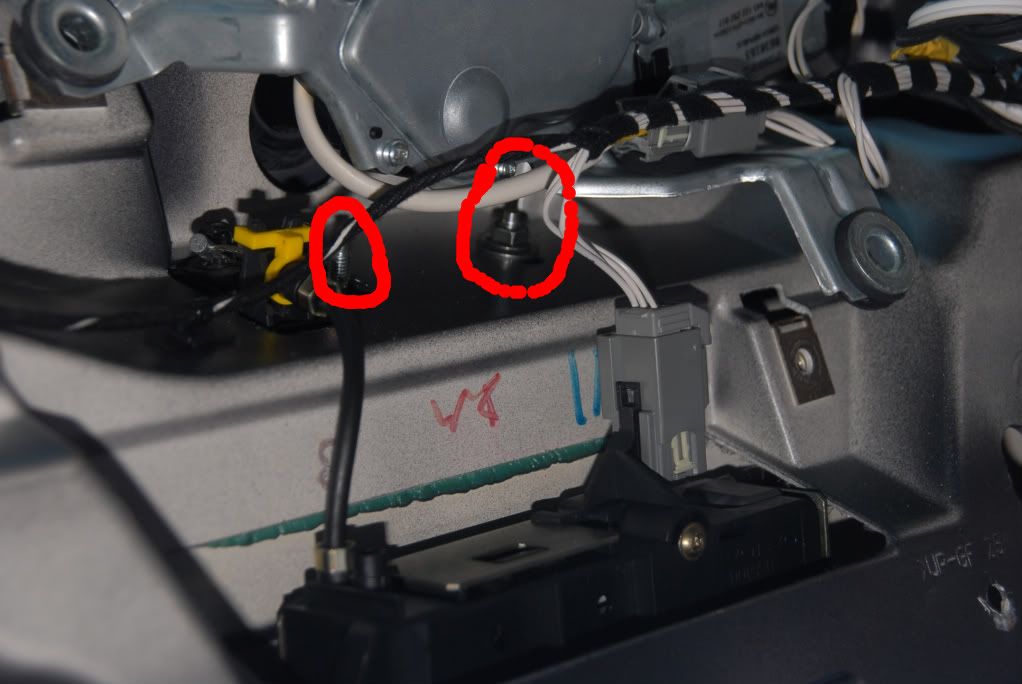 Now, the whole rear handle/finisher can be removed from outside of the car... 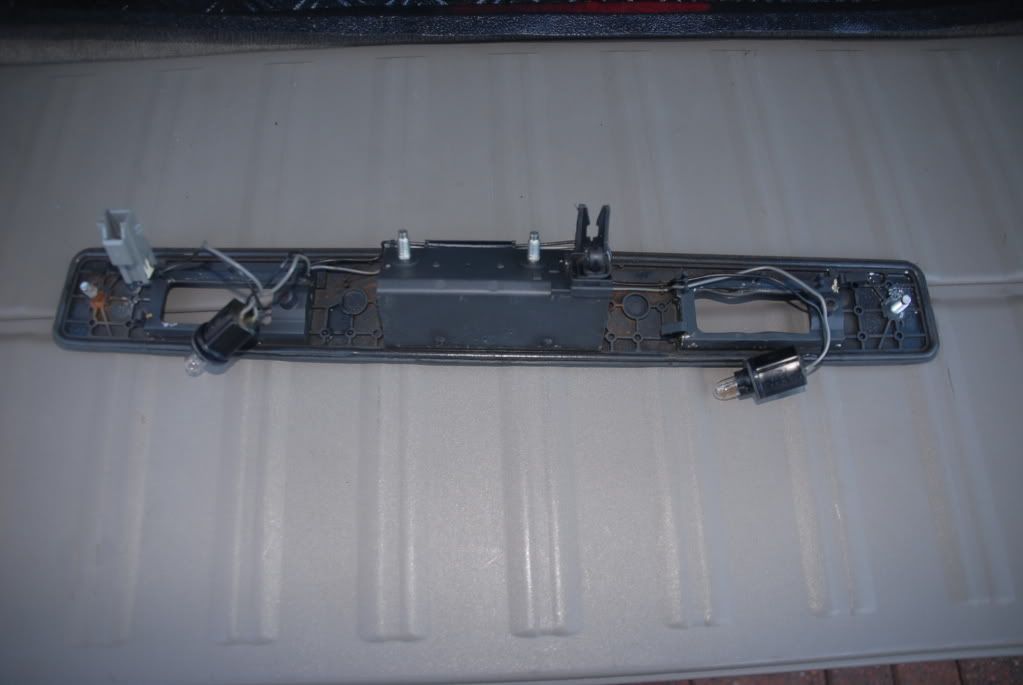 Close inspection shows the problem... here is the pin - from both sides all rusted up... 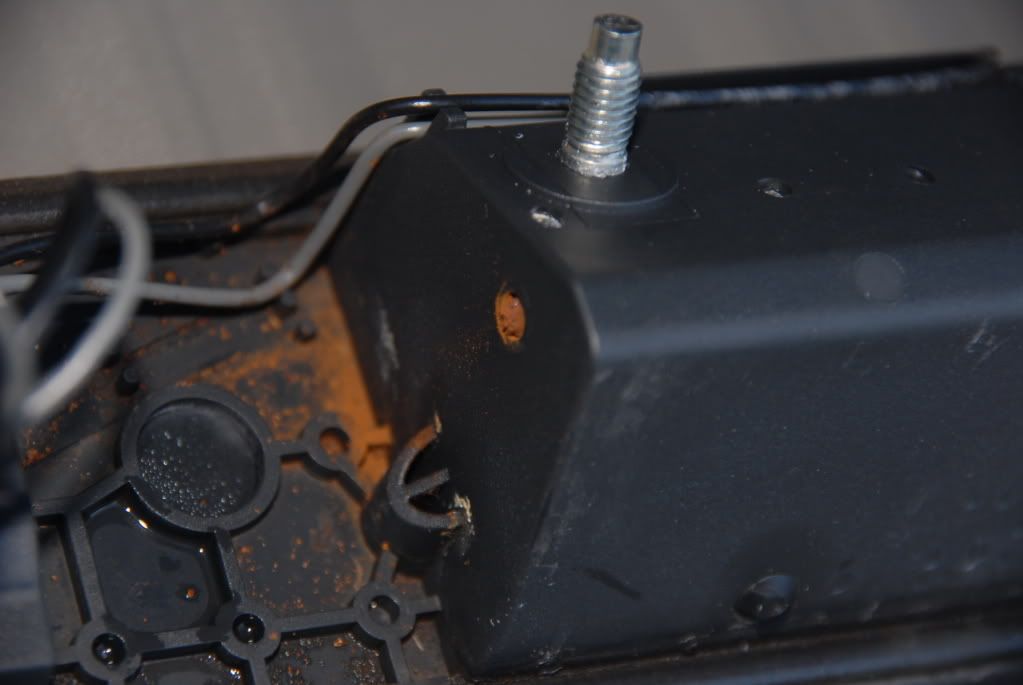 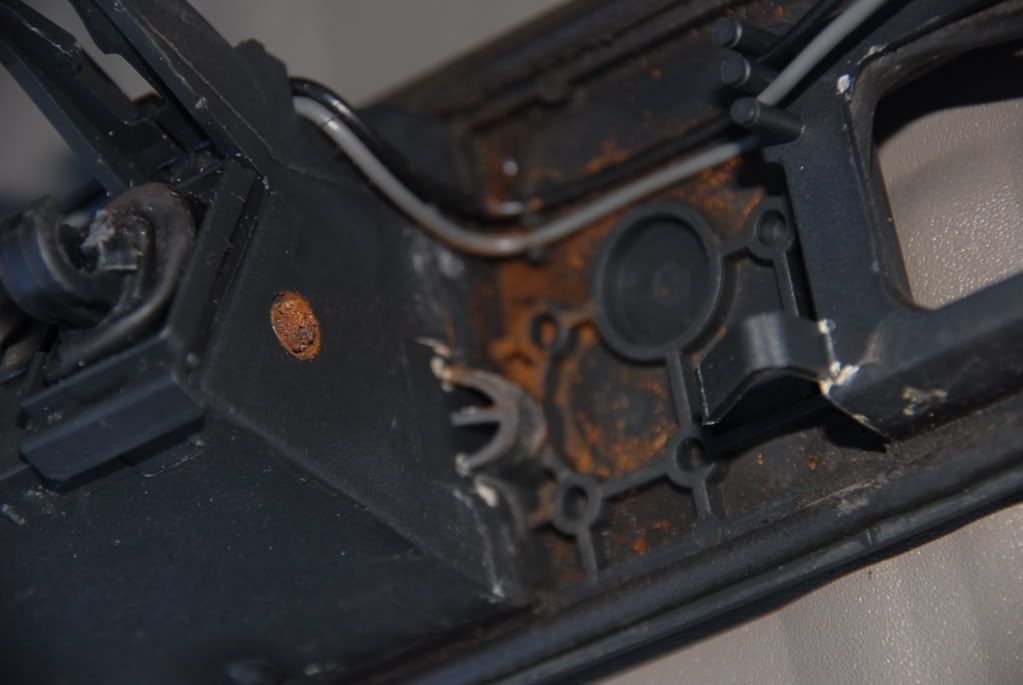 The hinge pin can now be simply drifted out - and looks like this when removed and cleaned up of rust - what a pitted state. It was originally zinc passivated. When you are removing the pin, you can remove the whole handle, but you may have fun refitting the spring inside! I did remove it too and cleaned it up...your call.  So - to ensure this is a permanent fix, I got some 4mm 304 grade stainless steel rod - easily found from any merchants - or even ebay. I would suggest 304 is selected as it offers better corrosion resistance than the more common and cheaper 303 grade... and we all know what the UK salt is like in winter... An alternative would be to use a stainless MMA welding rod... 4mm is a heft but common grade for them! The original rod on mine was 108mm long - and I cut the replacement 5mm longer so there was more of an overhang at each end when fitted. More overhang than this may foul the rear body when refitting. 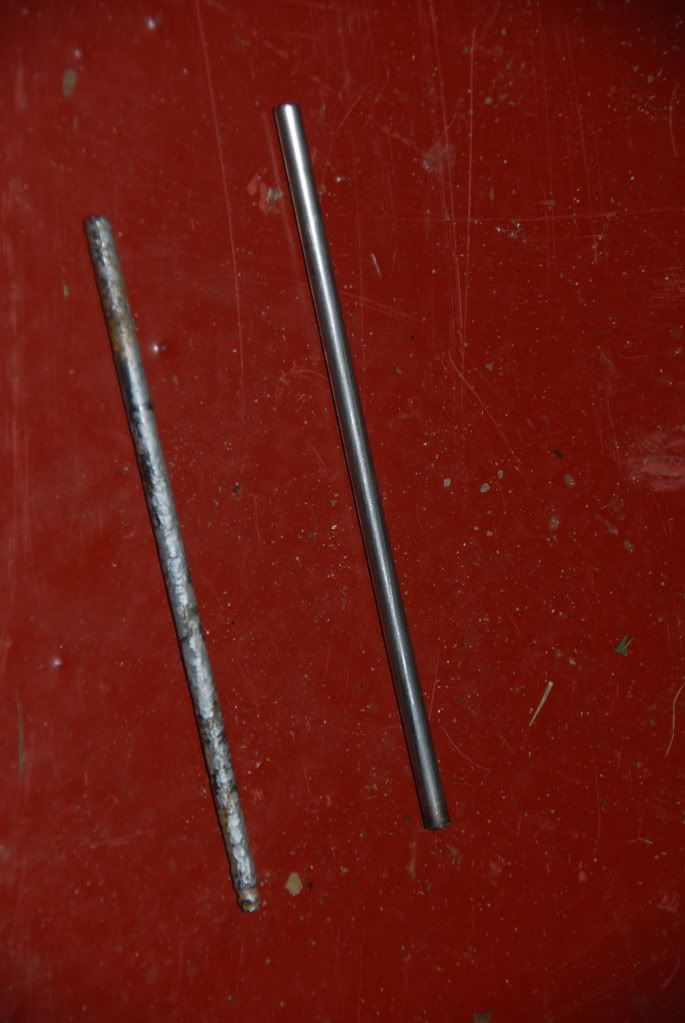 When fitted, you can see the overhang here and compare it to the earlier picture...  And lastly, looking from the same angle as the first rusty shot... 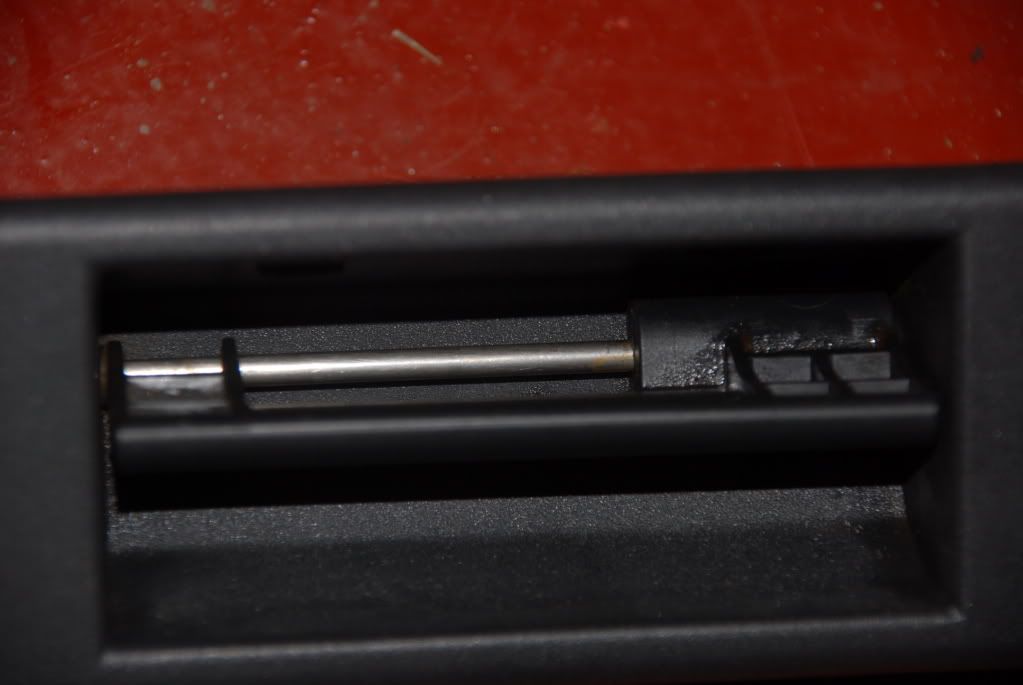 So - job done! Reassembly, is as they say, a reversal of removal... and you dont need pictures for that! Hope that helps someone out.... David |

|

|
| The Following 60 Users Say Thank You to BestGear For This Useful Post: | 400-ascona, andreasb, Arianne, ascender, barbershores, Beavis, bobdabuilda, BoomerFT, bugi666, CARS, Catchpowle, cchidzey, chb, D5Gill, DCO, deeppockets, DG651, DickyB V70R, ericp, Funky Diver, fuzzypicture, Gairdener, galloot633, GenericVolvoDriver, GJB, Harley Dave, ian ferguson, indiebands, jayhl7, Jonboylaw, lordlichfield, lyron, M1chae1, marlonjd, meddler34, miccheck1516, Montymax, Moose Test, mrooke, MuscleFlex, NCS XC90, ofrex, Orangemoon, owenfackrell, Passmark1, poisondart, prjames, Ron_XC90, RoyMacDonald, russya, sasvarit, Shadeyman, siggi757, sumomeister, swetype, trumpetdropper, turbo1, Volvo Ocean Race, xco, YorkshireDave |
|
Oct 28th, 2010, 20:30
|
#2 |
|
Premier Member

Last Online: May 31st, 2022 11:32
Join Date: Nov 2009
Location: south
|
excellent writeup as always bestie! One q- did you break the cable retainer where the cable barrel nub sits as it looks broken in the 2nd pic of the rusty bar side views?
|
|
|
|
|
Oct 28th, 2010, 20:59
|
#3 | |
|
Master Member
Last Online: Feb 3rd, 2024 18:39
Join Date: Sep 2009
Location: Sunny Scotland
|
Quote:
Yes, I did - it was only the very small "tang" that attempts to retain the cable. It was easily held with a very thin cable tie however on re-assembly! David |
|
|
|
|
|
Nov 15th, 2010, 11:35
|
#4 |
|
Member
Last Online: Nov 1st, 2011 18:49
Join Date: Jul 2010
Location: Dumbarton
|
Again, thanks for this guide! I have followed the procedure, and it's easy enough (especially with all these pictures
 ). ). The only thing I found quite difficult, was how to take all these plastic covers without breaking their "catches" or whatever you call it... Managed to do it, but it's quite tricky One additional tip for "dummies" (from another dummy  ) - when you took off the release cable, and you need to go to the shed for another spanner/tool/whatever, don't close the tailgate ) - when you took off the release cable, and you need to go to the shed for another spanner/tool/whatever, don't close the tailgate
|
|
|
|
|
Nov 15th, 2010, 16:54
|
#6 |
|
Master Member
Last Online: Feb 3rd, 2024 18:39
Join Date: Sep 2009
Location: Sunny Scotland
|
Thanks for saying thanks guys - its nice to see these are appreciated - they do take a wee while to write up....and the wife and neighbours wonder what is going on...then roll their eyes....
 The "dont close the tailgate" comment made me smile... that nearly caught me too! David |
|
|
|
| The Following 2 Users Say Thank You to BestGear For This Useful Post: |
|
Nov 23rd, 2010, 23:45
|
#7 |
|
Junior Member
Last Online: Nov 23rd, 2013 22:49
Join Date: Dec 2006
Location: Reykjavik
|
Great instructions. Thanks for taking the time to do this.
An annoying problem that I look forward to fix. Cheers |
|
|
|
|
Nov 24th, 2010, 06:02
|
#8 | |
|
Junior Member
Last Online: Feb 21st, 2014 21:10
Join Date: Oct 2010
Location: Prague
|
Quote:
|
|
|
|
|
|
Dec 12th, 2010, 16:46
|
#9 |
|
Junior Member
Last Online: Feb 7th, 2013 09:24
Join Date: Oct 2010
Location: london
|
hi i just found the 4mm 304 grade stainless steel rod on eBay Item number: 160508359661 all in £5 i will do my one of Xmas
|
|
|
|
|
| Tags |
| handle, stainless, sticking, tailgate, xc90 |
| Currently Active Users Viewing This Thread: 1 (0 members and 1 guests) | |
| Thread Tools | |
| Display Modes | |
|
|


 Linear Mode

