
|
|||||||
| 850 / S70 & V70 '96-'99 / C70 '97-'05 General Forum for the 850 and P80-platform 70-series models |
 Information
|
|
New pride & joyViews : 75937 Replies : 301Users Viewing This Thread : |
 |
|
|
Thread Tools | Display Modes |
 Jan 30th, 2011, 10:33
|
#31 | |
|
Premier Member
Last Online: Yesterday 22:34
Join Date: Jan 2011
Location: Horne (Nr. Horley)
|
Quote:
You're a top man! Cheers 
__________________
Some people are like Slinkies, they serve no useful purpose but they still bring a smile to your face when you push them downstairs. |
|

|

|
|
Feb 2nd, 2011, 18:55
|
#32 |
|
Premier Member
Last Online: Yesterday 22:34
Join Date: Jan 2011
Location: Horne (Nr. Horley)
|
OK, an update: I had the day off work today, so spent it playing with the Volvo - what better!
First off, as mentioned earlier the exhaust has broken off where it enters the centre box. Taking both parts out was quite easy once the car was jacked up, as it's broken in two. I cleaned up the broken joint with a wire brush in a drill and this is what I was faced with: 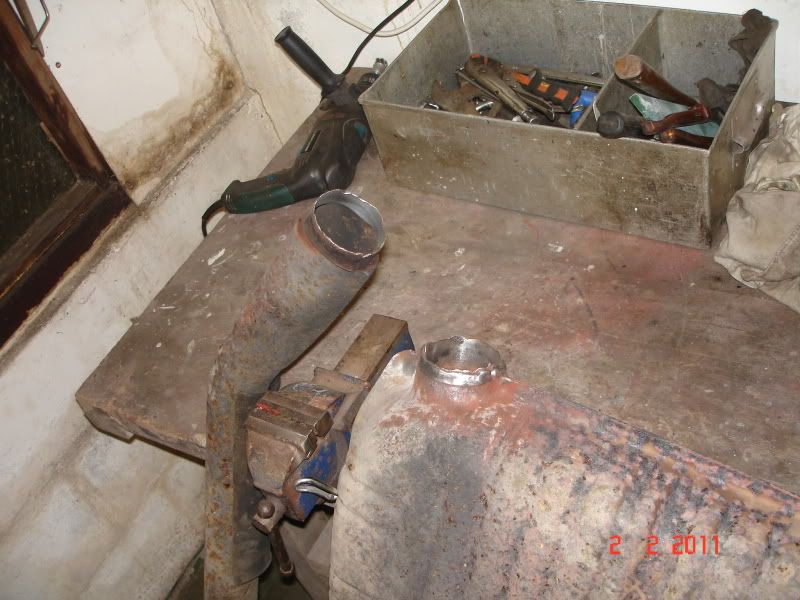 So, after much heaving and pushing, I managed to wedge both parts together on the bench in what seemed close to the right position, and welded them together. Not the prettiest weld I've ever done, but believe me it's strong! 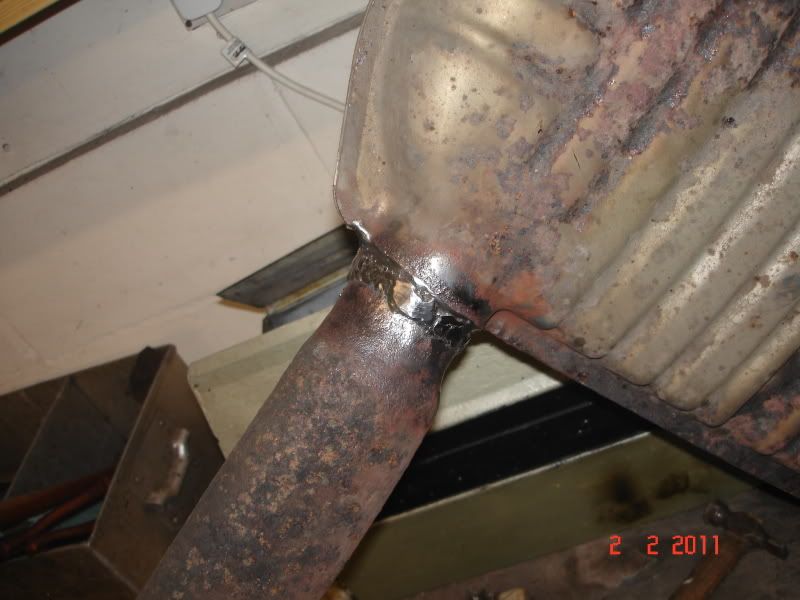 Gave it a quick coat of high temperature manifold paint to keep the worst of the tin worm at bay: 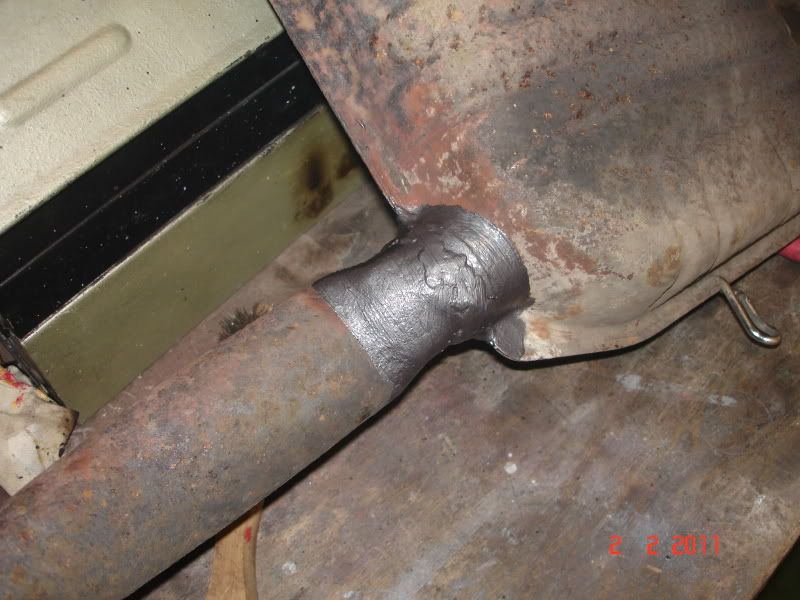 I also took the opportunity to polish up the tailpipe trim while it was out - took quite a bit of polishing with a big polishing wheel on a drill, but came up OK: 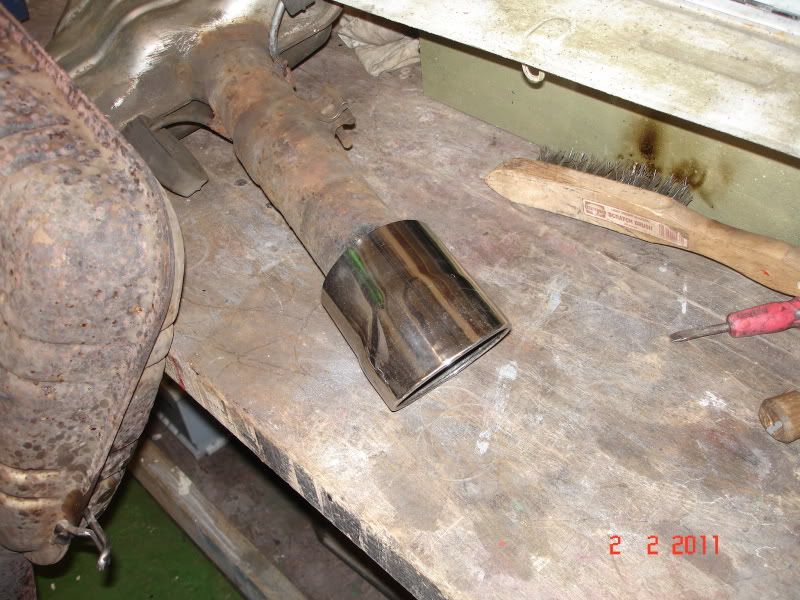 Then tried to fit it back into the car. Well..... it's about 15 feet long and weighs half a ton, and there was no way on God's sweet earth that it was going to go back in without dropping half the rear suspension. It's just possible that it would go in if I had it right up in the air on a ramp, but in my garage it's simply too dangerous to hoist the car that high, so I decided to introduce an additional joint in the system. I cut it in between the centre box and the rear box, and welded a galvanised steel sleeve to it with a slit down one side: 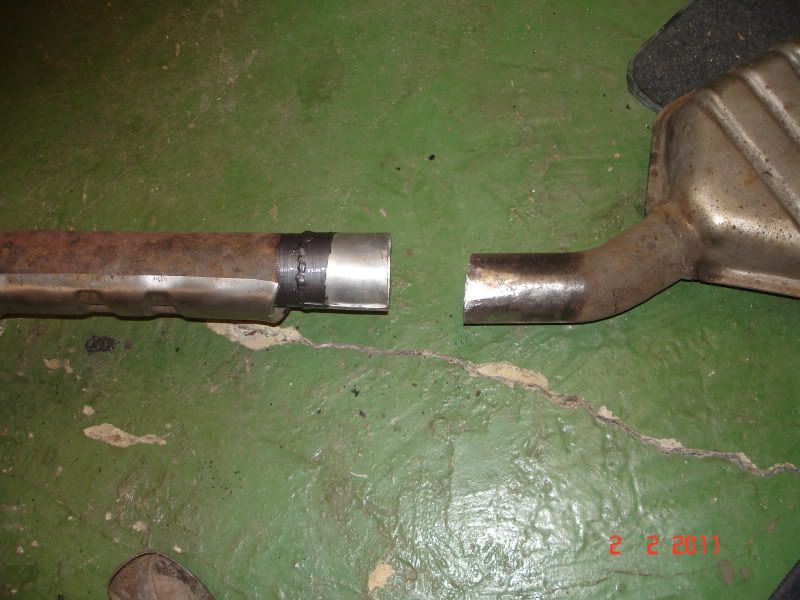 As you can see, also with some HT manifold paint to keep it neat. I found that one of the centre box rubbers was knackered, and I needed a clamp to hold the new joint together, so I popped out and got those (thanks Camberley Auto Factors and Unipart!) and then proceeded to fit it all back in. With the new joint it was a doddle, hung the centre box on its new rubbers first, then slid the back section into my new "custom" joint, hung that on its rubbers, added a wipe of exhaust paste on the joints and did them all up tight and all done! And it all lined up perfectly thank goodness, my welding must have been pretty accurate. Here is the new joint all installed: 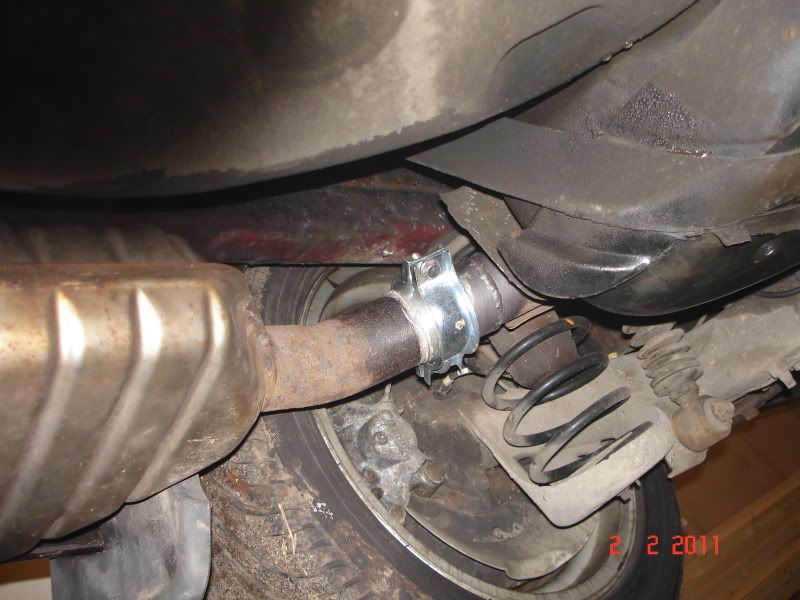 While the rear of the car was up in the air I also changed the fuel filter preparatory to the full service I'm planning. I've mentioned previously that I also have a very soft spongy brake pedal, so I was planning to do a full brake service and fluid change/bleed. Well while the rear was in the air I had time to pull the rear brakes apart and bleed some new fluid through - I used my Gunson Eezi-bleed which worked just fine. The rear brakes were in fairly good nick as they had new calipers, pads and shoes less than a year ago (allegedly) but I cleaned them up and re-assembled with coppaslip anyway. Started the car up, and it runs quiet and smooth, and already the pedal seems a good bit firmer - I suspect they weren't bled properly before. I'm expecting even more improvements when I do the fronts, I have new pads for them too. So - progress! I want to finish the front brakes next, then get on with the rest of the full service. I'll be glad when this is done, as I hate exhausts and brakes - filthy jobs! Cheers all
__________________
Some people are like Slinkies, they serve no useful purpose but they still bring a smile to your face when you push them downstairs. |
|
|
|
| The Following 6 Users Say Thank You to Luxobarge For This Useful Post: |
|
Feb 2nd, 2011, 19:11
|
#33 |
|
VOC Member 23660

|
Thats what i like to see Luxobarge,real hands on stuff,your weldings ok,as good as mine is anyway
 .A real good right up,and has given members loads of good ideas,thanks. .A real good right up,and has given members loads of good ideas,thanks.
__________________
 Old Works Motor. Old Works Motor.Malcolm and my Wheels, 1998 V70 2.5 20 Valve Auto Classic,Unmodified. |
|
|
|
| The Following 2 Users Say Thank You to Toplights For This Useful Post: |
|
Feb 2nd, 2011, 21:30
|
#34 |
|
Ovlovnut

|
Hi Luxo'B
Great stuff, wishing I knew how to weld! My 850's exhaust is very rusty & I'm told the 'throatyness' from it is due to the baffles in the silencer collapsing. Not an MOT issue I understand. I've been wondering about wire brushing & painting it if it goe's through the next 'Contrôle' in March. Would be interested to know the details of the HT manifold paint if poss'? I replaced the pipe on 'Tank' (my 240) & found it not too bad a job. I understand on 800's the fitters take around 2 hrs, & as you say it is a heavy item, so maybe not really a home fit job on ramps? I just know having one fitted here is going to be close on 1/2 of the price I paid for the car lol. Thanks for the great thread, I & others are enjoying it 'big time'
__________________
2004 V70 2.4SE Auto 'The Welshmobile 2002 Laika Ecovip 400i ( Motorhome on an Iveco 2.8TD) http://www.gitessouthbrittany.com/ http://moncopainmonchien.jimdo.com/ |
|
|
|
|
Feb 2nd, 2011, 21:52
|
#35 | |
|
Premier Member
Last Online: Yesterday 22:34
Join Date: Jan 2011
Location: Horne (Nr. Horley)
|
Quote:
It's POR 15 "Factory Manifold Gray" - from our friends at www.frost.co.uk 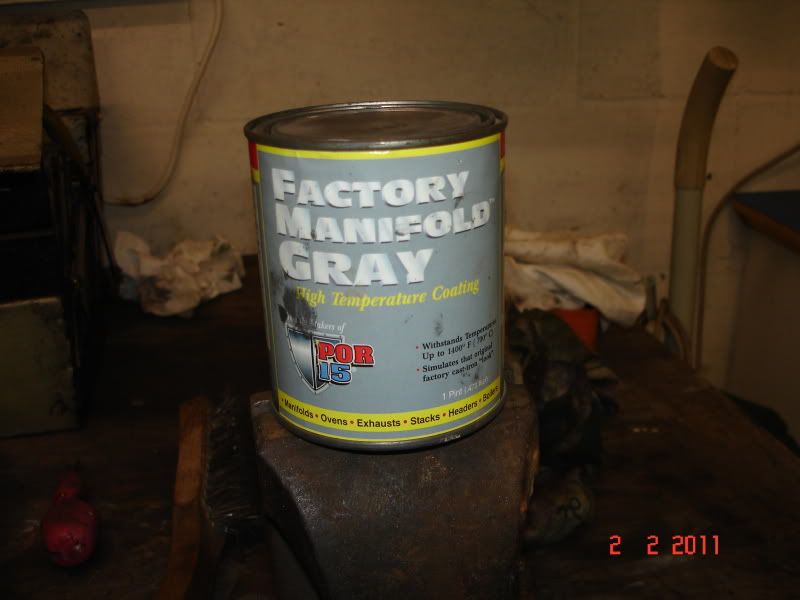 It takes a while to dry, and needs to be heat-cycled to cure properly. I did the first stage of this by running a hot-air gun through the exhaust while I was doing other things, seemed to work. Glad you're enjoying the "blog" - I enjoy doing it! Cheers
__________________
Some people are like Slinkies, they serve no useful purpose but they still bring a smile to your face when you push them downstairs. |
|
|
|
|
| The Following User Says Thank You to Luxobarge For This Useful Post: |
|
Feb 2nd, 2011, 23:07
|
#36 |
|
Member
Last Online: Mar 19th, 2022 22:14
Join Date: Jun 2010
Location: dorset
|
Nice looking car.....

|
|
|
|
|
Feb 3rd, 2011, 13:09
|
#37 |
|
Premier Member
Last Online: Yesterday 22:34
Join Date: Jan 2011
Location: Horne (Nr. Horley)
|
Update:
A bit more tinkering today, driving it around a little tells me that the brake pedal is now firm and about where it should be - that shows that bleeding/flushing the rear brakes yesterday cured it. I reckon they weren't properly bled when the calipers were changed last year by the PO. I still have the front brakes to service/flush/bleed too, so I'm expecting it to get even better when I've done that. Also - my "Draper Expert" service light reset tool arrived today - followed the instructions and it worked first time - no more service light! Happy days. Edit: Even happier days - the PO has just phoned me to say he's found the service book and one of the remote control plippers, he's local so he will drop it in at some point. Top man! More tinkering this afternoon hopefully....
__________________
Some people are like Slinkies, they serve no useful purpose but they still bring a smile to your face when you push them downstairs. Last edited by Luxobarge; Feb 3rd, 2011 at 13:38. |
|
|
|
|
Feb 3rd, 2011, 15:03
|
#38 |
|
Ovlovnut
|
Another request from me! If I may. I shall be replacing my 850's front discs & pads. Done the rears & all 4 on my 240.
Got my 7mm alun key ready, but a few pics of yours would help me tremendously. I've not yet tackled the style of front callipers on 850's. Thanks.
__________________
2004 V70 2.4SE Auto 'The Welshmobile 2002 Laika Ecovip 400i ( Motorhome on an Iveco 2.8TD) http://www.gitessouthbrittany.com/ http://moncopainmonchien.jimdo.com/ |
|
|
|
|
Feb 3rd, 2011, 19:54
|
#39 | |
|
Premier Member
Last Online: Yesterday 22:34
Join Date: Jan 2011
Location: Horne (Nr. Horley)
|
Quote:
OK, these brakes are the same design as found on loads of different makes, for example they are the same as on my Jaguar! They're pretty easy to work on. Sadly I didn't see your request until after I'd done the job, so I've got you two "after" pictures only. This is a picture of the ourside of the caliper: 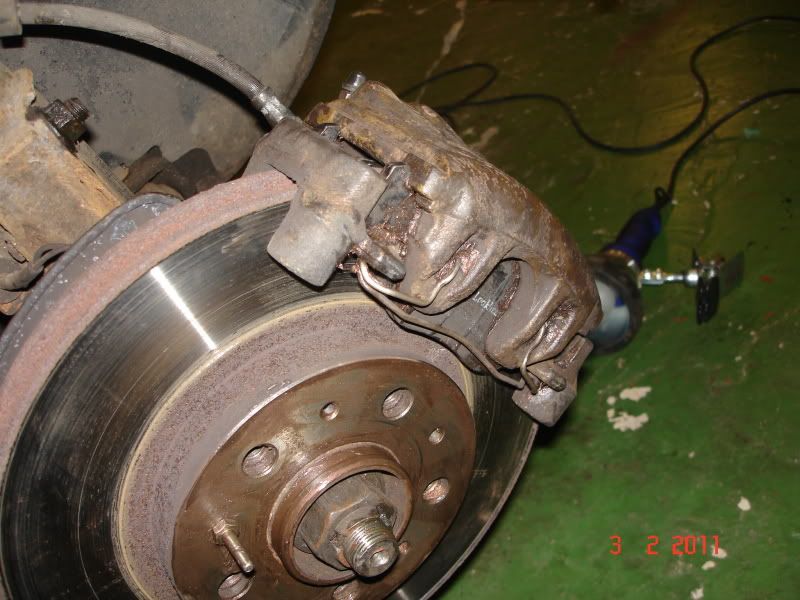 The wire anti-squeal spring just pings off with a screwdriver. Here is a picture of the back of the caliper: 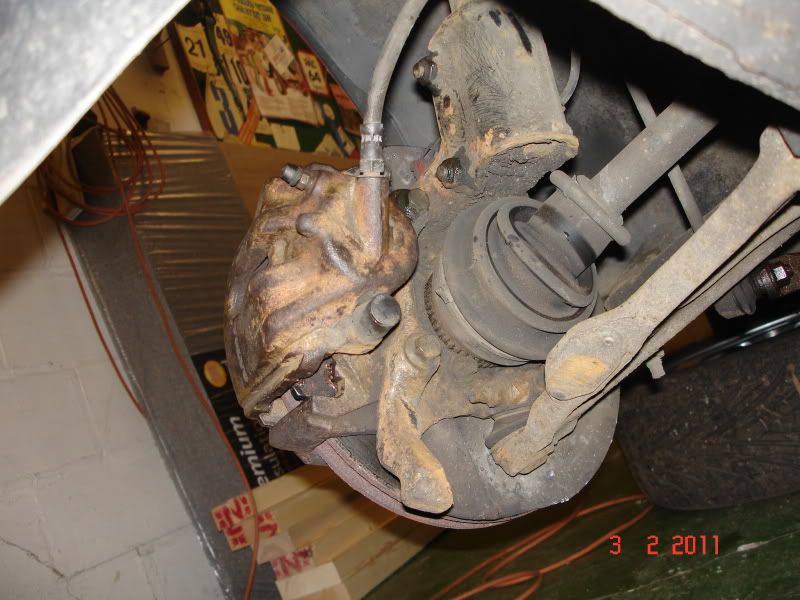 You see at the back near the bottom there is a black cylinder thing, about 1/2" diameter - there's another one hiding behind the flexi-hose union, the ends are covered by plastic grommets, flick these off and inside are the stainless steel guide pins. These need a 7mm allen key to undo, use a good quality one as I've always foudn they need a whack with a heavy hammer to get them moving. When undone, fish them out with a screwdriver and clean them thoroughly - cover them in copper slip when re-assembling. Then "twist" or "rock" the caliper slightly to move the pads back into the calipers a little to give you clearance to withdraw the caliper. Remove the pads and hang the caliper on a hook from the road spring - NEVER let it dangle by the flexi-hose (badger). Clean up the caliper and caliper carrier, I always pay special attention to the little surfaces where the pads locate on the carrier and caliper, to make sure they will move freely, and these are the areas that most need copper slip when re-assembling. If you're changing disks, then the caliper carrier will have to come off too, this is held in by two bolts (can't remember the size, about 17mm?) and again use a good quality spanner as this will also need a whack with a manchester spanner to get them off. Re-assembly is the reverse of the above, as it says in HBL!! - Talking of which, this is amply covered in the manual. It's an easy job provided you've got decent tools, but sure is messy - I use latex gloves and still get covered in muck. Hope that helps!
__________________
Some people are like Slinkies, they serve no useful purpose but they still bring a smile to your face when you push them downstairs. |
|
|
|
|
| The Following User Says Thank You to Luxobarge For This Useful Post: |
|
Feb 3rd, 2011, 20:07
|
#40 |
|
Premier Member
Last Online: Yesterday 22:34
Join Date: Jan 2011
Location: Horne (Nr. Horley)
|
More tinkering this afternoon:
Last week I'd stripped out the floor carpeting from the boot and washed and scrubbed it in the bath - it was filthy with some vile stains, but it's come up all right. I fitted it this afternoon - pretty happy with that:  I finished bleeding and flushing the front brakes, and did a strip down and re-fit of them too - the pedal feel is brilliant now, so that's that sorted! See post above for details.... I also decided to change the anti-roll bar drop links as there was a distinct rattle from the front when going along a bumpy road slowly. 15mm spanner required, again it needed a whack with a manchester spanner to get the nut moving, but then it just moves the whole bolt around in the hole, so it needs a 16mm open-ended spanner slid in between the rubber and the ARB where there are some flats to hold it still. Here's the top one with both spanners being used: 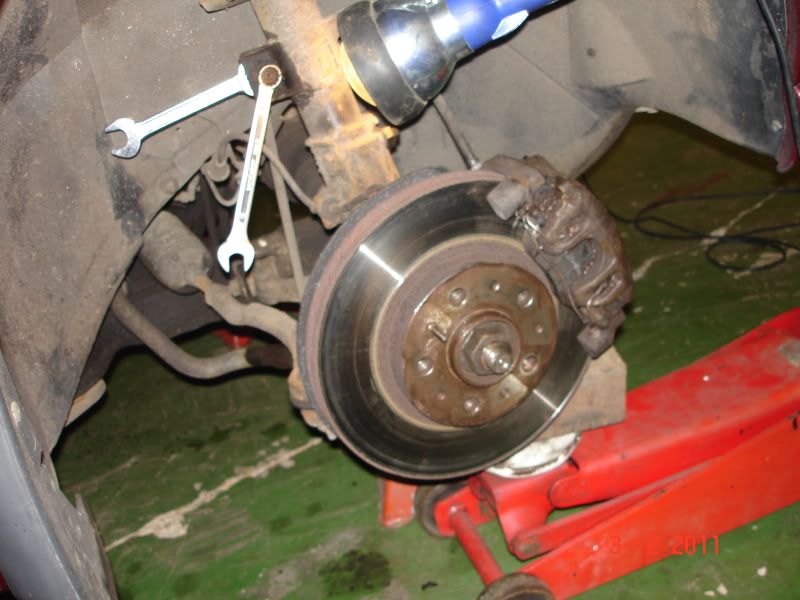 Note the use of the trolley jack, to raise the suspension just enough to take the tension off the ARB so that the links come out easily - even more important for fitting the new ones! Popped the new ones in, these needed a 5mm allen key to hold them still while tightening instead of the flats behind the rubber, but it worked fine. Here they are all nice and new: 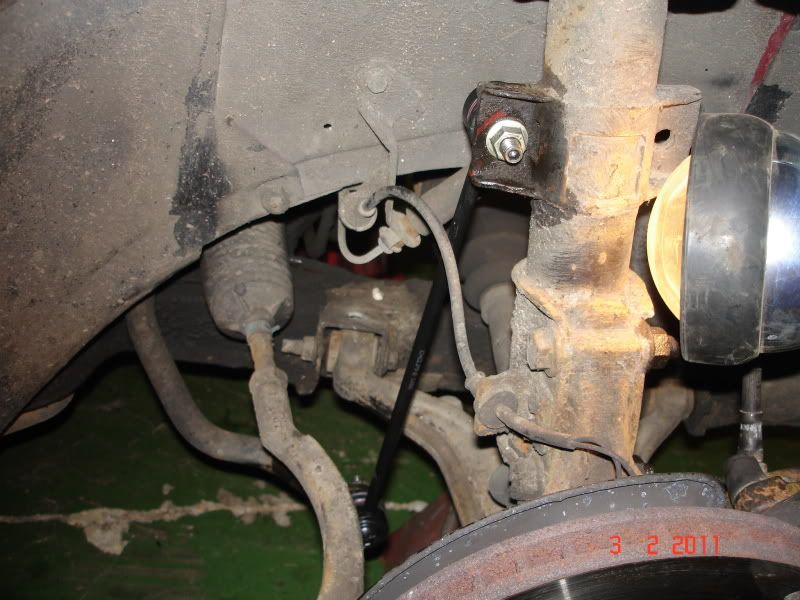 The N/S one was pretty well knackered, so I reckon my diagnosis was about right - we'll see when it's back on the road again. I have the same job to do on my Saab 9-3 too, hope it's as easy! Final job today (no pics) was to secure the two front mudflaps which were doing more "flapping" than they are supposed to. I took out the huge pop rivets that someone has bodged them with in the past, and used proper plastic expanding fixers in the holes, squirting a bit of waxoyle behind them first for good measure. Now nice and solid and one more thing that won't rattle! There was a missing fixing on the plastic inner arch too, which was rattling, so I replaced that as well. Happy days! - next job is the oil change, plugs, dizzy cap/rotor, airfilter etc. More anon. Cheers!
__________________
Some people are like Slinkies, they serve no useful purpose but they still bring a smile to your face when you push them downstairs. |
|
|
|
| The Following 2 Users Say Thank You to Luxobarge For This Useful Post: |
|
| Currently Active Users Viewing This Thread: 1 (0 members and 1 guests) | |
|
|


 Linear Mode

