
|
|||||||
| x40 S1 Articles Article posts pertaining to x40 S1 Articles series Volvos |
 Information
|
|
Guide: Retro-fitting heated seatsViews : 24865 Replies : 17Users Viewing This Thread : |
 |
|
|
Thread Tools | Display Modes |
 Oct 30th, 2010, 00:28
|
#1 |
|
VOC Member

Last Online: Apr 4th, 2023 18:13
Join Date: Apr 2010
Location: Oxford
|
This has been done before, and I am indebted to (former?) member Toblerone for the guide here, without which I could never have contemplated this wonderful upgrade.
This new guide is just an attempt to make the job seem a bit less scary, by adding a few details and some photos. It's really a great deal easier than I expected it to be. Suggestions that you can ruin your upholstery trying to do this are definitely wide of the mark unless you are really very reckless and clumsy to boot. My car is a 1997 Phase 1 model. I assume that most things would be the same on a more recent car; the most important thing to note might be that the P2 seat-removal/airbag procedure may be different, since the P2 has side curtain airbags that explode from the B pillars whereas the P1 has relevant airbags only in the seat. Also the switches for the heated seats are in a different place. What you need - A car without heated seats but with the wiring pre-fitted. As Toblerone's guide suggests, it seems that the higher-spec models normally have the wiring in place even if heated seats were not installed in the factory. (My car is a CD.) You can quickly tell if the wiring is there by looking at the back of the switch blanks where the heated seat switches belong. Wiring, if installed, should be plugged into the back of the blanks. - 14mm and 15mm sockets - Heated seat pads (mine were second-hand from a set of fabric seats being sold by a forum member upgrading to leather; you can also buy them new (but they are expensive - over £100 a seat, even with the discount) from Rufe) - Heated seat switches (mine were off ebay, months ago, costing £5 the pair). - Pliers - both needle-nose type and normal wider ones - Double-sided tape - Sticking plasters How to do it 1. Disconnect the negative lead from the car's battery and wait at least 2 minutes. (Some say an hour to be safe. I say disconnect it, have a smoke and then get to work.) 2. Fit your switches. On a P1 car, they belong just in front of the gear lever. Just squeeze the edge of the gaiter to unclip it, and you can get access to the blanks from behind the panel in front. Just push them out, and replace with switches, clipping the wiring into the backs of them. 3. Remove the plastic cover from the outside of the bottom part of the seat by lifting it upwards. It has a little red key inside. 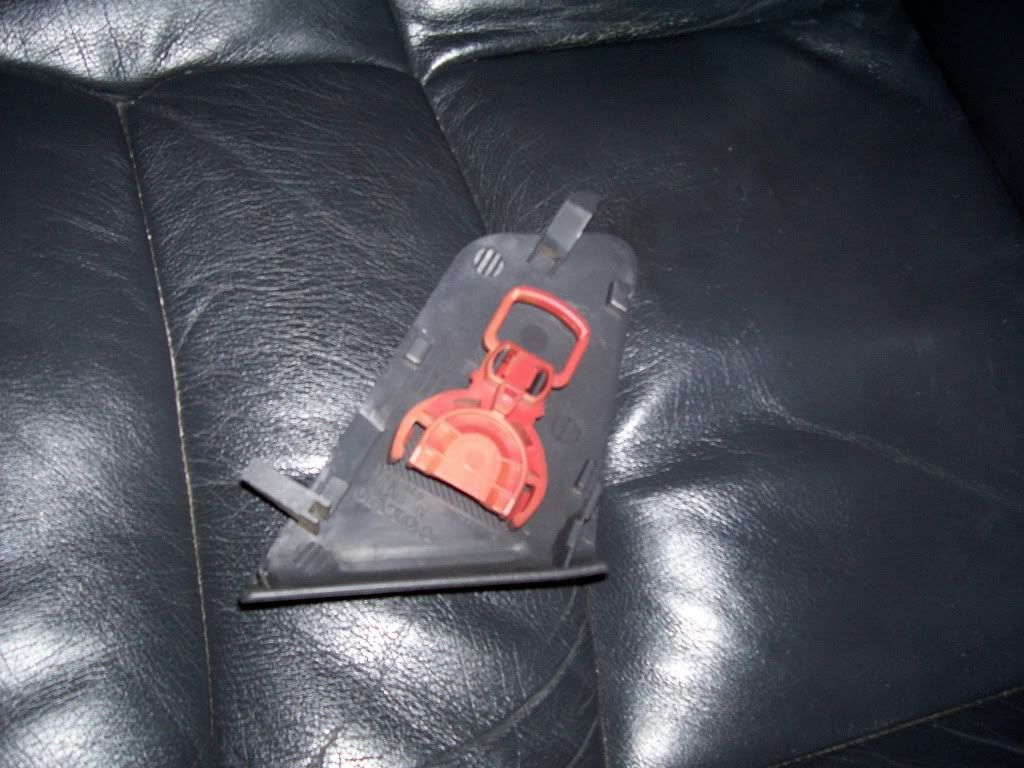 4. Slot the key over the side airbag sensor to stop it going off if you bang the seat by accident. The sensor is located just forward of the cover. It's hard to see, when the seat is still in the car, exactly how it is supposed to fit on. You have to feel it slot firmly over the sensor. When fitted properly it should look like this: 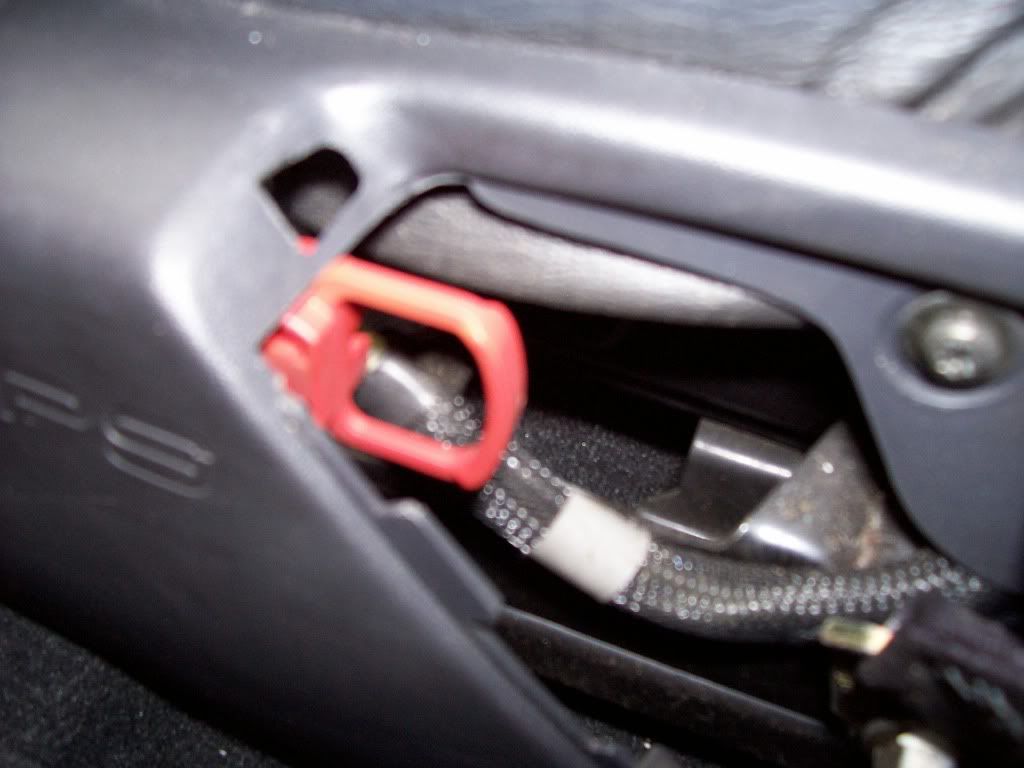 5. Undo the nuts and bolts that hold the seats in the car. There are two 15mm nuts at the front, one of them under a plastic cover as shown here: 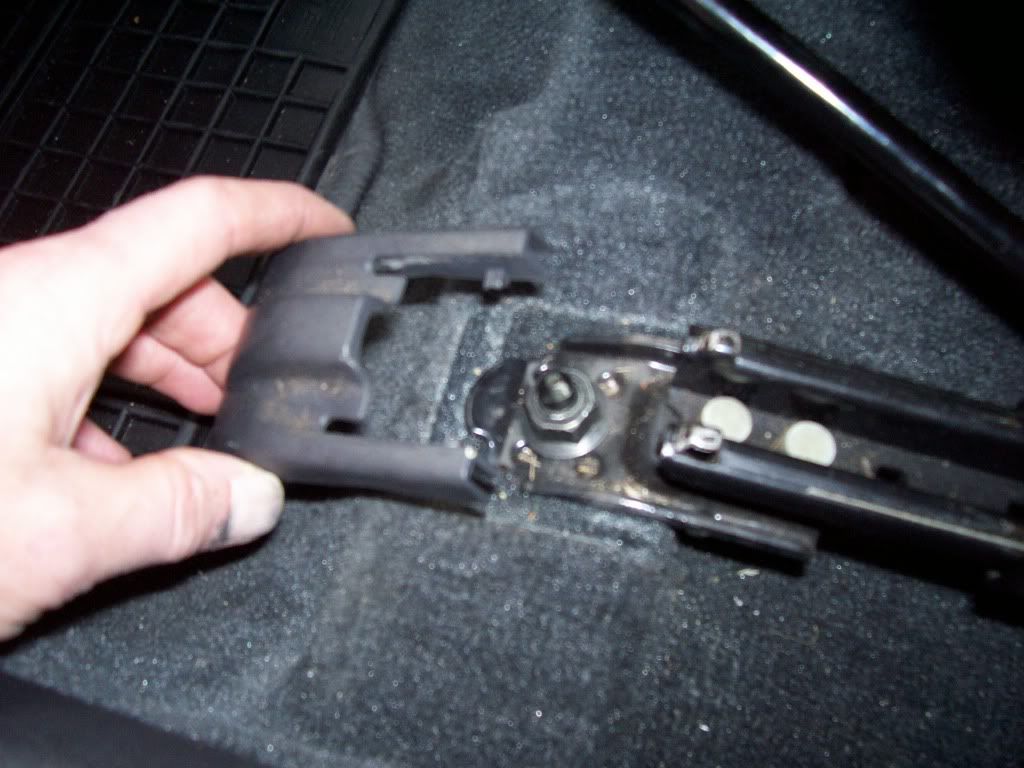 and two 15mm bolts at the rear – again, the outside ones are under plastic covers: 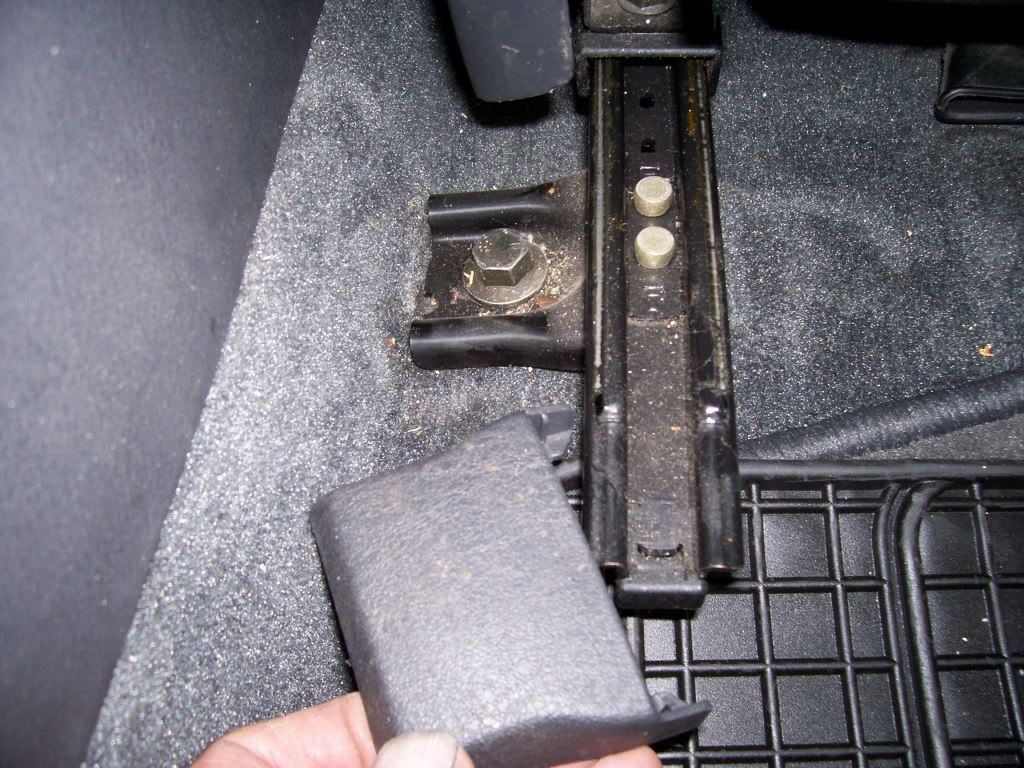 To get at the rear bolts in the centre of the car, you have to remove the rear portion of the centre console. To do this, remove the rear bin/ashtray drawer and undo the three screws visible in the following picture – two at the bottom revealed when you pull out the ashtray, one in the cup-holders (lift off the rubber insert to reveal it): 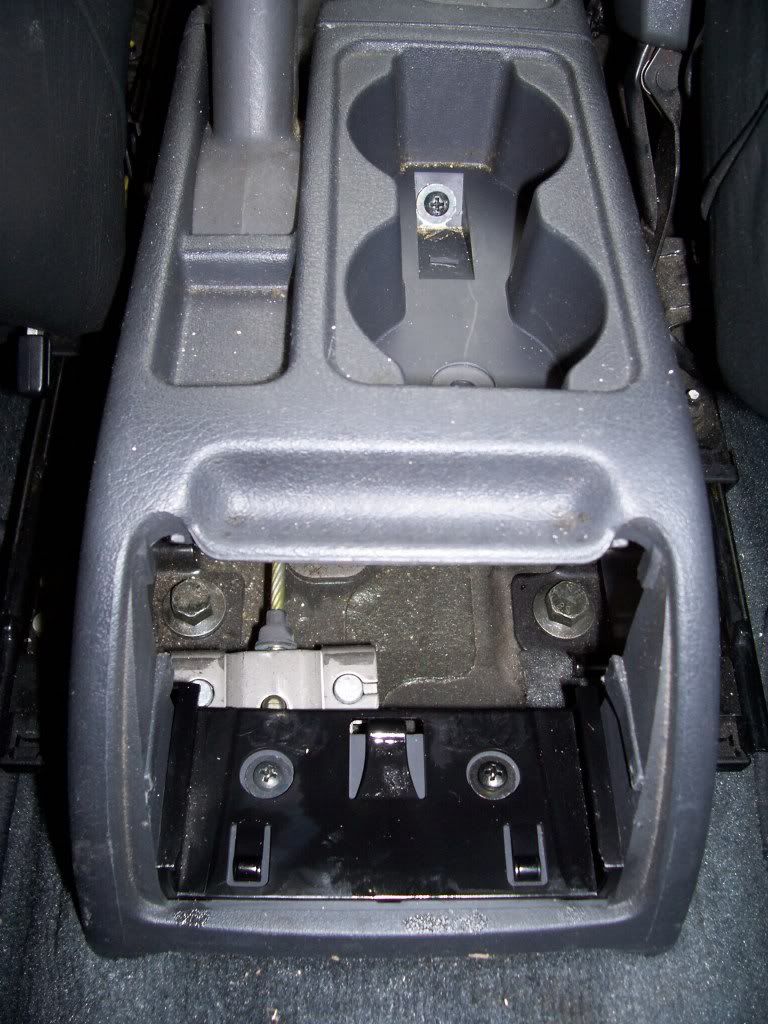 With the three screws removed, just give the rear part of the console a wiggle and a tug and it should come free. 6. Using your 14mm socket, undo the bolt that holds the seatbelt to the seat. Note that it has a washer/spacer ring behind it, which you will need to put back when you refit it. Depending on the size of your socket and ratchet, it may help to lift the outside of the seat as you undo this bolt, as you may find that your tool becomes wedged between seat and door sill otherwise. 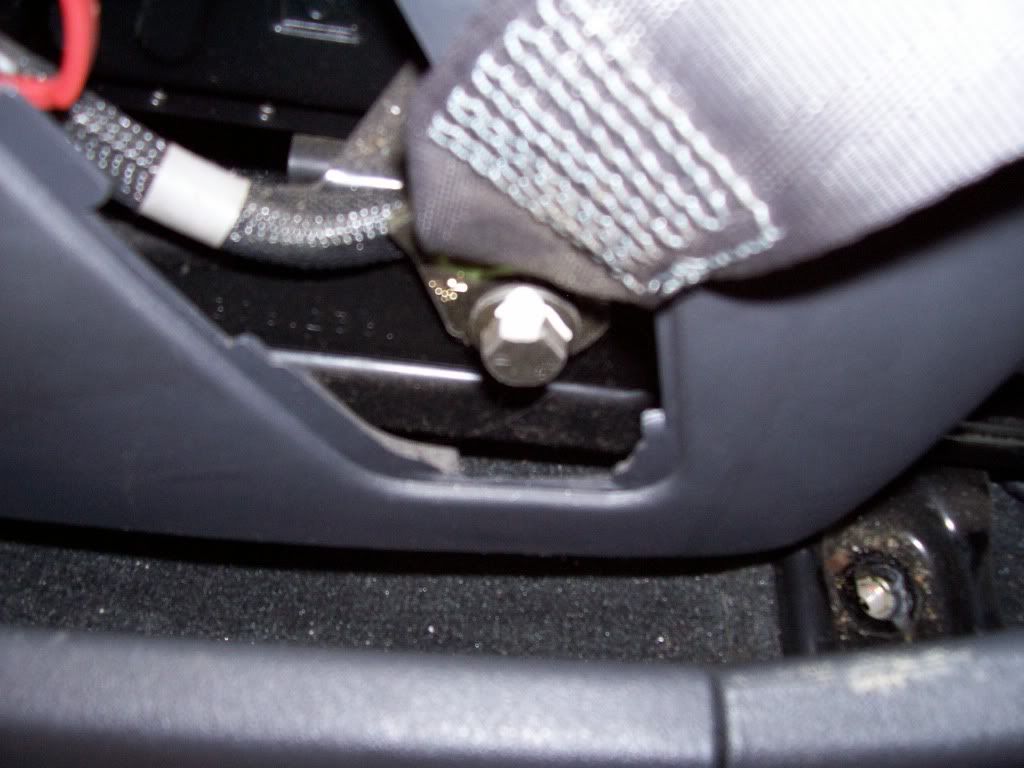 7. The passenger seat should now be able to be removed from the car. Just carefully lift it out – mind your paintwork. The driver's seat has an electrical connector underneath it that you have to disconnect before it can be removed. (This is the wire to the seatbelt clip that is responsible for the infuriating tickatickaticka noise till you put your seatbelt on.) The relevant wire is visible (cable-tied to the underside of the seat) in this picture: 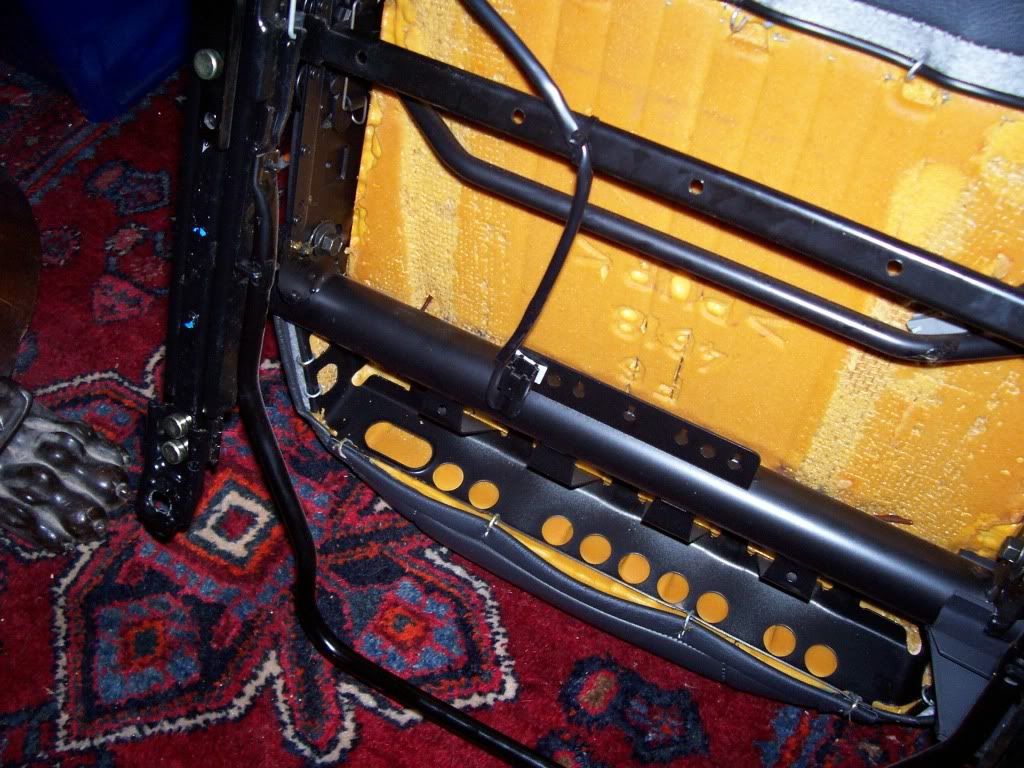 8. Take the seats carefully inside and enjoy a small interim celebration. 9. With the seats out of the car, it's no bad idea to locate the wiring connectors that should be under the seats and test the pads to make sure they work. (Obviously you'll need to reconnect the battery first.) The car's wiring may be hidden under the carpet and I had to grope about to find it on the passenger side. Note that each of a pair of heated seat pads has a grey connector; these slot together. There is then one remaining white connector which joins up with the white connector in the car. 10. Go back to your seats and work out which heated pad is going to go where. The plain one is for the back part of the seat: 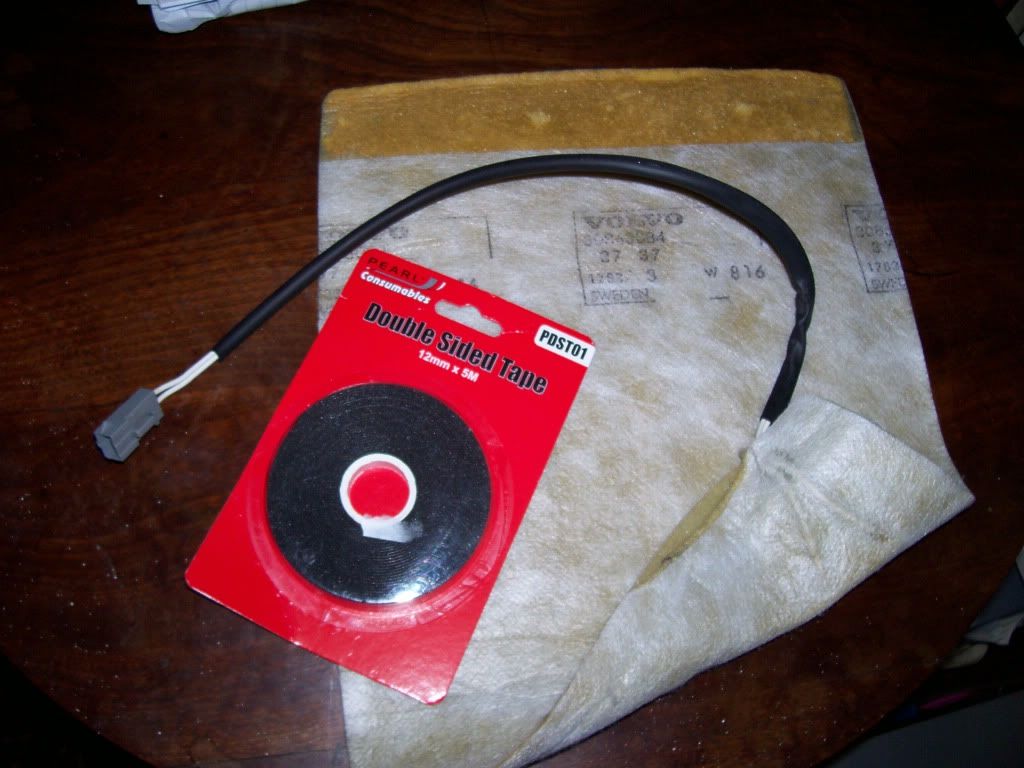 The longer one, with holes in it, is for the bottom part, that you sit on, as shown here: 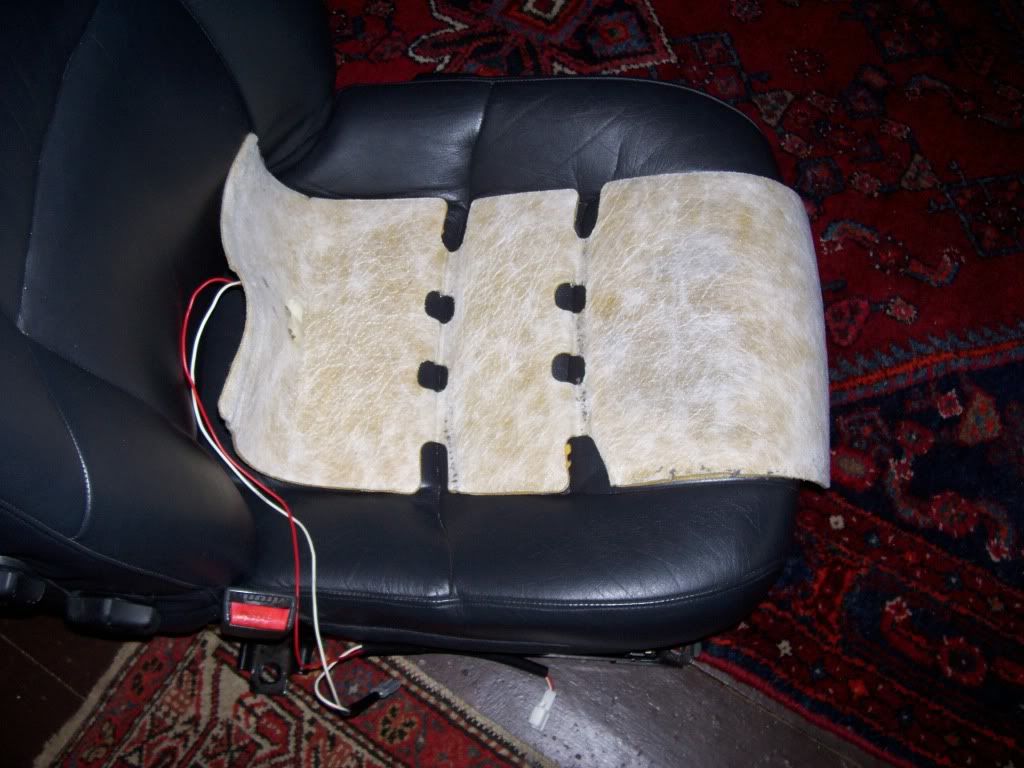 11. Turn the seat upside down and undo the zip at the bottom of the back part of the seat. Flip the seat back over, pull the leather through at the bottom of the seat back and fit the plain pad by simply sliding it up under the leather as far as it will go, as shown. Use a strip of double-sided tape to hold it in place at the top. 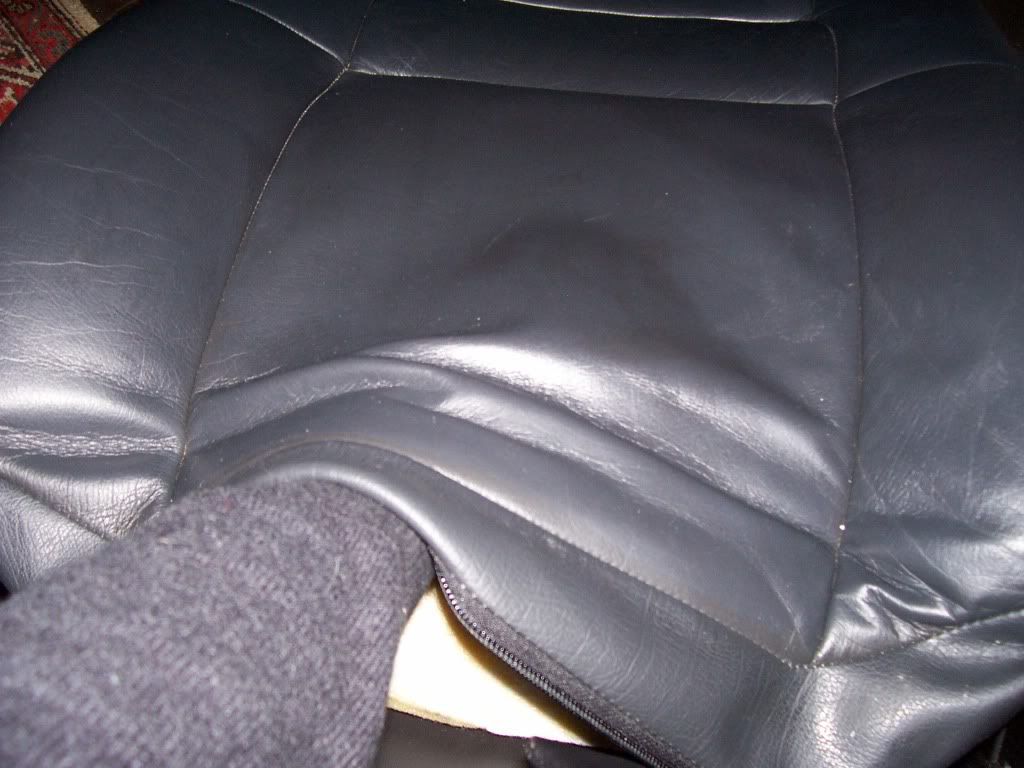 12. Refasten the zip, making sure the wiring from the pad comes out neatly at the side: 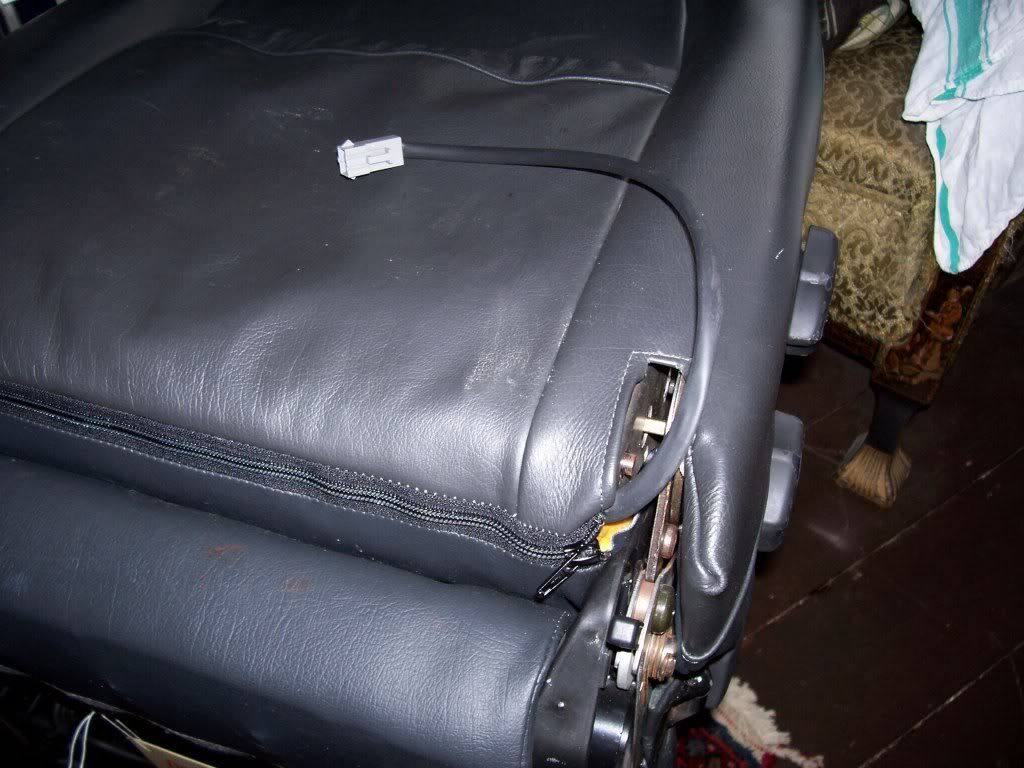 13. Now the unpleasant bit. Look at the underside of the bottom part of the seat. The leather is fixed by metal rings – plenty of them – to the seat. You need to open these up with your narrow pliers one by one, on three sides – the back, the front, and the seatbelt-clip side. You do not have to release the leather from the other (outside) edge of the seat bottom. Here are the rings holding the leather under the seat at the back:  And here's me starting to open up one of the rings at the side: 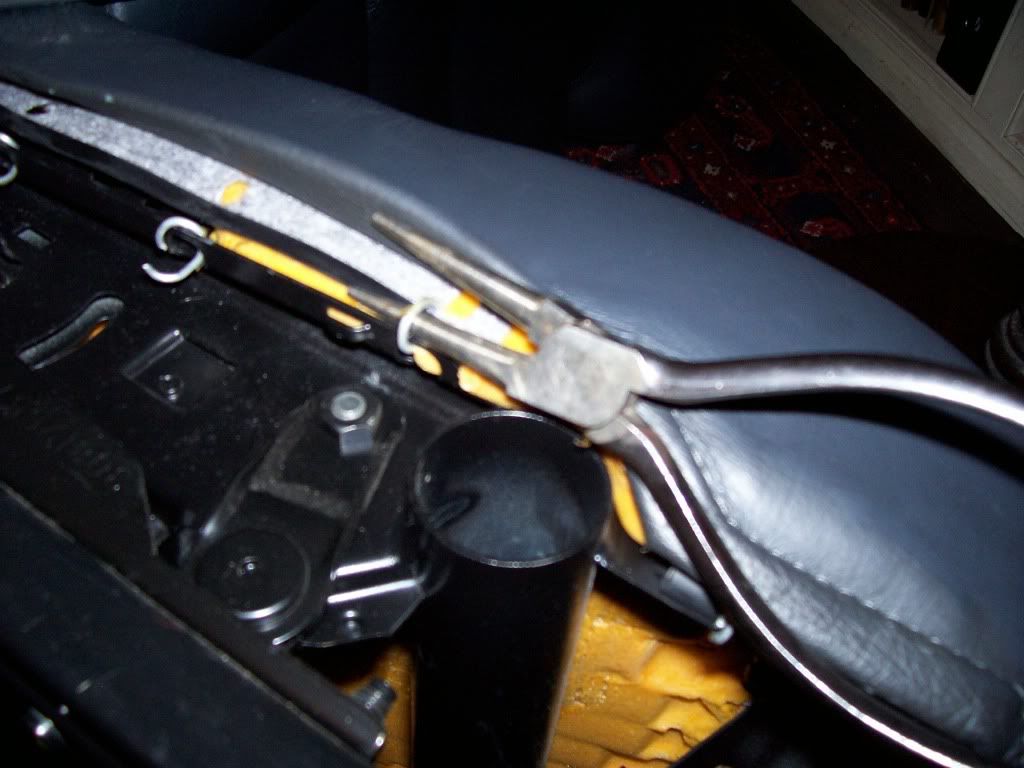 A good technique if the rings are too small to get both points of the pliers in at once is to do what I'm doing in the picture and shove just one in and force it a bit till the ring is wide enough. Then you can get both bits in and force the pliers open to get the thing released. Warning: try not to let your pliers slip while doing this: the bottom of the seat has sharp edges everywhere and it is easy to bash and scrape your knuckles there. 14. With the edges of the leather underneath and at the side of the seat released, start to pull it up and expose the foam, as shown: 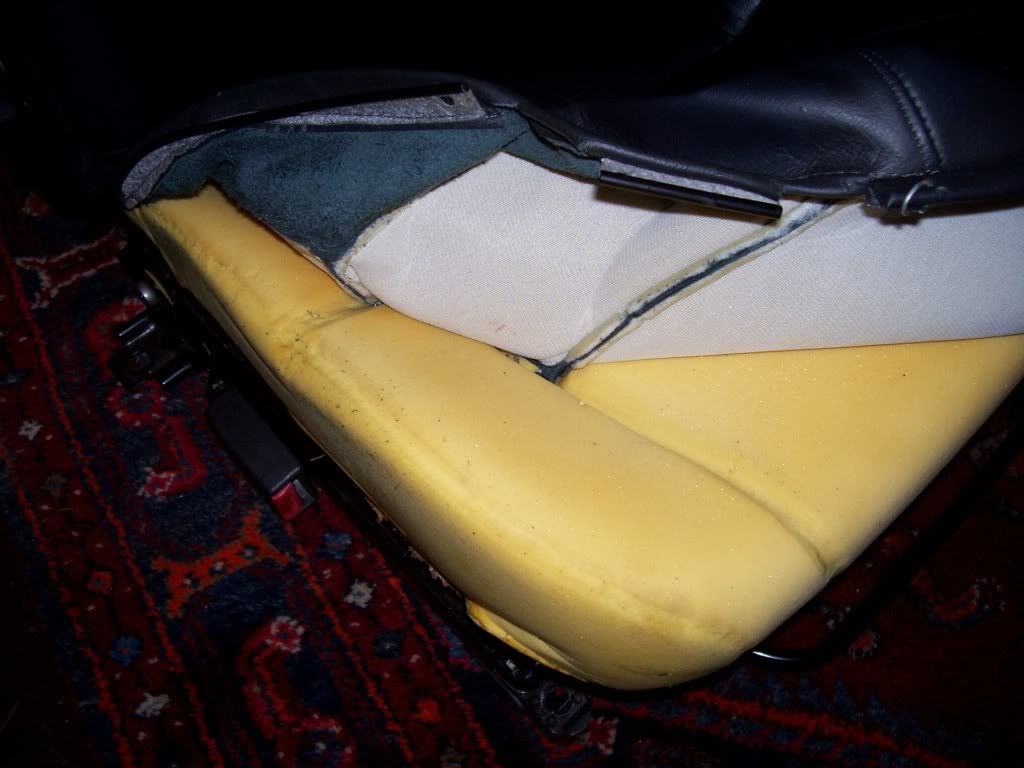 15. You will see that the leather is attached to the foam at various points all along the seams. The first such attachment that you come across - slap in the middle of that picture - is different from the others. Here, the leather is held down on to the foam very tightly by a toggle attached to the foam that goes through a cloth loop on the leather – like a duffel coat button. I found this a beast to undo, and worse still to reattach. It's the only bit of the job that I found really annoying. Eventually managed it by grabbing both loop and toggle firmly,each with a different pair of pliers, one in each hand, and using a fair bit of force to pull each out enough to make the toggle go through the loop. An extra pair of hands here would have been welcome, but you can do it alone. Here are loop and toggle finally separated: 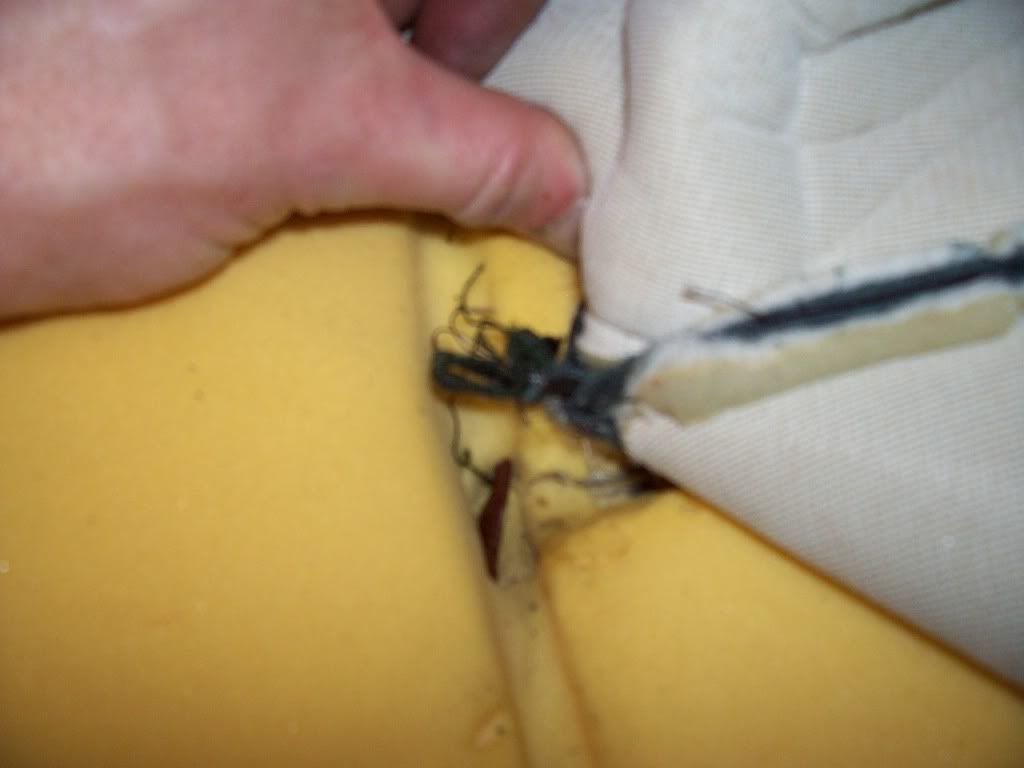 16. Apart from that, it's just more of the metal rings, which attach the leather to thin metal bars that are embedded in the foam. You have to open up these rings one by one in the same way as the ones underneath the seat. It's not really hard, just laborious and a bit fiddly. Remember that you only need to go far enough across to allow the pad to be fitted. There's no need to undo the rings all the way across. This is how far I went (the minimum possible): 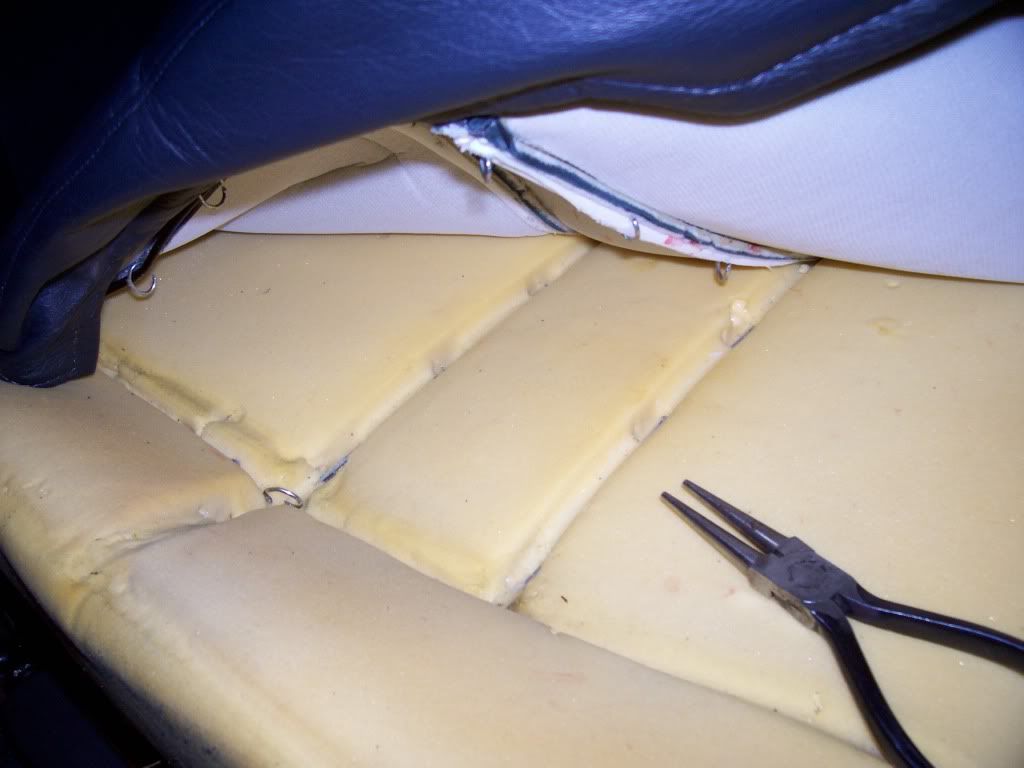 17. Fit the pad into place as shown in the next picture, feeding its wiring out of the back of the seat bottom. Make sure the holes in the pad line up with the places where the metal rings fit. 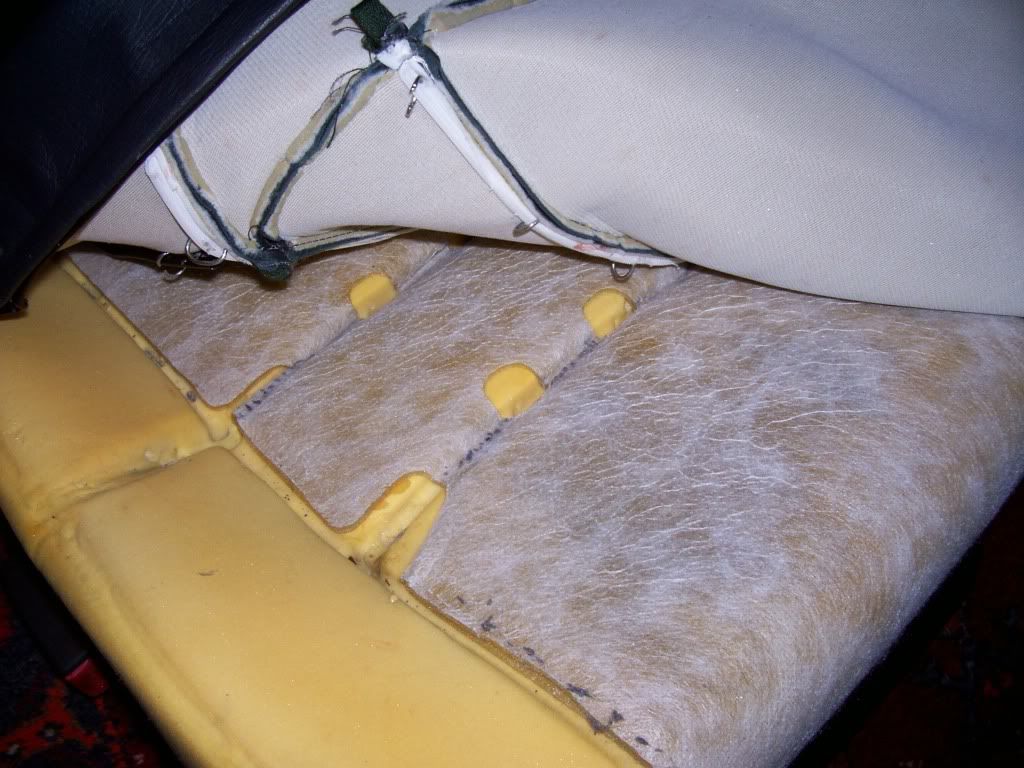 18. Now you just have to reattach the leather to the foam – that is, replace all the metal rings that you just opened up. This is rather fiddly and horrible in places. To make it easier in the hard-to-reach places, I used cable ties instead. Tighten them, then snip the long end off, and turn the bulky 'head' bit of the cable tie so that it is pointing down into the foam. As far as I can see this ought to be strong enough. Anyway it makes it a whole lot easier. I did use the metal rings in places where it was easier to get access to squeeze them with the pliers. 19. Similarly reattach leather to the underside and side of the seat – here, it is relatively easy to refit the rings – here's my final one: 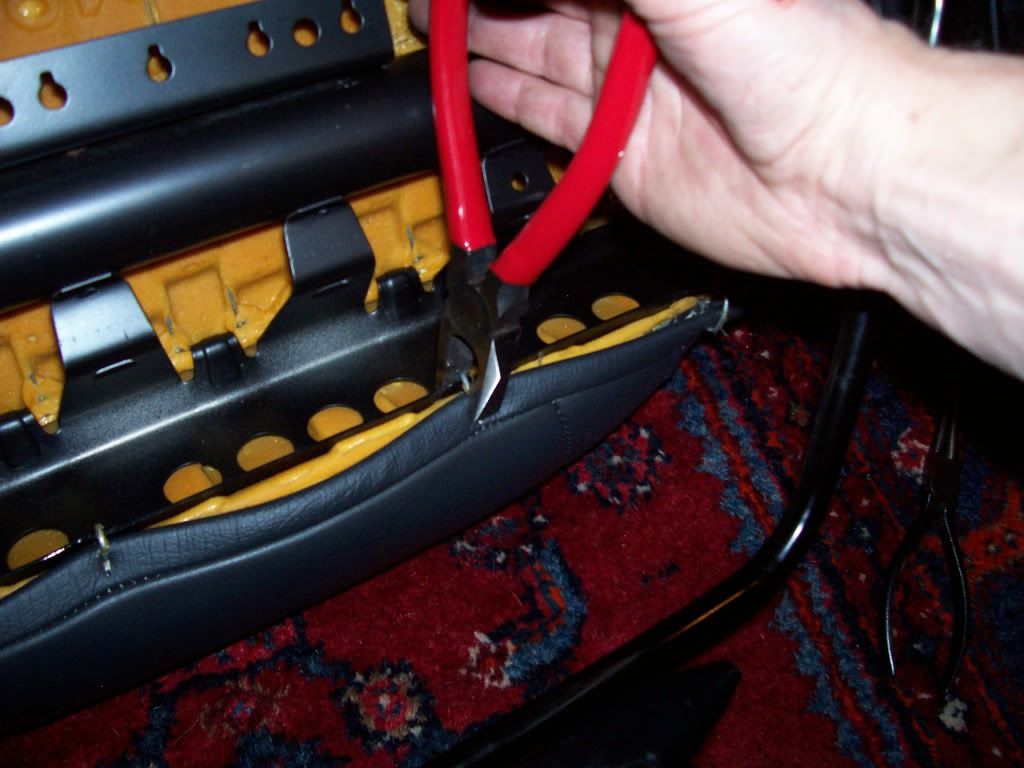 20. With the leather refitted, stand back and admire your work. Arguably this is a good time to clean/condition your seats, as you can get access to bits that are hard to reach when the seats are in the car. Otherwise, refit seats and seatbelt, and connect up the heated pads to the car's wiring of course. Torque settings according to Haynes are: Seat nuts and bolts: 40Nm Seatbelt bolt: 45Nm 21. Don't forget to remove the airbag key thingy from the sensor and put it back where it is usually stored. 22. Apply the sticking plasters to all the cuts and scrapes that you got while undoing the rings on the bottom of the seat. 23. Go and enjoy another large celebration. Special thanks to forum member BobbyV whose old heated pads I have, and who very kindly went to great trouble to remove them carefully from his old fabric seats before sending them to me.
__________________
(Formerly) 1988 745 B230K (Phoenix) |

|

|
|
Oct 30th, 2010, 09:27
|
#2 |
|
Master Member
Last Online: Apr 28th, 2023 11:20
Join Date: Mar 2007
Location: Sc.unthorpe
|
awesome guide. well done!
|
|
|
|
|
Oct 30th, 2010, 14:46
|
#3 |
|
VOC Member
Last Online: Apr 4th, 2023 18:13
Join Date: Apr 2010
Location: Oxford
|
Thank you. I should have added:
1. While you've got the seats out it's an excellent opportunity to clean the inside of the car, getting at all the hard-to-reach bits, especially if yours is as disgusting as mine looks in the photos. 2. You will probably want to cable-tie the heated seat wiring to the bottom of the seat to stop passengers tripping over it, especially if you have small children. It's a devil of a lot easier to do this while the seats are out than after you have put them back in. Just make sure the connector on the pads ends up where the wiring connector in the car will reach it. Middle of the seat is good.
__________________
(Formerly) 1988 745 B230K (Phoenix) |
|
|
|
|
Oct 30th, 2010, 19:55
|
#4 |
|
Winegrover
Last Online: Jul 17th, 2019 11:08
Join Date: Nov 2009
Location: Slovenska Bistrica
|
I like it, I like it!
If I ever come across all the necessary bits for phase 2, I will do the same. It's more trickier - it's not prewired, needs new climate console, and additional modules under each seat. |
|
|
|
|
Oct 30th, 2010, 20:08
|
#5 | |
|
VOC Member
Last Online: Apr 4th, 2023 18:13
Join Date: Apr 2010
Location: Oxford
|
Quote:
__________________
(Formerly) 1988 745 B230K (Phoenix) |
|
|
|
|
| The Following User Says Thank You to DWM For This Useful Post: |
|
Oct 31st, 2010, 09:27
|
#6 |
|
Senior Member

Last Online: Feb 29th, 2024 16:52
Join Date: Jun 2010
Location: Notts
|
Great guide, seats are looking good!!!
|
|
|
|
|
Oct 31st, 2010, 10:20
|
#7 | |
|
VOC Member
Last Online: Apr 4th, 2023 18:13
Join Date: Apr 2010
Location: Oxford
|
Quote:
__________________
(Formerly) 1988 745 B230K (Phoenix) |
|
|
|
|
|
Oct 31st, 2010, 23:20
|
#8 | |
|
Senior Member
Last Online: Feb 29th, 2024 16:52
Join Date: Jun 2010
Location: Notts
|
Quote:
|
|
|
|
|
|
Oct 31st, 2010, 23:39
|
#9 | |
|
VOC Member
Last Online: Apr 4th, 2023 18:13
Join Date: Apr 2010
Location: Oxford
|
Quote:
As for the leather: my seats were looking much more their age when I got the car. In the first month, I sorted them out with Gliptone products - the cleaner, the conditioner and the scuffmaster dye from here: http://www.liquidleather.com/car-shop.html#Scuffmaster. It's fantastic stuff - makes a huge difference. As I said in another thread: My leather was not in terrible condition but it was rather aged and slightly scuffed in a few places and generally worn, shiny, and slightly creased. I followed the instructions to the letter (it takes patience and time) and used their cleaner, conditioner and then the dye. It's an absolutely fantastic range of products in my view, and the rationale (explained in all the leaflets that come with the products, and on their website) makes perfect sense: you have to clean and condition before you fix the colour - so that you are working with something that is soft and ready to be treated, and not just painting over a problem. My seats were so much better (softer but also tighter, and infinitely better looking) after the careful first cleaning alone that I was almost tempted to stop there. The products are all water-based and easy to use. An excellent product, and an A1 mail order service. See also the guide here by another happy user: http://www.volvoforums.org.uk/showthread.php?t=95594 (Oh and mine are better still now cos I did them again before I refitted them. I'd neglected them since May.)
__________________
(Formerly) 1988 745 B230K (Phoenix) |
|
|
|
|
|
Nov 1st, 2010, 06:09
|
#10 |
|
Senior Member
Last Online: Feb 29th, 2024 16:52
Join Date: Jun 2010
Location: Notts
|
Think ill be treating myself to some of those cleaners for xmas

|
|
|
|
|
| Currently Active Users Viewing This Thread: 1 (0 members and 1 guests) | |
| Thread Tools | |
| Display Modes | |
|
|


 Linear Mode

