
|
|||||||
| XC90 '02'15 General Forum for the P2-platform XC90 model |
 Information
|
|
How to: Rear reflector LED light strip conversion.Views : 13575 Replies : 37Users Viewing This Thread : |
 |
|
|
Thread Tools | Display Modes |
 Mar 6th, 2013, 21:56
|
#1 |
|
Premier Member

|
Volvo LED lights - this is how I did it after following some previous advice on here - how difficult can it be ???
Ok so here we go - how I fitted 2 LED strips into each of the vertical reflector units above the rear light clusters: #1 Remove light cluster by releasing these two nut/bolts (do not drop them down the skin)  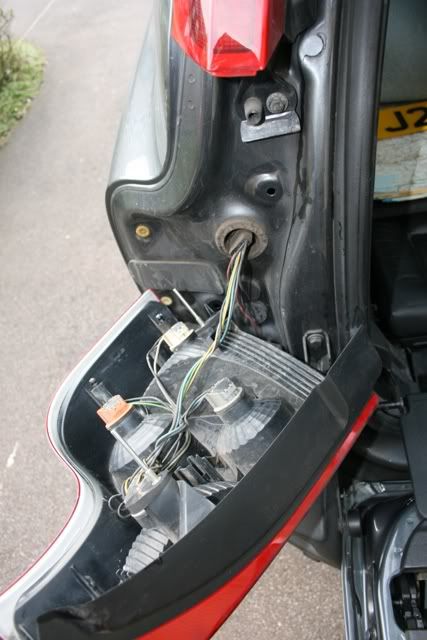 #2 release the bolts holding the vertical strip 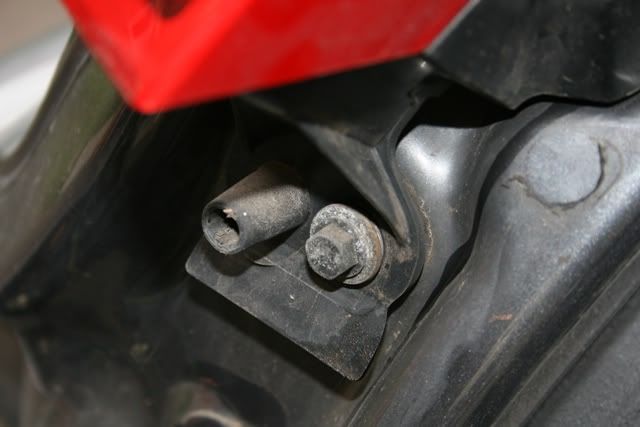 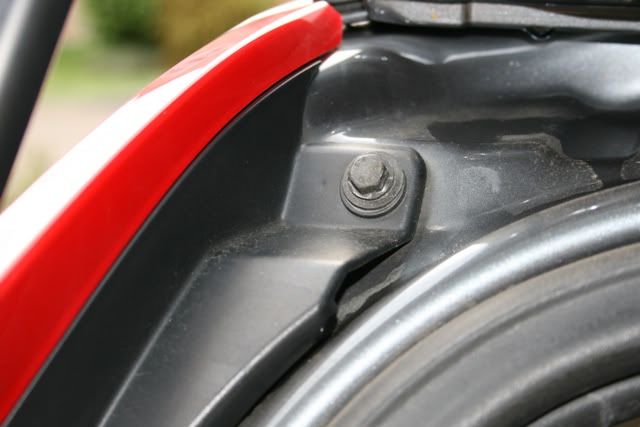 #3 Voila - the rectangular strip down the centre is what you're interested in :-) 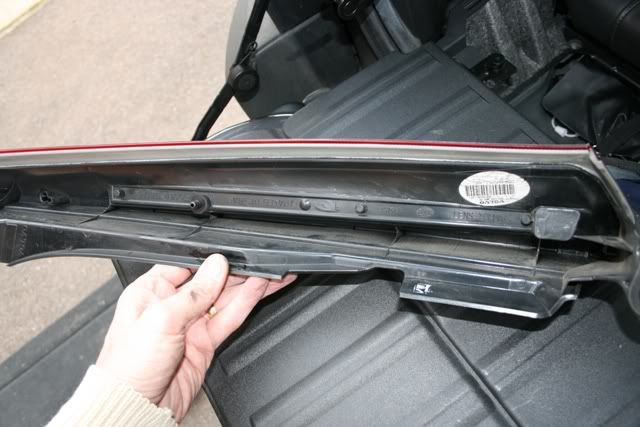 Back to this in a minute #4 This is what I used to make the channel to hold the strips in (Wickes if they still do it): 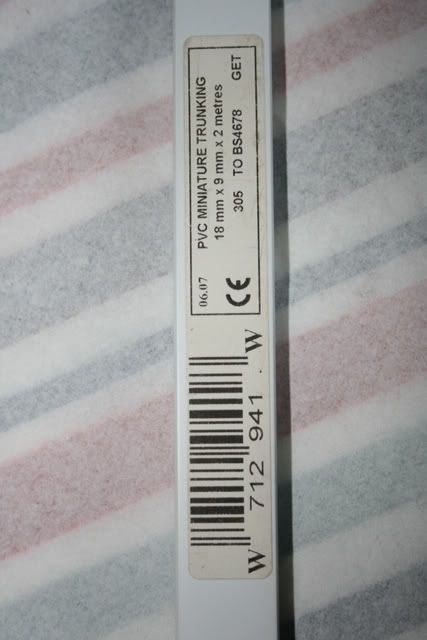 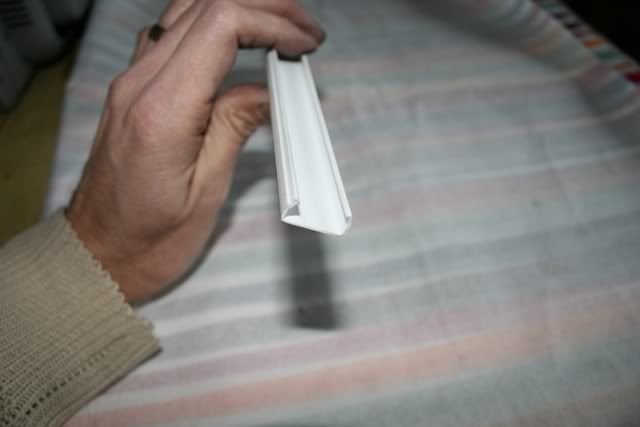 #5 I bought a variety of white and red strips as I didn't know how bright or not they'd look behind the red lens - these flexible strips are what I ended up with: 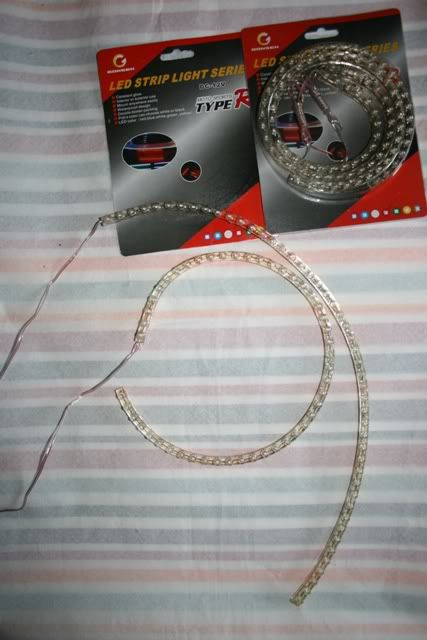 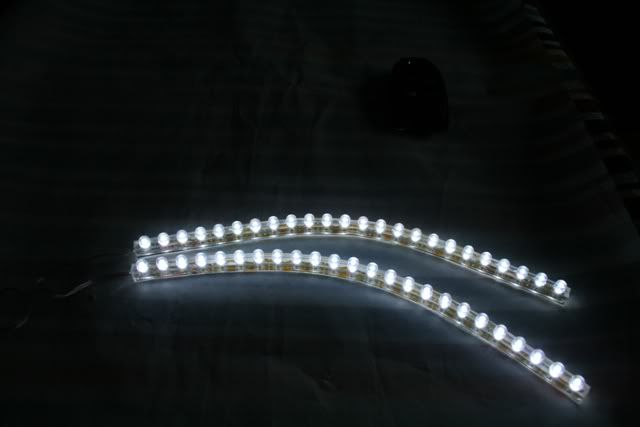 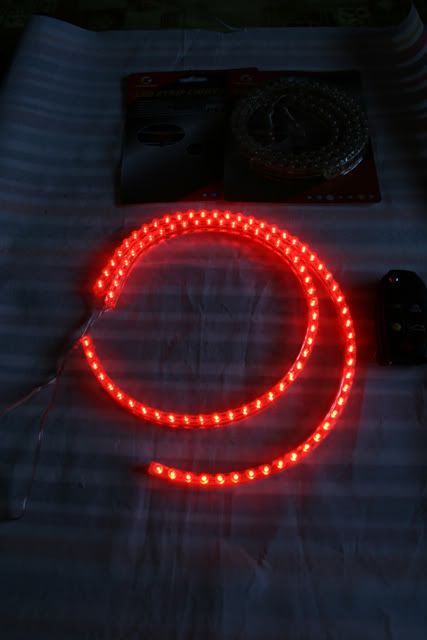 In the end I used 1 red and 1 white strip per side. #6 OK now the deep breath and time to get the Drimmel out. Using a cutting bit I followed the line around the rectangle I mentioned above. I left the 'nipples at each end for a reason which will become apparent in a mo: 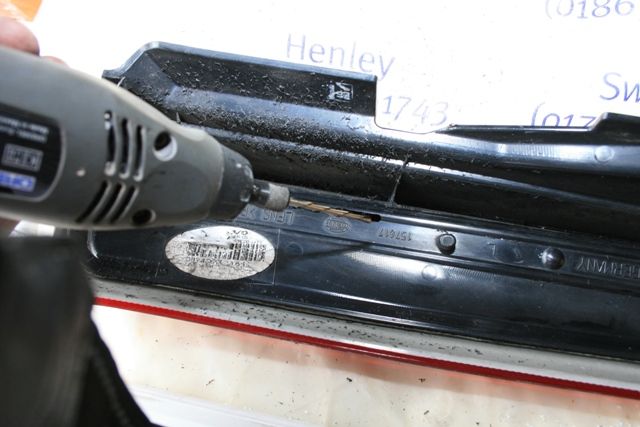 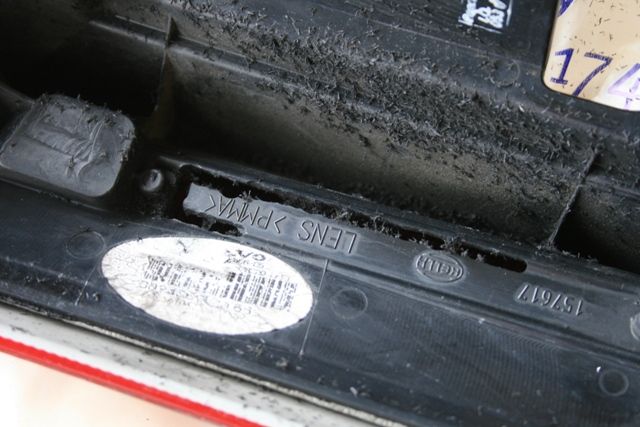 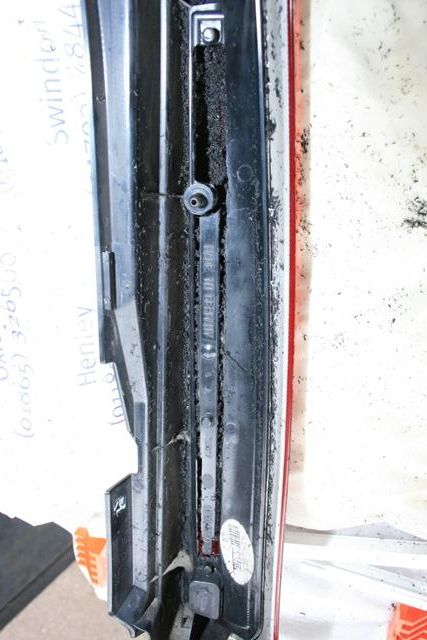 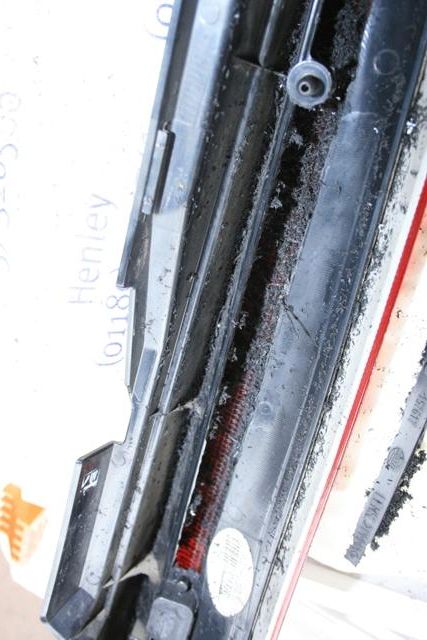 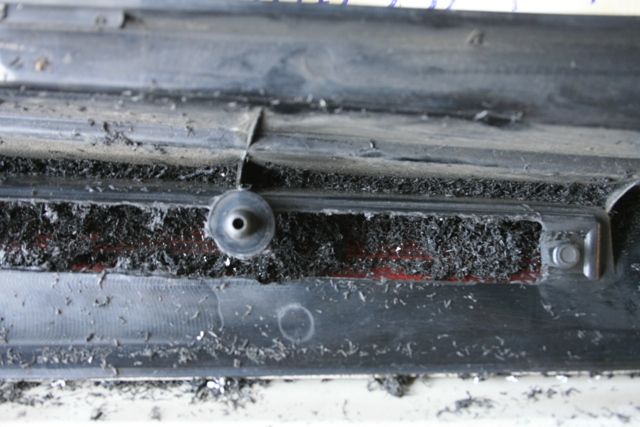 I wasn't sure if I'd need this bit to help position it later - so I kept it in tact and made sure the channel stayed straight along the edge: 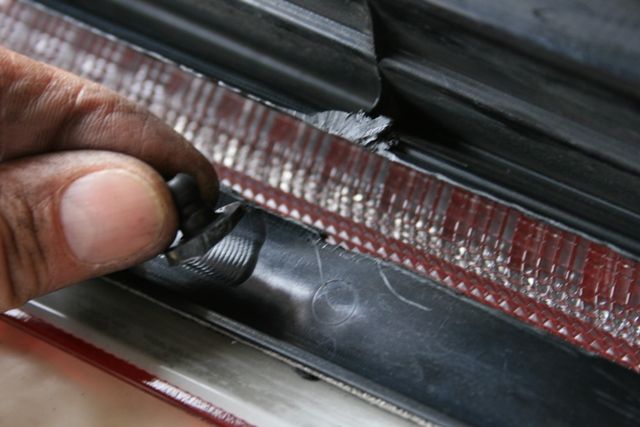 #7 Phew! 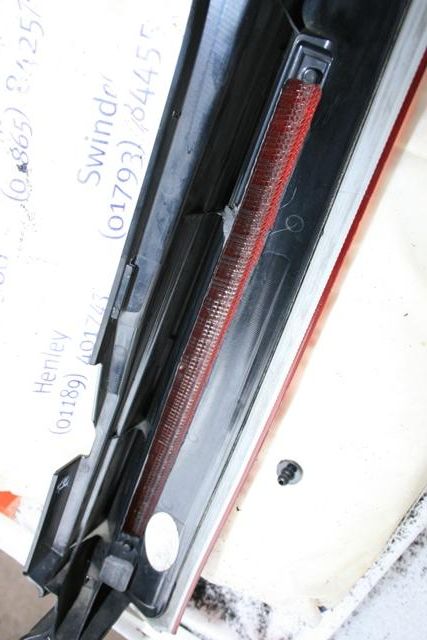 #8 Measure the length of channel you need: 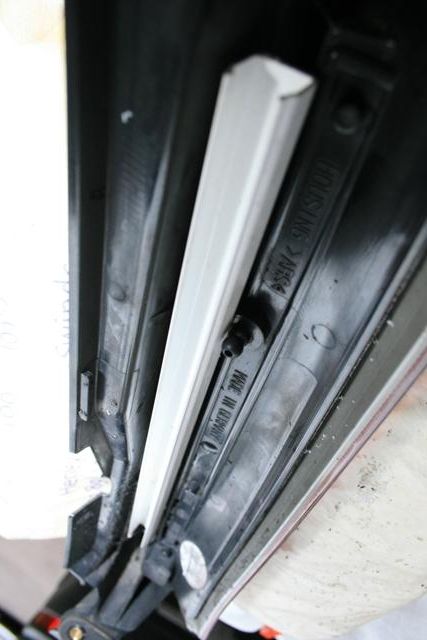 #9 Trim it and use the 'nipples' to help stop it falling into the lense (neat huh!) 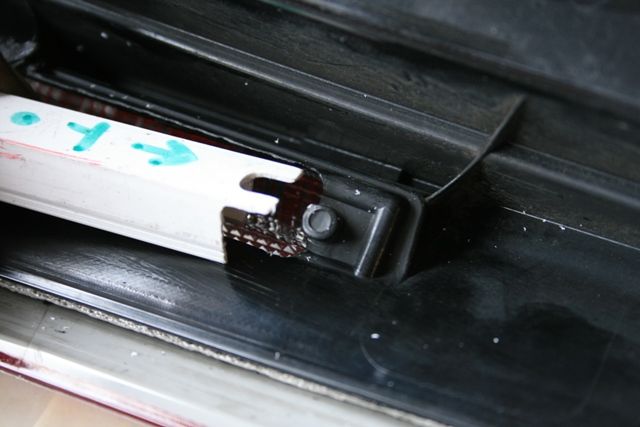  repeat for the other end and BINGO 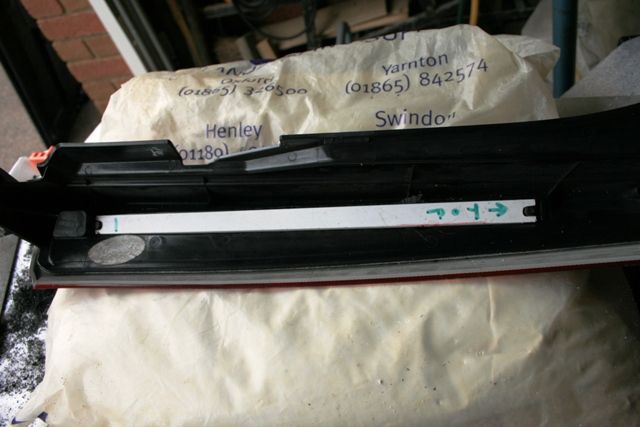 "Top" As I'm getting senile in my old age - always helpful to make sure you get things things the right way up - been there, done that and had to buy a new interior door to put it right :-) #10 Ok so now to the LEDS - 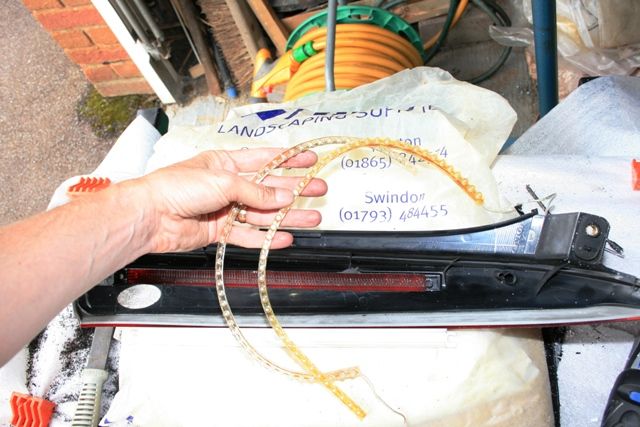 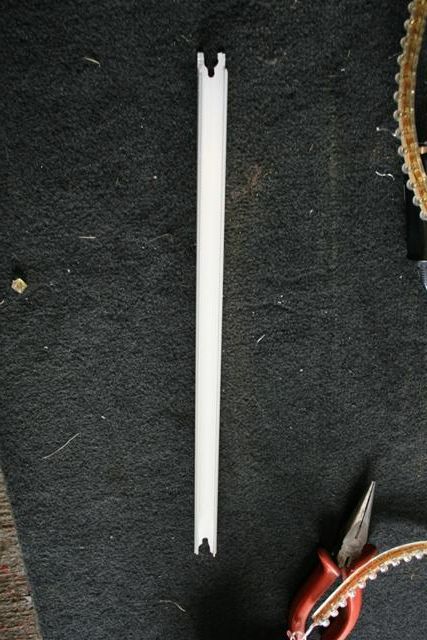 These are a snug fit side by side - trim to length: 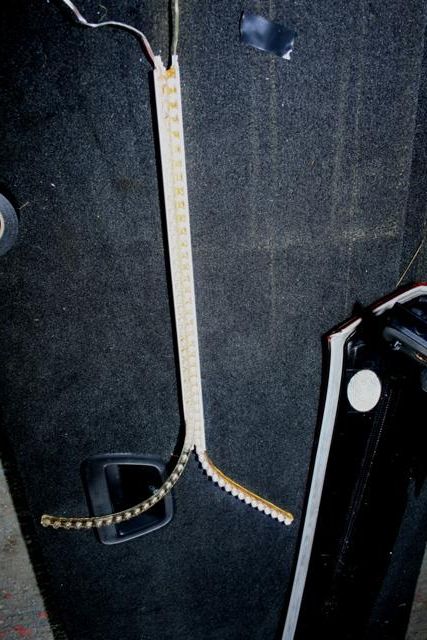 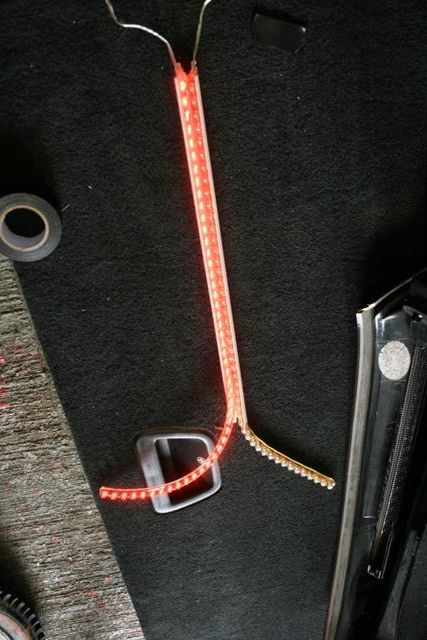 Make sure you remember which is which when you come to wire them up if you're putting in more than one strip per side (inner to inner etc.) 'cos when you start turning things around it's easy (for me) to forget what's what.. #11 Quick check: (been there done that too) 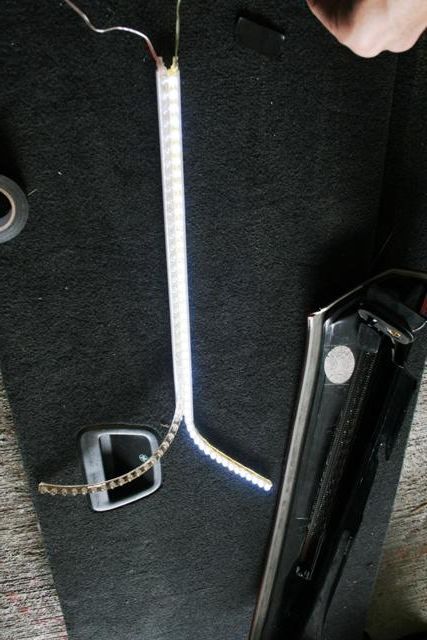 #12 Hey presto - drop the channel in place with wires at the BOTTOM 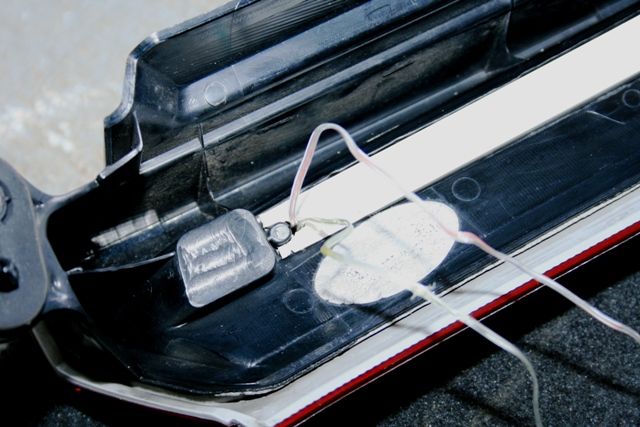 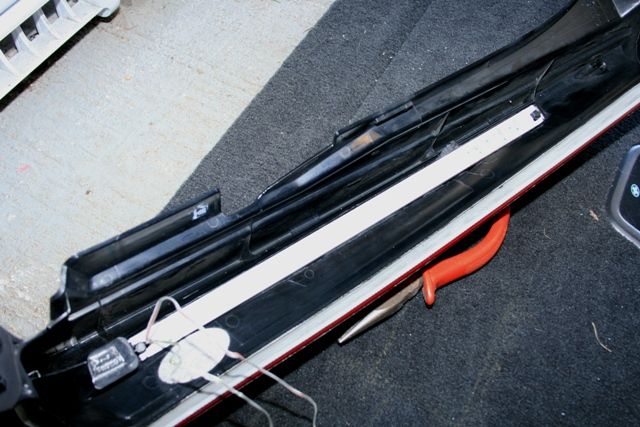 #13 Just to make it as water tight as possible I used some bathroom sealant to hold it all together ( not too pretty - but effective) 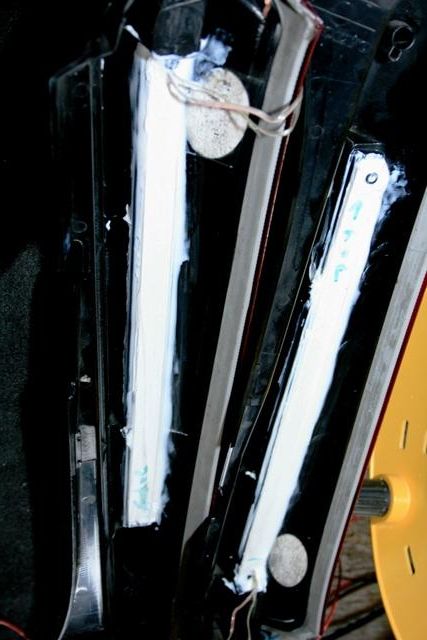 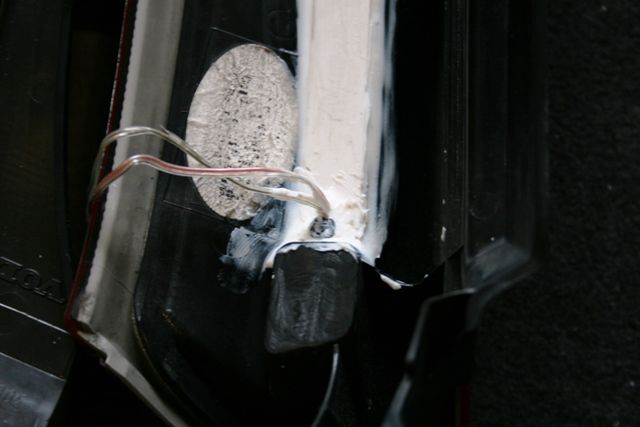 #14 I soldered some thicker wire to the LED wiring to hook up to the loom in the car - black was common and blue and red to distinguish between drl and brake light 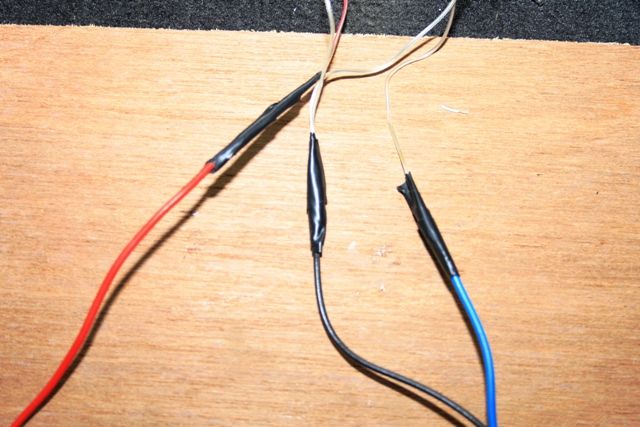 #15 It really is difficult to tell in these two pictures because of the light - but: DRL:  DRL + brake 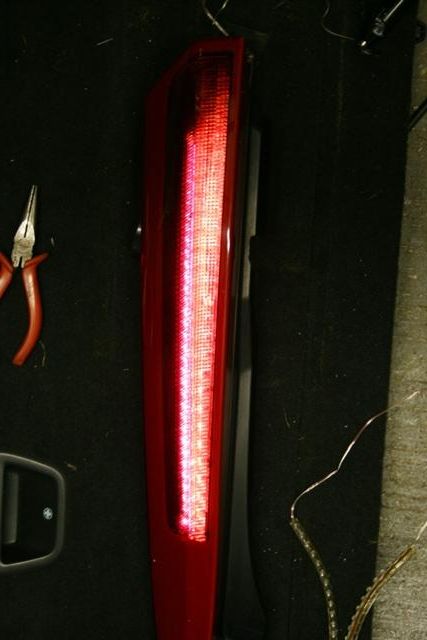 #16 Back on the car 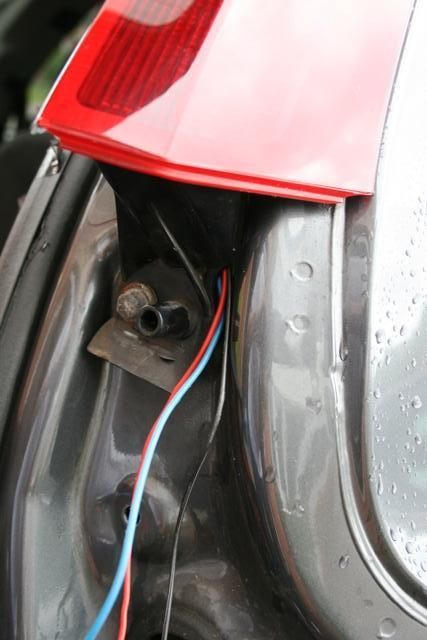 I think at this point I got rained off and stopped taking photos and then when I finally got back to it to wire it up I was against the clock. So the final stages were to identify the wires needed in the lighting loom for the DRL's and the brake light + a common earth. Duly crimped together using the blue type fold over and crimp connectors from Halfords. For my sins I do not have a photo of them in action on the car - but I do know that some of the leds have blown since last summer so I need to revisit the strips concerned. Hope that helps - it was worth the effort and does indeed look awesome. Good Luck Cheers Ian. PS I bought the LED strips a few years ago and had been sitting on them 'til last year - so any search on e-bay etc. should find you something the same but at least you know what to aim for. |

|

|
| The Following 7 Users Say Thank You to ianu For This Useful Post: |
|
Mar 6th, 2013, 22:02
|
#2 |
|
Member

Last Online: Feb 26th, 2014 16:33
Join Date: Aug 2012
Location: Dumfriesshire
|
looks very good but perhaps a final rear view shot showing the whole tail end would be helpfull for full effect
|
|
|
|
| The Following User Says Thank You to marinemitch For This Useful Post: |
|
Mar 6th, 2013, 22:05
|
#3 |
|
Junior Member
Last Online: Dec 11th, 2014 22:49
Join Date: Mar 2009
Location: Canvey Island
|
Good how to, thanks
|
|
|
|
|
Mar 6th, 2013, 22:05
|
#4 | |
|
Premier Member
|
Quote:
Cheers Ian. |
|
|
|
|
| The Following User Says Thank You to ianu For This Useful Post: |
|
Mar 7th, 2013, 12:08
|
#5 |
|
New Member
Last Online: Mar 7th, 2013 22:47
Join Date: Apr 2010
Location: Coventry
|
Looking forward to seeing a rear end shot of the finished article. Can I ask how much it cost for the materials for this?
|
|
|
|
|
Mar 7th, 2013, 15:42
|
#6 |
|
A bloody Volvo at my age
Last Online: Sep 20th, 2013 14:03
Join Date: Oct 2012
Location: Cheshire
|
Top job that is.....I have the LED's off ebay just like those and also the tracking too off a caravan curtain track ! Deep breath and start cutting !
__________________
'07 XC90 SE Lux Auto | '11 Trek 7.5FX | Tin Tent |
|
|
|
|
Mar 14th, 2013, 10:47
|
#8 | |
|
Premier Member
|
Quote:
To be honest - it was such a while ago that I bought the LED's I honestly can't remember. Maybe £20 tops - but I bought several packs to play with so didn't use all of them. The conduit I already had in my garage left over from a house project. Wire and all the other bits etc. again taken from the 'that'll come in handy one day' shelf in the garage. AND who needs an excuse to buy a Drimmel :-) (improvise or borrow one). But just be careful not to break or scratch the lense. I supported it on a bag of soft sand rather than try and grip it with a clamp. Cheers Ian |
|
|
|
|
|
Mar 14th, 2013, 15:39
|
#9 |
|
Junior Member
Last Online: Apr 10th, 2024 00:15
Join Date: Mar 2010
Location: Glasgow
|
Hi Ian
Great right up. Can I ask a couple of silly questions! Did you use the red LED strips for the break lights and the white strip as the DRLs? Or are both strips on constant with the DRLs? If anyone got advice/pics on connecting the wiring that would be great Bob |
|
|
|
|
Mar 14th, 2013, 23:32
|
#10 | |
|
Premier Member
|
Quote:
I went with the inboard strip white connected to DRL. The outboard strip red connected to the brakelights. This is why you need to be methodical because when youput the strips in the channel you then turn them over to put in the lense - you then turn the lense round to put it on either the left or right rear of the car. It's like 'chase the ace' keeping track. To be honest - the difference between the two when lit is marginal. The DRL white strip is a softer red when lit. The red brake light strip brightens it up a bit with both on together. I will try and get back out to finish of the photos soonest - including the wiring connections. cheers Ian. |
|
|
|
|
| The Following 2 Users Say Thank You to ianu For This Useful Post: |
|
| Currently Active Users Viewing This Thread: 1 (0 members and 1 guests) | |
|
|


 Linear Mode

