

|
|||||||
| S60 & V60 '18> / XC60 '17> / S90 & V90 '16> / XC90 '15> General Forum for the SPA-platform 60- and 90-series models |
 Information
|
|
'How To' dashboard inlay swap overViews : 1940 Replies : 7Users Viewing This Thread : |
 |
|
|
Thread Tools | Display Modes |
|
|
#1 |
|
Events occur in real time
Last Online: Jan 24th, 2024 19:51
Join Date: Sep 2007
Location: Worcester
|
Carrying on from my previous post regarding changing over the standard aluminium inlays, next up to arrive were the dash inserts. These arrived in at the dealers leaving only the central floor console covers to arrive.
After fitting the decor inlays to the doors, these really were very straightforward and I had all parts fitted inside of 40 mins. As before, make sure the ignition is off and put the key fob out of range of the car. I started with the right hand side piece to the right of the steering wheel. Starting at the outer most edge with a clean trim pry tool, I gently eased the inlay away from the dash, going gentle, you can feel the sprung metal clips release like they did on the doors. 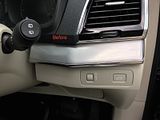 It's held on with 3 clips and the wiring for the optional LED lighting is closest to the steering wheel. 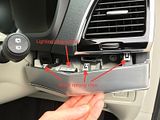 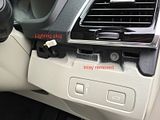 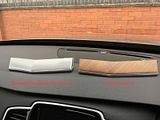 Disconnect the white plug and that's it, the inlay is off. If you do have the LED lighting you'll need to swap the lighting strip which you'll find is a more rigid style, than those fitted to the doors. 2x Torx 20 screws secure this to the inlay. Use a thin, blade type implement, to insert under the female plug socket and release it from its mounting lug. 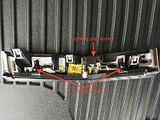 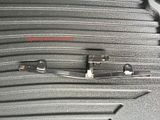 Fit to the rear of the replacement inlay in the reverse of the removal procedure. Next to do was the tiny piece of inlay to the left of the steering wheel. This is only held on with two metal sprung clips and simply eases off with care. Be mindful to not try and pry it off the dash from the middle of its bottom edge - this piece is different to all of the others in that any lighting strip remains on the dash, and not on the inlay. Therefore, it sits along the bottom edge of the inlay when it is fitted and there could be a risk you're prying against that, in order to remove the trim. Go for the far right to begin to loosen this piece. 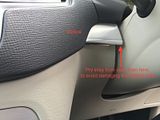 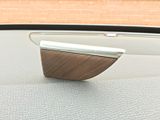 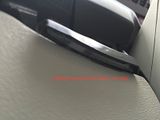 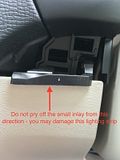 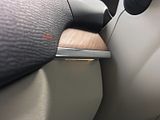 Simply clip into place the replacement inlay and that's it done. Next, I did the long piece along the passenger side of the dashboard. Like the first piece, pry off the inlay from the vey edge of the dashboard. Once the first metal clip was released I then used my hands to gently pull off the piece, working my way toward the centre of the car, releasing all 4 clips. The lighting strip connector is angled on this piece but mounts in just the same way as others. 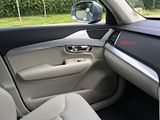 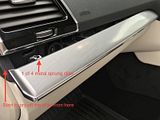 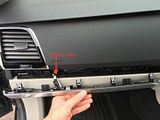 Unplug any lighting connector and unscrew the lighting strip from the rear of the inlay in just the same way as before. There are 3x Torx 20 screws to undo/replace. Reconnect the lighting plug and fit the inlay back to the dashboard starting at the the centre of the car first, working your way out to the edge of the dashboard. I found this to be a really tight fit and required a fair amount of effort to refit. Used the heel/palm of your hand to push along the length of the inlay to refit. 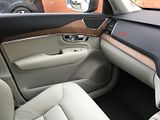 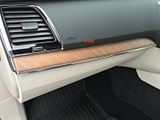 The last piece to do was around the switch module. This is held on with 4 metal sprung clip. I used a combination of two pry tools for this, a broad one along the top edge and a smaller one on each side, in turn. The was a definite click, as each of the 4 clips released. Go slow and steady so as not to force anything. 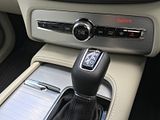 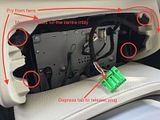 The whole unit slides out of the dash towards the gear lever and you can find one multi pin connector on the back of the module. Disconnect this plug by depressing the release tab and then, the whole unit is out. 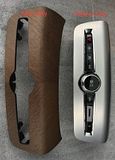 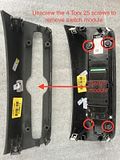 Remove the 4x Torx 25 screws that secure the module to the rear of the inlay and replace them on the replacement inlay in the same way. These were tight, so go steady. 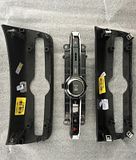 Reconnect the green plug and ease the unit back into the dash. With both hands push the unit home until it clicks into place around all 4 clips and the 'trim gap' looks like it did before. 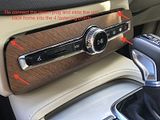 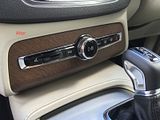 All done! Parts used: Driver R/H/S 31366525 Driver L/H/S 31366527 Passenger 31366529 Centre switch surround 31366818 When my final parts arrive I'll do a similar post for those that may be interested. Have fun! Lozza.
__________________
2020 XC40 T4 AWD Inscription 2017 XC90 D5 PP Momentum (Sold) 2007 V70 D5 SE 6 speed manual (Sold) 2005 S40 2.0D SE (Sold) |
|
|

|
| The Following 4 Users Say Thank You to Lozza For This Useful Post: |
|
|
#2 |
|
Premier Member
Last Online: Apr 2nd, 2023 10:37
Join Date: May 2016
Location: Yorkshire
|
Thanks again Lozza for taking the time to show this, looks great.
Any further comments on your impression of the build quality once you get under the surface. |
|
|

|
| The Following User Says Thank You to neon For This Useful Post: |
|
|
#3 |
|
First time Volvo owner
Last Online: May 3rd, 2022 11:34
Join Date: Mar 2016
Location: Occitanie, France
|
Great work Lozza.
Do you (or anyone else) know what the slot between the glovebox dor switch and the previous track button is for?
__________________
Current - MY20 XC90 T8 Inscription Pro, Electric Silver, Charcoal, Metal Mesh Inlays, Xenium Pack, BLIS, Towbar, Smartphone Previous - MY16 XC90 T8 Inscription Last edited by FooMan; Jul 15th, 2016 at 08:54. Reason: Typo |
|
|

|
| The Following User Says Thank You to FooMan For This Useful Post: |
|
|
#4 |
|
Premier Member
Last Online: Apr 2nd, 2023 10:37
Join Date: May 2016
Location: Yorkshire
|
|
|
|

|
|
|
#5 |
|
Premier Member
Last Online: Today 09:47
Join Date: Feb 2016
Location: Yorkshire
|
Excellent write-up. Many thanks.
|
|
|

|
|
|
#6 |
|
Premier Member
Last Online: Today 09:47
Join Date: Feb 2016
Location: Yorkshire
|
|
|
|

|
| The Following User Says Thank You to Lexman8 For This Useful Post: |
|
|
#7 |
|
Events occur in real time
Last Online: Jan 24th, 2024 19:51
Join Date: Sep 2007
Location: Worcester
|
Many thanks. Yes, still impressed, the fit on some of these inlays is very snug and well manufactured. Nice to see.
__________________
2020 XC40 T4 AWD Inscription 2017 XC90 D5 PP Momentum (Sold) 2007 V70 D5 SE 6 speed manual (Sold) 2005 S40 2.0D SE (Sold) |
|
|

|
|
|
#8 |
|
Events occur in real time
Last Online: Jan 24th, 2024 19:51
Join Date: Sep 2007
Location: Worcester
|
Yes the little slot is the temp sensor for the passenger compartment.
__________________
2020 XC40 T4 AWD Inscription 2017 XC90 D5 PP Momentum (Sold) 2007 V70 D5 SE 6 speed manual (Sold) 2005 S40 2.0D SE (Sold) |
|
|

|
| The Following User Says Thank You to Lozza For This Useful Post: |
 |
| Currently Active Users Viewing This Thread: 1 (0 members and 1 guests) | |
|
|