
|
|||||||
| PV, 120 (Amazon), 1800 General Forum for the Volvo PV, 120 and 1800 cars |
 Information
|
|
1968 US Combi Being Outfitted with Vintage Performance PartsViews : 14656 Replies : 87Users Viewing This Thread : |
 |
|
|
Thread Tools | Display Modes |
 Jul 12th, 2016, 13:05
|
#11 |
|
Premier Member

Last Online: Today 10:20
Join Date: Jul 2007
Location: Connecticut, USA
|
Saner;
Indeed...good advice! That is a huge overhanging mass with constant vibration input from the drive-belt...a recipe for long-term material fatigue and failure...it needs to be very well supported! Too bad about the carb also...as you say, perhaps a suitable Weber would work out. Cheers |

|

|
|
Jul 12th, 2016, 13:35
|
#12 | |
|
Member

Last Online: Nov 11th, 2023 13:34
Join Date: Jul 2016
Location: Brattleboro, VT
|
Quote:
The 30% figure came from Road & Track a very well respected magazine here in the US after a test. Judson earlier advertised a larger power gain but later lowered it to around what Road & Track found and reported. Yes, the Holley is not as sophisticated as a Weber but to call it crude is not accurate. It has been manufactured here in the States for over 100-years and is tunable; the jets and power valves and knowledge are available to tune them is available here in the States, and I also have a service manual for this carburetor. Holley carbs are still used in all types of racing here including NASCAR, road and drag racing and 100s of millions of them were built for cars and trucks until FI took over. This Holley was originally used on a 3.6 liter Ford 6-cyl. motor, so it will pass enough air and fuel for the blower on a 1.8. The Holley on the Judson I had sometime ago worked very well. If I can get this one to work as well, I think it will be used it as a baseline for further experiments, and I thought that a big SU might work OK and fit in better on a Volvo. Thanks for the warning about the support, I am aware of it. The intake manifold has a large 3/8" set screw in a boss just behind the blower that is adjusted to support it on the exhaust manifold. I am planning on including one for the front also. As to an exhaust, the original Abarth system is only 1 3/4 inch and a 2 or 2 1/4 inch would probably work better in this situation. Last edited by Vintagewrench; Jul 12th, 2016 at 14:35. |
|
|
|
|
|
Jul 12th, 2016, 15:00
|
#13 |
|
Member
Last Online: Nov 11th, 2023 13:34
Join Date: Jul 2016
Location: Brattleboro, VT
|
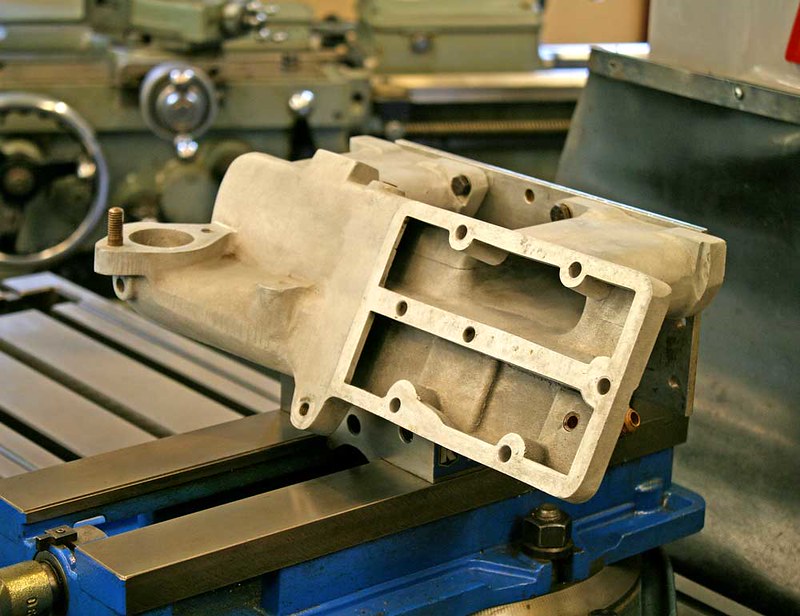 I have been planning to share more photos so it is a good time to start with the intake manifold (above) and (below) the blower housing. The boss used to support the complete blower assembly is seen in the middle of the bottom and is drilled and taped for a 3/8-inch bolt that is screwed down until it rests on the exhaust manifold and then is held in that position w/a lock nut. The front brace is attached to the top aluminum bearing housing bolt and the unused drilled and tapped hole at the right front of the head. 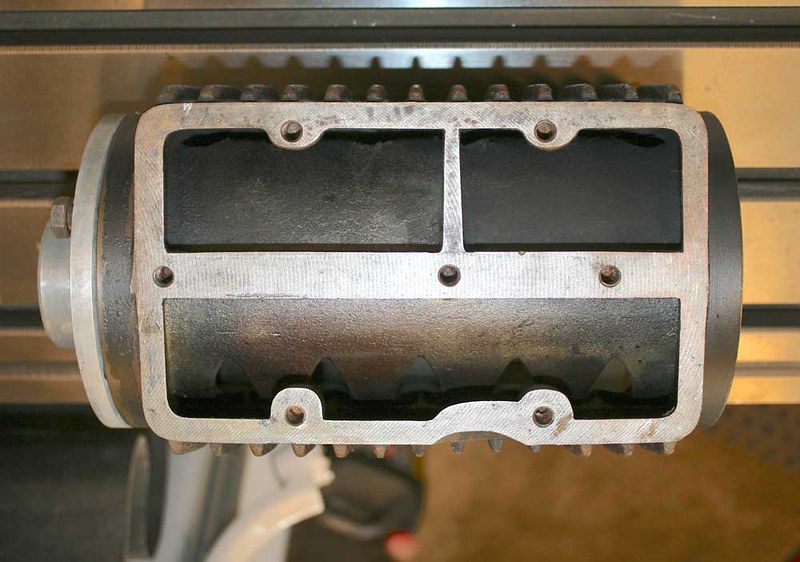 The intake mixture enters in the bottom half of the blower housing seen above through the diamond shaped openings. The compressed mixture exits at the top into the intake manifold. The divider helps to equalize the flow to both the front and rear intake runners. More photos and info soon. 
Last edited by Vintagewrench; Jul 12th, 2016 at 15:09. |
|
|
|
| The Following 3 Users Say Thank You to Vintagewrench For This Useful Post: |
|
Jul 12th, 2016, 15:23
|
#14 |
|
Member
Last Online: Jul 10th, 2023 15:43
Join Date: Aug 2010
Location: Bracknell
|
Perhaps I was too harsh on the Holley, but I have found getting it to run smooth throughout the rev range a difficulty. To be honest its simplicity over a more modern Weber means there is less to adjust, which can be a good thing.
Short of getting it completely cleaned and rebuilt I'm at my current tether with it, which is probably why i'm looking at other options! Thank you for the diameter info on the Arbath, I believe the Ruddspeed was a 2 1/2 inch system, an in particular, under axle rather than over. |
|
|
|
|
Jul 12th, 2016, 16:24
|
#15 | |
|
Member
Last Online: Nov 11th, 2023 13:34
Join Date: Jul 2016
Location: Brattleboro, VT
|
Quote:
Photo below of the Holley 1904 carburetor - The float is under the glass float bowl cover. 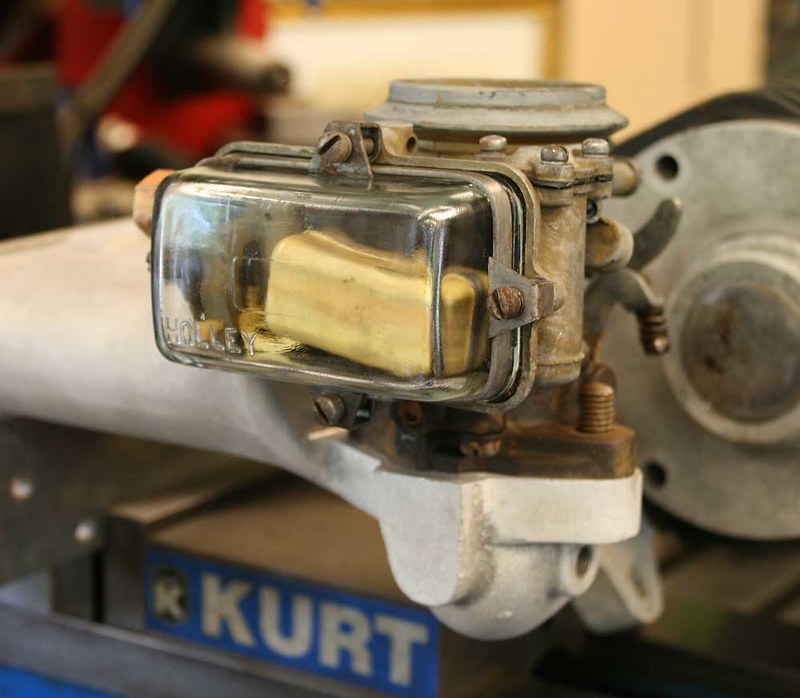
Last edited by Vintagewrench; Jul 12th, 2016 at 16:29. |
|
|
|
|
| The Following User Says Thank You to Vintagewrench For This Useful Post: |
|
Jul 13th, 2016, 16:14
|
#16 |
|
Member
Last Online: Jul 10th, 2023 15:43
Join Date: Aug 2010
Location: Bracknell
|
 
|
|
|
|
| The Following User Says Thank You to Saner For This Useful Post: |
|
Jul 13th, 2016, 16:15
|
#17 |
|
Monster Raving Loony

Last Online: Nov 12th, 2018 20:03
Join Date: Oct 2013
Location: hitchin
|
Gorgeous. It just needs whitewalls. Proper wws, not the inch-stripe pretenders
__________________
1994 850 2.0 bought at 32,000 miles used daily now 45,000. Still like a nearly-new car  2004 filthy polluting diesel VW |
|
|
|
|
Jul 13th, 2016, 18:36
|
#18 |
|
Member
Last Online: Nov 11th, 2023 13:34
Join Date: Jul 2016
Location: Brattleboro, VT
|
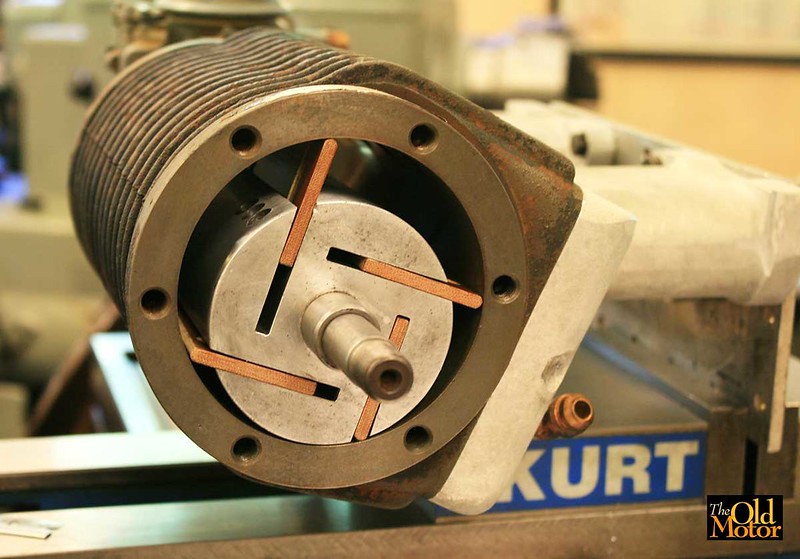 Summer has been super busy here in the shop getting client's vintage racing cars ready to run at events at both Indy and Milwaukee, rebuilding a 1914 Simplex 4-cyl. 600 ci engine and trying to get a little time in here and there on the Volvo. The new micarta vanes for the supercharger are finally finished, and you can see them above in the aluminum rotor, mocked up in about the same location in the housing bore that it rotates in (there is clearance below it). The assembly rotates clockwise, and the right-hand vane is shown about five degrees before it starts to pull in the fuel and air charge from the portion of the aluminum manifold fed by the carburetor at atmospheric pressure. It then compresses it under the rotor; next as it rotates the vane slides out of the rotor slot via centrifugal force, lets the compressed mixture expand until it is forced out of the housing into the intake manifold at a maximum of 5-7 psi. The intake mixture enters in the bottom half of the blower housing seen above through the diamond shaped openings. The compressed mixture exits through the top half into the intake manifold. The divider helps to equalize the flow to both the front and rear intake runners. 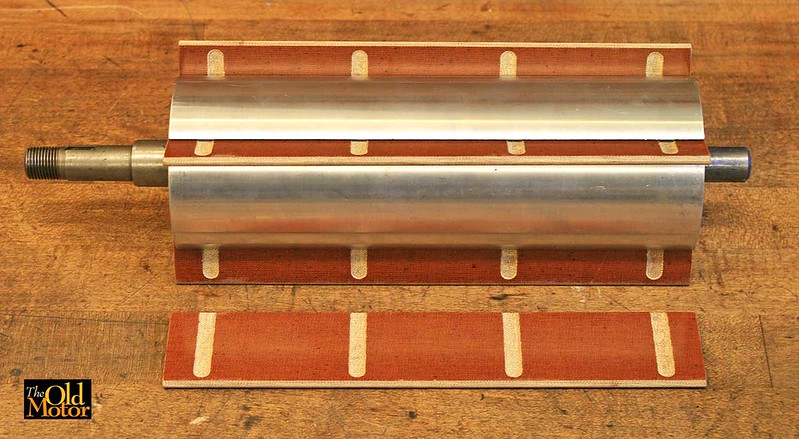 The new vanes above placed in the rotor. They are made of micarda, a tough thermosetting plastic and cloth composite that is the same material used for Volvo "fiber" camshaft gears. The slots assist in collecting the gas, air, and oil mixture to help lubricate the rotor slots and the sides of the vanes. 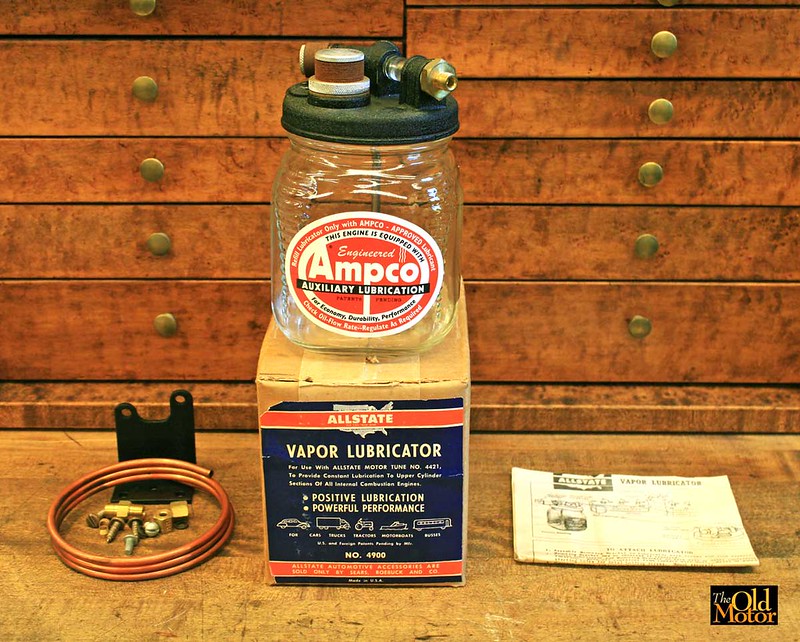 The housing bore and the rotating assembly will be lubricated by an Ampco "Vapor Lubricator"; this one is a brand new old stock unit. It injects a very fine mist of "Marvel Mystery Oil" or 10 weight oil through a spray nozzle into the carburetor venturi in the amount of about one drop very 4-6 seconds. After passing through the blower, it serves as a top end lube for the intake valve guides, intake valve and seat faces and the cylinder bores and rings. New pressure-sensitive aluminum ID plate below for the front end of the supercharger housing. Next up is to hone the ID of the blower housing on the shop Sunnen precision honing machine, in the same manner as a cylinder bore is done. Then detail everything, get new bearings and seals and reassemble it. 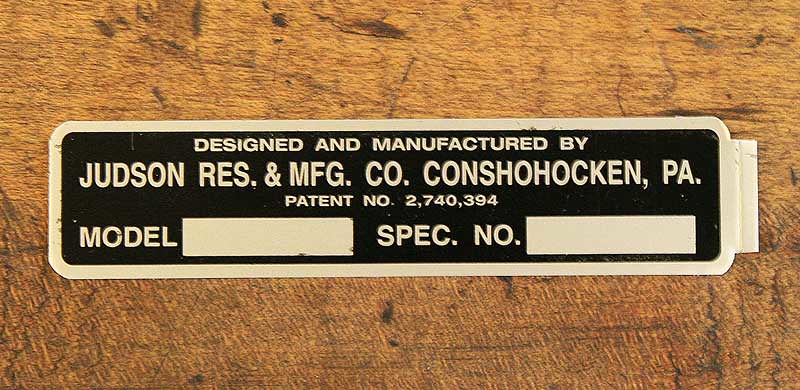
|
|
|
|
| The Following 5 Users Say Thank You to Vintagewrench For This Useful Post: |
|
Jul 14th, 2016, 08:03
|
#19 |
|
Senior Member
Last Online: Apr 9th, 2024 10:10
Join Date: Jan 2014
Location: stranraer
|
The outlet side seems to be divided in two unequally, what's the reason for this?
|
|
|
|
|
Jul 14th, 2016, 10:09
|
#20 |
|
Premier Member
Last Online: Today 10:20
Join Date: Jul 2007
Location: Connecticut, USA
|
underdrive; I expect this is to compensate for the shorter flowpath to cylinders 1 and 2 because of compressor's forward position, but vw can confirm this.
vw; It looks like you really do run a competent restoration shop with a true appreciation for the vintage hardware, and are not a 20 year old who is going to bolt on a supercharger and beat the car into the ground in a couple of years...that's what I hate to see...I may have come on a bit strong fearing that, in my earlier postings. I guess I'm OK now with the period proper modifications, and the spirit in which you are undertaking them... Compliments on the documentation and presentation...please keep it up! Cheers Last edited by Ron Kwas; Jul 14th, 2016 at 10:11. |
|
|
|
| The Following 2 Users Say Thank You to Ron Kwas For This Useful Post: |
|
| Currently Active Users Viewing This Thread: 1 (0 members and 1 guests) | |
|
|


 Linear Mode

