
|
|||||||
| 700/900 Series Articles How to's and Guides for the P700/900 series. |
 Information
|
|
960 / V90 parking brake cable R&RViews : 14431 Replies : 11Users Viewing This Thread : |
|
|
Thread Tools | Display Modes |
 Nov 5th, 2013, 00:31
|
#11 |
|
Junior Member
Last Online: Jun 28th, 2017 04:13
Join Date: Oct 2013
Location: Ottawa
|
REASSEMBLY - PARKING BRAKE DRUMS (Cont'd)
**Edit to previous post - delete #6. You can *not* put the rotors on at this point. #6 (revised) - With drums off, connect all cables at rear. 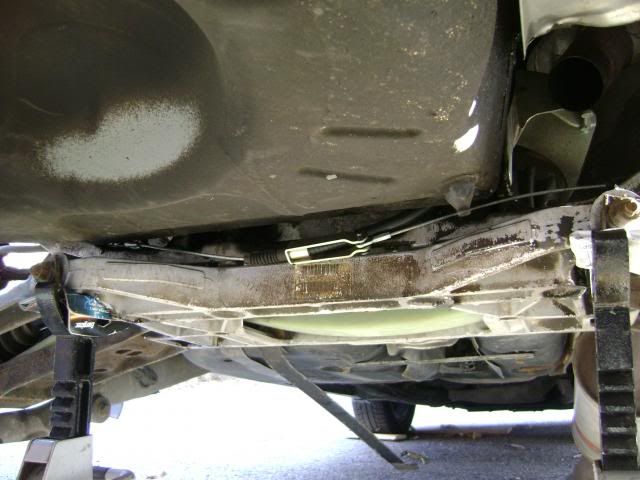 #7 - In cabin, ensure adjuster knob on handbrake is completely slacked off. Pull the cable forward and hook onto handbrake assembly. If using pliers, be careful not to damage the cable end and/or cable. 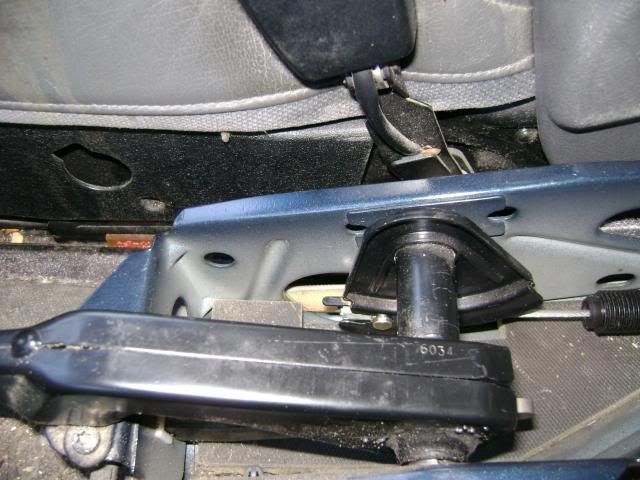 *Author's note; I actually did the reverse; connected the handbrake first, then put in the cotter pin in the rear end. That said, I suspect it is easier as done above; as long as the drums are OFF. A few random notes: A) Some have mentioned that they had trouble pulling the cables out of the aluminium subframe. Galvanic corrosion is the obvious suspect here. Suggestion; cut off the cable just before the ferrule. The ferrule, you will notice, is crimped on, and is hexagonal. (Hint, hint.) 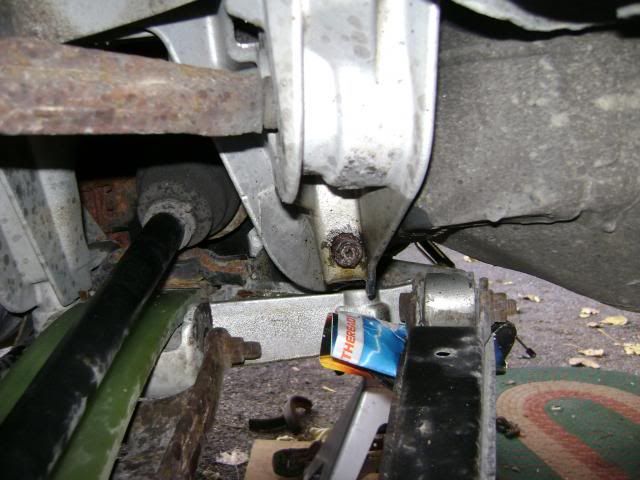 Assuming (of course) that you have doused everything with penetrating oil the day before... hammer a 15mm socket onto the ferrule, and twist away in either direction. (It's not threaded, you're just breaking it free.) Mine were locked in solid, but yielded almost immediately to this treatment. 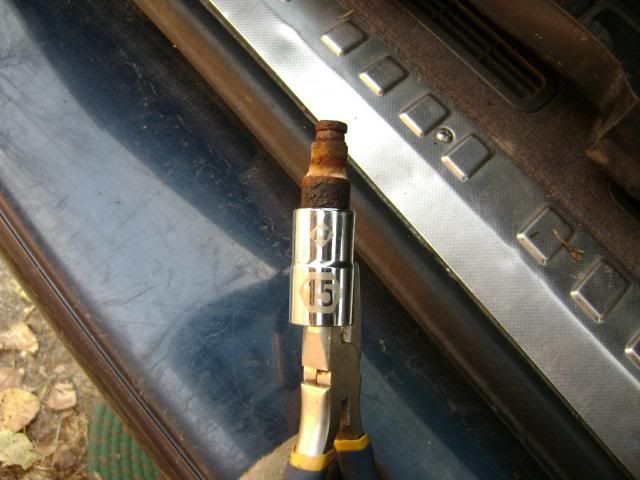 B) At the other end of that same cable (so, the outboard end attached to the caliper housing) after prying out the U-shaped retaining washer, the other ferrule was also locked in solid. When I started using the BFH on it, I noticed (rather fearfully) that the part of the caliper into which the ferrule attaches was moving along with it. I was really afraid that I was going to break the caliper; which is exactly what happened. The ferrule, and the surrounding caliper "collar", came off together. The good news; the collar is just a friction fit. And, added bonus, it's much easier to punch out the ferrule on the bench, than on the car. So, long and short; don't worry about everything coming apart there. Just knock it off; if the collar comes with it, it's easy to reinstall. And finally; just a little video of what greeted me when I pulled the left-side rotor. http://s10.photobucket.com/user/toso...1ee57.mp4.html |

|

|
| The Following User Says Thank You to tosoutherncars For This Useful Post: |
| Currently Active Users Viewing This Thread: 1 (0 members and 1 guests) | |
| Thread Tools | |
| Display Modes | |
|
|


 Threaded Mode