
|
|||||||
| XC90 '02'15 General Forum for the P2-platform XC90 model |
 Information
|
|
D5 Intercooler replacement with picturesViews : 27541 Replies : 46Users Viewing This Thread : |
 |
|
|
Thread Tools | Display Modes |
 Mar 11th, 2013, 20:06
|
#1 |
|
Premier Member

|
First off I'd like to thank D5Gill for the guide on how to do this originally which I've shamelessly stolen to help put this one together with a few pictures to help as well.
Mine has been leaking for quite a while and I've chosen to replace mine with a new rad as I didn't think the old one had done too bad considering. SO - hopefully the important bits are already covered to fix it - but the removal/refitting is still the same either way. However I didn't seem to need to do all the steps D5Gill needed to. So first up: Remove the headlamps - easy 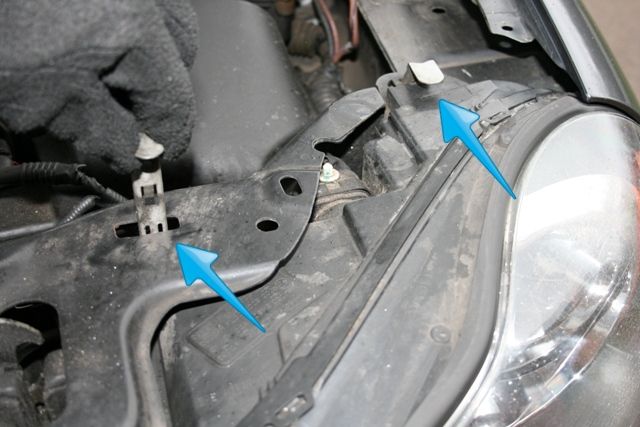 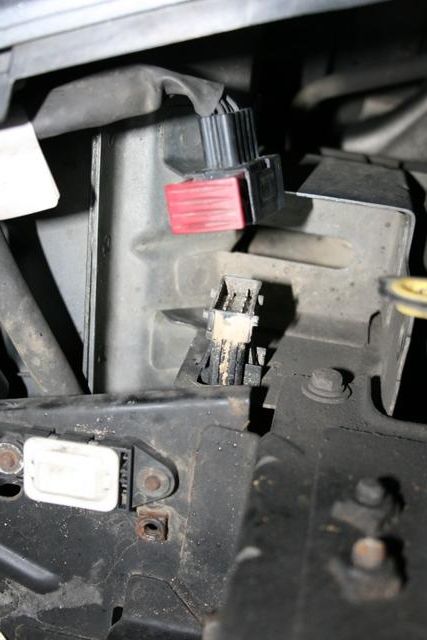 No need to unplug all the cables - just one (the red tag prises up to release the plug) 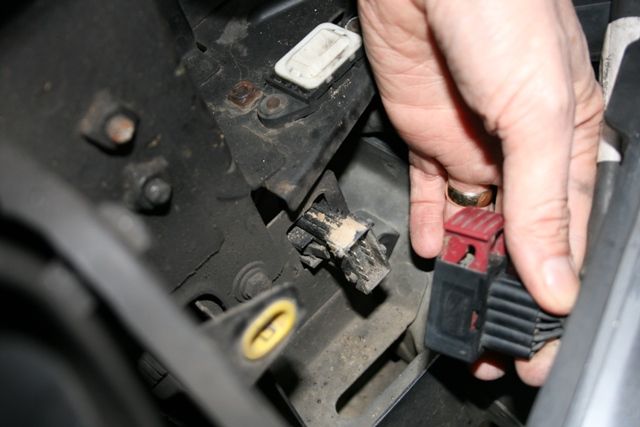 Remove air in take snorkel (10mm): 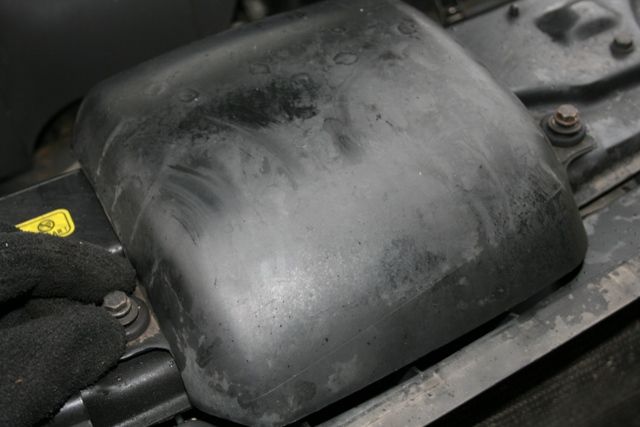 There is no clip on the other end of this - it just pulls out. The intercooler hoses at the rad end (7mm unless you've got a tiny screwdriver that will fit) 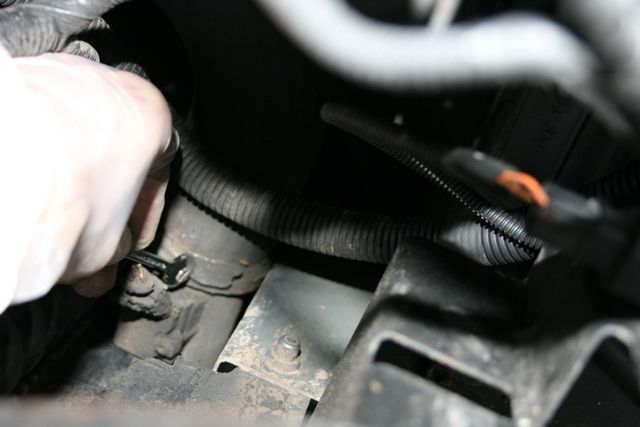 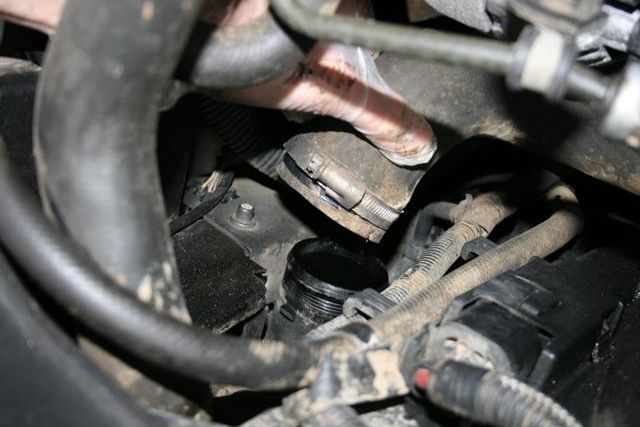 drivers side (rhd) Remove the sensor plug (swap the sensor to new rad when removed using a small star socket) 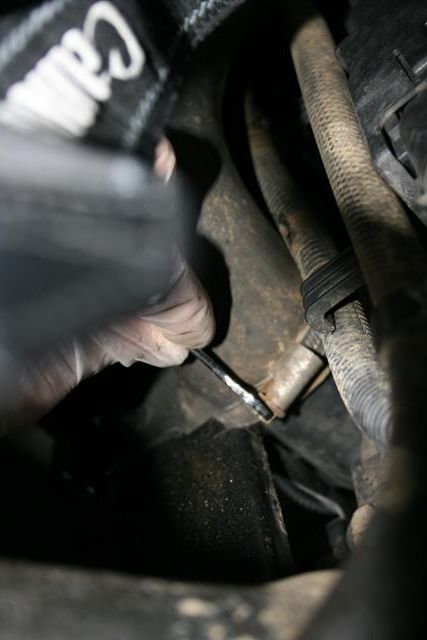 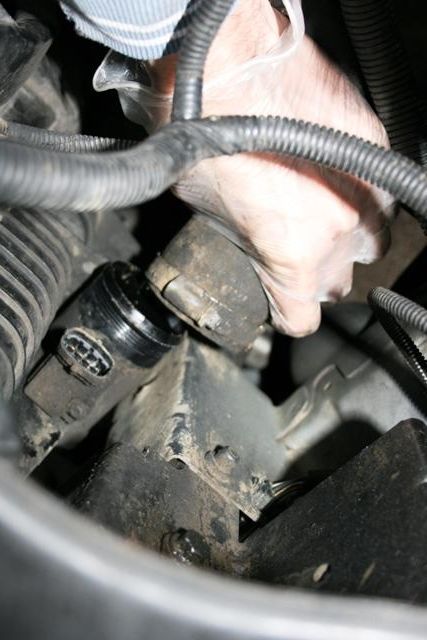 Passenger side Remove the wheelarch/bumper securing clip (push out the middle and release the clip) 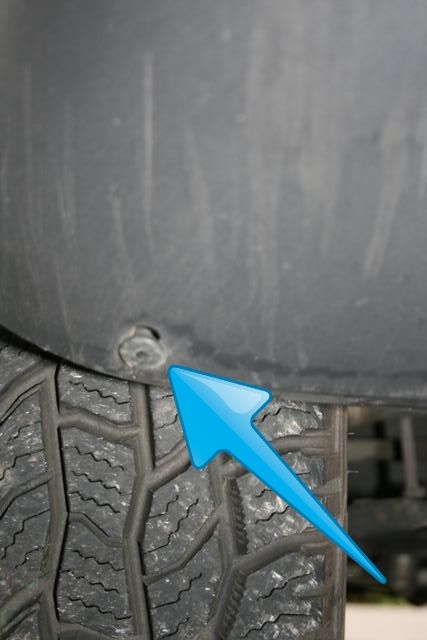 BUMPER REMOVAL Now comes what is probably the most challenging part of this job - the elusive bumper removal. There are quite literally 2 bolts that hold this damn thing on. But it's the hidden clips that will get your patience boiling. So for the first time on here (I'll probably post in a quick 2 minute guide seperately as well later) photographs of the little b**gers that you need to know about. OK the simple bit: 2 of these:  One of these (headlamp washer feed): 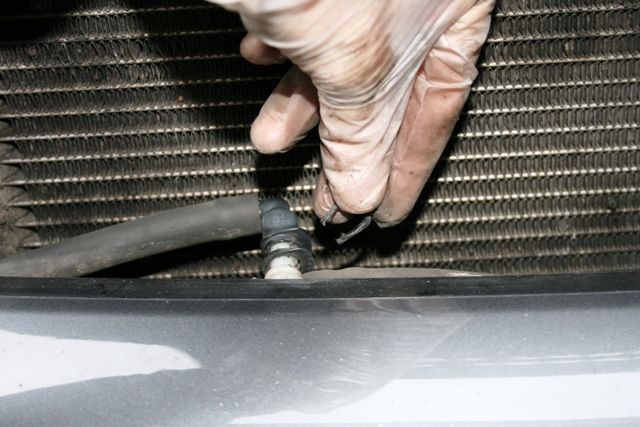 2 of these (Fog light) squeeze the spring clip in to release the plug. You can get to the passenger side from above, the drivers side from below: 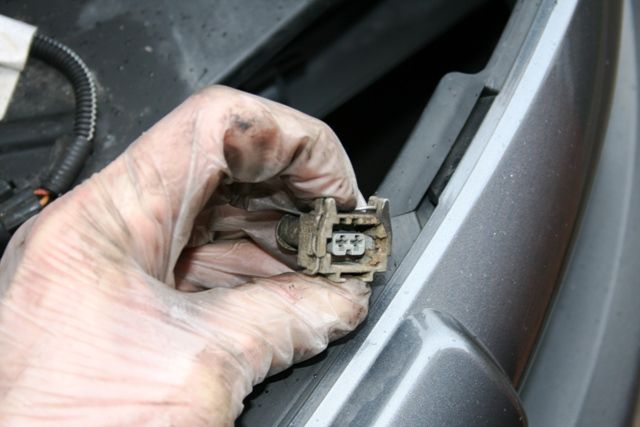 To release the clips at the side - some have suggested a hard pull (I'm sure it works - but you never know how hard is hard enough unless you know what you're fighting against) It sounds brutal and probably needs to be but if you know where the clips are, you can spring it off quite easily. So here they are: 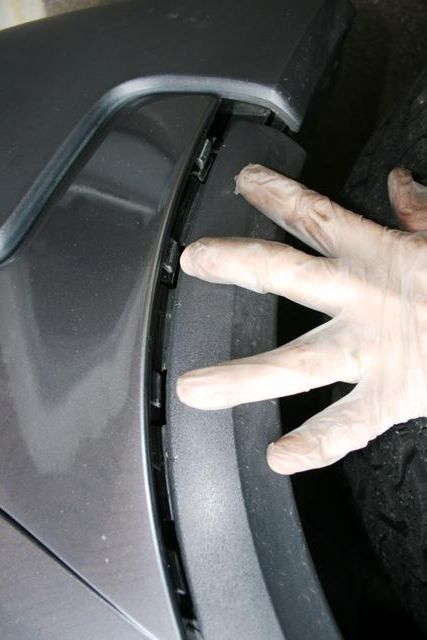 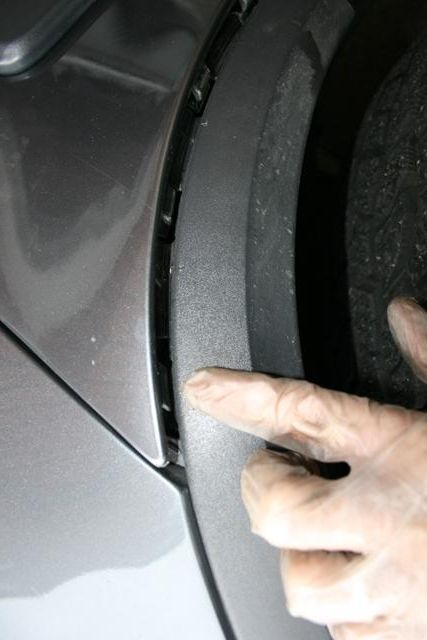 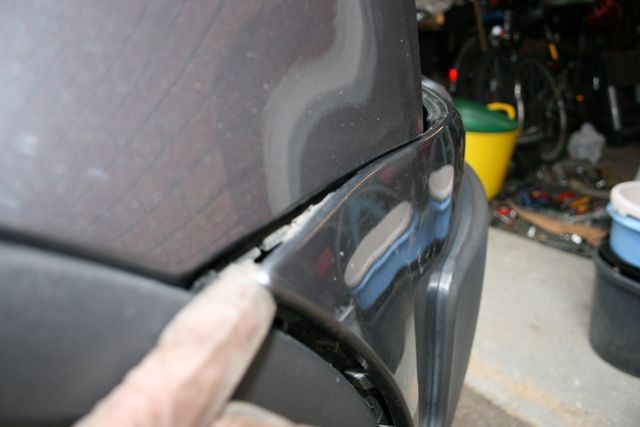 I used the handle of a plastic craft knife (with the blade removed) to prise between wheel arch trim and bumper trim to spring the vertical clips free. The clip along the horizontal edge is a U shaped channel and hooks over a guide behind it. It will spring off - but will also slide off when you pull it forward. The other side: 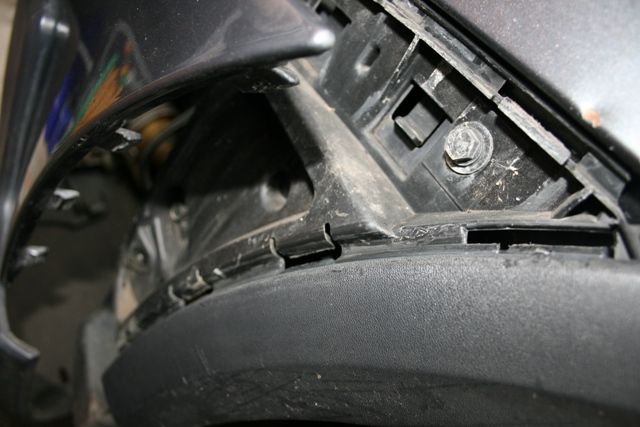 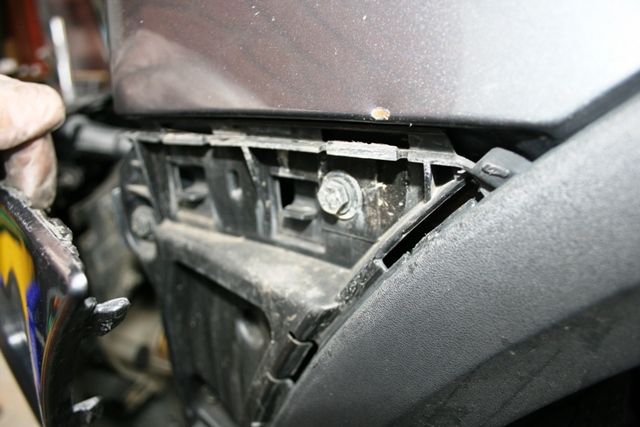 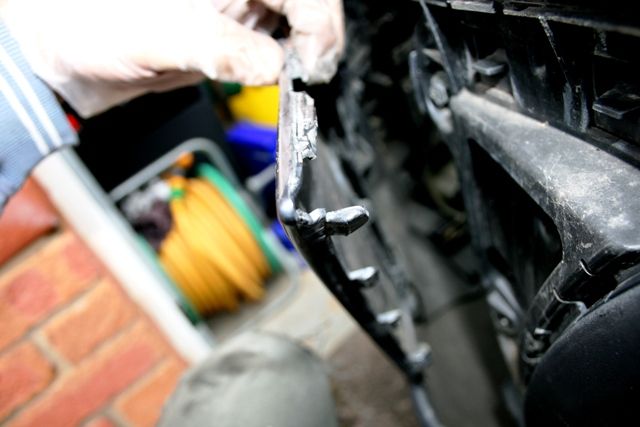 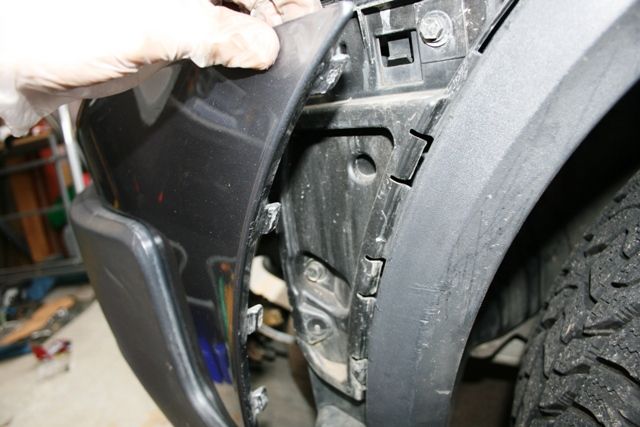 It will literally fall away once the clips are clear. make sure you have a soft surface to lay it on and marvel at how simple that was !! So you're now left with this: 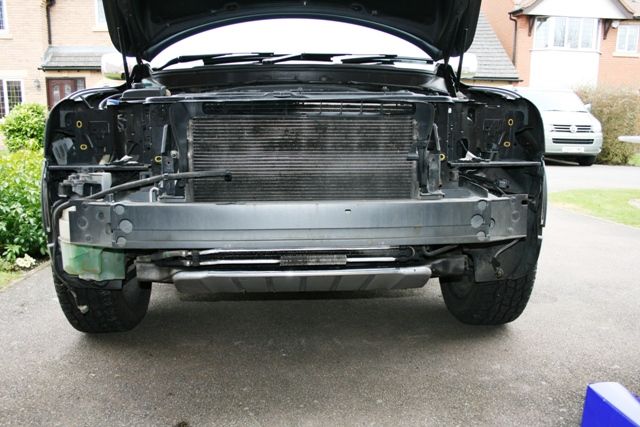 I then removed the lower skid guard - 6 bolts - fairly straightforward although the front mountings do have a small locating lug that needs to be lifted slightly to unhook it (i.e push the guard up towards the radiator and pull forward) You'll then see this: 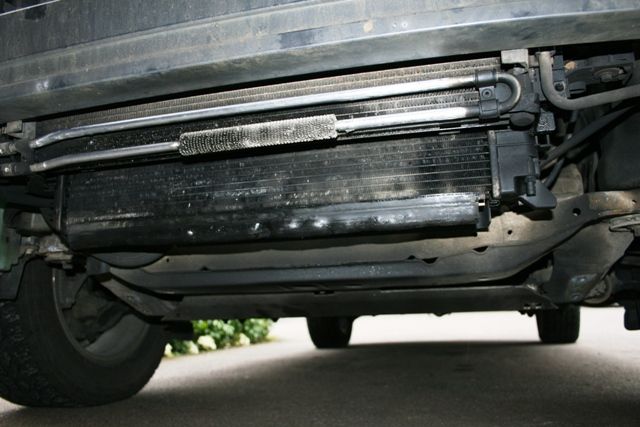 I removed these 2 bolts too - just gave a little bit of flexibility which came in useful 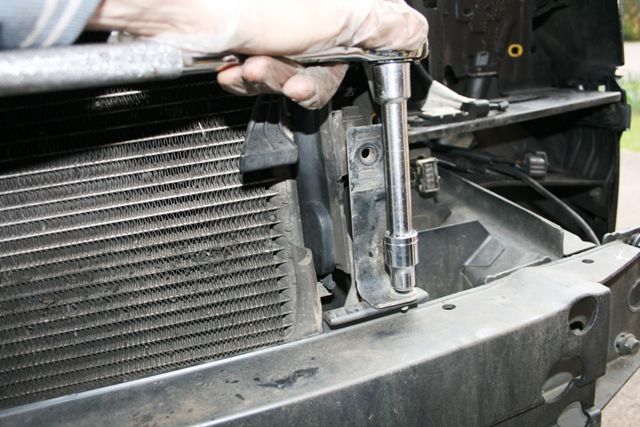 Remove this: 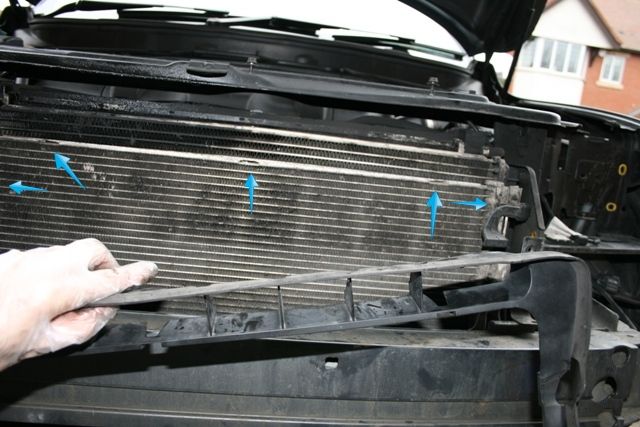 The two small rubber 'guides between the aircon rad and the beam across the front pull off easily and the clips are the same principle as the bumper/wheelarch clips - you can get your hand in the cross beam and push the centres out. D5Gill mentions "Detach the front coss member and guide it so that it will allow you to access the intercooler." I wasn't really sure which bit that was as the beam across the front didn't look like it was removable. the only other mounting seemed to be the radiator bolts here: 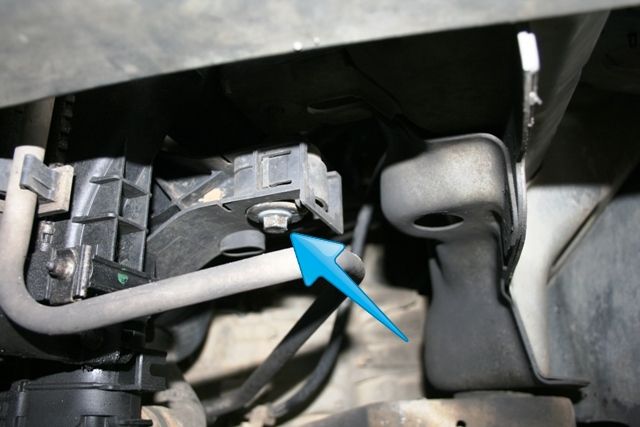 Releasing these each side lowered the whole sandwich. Undo the oil cooler brackets: 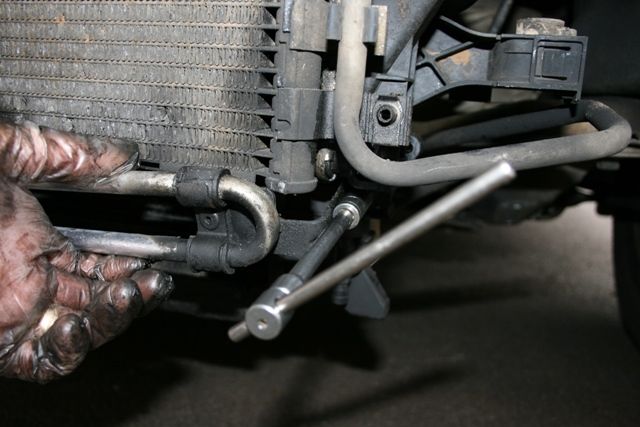 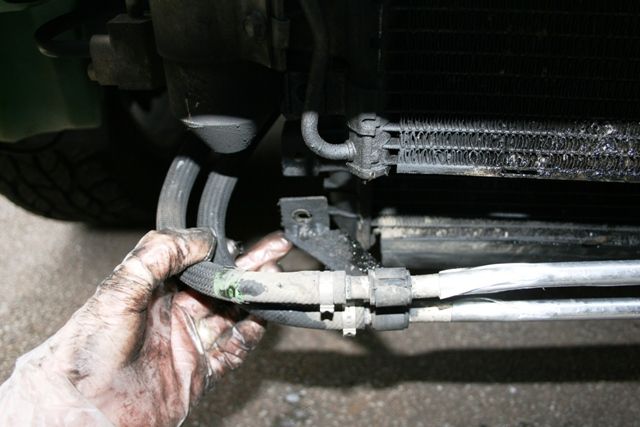 And then the four bolts holding the three rads together: Top drivers side: 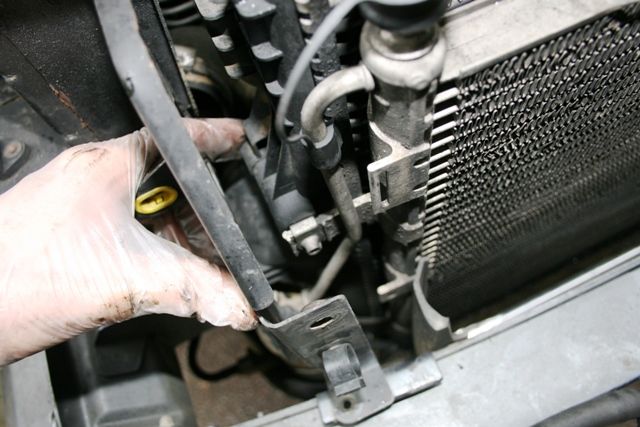 Top passenger side 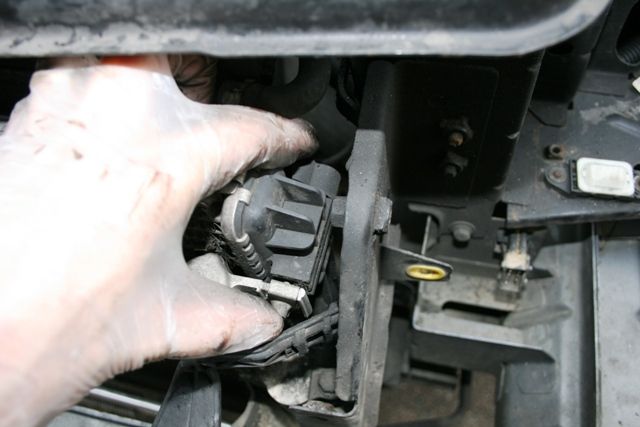 Bottom passenger side: 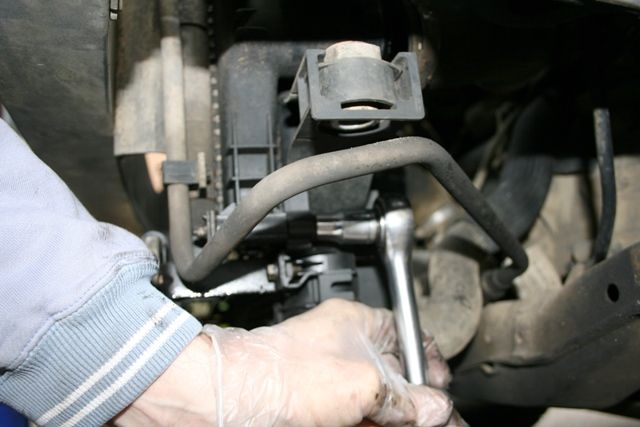 PITA bottom drivers side: 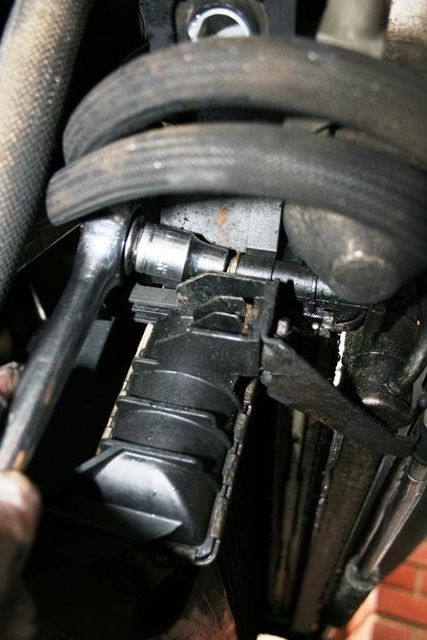 I had no cause to touch anything that looked like an airbag sensor on the front cross member of the subframe ?? At this point everything was loose and free to move. Note the water radiator is heavy unsupported and can be a bit of a handful when you're trying to juggle three radiators to get some space to slide the middle one out. This picture shows everything loose and the new rad repositioned - the arrowed bit I unplugged the cable to stop it getting stretched: 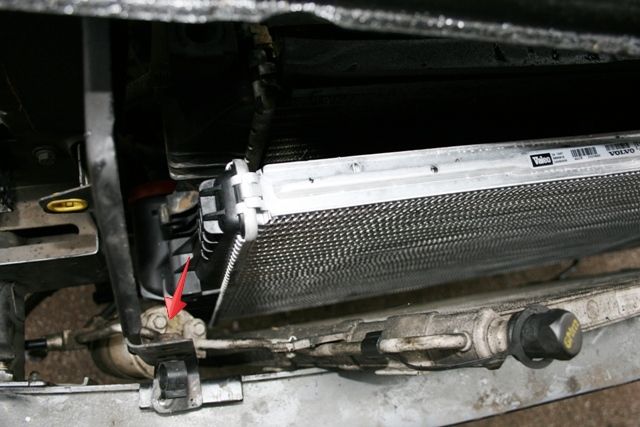 To get the rad out was a bit of a wrestle and I didn't think at first it would come out as the inlet and outlet pipes at each end snug round the water radiator. With a bit of logical will power and manouvering of the air con rad and water rad it popped out from the bottom. The new one went back in within 2 minutes (after I'd removed as much of Abingdon/CORE & Kirton as I could). Refitting they say is the reverse of the above !! I found it helpful as soon as I could to get the water rad bolts back in place to take the weight of the whole assembly so I could start to get the four sandwich bolts in place to help position everything back in alignment: 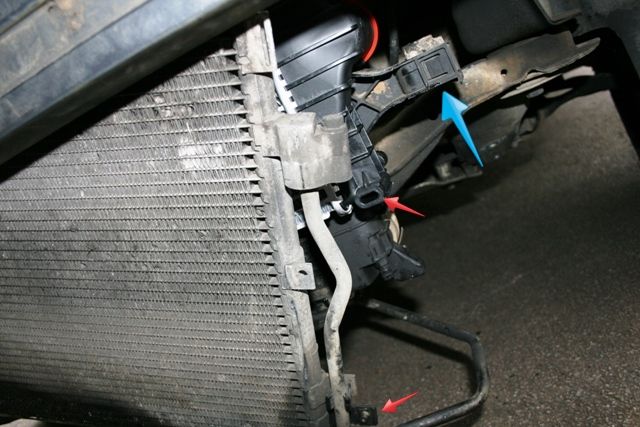 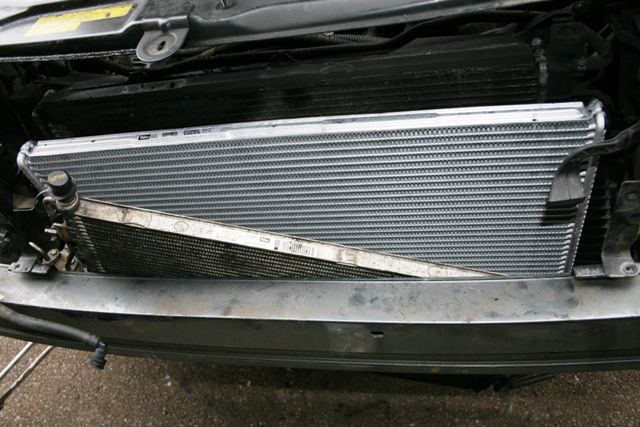 Being methodical I simply worked backwards bolting and clipping everything back together. Don't forget: the drivers side fog light cable, the cable to the air con rad, the washer jet feed pipe, the bumper/wheelarch clip. Mine is a 163bhp manual so I don't know if there are other bits on the 185 auto's that will be different and in the way - but I was suprised how little had to come off (once the bumpoer was off) to do this. The cross member and airbag sensors still puzzle me a bit as I touched neither. However a huge thanks to D5Gill for giving me the confience to give this a go - so this in conjuction with 'Gill's guide should be everything you need to have a go if you're handy with a spanner. Special tools 7mm small spanner, sockets 10mm - 14mm, small star key (rad sensor) and a stiff plastic thingy for poking and prising the bumper trim apart. At the time of writing the new rad was £225.42 + delivery from FRF - thanks Gents. Only regret I didn't have more time to clean up more of the oil - it was quite a mess behind there - maybe a summer project :-) Good luck - the thought of £200 still in my pocket makes me feel great. Cheers Ian. |

|

|
| The Following 19 Users Say Thank You to ianu For This Useful Post: |
|
Mar 11th, 2013, 20:53
|
#2 |
|
Premier Member
Last Online: Feb 4th, 2024 19:04
Join Date: Dec 2009
Location: southampton
|
Ian. From memory the airbag sensors are the white rectangles that you can see in your second and third pictures. The cross member can be unbolted if you wish but i got mine out the same way you did. I don't remember any difference for the 163 auto.
|
|
|
|
| The Following 3 Users Say Thank You to owenfackrell For This Useful Post: |
|
Jul 27th, 2013, 15:35
|
#3 | |
|
New Member
Last Online: Jul 3rd, 2015 20:08
Join Date: Apr 2013
Location: oxford
|
Quote:
|
|
|
|
|
| The Following 4 Users Say Thank You to bigwheel For This Useful Post: |
|
Mar 17th, 2014, 12:47
|
#4 |
|
New Member
Last Online: Jul 9th, 2014 11:31
Join Date: Feb 2012
Location: St Samson de la oque
|
Thanks for your article on how to replace the intercooler. I have just replaced mine with one from coolpartsuk on ebay for £102 inc postage, arrived next day.
When I was putting back the radiator 'sandwich' I had trouble realigning it and could not get the 2 long bolts that go up vertically from below to locate easily. The reason was because there are 2 'finger' bolts that have to locate into the holes in 2 rubber blocks which are on the top of the radiator. If you look on the 4th photo of the air intake snorkel you can see one of the locating finger bolts (10mm) to the right of the right hand snorkel retaining bolt. The other is in the same place on the left hand side of the car. I would suggest removing these at the same time as the snorkel bolts as it also allows more movement for the radiator when disassembling. |
|
|
|
| The Following 4 Users Say Thank You to Pschatz For This Useful Post: |
|
Feb 17th, 2015, 20:37
|
#5 |
|
New Member
Last Online: Jul 8th, 2016 09:27
Join Date: Aug 2014
Location: Birmingham
|
Just finished replacing intercooler on 163 Auto. I think there are a couple of ways to do this. I didn't touch the Air con pipes I removed the cross bar (slam bar) and didn't disconnect the air bag sensors. I don't think there would be any implications if I did as they are simply plug in clips with no warning notes etc. I was then able to jiggle the I/C unit clear.
Must say after replacement with OE part of ebay and also an MTE remap the car is allot smoother, powerful and quieter. |
|
|
|
| The Following User Says Thank You to uans03 For This Useful Post: |
|
Feb 18th, 2015, 12:12
|
#6 |
|
Member
Last Online: Apr 24th, 2023 14:18
Join Date: May 2014
Location: Rainham
|
That's the method I used, however I did disconnect the air bag sensors. Nothing happens. It's a little tight getting the IC out through the top but it only took about an hour and a half.
__________________
XC90 D5 in the only colour worth having, black. Obviously with the obligatory tinted windows. |
|
|
|
| The Following User Says Thank You to Chesney46 For This Useful Post: |
|
Feb 27th, 2015, 21:12
|
#7 |
|
New Member
Last Online: Feb 10th, 2024 16:35
Join Date: Jan 2013
Location: Warrington
|
Great guide, followed today whilst replacing my intercooler. Can't believe how easily the bumper came off:-)
Thanks! |
|
|
|
|
Mar 1st, 2015, 22:21
|
#8 |
|
VOC Member

Last Online: Feb 1st, 2023 11:27
Join Date: May 2007
Location: Rye, East Sussex
|
Ian, I can't believe how clean your car looks underneath, after all the mud you've wallowed in.
__________________
 1984 245 SE 1986 345 SE Auto 1984 245 SE 1986 345 SE Auto1991 940 TD Auto 2003 XC90 D5 SE AWD Geartronic2002 V70 D5 SE Auto 2014 V40 D2 SE Tiptronic Cross Country 2017 V40 D2 Cross Country Geartronic Pro 2015 XC60 D5 Polestar SE Lux Nav AWD Geartronic |
|
|
|
|
Jun 12th, 2016, 20:14
|
#9 |
|
New Member
Last Online: Jun 12th, 2016 20:14
Join Date: Jun 2016
Location: Irvine
|
Hi guys5.
I am new here but I already see that Information Is as good as ever. This post helped me to change the intercooler in about 3-4 hours ( had 2 small kids to "help" me😂😂😂😂😂😂  The car is like new. The old intercooler looks like it's been through the WW2. I am surprised it actually lasted this long. I only bought the s60 d5 2 months ago and 11000 miles went in since. It was really bad in the past week that a cloud of black smoke came through the exhaust which was embarrassing. It had shown signs for about 6 weeks as at steady 2300 rpm at 70 mph was smoking black too. Now after I fitted and intercooler from eurocarparts ( EIS made in Germany) car feels like new. I would like thank again for the authors of this post as it saved me hassle to see a diesel Specialist ( garage did not want to take care saying no clue why the black smoke. I guess we can open our own garage then😊😊😊😊😊 and a couple of hundred in labour. Thanks again |
|
|
|
| The Following User Says Thank You to Djyohan For This Useful Post: |
|
Jul 5th, 2016, 18:18
|
#10 |
|
Junior Member
Last Online: Jan 9th, 2024 09:38
Join Date: Aug 2010
Location: Abingdon, Oxon
|
Excellent guide, I'll be following this soon as I have black smoke and loss of mpg/confused power delivery.
Is it always the intercooler or possibly just the hoses? Would you put new hoses on as well? A new intercooler is only £87.74 on Ebay, mind. Probably worth doing on my 12 year old XC90. |
|
|
|
|
| Currently Active Users Viewing This Thread: 1 (0 members and 1 guests) | |
|
|


 Linear Mode

