
|
|||||||
| 140/164 Series Articles How to's and Guides for the 140/164 series. |
 Information
|
|
164 foglamp reconditioningViews : 12462 Replies : 1Users Viewing This Thread : |
 |
|
|
Thread Tools | Display Modes |
 Jan 8th, 2010, 18:51
|
#1 |
|
VOC Member
|
164 foglamp reconditioning
If you have a 164 with excellent condition foglamps, you are lucky! Most are suffering from dirt and rust inside, making them ugly and useless for their intended purpose. Normally, buying new lamps is a cost effective way to spruce up a classic car, but the 164 foglamps are rare and expensive, so I decided to recondition my foglamps to make them look as-new (or close). I recorded the process here in case it's useful to other 164 owners. Before the details, before and after photos: 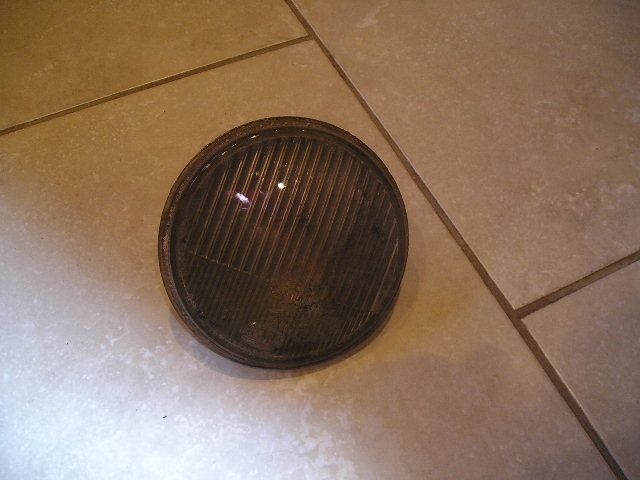 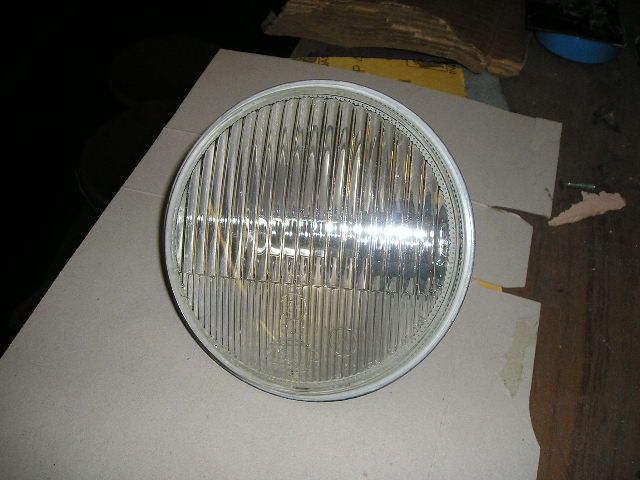 The process is not very difficult, but it is fiddly and there is a risk of damaging the lamp if you are careless. So wait until you're in a patient mood! The end-product looks good. Of course, it will not perform as well or last as long as a brand new lamp, but for a tiny fraction of the price, it is a good substitute. And there is a lot of satisfaction to be had from a DIY repair. 0. Things you will need for the refurb:
*This must be an automotive silicon product specifically designed to bond and glue components. A simple gap-filling sealant (such as domestic bathroom sealer, car seam sealer or windscreen sealer) may look similar, but can't be relied on to hold the lamp together. 1. Disconnect the wiring and remove the foglamp from the car (single nut in the centre at the back of the lamp). Remove the bulb holder, then clean inside the lamp with hot soapy water and an old toothbrush, then dry it. 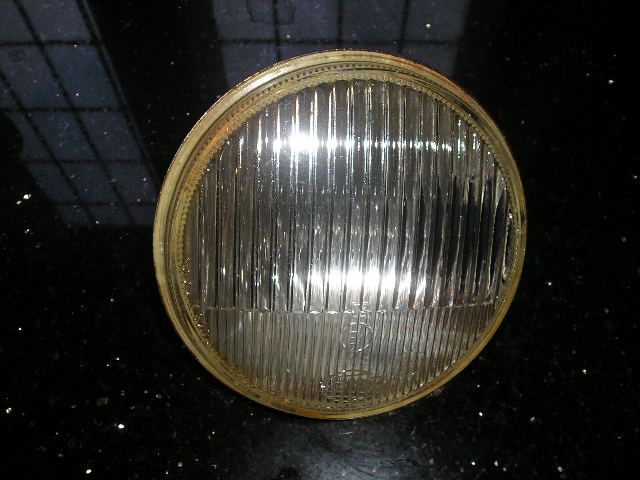 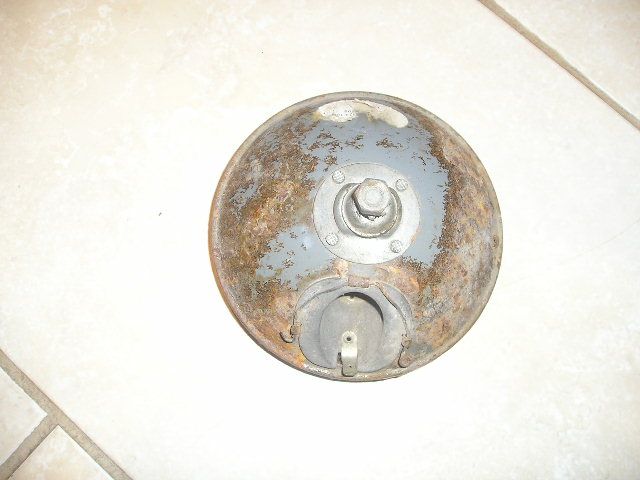 If you are lucky, your lamp will have just dirt inside; no rust. If you find there is no damage to the reflector, congratulations, you've finished! However, most lamps, like mine, will have some corrosion and discolouration inside. 2. Next, de-rust the back of the lamp. This is best done with the lens still fitted, because the metal may be very weak and the glass helps keep it in shape while you work. Wrap some tape around the edge of the glass to protect against damage. 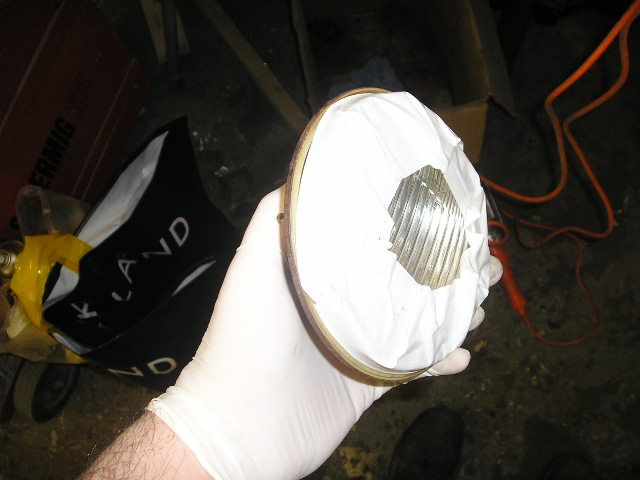 Remove loose paint and rust from the back of the lamp with a wire brush. I used a brush on the angle-grinder, but do this very delicately and carefully. (Think dentist, not lumberjack!). I sat on the floor to do this... less likely to break the lamp if it's dropped! 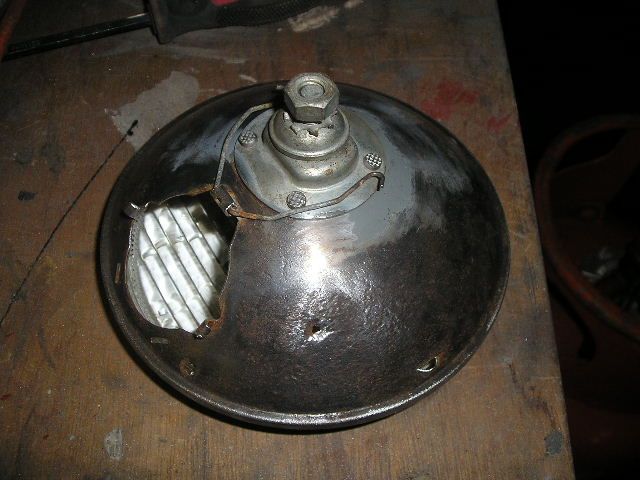 You can see that the metal on my lamp is very thin; it had rusted through in two places. (If your reflector is even more weak and fragile, you may need to reinforce it - see steps 7 & 8 - with the glass still in place. Then return to step 3 and remove the lens). 3. Next, removing the lens. The objective is to separate glass and reflector without damaging either. Working on 2 or 3 inches at a time, use a heat gun to heat the metal at the back of the glued joint. Be careful to avoid getting burnt, or dropping the lamp.  Once heated moderately, the glue will become crumbly and can be carefully dug out using a tiny screwdriver or a knife blade. 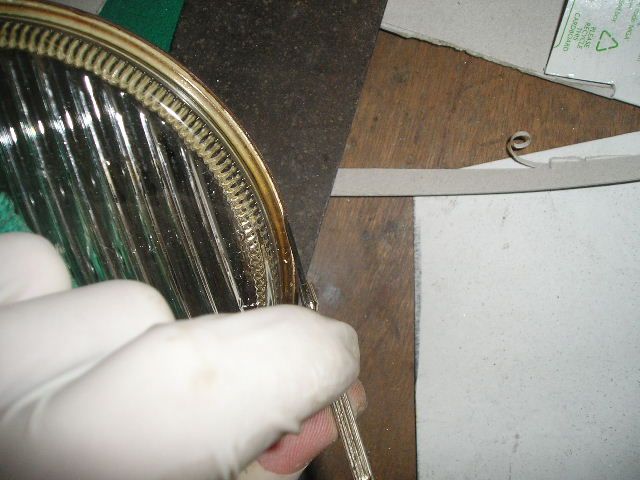 Keep working on the glue going all round the rim, several times if necessary, until the glass will come out easily. Do not use any more than very minimal leverage. Any significant force could damage the glass and/or the reflector. Don't use any leverage on a part of the reflector that looks weakened due to rust. 4. Preparing the lens. Scrape off the glue until it's perfectly clean. 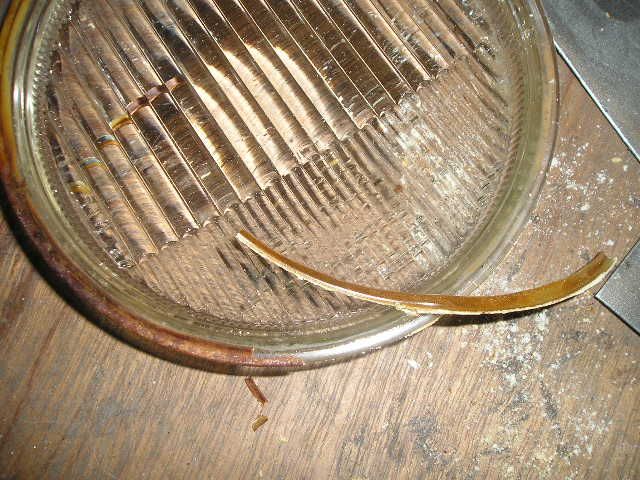 Use car class cleaner to remove all the dirt from inside the lens.  Remove the protective tape and put the glass in a safe place. 5. Clean the bulb holder with wire wool. 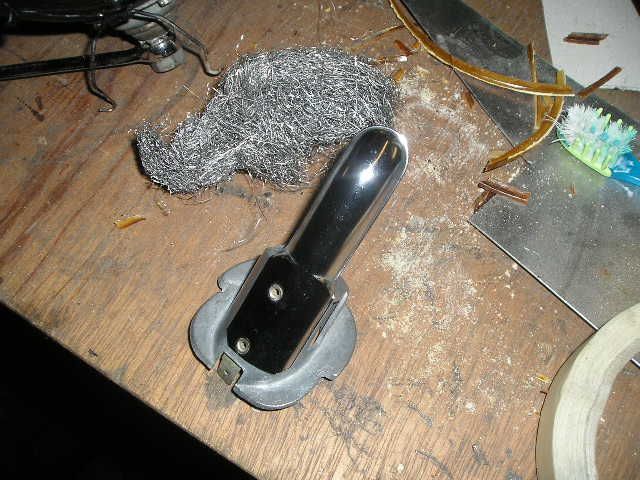 6. Preparing the inside of the reflector. The tape that will replace damaged areas is not as reflective as the original surface so it's important to retain as much of the original reflective material as possible, where it is in acceptable condition. Take care to avoid damage when doing your prep. Used a car bodywork polish to clean up the reflective surface, where possible. (I advise against metal polish; this is could be too abrasive and could damage/remove the reflective surface). 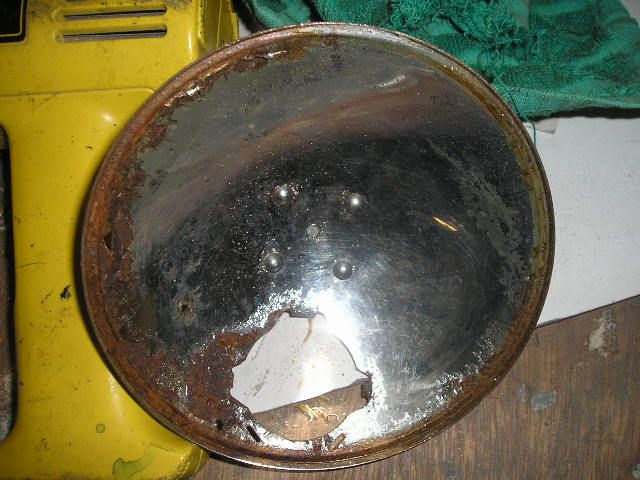 For the rusty areas only, prepare carefully with the wire brush on the grinder (where you can do so without damaging any good areas). Elsewhere, scrape away loose material with a small screwdriver. Remove all glue and rust from the rim. 7. De-rust the reflector. I use Bilt Hamber, which does not discolour the original reflective surface, only acting on rust and bare steel. 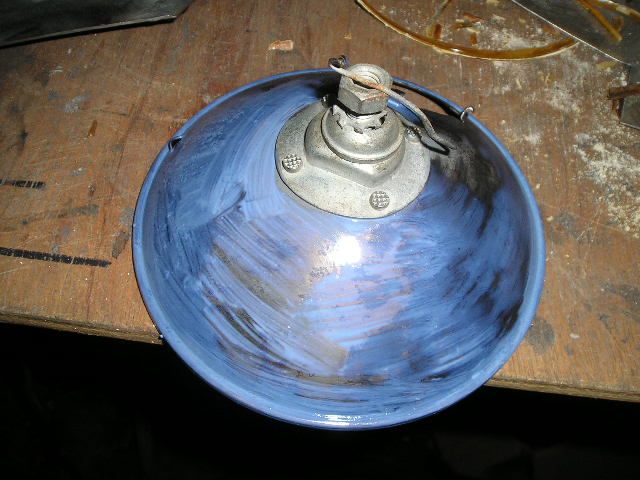 I used two coats inside and out. 8. Rust repair/reinforcement, using fibreglass filler. To keep the shape and avoid having to sand inside the reflector, put masking tape on the inside over any holes, while the filler sets. 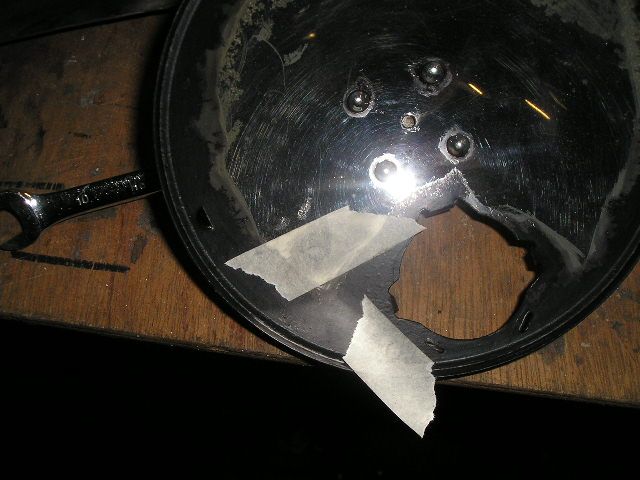 Where the metal is holed or very thin, apply a small amount of fibreglass bridging filler to the back of the reflector. 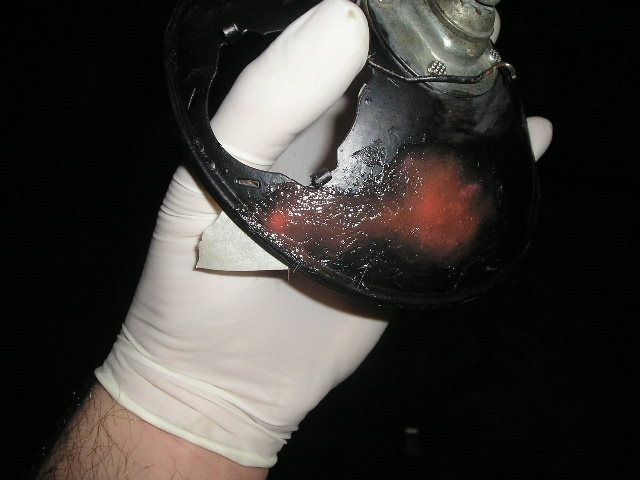 9. Sand the filler (if required), remove the masking tape and paint all of the back of the reflector. 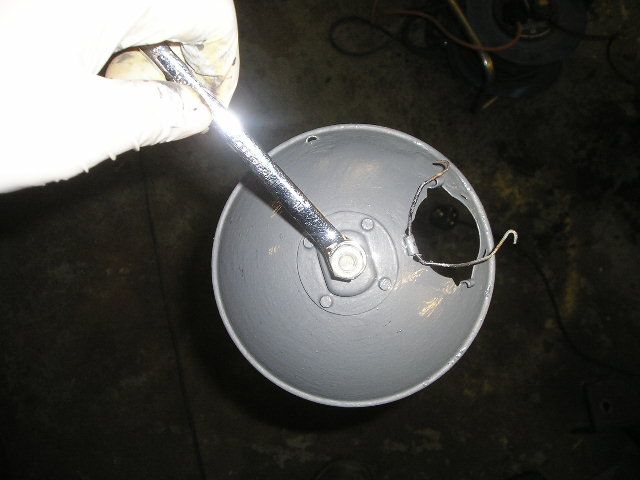 I bolted a spanner to the lamp mounting to make it easier to handle. Paint the inside carefully, covering only the rusted or damaged parts. I used hammerite (I mixed grey and white to get this colour). 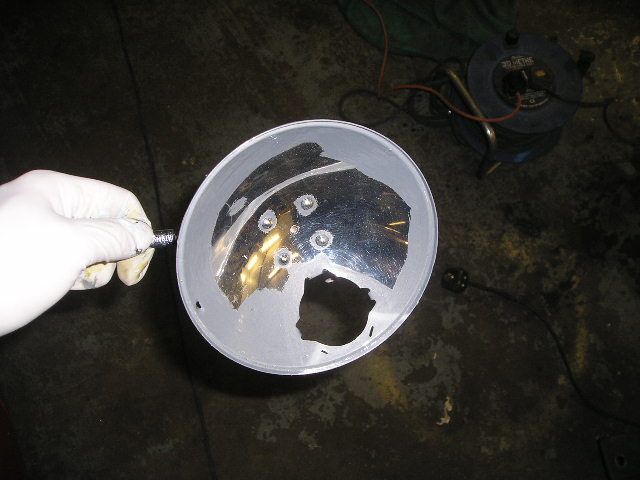 Check that the drain hole at the bottom of the lamp (on the left in the photo above) has not been blocked by filler or paint. If you had to fill over it due to rust damage, drill a new drain hole, If your lamp had only a few small areas inside that needed painting, you may wish to go straight to reassembly, step 11. 10. In most cases, to make the lamp look new it is necessary to repair the reflective surface; I used aluminium tape. Make a set of templates from card to get shapes which neatly cover the painted areas inside your reflector, but leave the good original reflecting surface uncovered wherever possible. 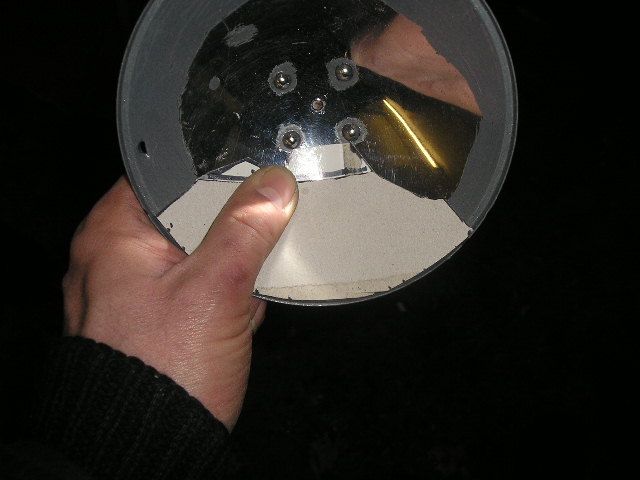 Clean the inside of the reflector with panel wipe, to ensure the tape sticks well. Cut the tape; rounded corners are best - less likely than a sharp corner to be snagged or to peel off. To help keep the tape secure, cut it wide enough to go onto the flat surface where the lens will mount, so the glass will hold it in place. Apply the tape carefully. Avoid wrinkles as much as possible, but you will get some because it's a double curvature and the tape won't stretch. As with applying a sticker, the best technique is to peel and fold back a small corner of the backing paper. Hold the piece of tape in the position that you want it, then stick down the corner to locate it. 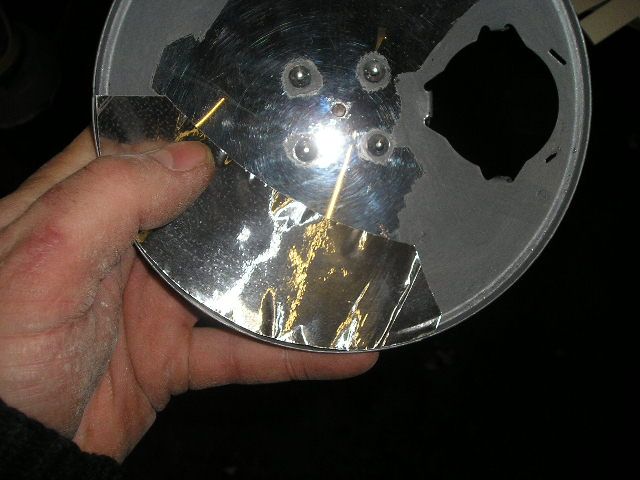 Peel back off the backing, a little at a time, pressing down the tape from the centre as you go.  Initially, tape over the hole for the bulb holder and the drain hole. When all sections of the tape are in place, use a knife blade to cut out the bulb hole, leaving a few mm to fold back around the edge. Cut out the drain hole. 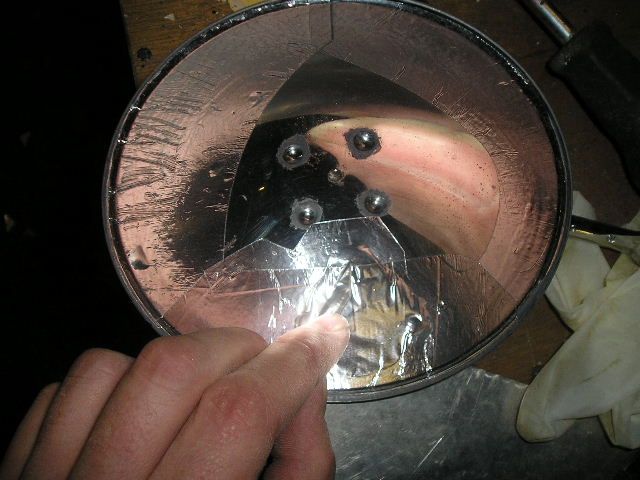 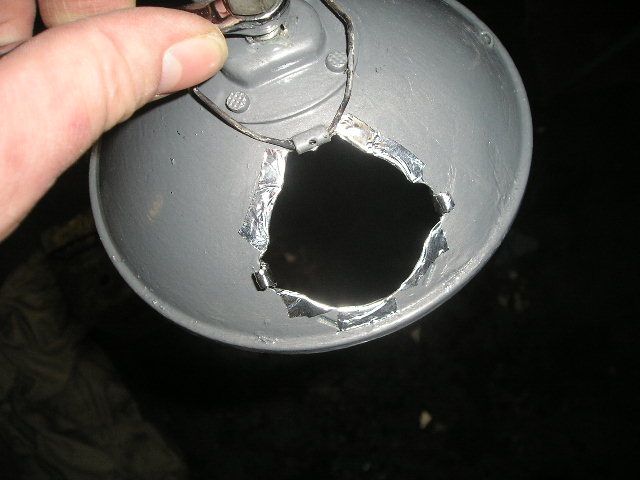 Polish up the tape and the reflector with car body polish. Be careful to avoid snagging any tape edges and don't get polish on the rim where the glass will be glued on. 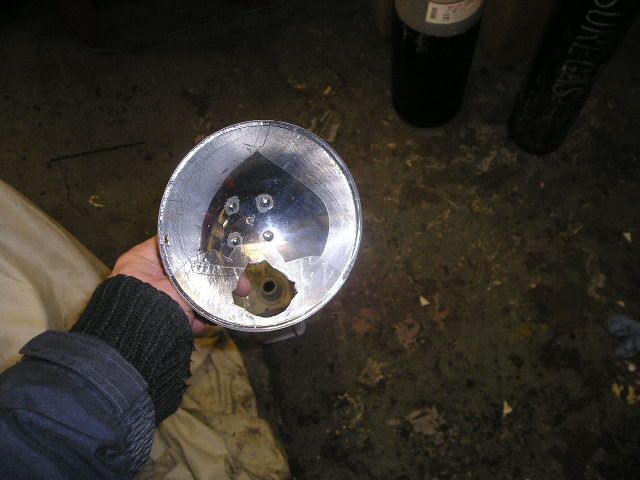 11. Reassembly. Use sandpaper to key the mating surface of the glass. Then clean the mating surfaces of the lens and the reflector with thinners or panel wipe. Put a thin, even layer of white or grey car-bond around the edge of the glass. Apply to both the back and the edge of the glass. Do not get car bond on the inside of the lens; it's impossible to clean off once the lamp is reassembled. This is tricky to use neatly. Work slowly, apply a little at a time, spreading it carefully with a small screwdriver. Get a neat edge by running the knife blade around the edge to remove excess, wiping it frequently on a rag soaked with panel wipe. 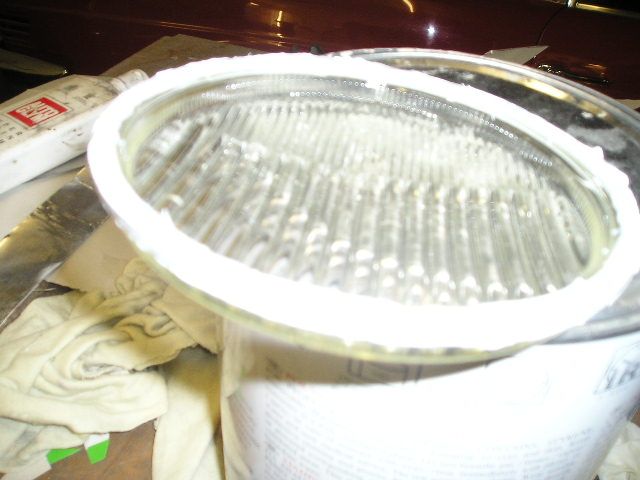 Carefully mount the lens and press it into place. Line up the bottom of the lens with the drain hole in the reflector. Add a little more car-bond if there are any gaps or cracks visible around the edge. Use a small screwdriver to work it into the gaps neatly. Use paper towels dampened in panel wipe to remove any excess, while the car-bond is still wet.  Leave the lamp overnight with a modest weight holding the lens in the correct position. 12. The lamp can be now be refitted to the car. Showing a test fit on my front panel (the car is still in pieces, as you'll know if you follwo my project thread) 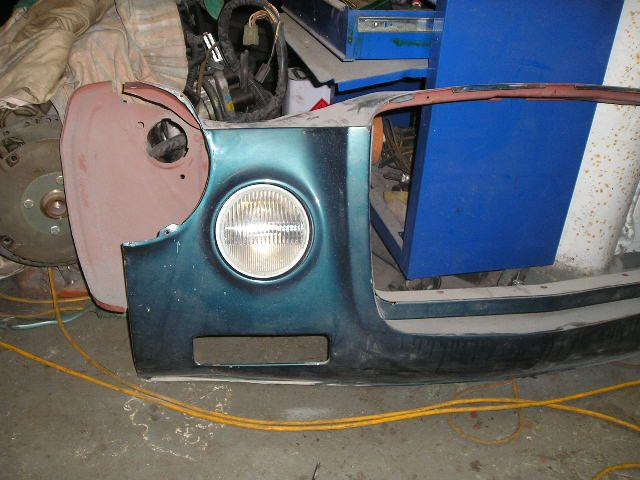 Originally, there would have been a light grey rubber edge-cover which slips over the joint between the glass and reflector, but I haven't been able to find a replacement for this. If anyone has any ideas, please pass them on! Best of luck! John
__________________
XX 
|

|

|
| The Following 9 Users Say Thank You to john h For This Useful Post: |
|
Jan 8th, 2010, 23:45
|
#2 |
|
300 Register Keeper
Last Online: Yesterday 17:23
Join Date: Dec 2001
Location: Nottingham
|
Excellent, John, thanks!
Now....anyone got any spare foglights they want to sell...? Condition unimportant  cheers James
__________________
VOC 300-series Register Keeper '13 V70 D4 SE Lux '89 740 Turbo Intercooler '88 360 Turbo Intercooler '84 360 GLT '81 343 GLS R-Sport '79 343 DL '70 164 |
|
|
|
| The Following User Says Thank You to foggyjames For This Useful Post: |
|
| Currently Active Users Viewing This Thread: 1 (0 members and 1 guests) | |
| Thread Tools | |
| Display Modes | |
|
|


 Linear Mode

