
|
|||||||
| S40 / V40 '96-'04 General Forum for the Volvo S40 and V40 (Classic) Series from 1995-2004. |
 Information
|
|
GUIDE: Changing P1 to P2 headlights (4 pin)Views : 14644 Replies : 51Users Viewing This Thread : |
 |
|
|
Thread Tools | Display Modes |
|
|
 Mar 5th, 2012, 14:39
|
#1 |
|
Senior Member
Last Online: Oct 20th, 2013 20:24
Join Date: Aug 2007
Location: Derbyshire
|
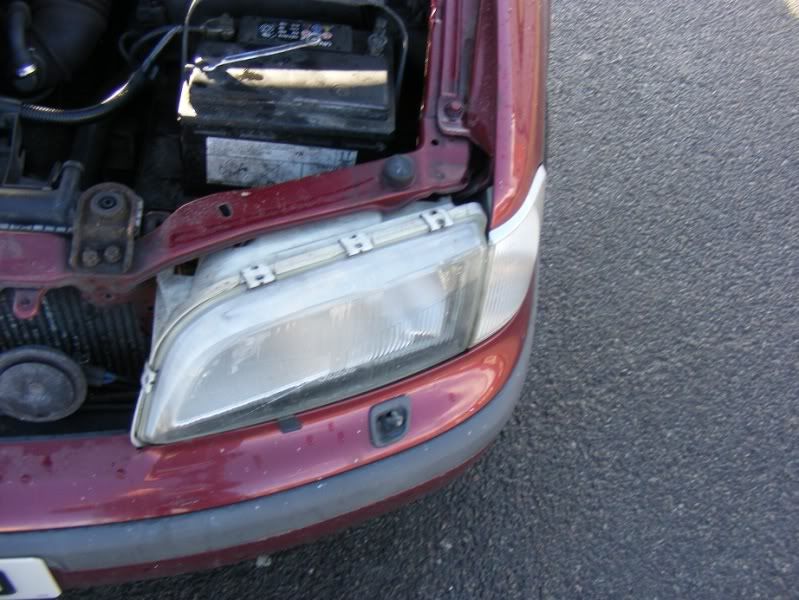
Step 1 - The P1 headlights are quite notorious for being sub-optimal, the P2 offer an upgrade without too much fuss. I believe there are at least two different types (4 pin and 5 pin), this will deal with the more awkward 4 pin version. I was changing mine because I fell victim of the terrible plastic headlight adjusters giving up in my P1 lights. Pop the bonnet and we'll start work on removal
 Step 2 - Between the headlight and indicator you will find a posidrive screw, slacken this off (it clamps the indicator in place but only needs to be slackened to let the unit slide out, no need to take the screw out completely)  Step 3 - Now simply slide the indicator unit outwards and shown 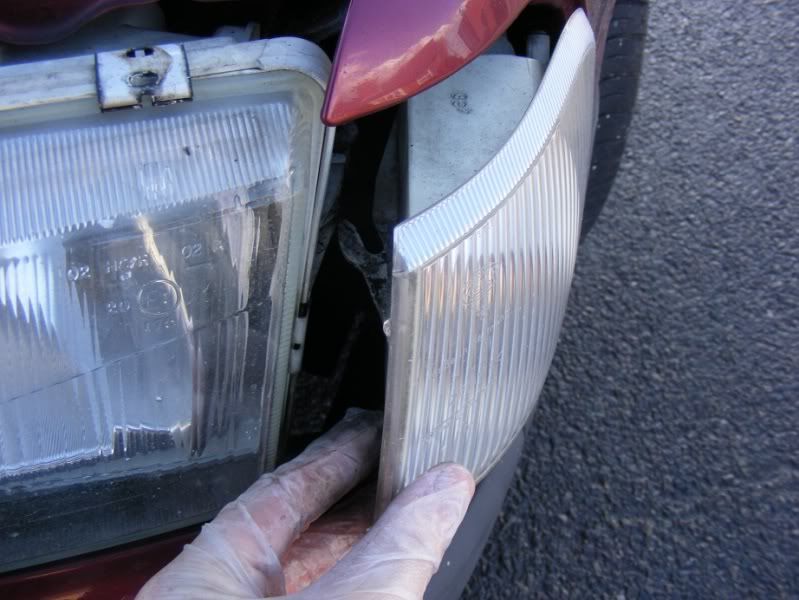
__________________
Click here for guides Last edited by JSeaman; Mar 5th, 2012 at 14:52. |

|

|
|
Mar 5th, 2012, 14:42
|
#2 |
|
Senior Member
Last Online: Oct 20th, 2013 20:24
Join Date: Aug 2007
Location: Derbyshire
|
Step 4 - Pull the light (gently) right out and then slide the connector off by lifting the tab, you can't see it on the first picture as it is on the underside so I took another one to show the tab
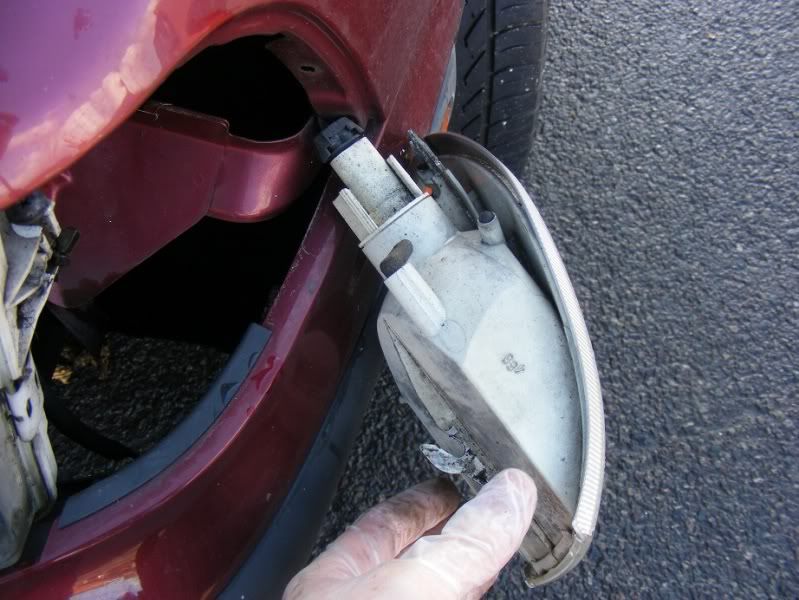 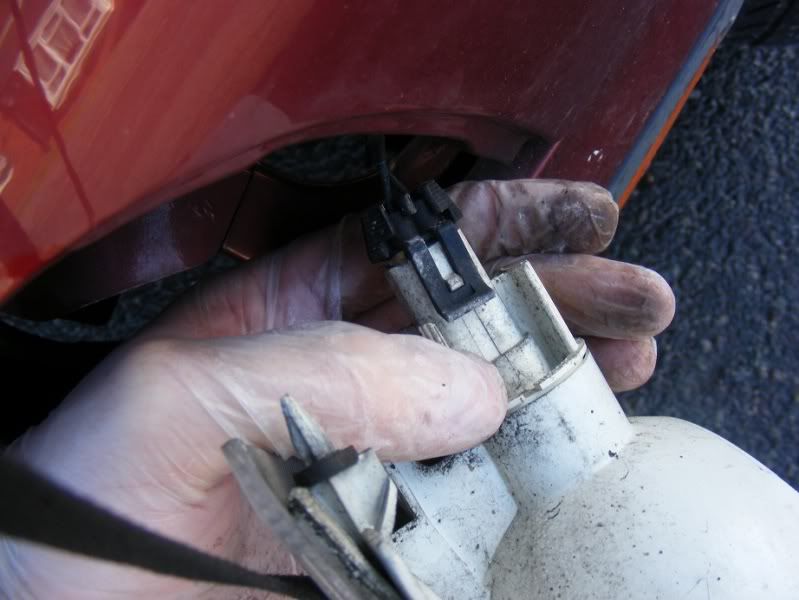 Step 5 - Remove the indicator from the car 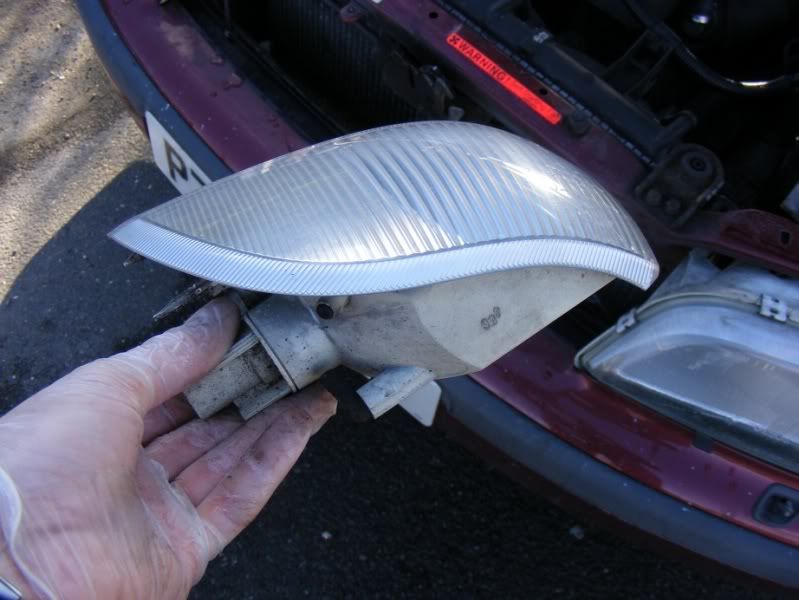 Step 6 - You have now revealed two 10mm nuts that hold the light in, remove these completely 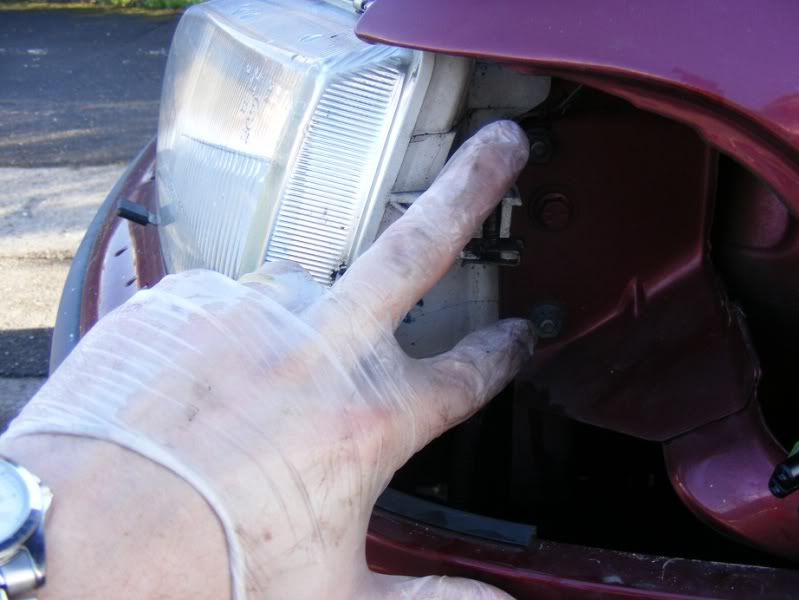 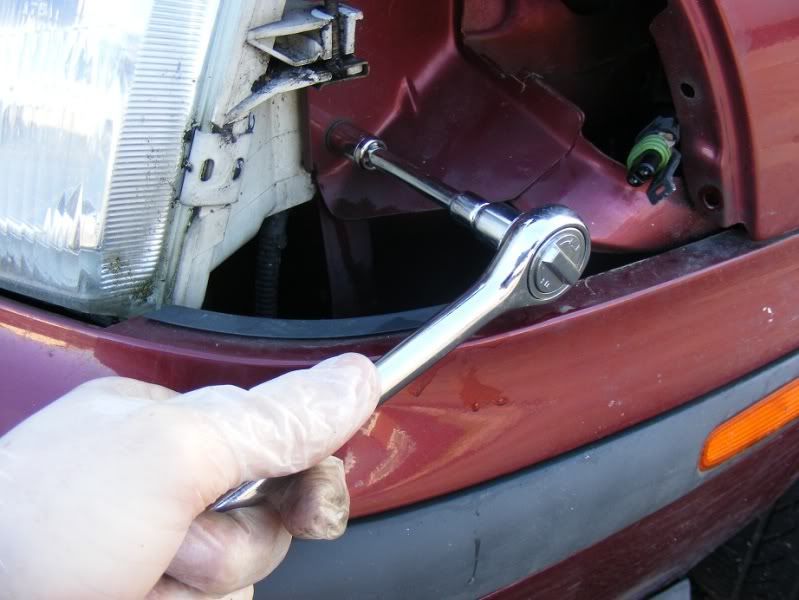
__________________
Click here for guides |
|
|
|
|
Mar 5th, 2012, 14:43
|
#3 |
|
Senior Member
Last Online: Oct 20th, 2013 20:24
Join Date: Aug 2007
Location: Derbyshire
|
Step 7 - A further two 10mm nuts hold the light in place from behind, these can be accessed already in the engine bay as shown
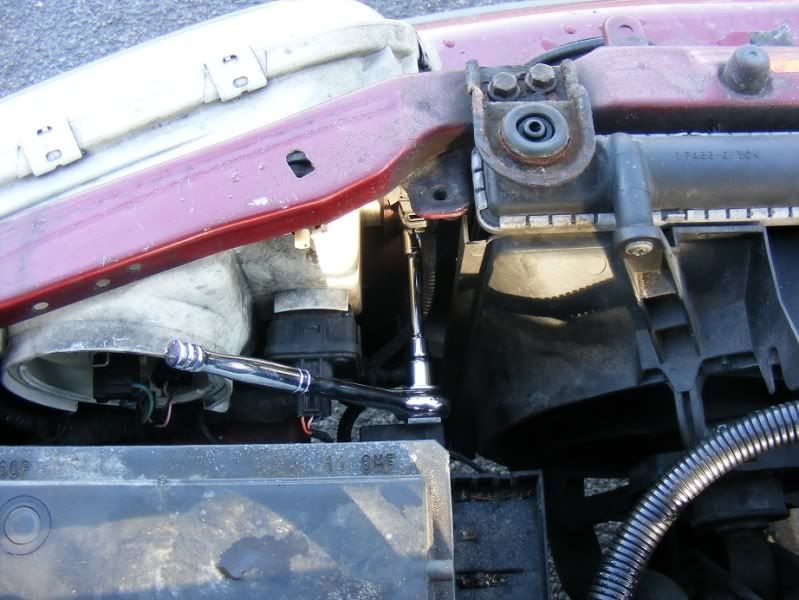 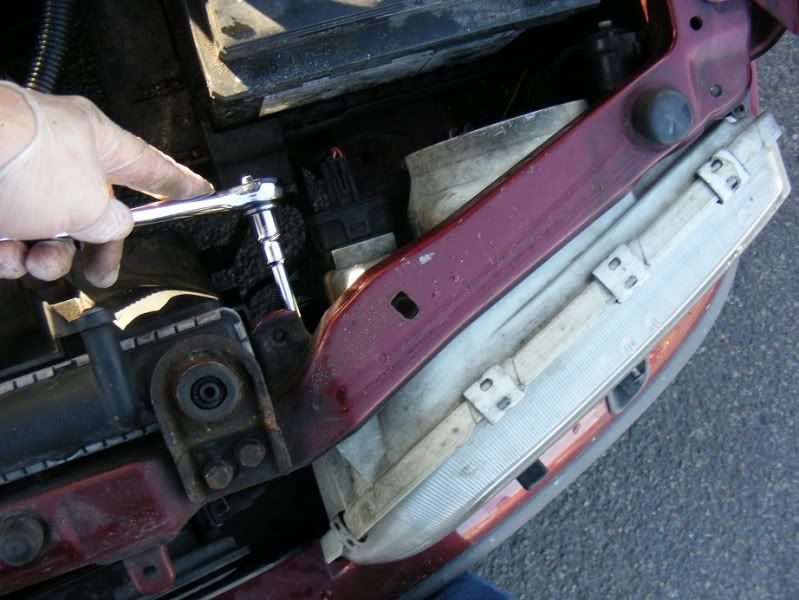 Step 8 - Removing the light is a bit awkward, the corner of the lens likes to hit the bumper so you need to force this down at the corner with one hand whilst wriggling the light out. It will come nad is probably easier if you can get two people on it. You need to pull forwards first then slide the unit towards the middle of the car to come off the 4 studs you removed the nuts from in steps 6 and 7  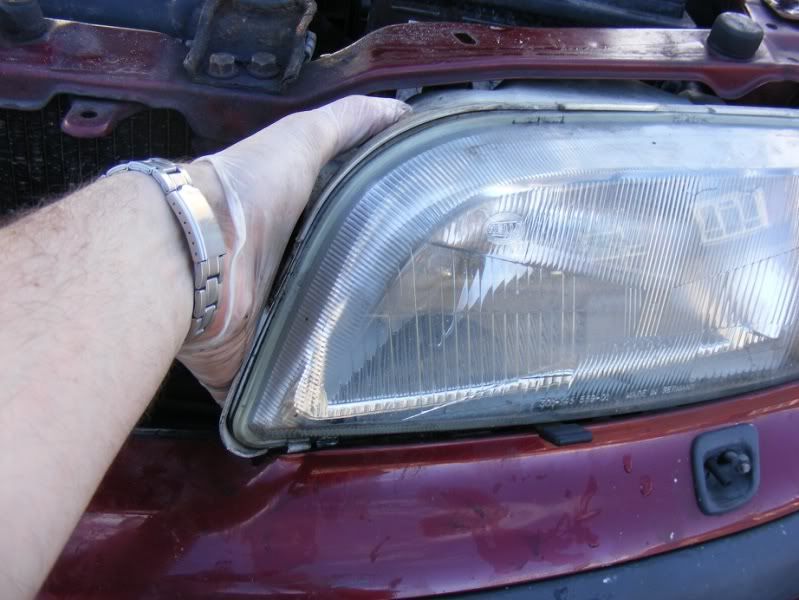 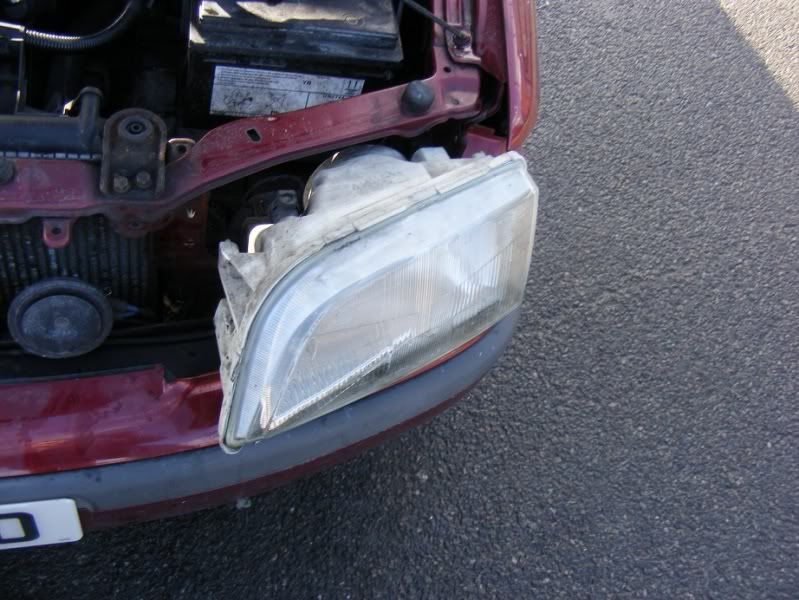
__________________
Click here for guides |
|
|
|
|
Mar 5th, 2012, 14:44
|
#4 |
|
Senior Member
Last Online: Oct 20th, 2013 20:24
Join Date: Aug 2007
Location: Derbyshire
|
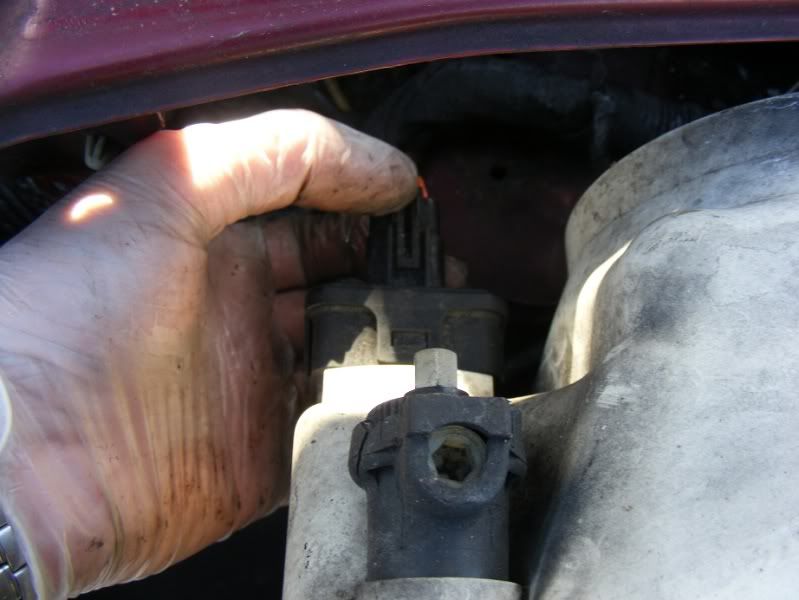
Step 9 - Squeeze and remove the 3 pin connector for the headlight level adjuster
 Step 10 - Twist and remove the black cap so you can get to the bulbs and then remove the 3 pin multi plug and 2 pin connector for the sidelight 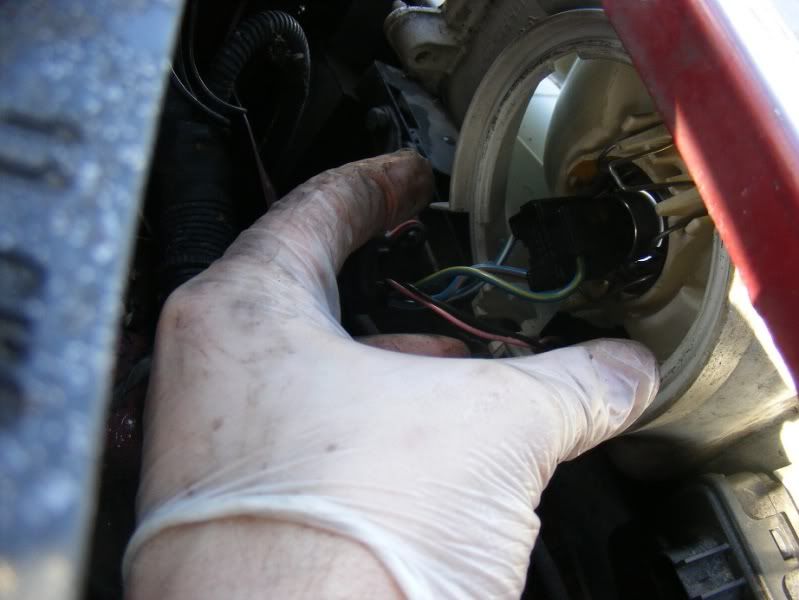 Step 11 - You can now remove the old lamp and throw it in the bin 
__________________
Click here for guides |
|
|
|
|
Mar 5th, 2012, 14:45
|
#5 |
|
Senior Member
Last Online: Oct 20th, 2013 20:24
Join Date: Aug 2007
Location: Derbyshire
|
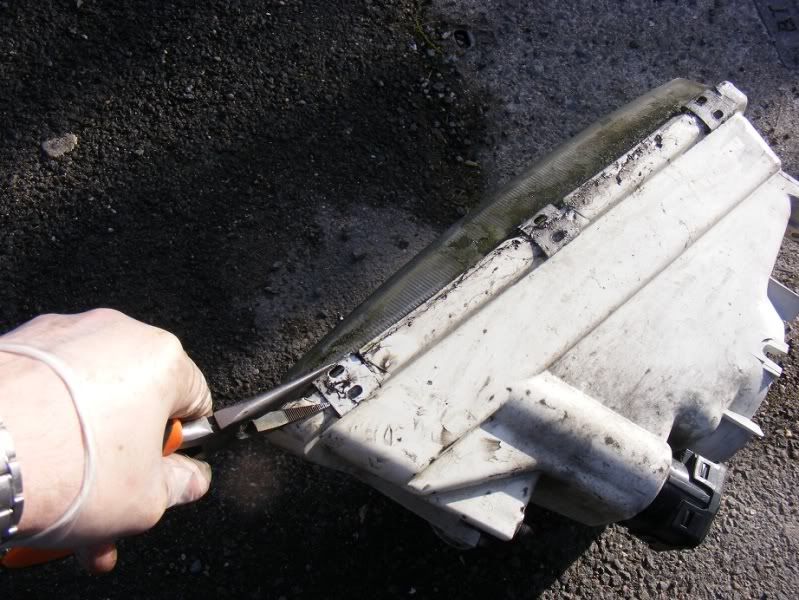
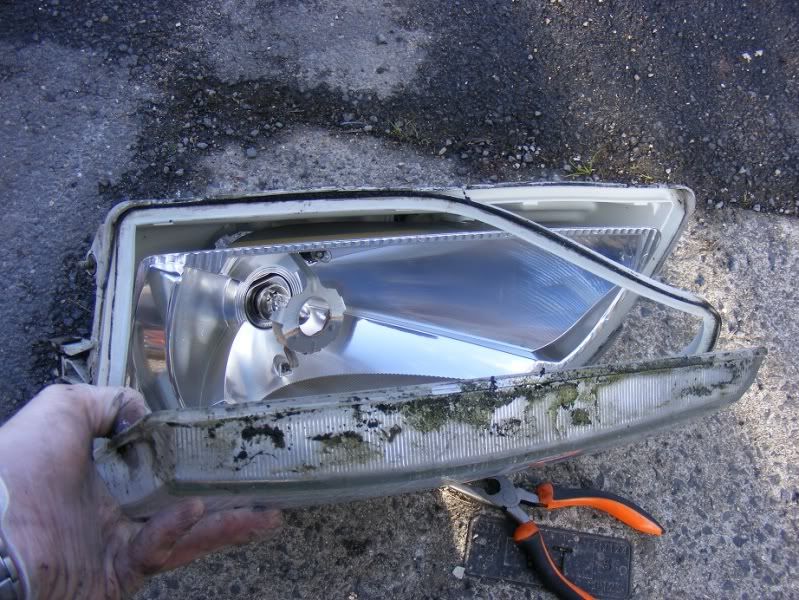
Step 12 - If you need to disassemble the unit, simply remove the clips (3 at the top, 3 at the bottom and one either side) as shown with some pliers/a screwdriver. You can then remove the glass (second picture) and set to work on any repairs
  Step 13 - Repeat the process on the other side, it is exactly the same 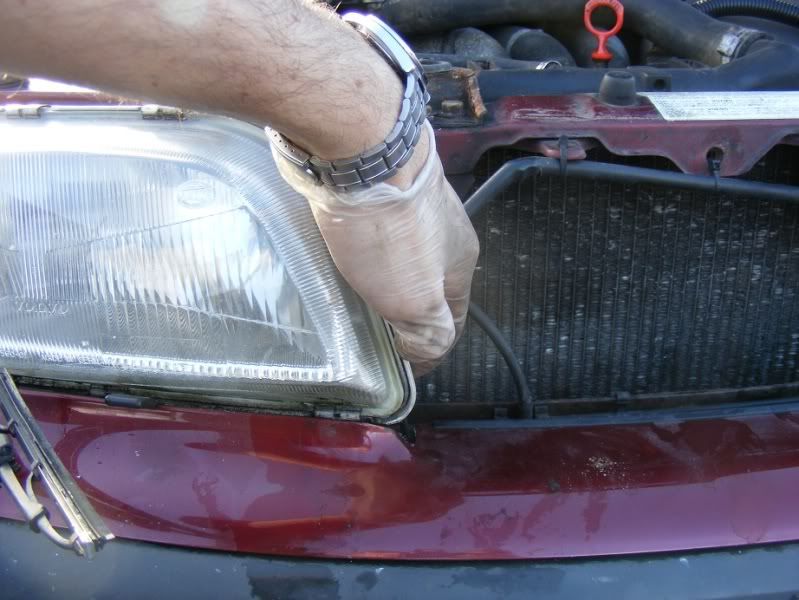 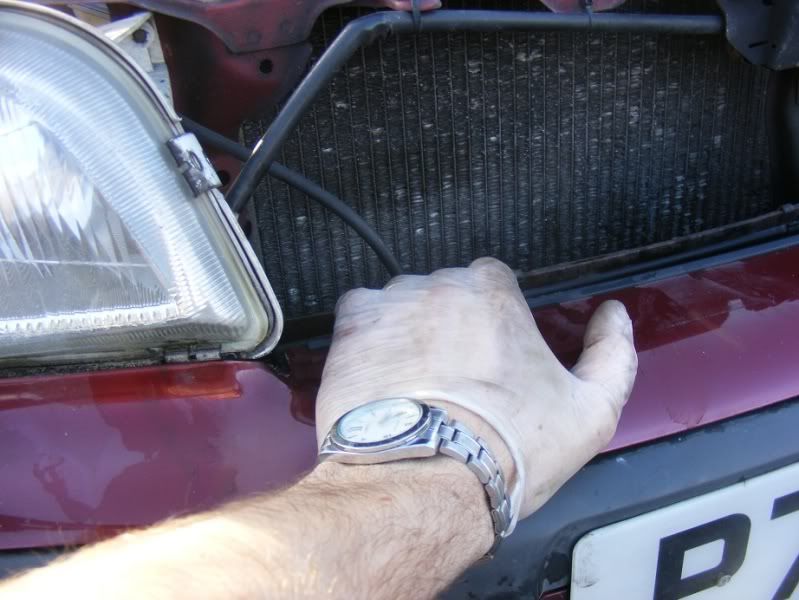 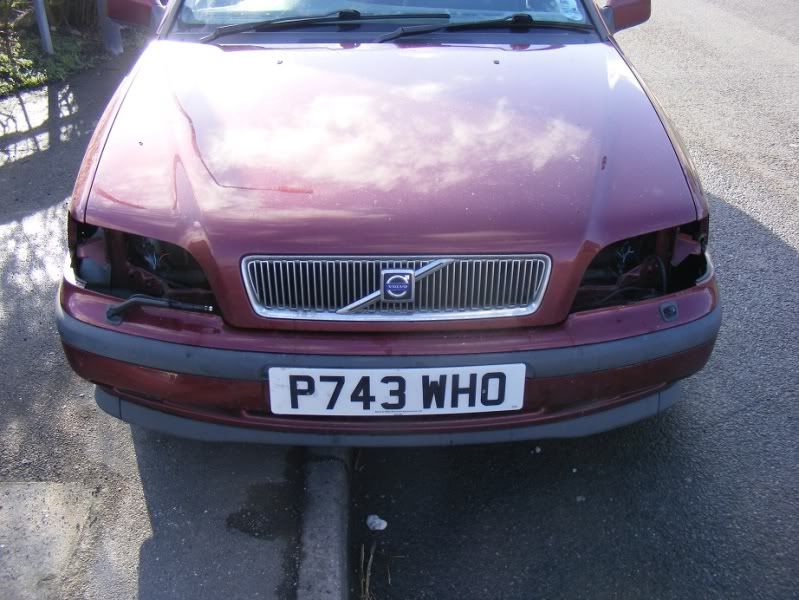
__________________
Click here for guides |
|
|
|
|
Mar 5th, 2012, 14:46
|
#6 |
|
Senior Member
Last Online: Oct 20th, 2013 20:24
Join Date: Aug 2007
Location: Derbyshire
|
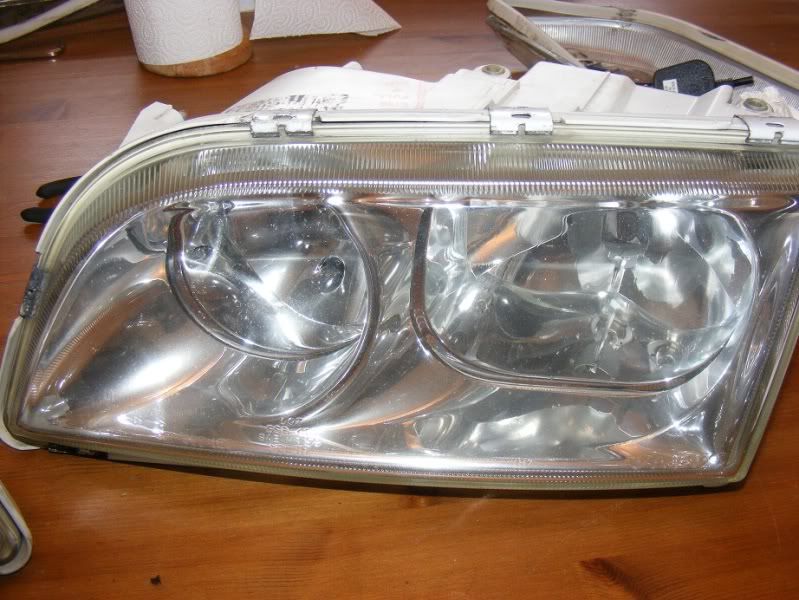
Step 14 - Now get yourself some of these pretty things, P2 clear headlights
 Step 15 - This is the 4 pin connector we will be using 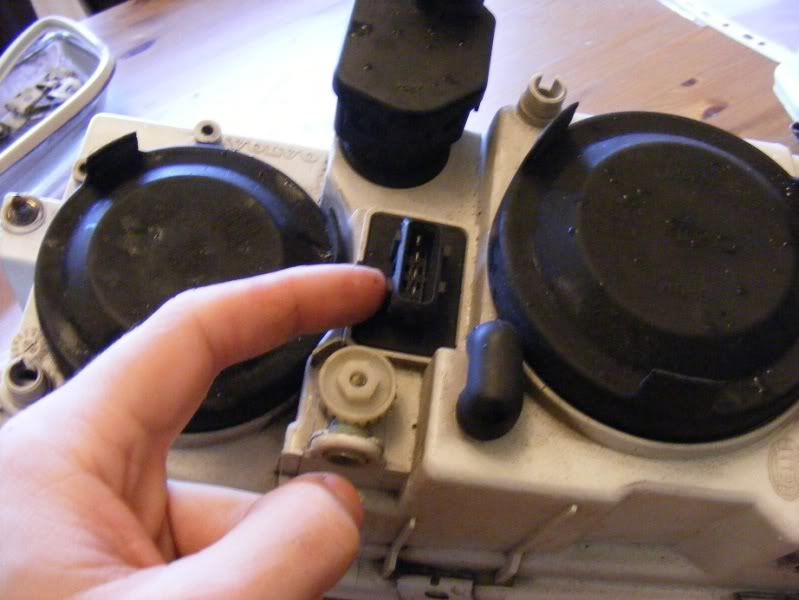 Step 16 - We will start by making some pigtails of wire up, cut to size (~8-12inches) with some scissors/snips (picture 1). Then Strip the ends of the wires (picture 2). Get some small red ferrule spade clips (picture 3) and drimp them onto the wires (picture 4)  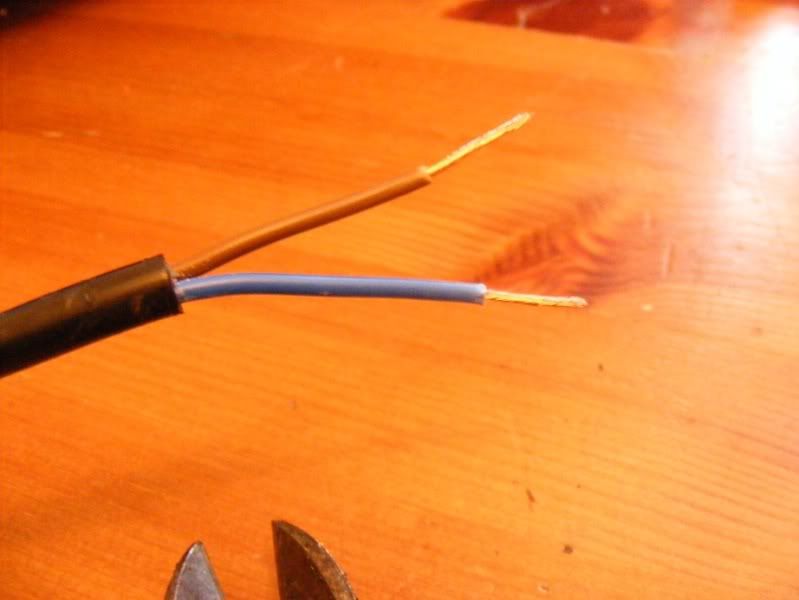 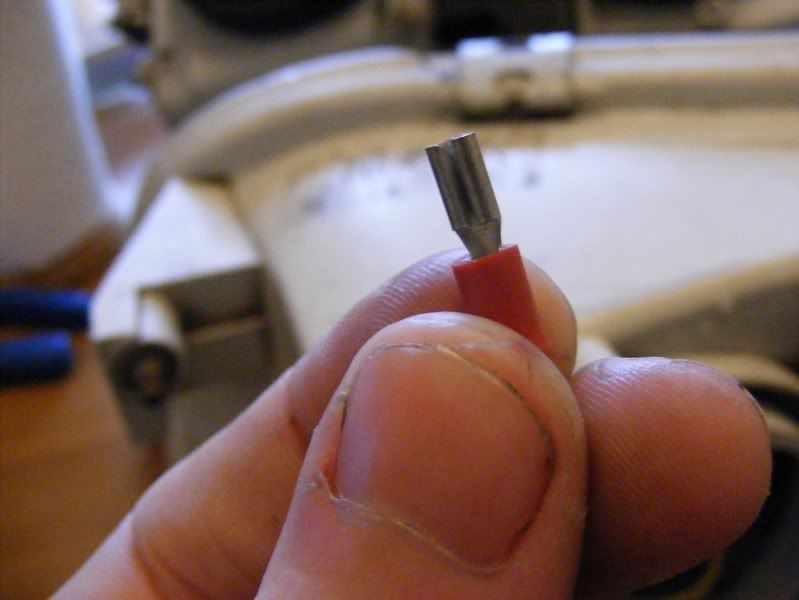 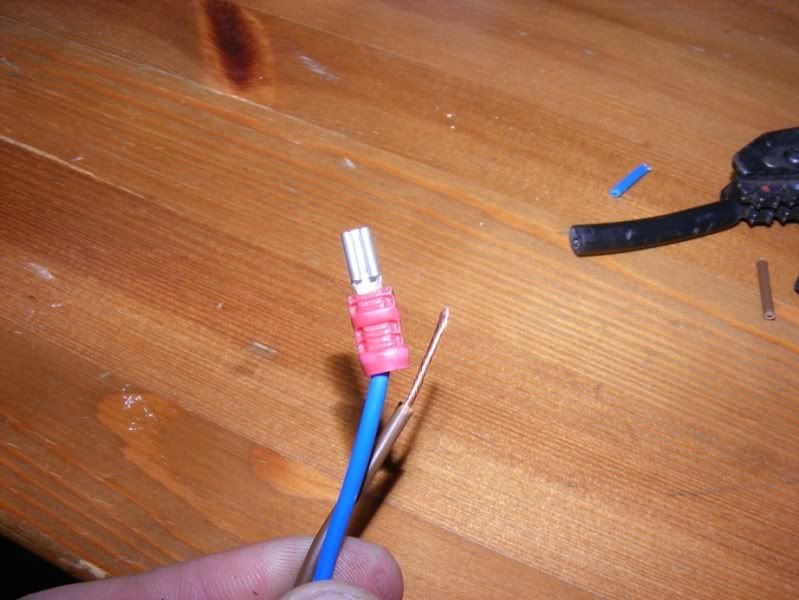
__________________
Click here for guides |
|
|
|
|
Nov 11th, 2012, 16:56
|
#7 |
|
New Member
Last Online: Nov 26th, 2012 15:46
Join Date: Nov 2012
Location: bexletheath
|
can anyone help, i am attempting this conversion (phase 1 to phase 2) but have a problem, on my 2000 V40, 2.0T the wires into the old phase 1 lights are different colours to the ones in this thread, mine are
Drivers side= Red/Green, Blue/Red & Black with small side light being 1 Black & 1 Yellow. Passenger side= Blue/White, Green/White & Black with small side light being 1 Black & 1 pink. can anyone tell me which colour goes to which pin on the 4 pin Phase 2 Headlights and the same with the small side light, pleeeease Last edited by nsherwood; Nov 11th, 2012 at 17:01. |
|
|
|
|
Nov 24th, 2012, 19:51
|
#8 |
|
Senior Member
Last Online: Apr 26th, 2024 20:42
Join Date: Jan 2006
Location: South Yorkshire
|
This is an excellent guide written by JSeaman but I do not understand why the pink and yellow wires inside the phase 2 headlights need to be cut.
The yellow is a common earth, could it not be left as is ? The pink is a side light live feed and is connected to one of the external pins on the headlight units. Why not connect the existing side light feed to the external pin. |
|
|
|
|
Apr 2nd, 2013, 23:07
|
#9 |
|
Junior Member
Last Online: Oct 17th, 2013 18:42
Join Date: Apr 2013
Location: swansea
|
hi im doin the same for my s40 2000 yr 2001 headlights the same as you but I have the connections on my new lights is there a way to use them instead of cutting all those wire s ???
|
|
|
|
|
Apr 2nd, 2013, 23:08
|
#10 |
|
Junior Member
Last Online: Oct 17th, 2013 18:42
Join Date: Apr 2013
Location: swansea
|
must admit fantastic guide I mean wow clear easy as it looks done my a professional
|
|
|
|
|
| Currently Active Users Viewing This Thread: 1 (0 members and 1 guests) | |
|
|


 Hybrid Mode
