
|
|||||||
| XC90 '02'15 General Forum for the P2-platform XC90 model |
 Information
|
|
How To - Rear Toe Control BushesViews : 879 Replies : 3Users Viewing This Thread : |
 |
|
|
Thread Tools | Display Modes |
 Jul 17th, 2018, 14:47
|
#1 |
|
Junior Member
Last Online: Apr 25th, 2023 02:23
Join Date: Jan 2016
Location: Darlington
|
Howdy all, I just did the rear toe control bushes yesterday, thought I'd do a write up. It's a simple job, took about half an hour each side.
Tools used- = 1/2" ratchet with 18mm socket for wheel nuts, and 15mm socket for toe control bush bolt. = 15mm spanner for toe control bush bolt. = Hacksaw = Hammer and small cold chisel = Wire Brush and Sandpaper. = 2 jacks (not necessary, but makes it easier) = Duck oil, silicone grease, threadlock. = Pair of new poly-bushes 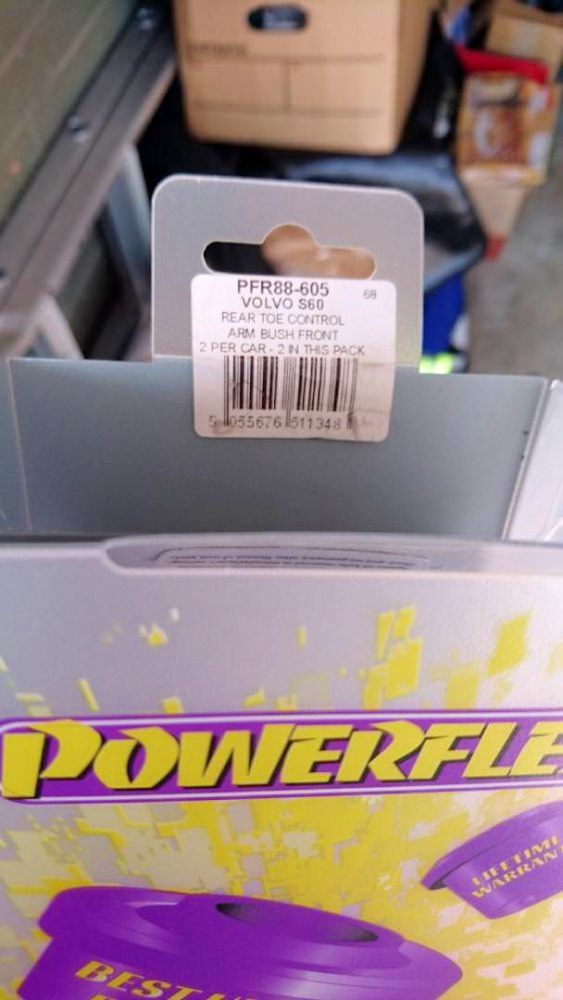  Typical symptoms of failing rear toe control bushes are heavy tyre wear on the outer shoulders, and at an extreme tyre squeal booting around a roundabout. 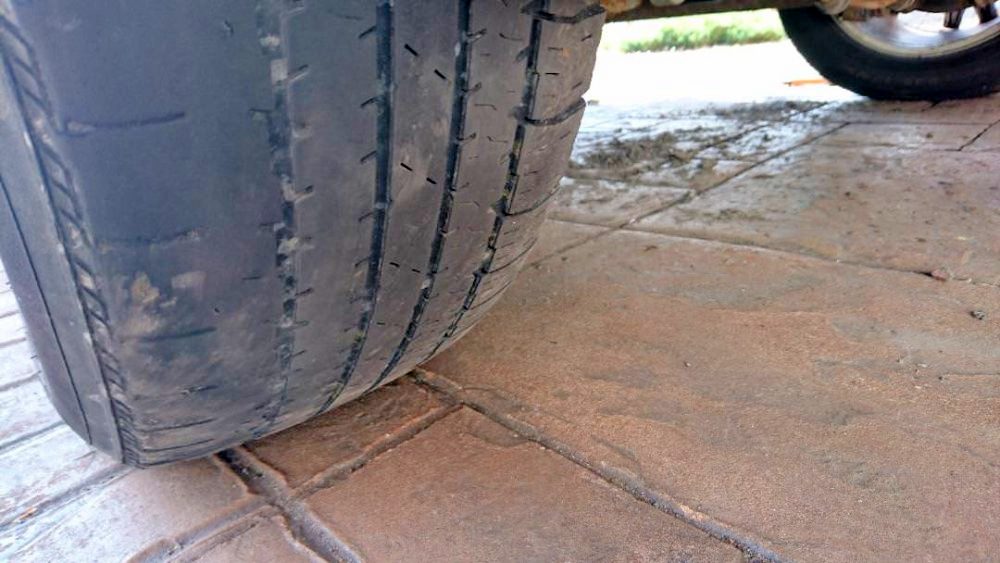 Jack up, wheel off and support car. I left the car on the jack and used the wheel and timber under the towbar for safety. 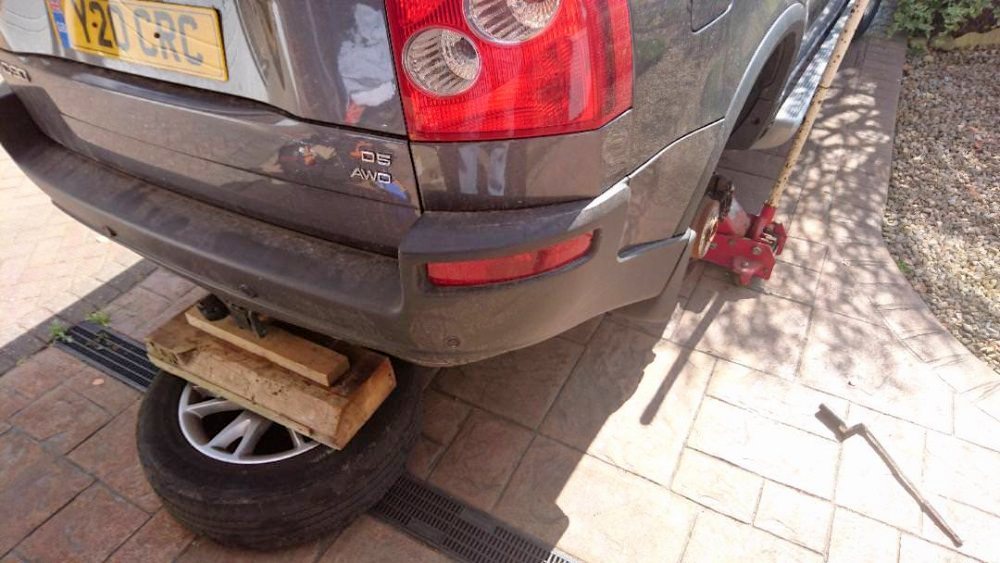 Wire brush and oil the protruding bolt threads, then loosen the bolt. 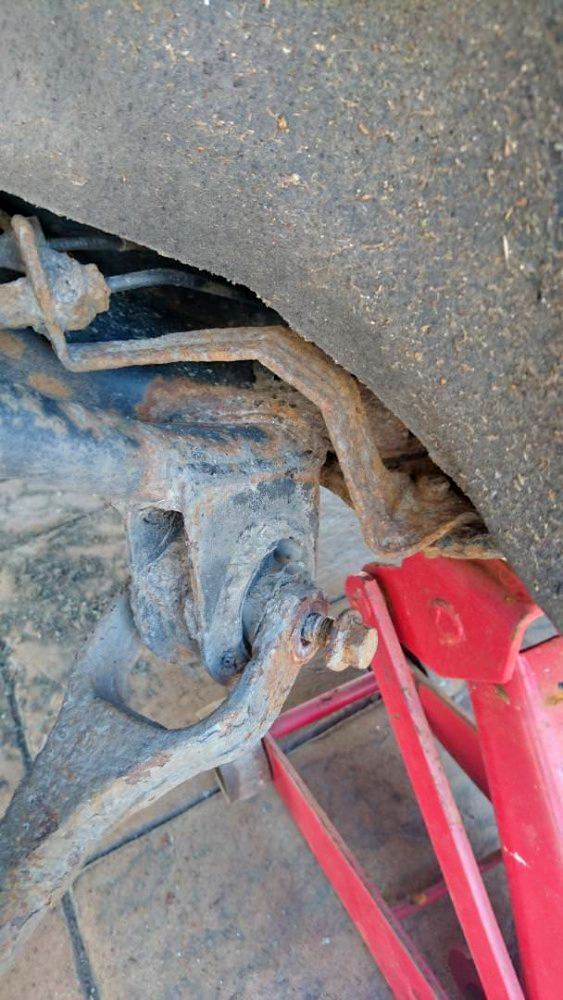 At this point, with the weight of the suspension hanging on the arm, the bolt is quite tight in the hole. I borrowed a second jack from my neighbour to raise the suspension, this centralised the bolt in the bush and the bolt came out easily by hand. 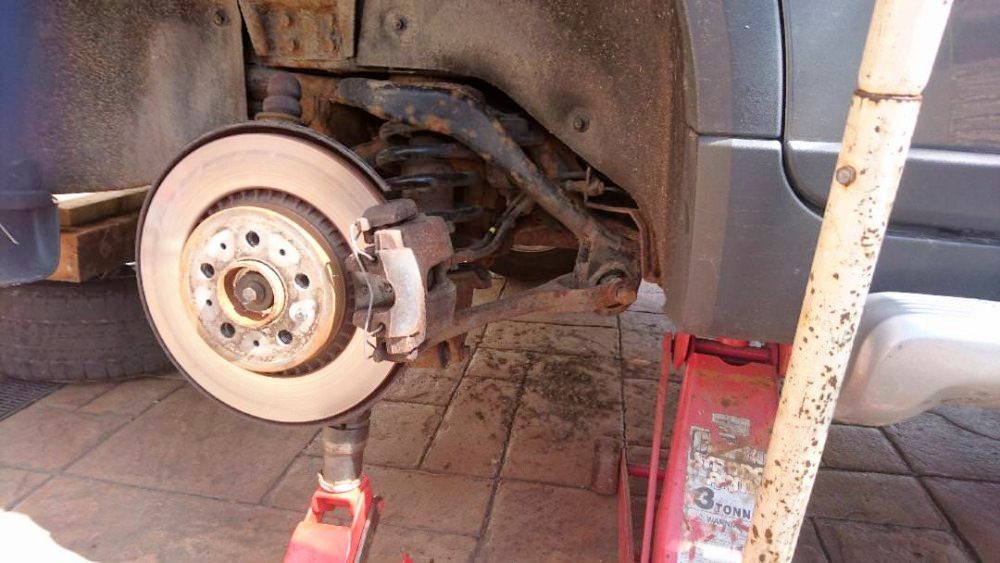 Remove bolt fully, lower the second jack to drop the arm out of the way. 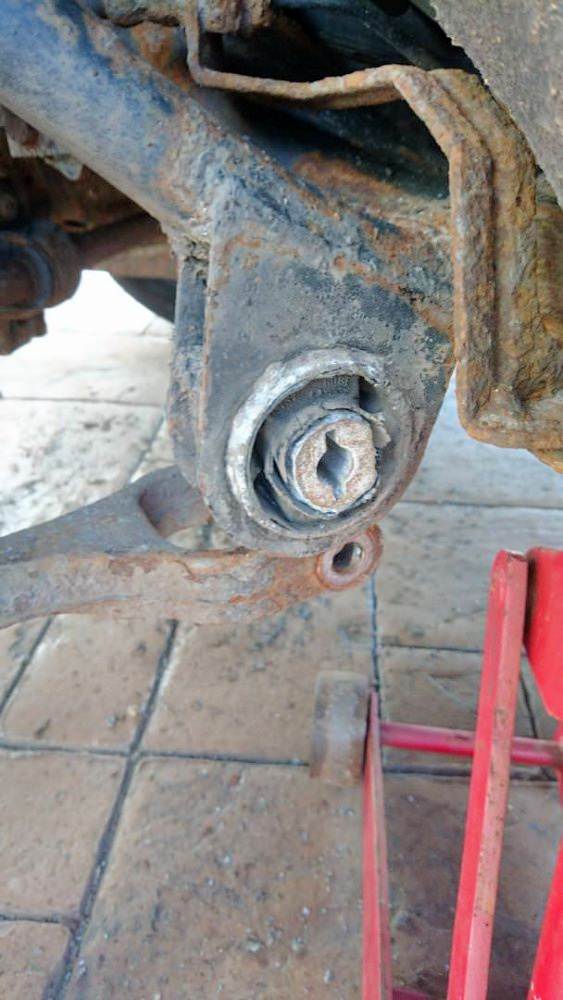 Now we see just how bad the bush actually is, it didn't look as bad when it was bolted into the car. The beauty of this type of hollow bush is, there's no need to fight on getting the rubber out of the bush, we can place a hacksaw straight through the bust and cut the outer race. 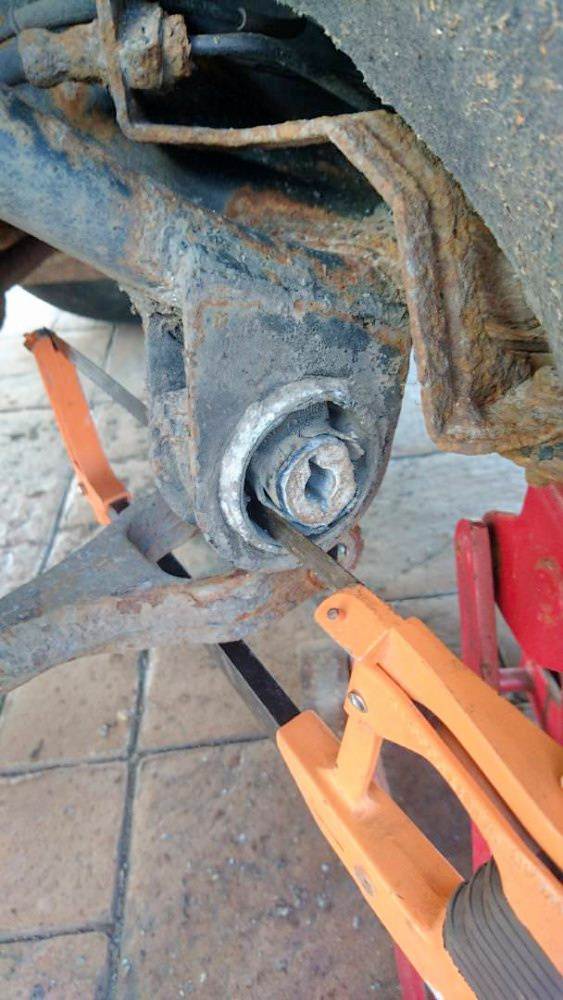 As the bush outer race is ally and the subframe is steel, it's very easy to cut the bush race without cutting into the subframe bush housing. To put this in perspective, it took about 15 strokes of the hacksaw to cut right through the bush. Take care to get an even cut, the ally does cut easily and you'll feel the extra resistance if you get to the steel. 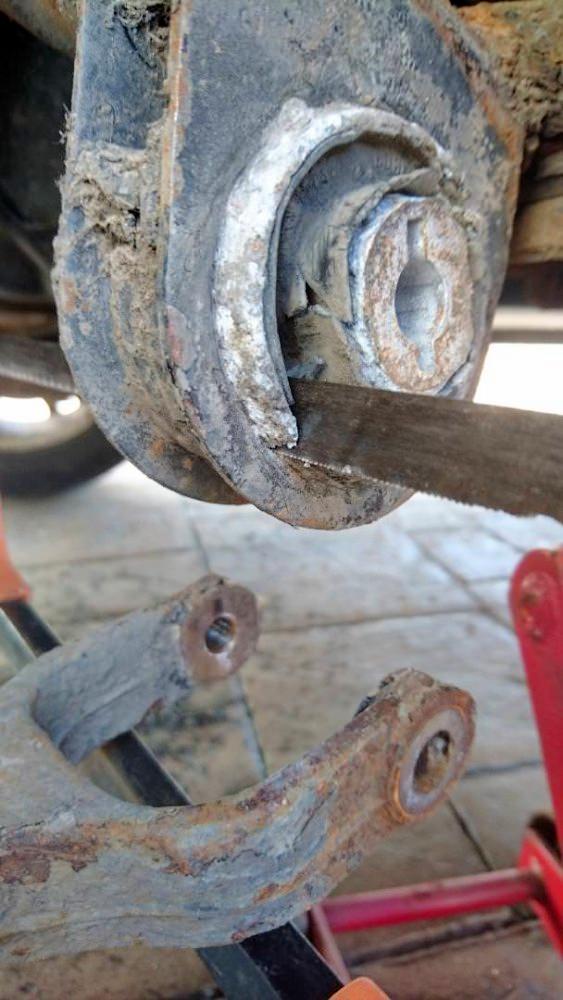 Using a small cold chisel, deform the outer bush race inwards to reduce it's diameter. 5 good strikes saw this bush loosen in its housing. Once you see the bush freeing up, a couple of short strikes with the hammer and it was out. It really wasn't as tight/stuck as I was expecting. 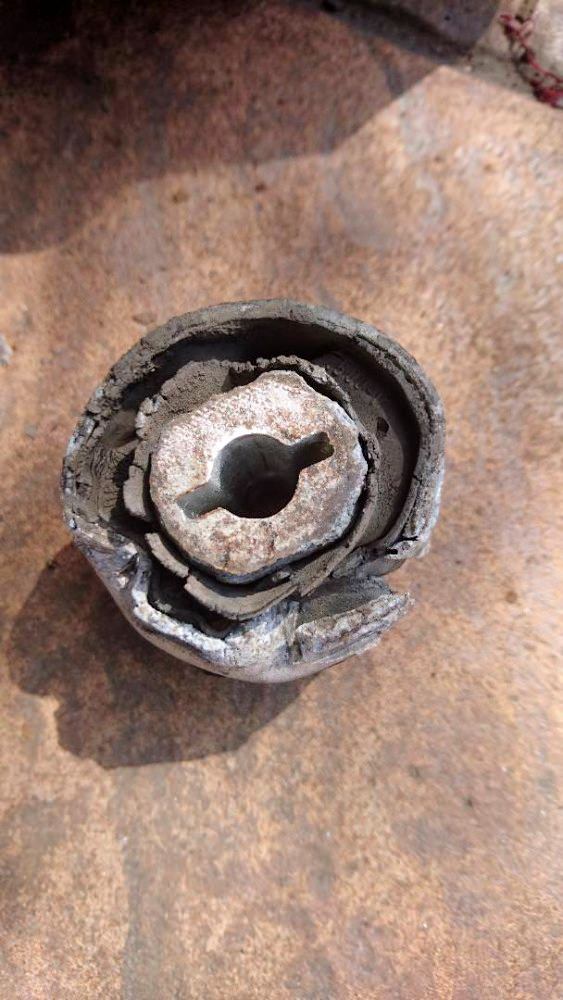 Clean up the bush housing, inside and both outer faces. I used poly-bushes as the replacements, for no other reason than they need no tools to fit, they can be put in by hand (might need a gentle tap with the hammer if they're snug). Certainly a damn sight easier than pulling in original bushes. It's important that the housing is clean. Apply a light lubricant, silicone grease for me but following the manufacturers instructions is te best bet. These bushes come in 2 halves, so push one half into each side, then push the centre spacer in. 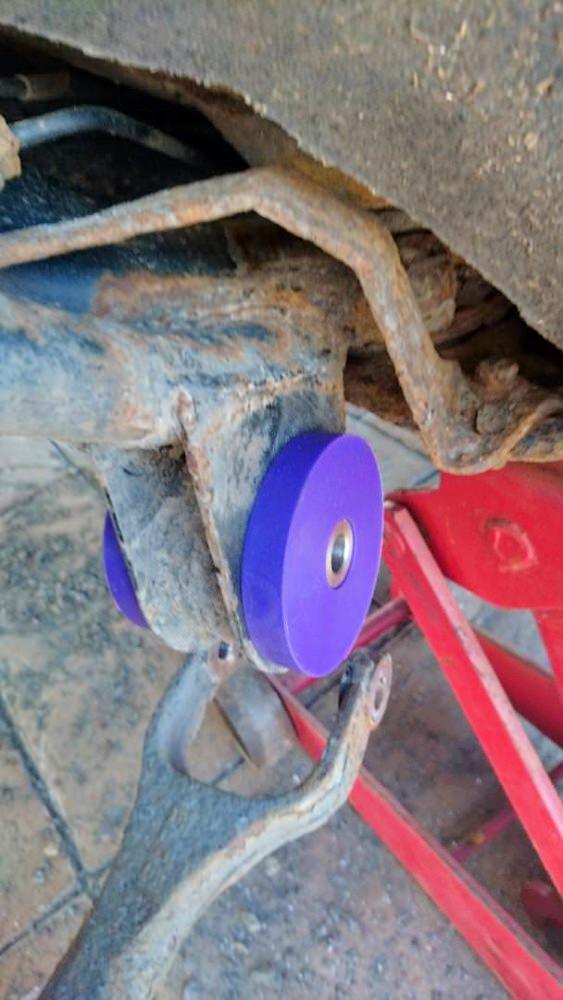 Jack up the hub again to bring the arm back in line with the bush. Make sure all the holes line up. If you're using new bolts, then put the bolts in and screw most of the way home. If re-using the original bolts, clean the threads with a die or wire brush and apply a new drop of threadlock. Again, screw most of the way in, but don't tighten yet. 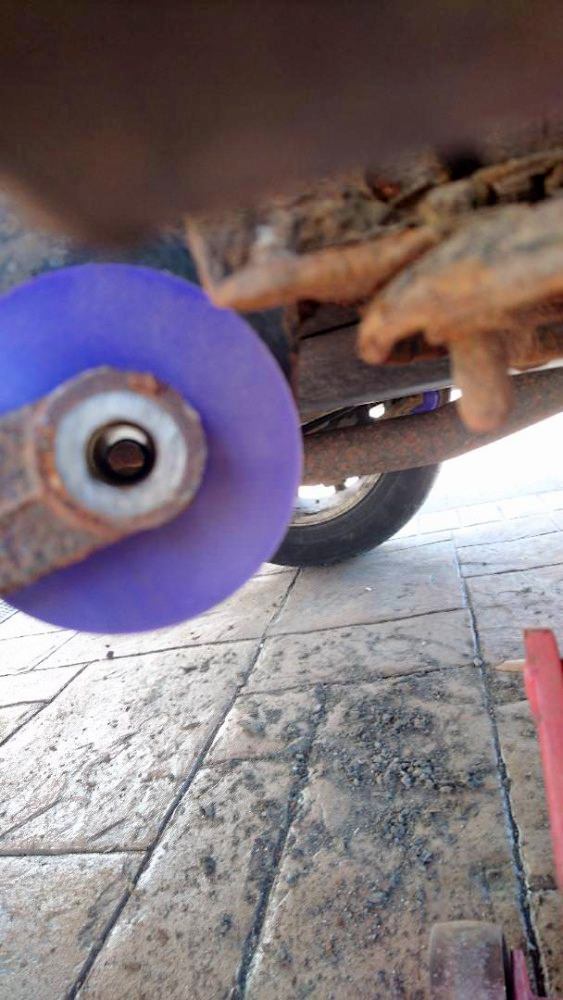 Drop the jack out from under the hub, refit the wheel and nip the wheel bolts. Drop the car down onto the ground, fully tighten the wheel bolts, reach in and fully tighten the bush/arm bolt. Rinse and repeat for the other side. |

|

|
| The Following 8 Users Say Thank You to cchidzey For This Useful Post: |
|
Jul 17th, 2018, 14:50
|
#2 |
|
Bungling Amateur

Last Online: Yesterday 20:51
Join Date: Aug 2014
Location: Beverley, East Yorks
|
Good write up that - it's pretty much how I did it.
Its worth noting that if you replace it with an OE spec bush you will need some sort of puller to re-install it.
__________________
2011 XC90 D5 Executive 2003 C70 T5 GT 2012 Ford Ranger XL SC 1977 Triumph Spitfire 1500 1976 Massey Ferguson 135 |
|
|
|
|
Mar 17th, 2019, 08:04
|
#3 |
|
XC90 tinkerer
Last Online: Oct 27th, 2022 23:08
Join Date: Feb 2016
Location: Twickenham
|
I recently had an MOT advisory - "Rear suspension arm pin or bush worn"
on both sides - Does this refer to the toe control bushes as shown being replaced in this thread? Also, had noticed rear tyres were wearing on outer edge (just replaced with expensive Cross Climates so want to avoid repeating) so plan to replace bushes myself asap My main question to cchidzey is did you fit S60 Powerflex bushes, as no one seems to make a poly bush specifically for the XC90, is the S60 identical in this way? Looks like you fitted THESE Can anyone confirm this will work OK? want to avoid using a puller to fit OEM type bushes if possible. |
|
|
|
|
Mar 17th, 2019, 09:35
|
#4 |
|
Bungling Amateur
Last Online: Yesterday 20:51
Join Date: Aug 2014
Location: Beverley, East Yorks
|
A couple of points that may help....
The OEM bushes are now solid, so the location is much firmer. I made my own puller from M12 threaded rod, and a die made from wrapping 2" bar around a 52mm socket. The force needed to pull in the new bush was significant - I did fear I would strip the threads on the rod (was a cheap one from Wickes) but all good in the end.
__________________
2011 XC90 D5 Executive 2003 C70 T5 GT 2012 Ford Ranger XL SC 1977 Triumph Spitfire 1500 1976 Massey Ferguson 135 |
|
|
|
|
| Currently Active Users Viewing This Thread: 1 (0 members and 1 guests) | |
| Thread Tools | |
| Display Modes | |
|
|


 Linear Mode

