
|
|||||||
| 700/900 Series General Forum for the Volvo 740, 760, 780, 940, 960 & S/V90 cars |
 Information
|
|
760 turbo restorationViews : 9673 Replies : 67Users Viewing This Thread : |
 |
|
|
Thread Tools | Display Modes |
 Oct 24th, 2021, 22:43
|
#41 | |
|
Premier Member
Last Online: Today 21:02
Join Date: Dec 2010
Location: Midlands.
|
Quote:
James. 
|
|

|

|
| The Following 4 Users Say Thank You to volvo always For This Useful Post: |
|
Oct 24th, 2021, 22:58
|
#42 |
|
Premier Member
Last Online: Today 12:22
Join Date: May 2012
Location: Lakenheath
|
Luke beat me to it - the sooner you get that one done the better James.
Just done a similar hole on mine but under the washer reservoir on the NSF (mine's n/asp so battery is opposite side) and like Luke said, the design allows moisture to creep in but then traps it there, causing it to rot. I was asked to leave it unpainted (alongwith the other patch in the floorpan under the drivers heel - Yabba-dabba-doo!) by the MoT tester so i've only recently put some Kurust on the patch. I made sure to work it well into the seam, once i'm certain there's no more rust in there, i'll apply some seam sealer to make sure moisture can't get in again as it's spot welded at the factory which allows moisture between the two unless seam-sealed.
__________________
Cheers Dave Next Door to Top-Gun with a Honda CR-V & S Type Jag  Volvo gone but not forgotten........ Volvo gone but not forgotten........
|

|
|
| The Following 5 Users Say Thank You to Laird Scooby For This Useful Post: |
|
Oct 24th, 2021, 23:03
|
#43 | |
|
Premier Member
Last Online: Today 21:02
Join Date: Dec 2010
Location: Midlands.
|
Quote:
James.
|
|
|
|
|
| The Following 4 Users Say Thank You to volvo always For This Useful Post: |
|
Nov 2nd, 2021, 07:25
|
#44 |
|
Go redblock or go home

Last Online: Today 20:57
Join Date: Feb 2012
Location: UK
|
All of the welding is done so now it is time to sort out the mechanical issues and get an MOT on it.
|
|
|
|
| The Following 6 Users Say Thank You to 360beast For This Useful Post: |
|
Nov 19th, 2021, 19:20
|
#45 |
|
Go redblock or go home
Last Online: Today 20:57
Join Date: Feb 2012
Location: UK
|
Turbo and exhaust manifold have been off, the manifold gaskets for #3&4 were blowing, All faces cleaned up and new manifold gaskets fitted along with a new oil drain seal and copper washers for the turbo pipes. Also changed the rear discs and pads but I forgot to get any photos of it all unfortunately.
I've just done the cambelt, cambelt tensioner, front oil seals, front crank housing gasket, oil and filter. I need to get new auxilliary belts, change the coolant, clean and gap the plugs, change the gearbox oil, fit new discs and pads on the front and I believe it should be ready to go for an MOT. I'll have to consult the list of jobs to make sure that's everything. So on to some photos  Checking the timing marks line up before removing anything.  20211119_142850 by Luke Ryland - Flickr2BBcode LITE  20211119_142910 by Luke Ryland - Flickr2BBcode LITE Mucky old cam seal 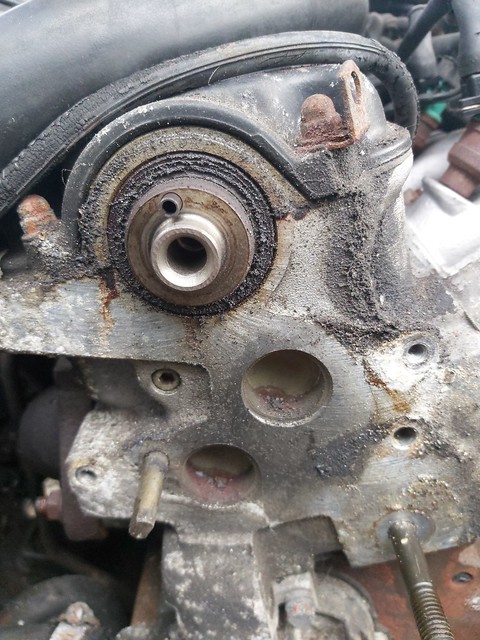 20211119_144320 by Luke Ryland - Flickr2BBcode LITE I forgot to get a photo of it cleaned up with the new seal fitted. Mucky front crank and aux shaft seal 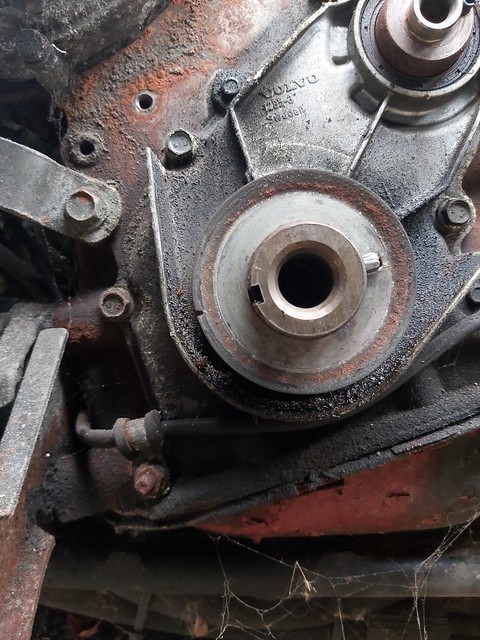 20211119_144351 by Luke Ryland - Flickr2BBcode LITE  20211119_144404 by Luke Ryland - Flickr2BBcode LITE I got the front crank housing off and it pulled one of the dowels out of the block with it.  20211119_150419 by Luke Ryland - Flickr2BBcode LITE All cleaned up  20211119_153621 by Luke Ryland - Flickr2BBcode LITE  20211119_153703 by Luke Ryland - Flickr2BBcode LITE I forgot to get a photo of the block all cleaned up but it did get a thorough cleaning before the new gasket went on, new oil seals in the housing and all back together.  20211119_161607 by Luke Ryland - Flickr2BBcode LITE All back together and double checking the timing marks 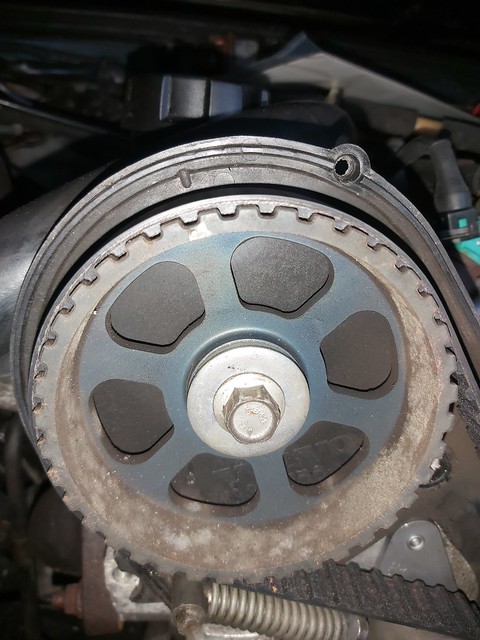 20211119_164844 by Luke Ryland - Flickr2BBcode LITE  20211119_164953 by Luke Ryland - Flickr2BBcode LITE  20211119_164854 by Luke Ryland - Flickr2BBcode LITE I found that someone had managed to tighten the crank pulley on to the gear without it being properly lined up so it damaged the locating pin. Luckily I have a 1988 B230ET bottom end in the garage so I used the crank gear and washer that was also damaged off of that.  20211119_165835 by Luke Ryland - Flickr2BBcode LITE Last edited by 360beast; Nov 19th, 2021 at 19:24. |
|
|
|
| The Following 7 Users Say Thank You to 360beast For This Useful Post: |
|
Jan 29th, 2022, 07:32
|
#46 |
|
Go redblock or go home
Last Online: Today 20:57
Join Date: Feb 2012
Location: UK
|
Things have slowed down considerably on this due to other jobs taking precedence and my house needing work doing but yesterday the entire underside got a nice coating of stonechip. My mate ame over with all of his equipment and did it for me, he also finished off doing my 940 which didn't get finished when I did the manual swap.
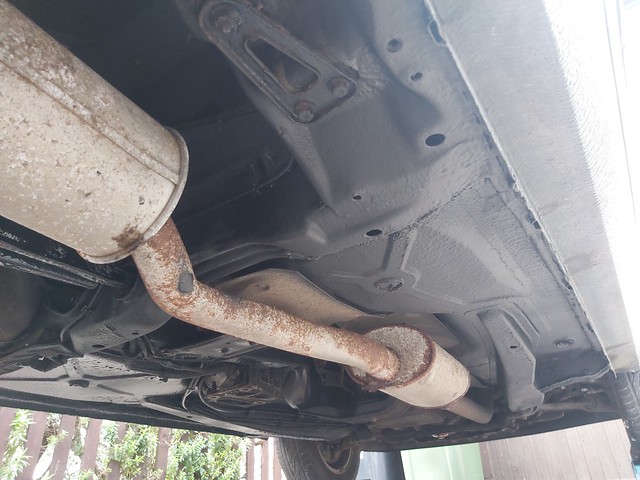 20220128_161102 by Luke Ryland - Flickr2BBcode LITE 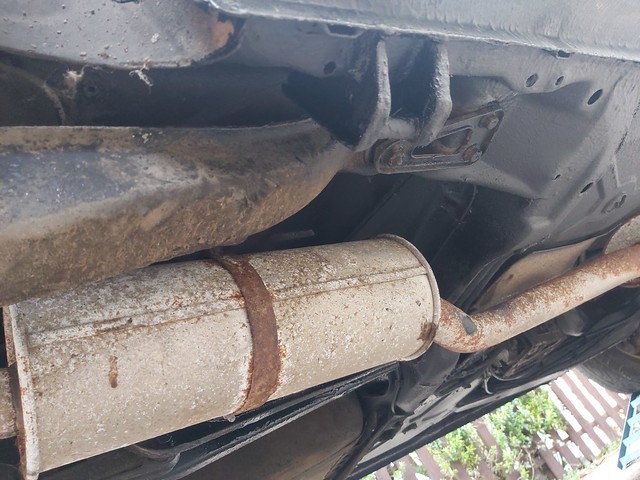 20220128_161108 by Luke Ryland - Flickr2BBcode LITE  20220128_161114 by Luke Ryland - Flickr2BBcode LITE  20220128_161136 by Luke Ryland - Flickr2BBcode LITE |
|
|
|
| The Following 11 Users Say Thank You to 360beast For This Useful Post: |
|
Jan 30th, 2022, 16:23
|
#47 |
|
Go redblock or go home
Last Online: Today 20:57
Join Date: Feb 2012
Location: UK
|
The gift that keeps on giving, I've had a poke around the front brakes and found that both calipers have one seized piston so I could strip the lot off and convert it to 940 discs, pads, carriers and calipers as I've got plenty of spares and I've got a few sets of new discs and pads for the front of 940s that came with cars I've broken.
The other option would be to get a new seal kit and new pistons, strip these down and rebuild them which would be the more expensive option as I'd have to buy new discs and pads, but it would keep the brakes original to make maintenance easier for the future owner.  20220130_134631 by Luke Ryland - Flickr2BBcode LITE  20220130_144550 by Luke Ryland - Flickr2BBcode LITE Last edited by 360beast; Jan 30th, 2022 at 16:35. |
|
|
|
| The Following 7 Users Say Thank You to 360beast For This Useful Post: |
|
May 4th, 2022, 21:52
|
#48 |
|
Go redblock or go home
Last Online: Today 20:57
Join Date: Feb 2012
Location: UK
|
I decided to go ahead with the plan to convert it to 940 brakes, I went through all of my spare calipers and found a pair that are in great condition, the seals are great and the pistons pushed back in with next to no effort.
So I used a knotted wire wheel in the angle grinder, picks, files, wire brushes etc to remove all of the rust and filth to take it back down to bare metal along with a pair of 940 carriers. I have etch primed them and given them a couple of coats of VHT silver. I found a pair of my spare calipers had new bleed nipples and brake flexi hose extensions so I cleaned out the holes they all go in, applied some silicone grease to the thread and fitted them. I then bought a pair of pagid flexi hoses and again applied some silicone grease and have fitted those to the calipers. I've removed the 760 calipers, carriers and discs, cleaned the surface rust off the hub mating face, applied copper grease and fitted a pair of discs that have done 1000 miles at the most! Tomorrow I will hopefully get the carriers and calipers mounted. I've also removed the front suspension arms, chiseled the remains of the spaceship bushes out and I will get on to those with the knotted wire wheel to clean them up and fit superflex spaceship bushes. Photos to come tomorrow. |
|
|
|
| The Following 6 Users Say Thank You to 360beast For This Useful Post: |
|
Jul 3rd, 2022, 13:20
|
#49 |
|
Go redblock or go home
Last Online: Today 20:57
Join Date: Feb 2012
Location: UK
|
The front arms had a refresh and the spaceship bushes are now superflex polybushes. The nearside strut rod had a bit of rot so I cleaned it up and welded. Plate over it, drilled a new drain hole and filled the drains with waxoyl.
https://flic.kr/p/2nvUEqm https://flic.kr/p/2nvUEsa https://flic.kr/p/2nvUEth And the 940 brakes are all fitted https://flic.kr/p/2nvVSJZ https://flic.kr/p/2nvVSJo |
|
|
|
| The Following 2 Users Say Thank You to 360beast For This Useful Post: |
|
Jul 3rd, 2022, 15:25
|
#50 |
|
Go redblock or go home
Last Online: Today 20:57
Join Date: Feb 2012
Location: UK
|
My new phone can't get the app I used to use for sharing the photos so you will have to click the links to open the photos unfortunately.
|
|
|
|
| The Following User Says Thank You to 360beast For This Useful Post: |
|
| Currently Active Users Viewing This Thread: 1 (0 members and 1 guests) | |
|
|


 Linear Mode

