
|
|||||||
| 700/900 Series General Forum for the Volvo 740, 760, 780, 940, 960 & S/V90 cars |
 Information
|
|
A pillar trim removal on 940 estViews : 2283 Replies : 5Users Viewing This Thread : |
 |
|
|
Thread Tools | Display Modes |
 Sep 10th, 2014, 20:51
|
#1 |
|
Getting on a bit
|
Hi,
Has anyone removed the A pillar trim from the drivers side on a 98 940 est, what clips are there to look out for, any other tricks to watch out for
__________________
 1998, 940 Celebration, 2.3LPT, 74,000. 1998, 940 Celebration, 2.3LPT, 74,000.
|

|

|
| The Following User Says Thank You to nutco For This Useful Post: |
|
Sep 11th, 2014, 11:58
|
#2 |
|
Forum Support Team

|
Hi,
Did this but forgot to take any photos. The main areas to be cautious are the ends. The top where you connect to the next piece of trim, the connection is fragile at best. The bottom where the air vent rubber is positioned. This is very very delicate and liable to snap so care and caution (and some warmth) should be applied. The rest is a matter of gently prising the trim from it's position. I can't remember off hand whether there are metal spring clips to hold it in position though. Des. . . 
__________________
Density:- Not just a measurement ~ It's a whole way of Life.! ! ! I drive a Volvo, Please Don't Get In My Way!  He shows up. People die. He vanishes. People should not be afraid of their governments. "He'll deliver more justice in a weekend than 10 years of your Governments should be afraid of their people... "V" courts & tribunals. Just stay out of his way." "I plan to."
|
|
|
|
|
Sep 11th, 2014, 20:36
|
#3 | |
|
bob12
Last Online: Today 11:19
Join Date: Aug 2006
Location: Woking
|
Quote:
 .......... guess it's the same as a 745 ... just take it VERY VERY easy and release/free the top door trim connection to the A pillar trim first to allow some movement/bending possibility .. the top hidden inner sliding retainer is more or less bound to snap due to age, but they are of a pretty standard type. .......... guess it's the same as a 745 ... just take it VERY VERY easy and release/free the top door trim connection to the A pillar trim first to allow some movement/bending possibility .. the top hidden inner sliding retainer is more or less bound to snap due to age, but they are of a pretty standard type.
|
|
|
|
|
|
May 13th, 2018, 14:32
|
#4 |
|
Senior Member
Last Online: Feb 23rd, 2020 19:46
Join Date: Oct 2015
Location: Erskine
|
Had to remove the A pillar trim to fit a dash cam cable. Took some photos;
Remove the grab handle. The insert is soft plastic and easily prises out; 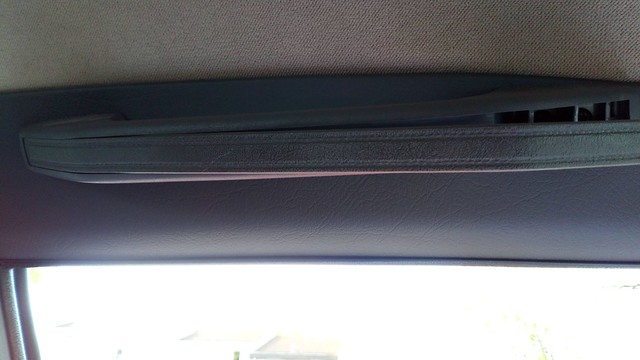 The screws are torx T25. Pull it back enough to reveal the top of the A pillar trim. Then remove the smaller T25 screw and washer here. There is also a small overlap of plastic, make sure that comes away. 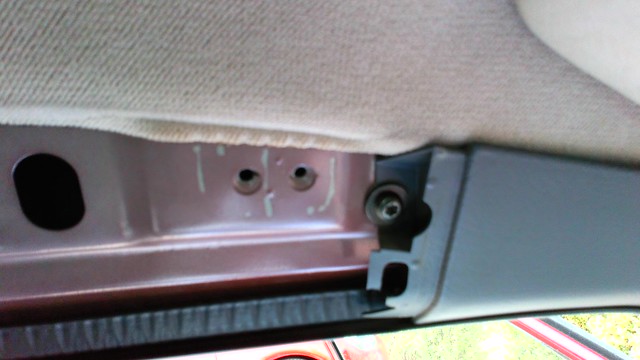 Next, as suggested elsewhere, prise the trim off using a wooden spatula, gentle wiggling it between the trim and the black trim edging; 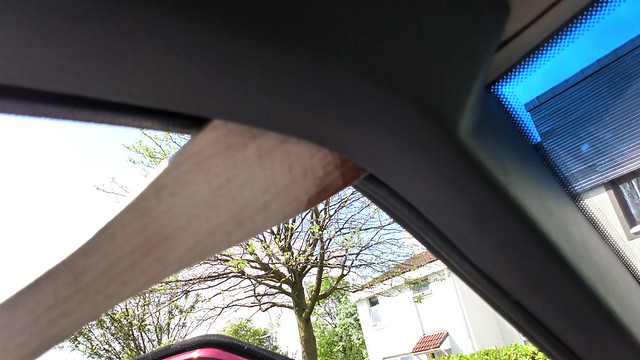 Two "clicks" as the top and middle fixings came off. The bottom one just wiggled out. That revealed the A pillar; 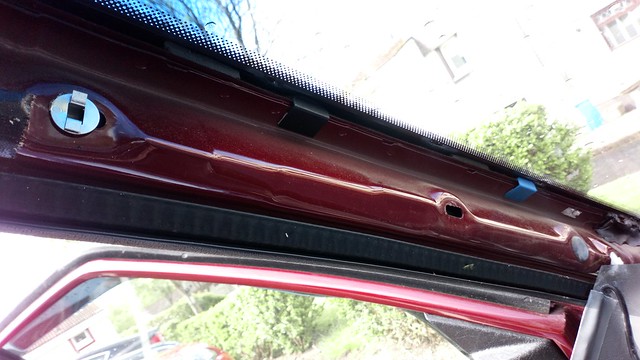 and this on the back of the trim. The nearest fixing is the top one, the metal is the middle and the bottom is a slide on one; 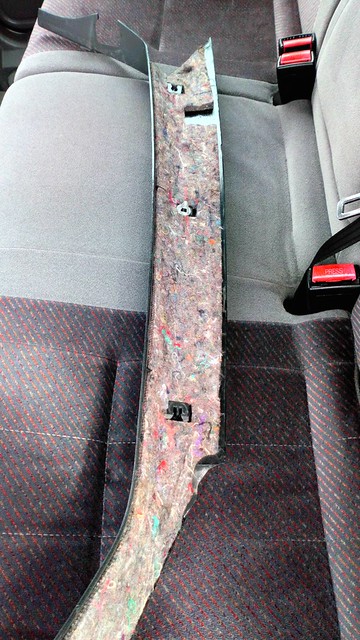 I do see why there are not three metal clips, the top and bottom are plastic and I am not sure exactly how they fit together, but they do. The bottom part of the trim is just held in place by the rubber of the vent and the stiffer black trim edging 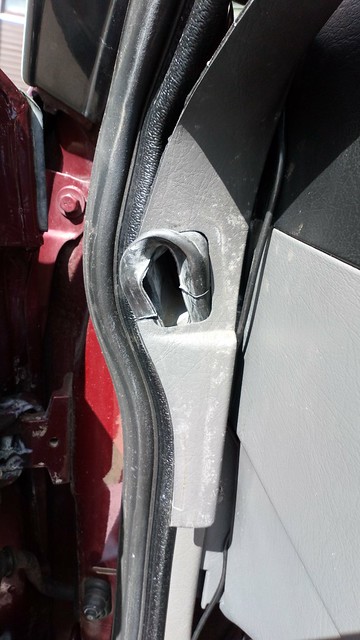 Replacing was the opposite I started at the bottom and worked my way up. Just make sure this edge goes under the VIN plate as you slide the trim back tight into the bottom corner of the window 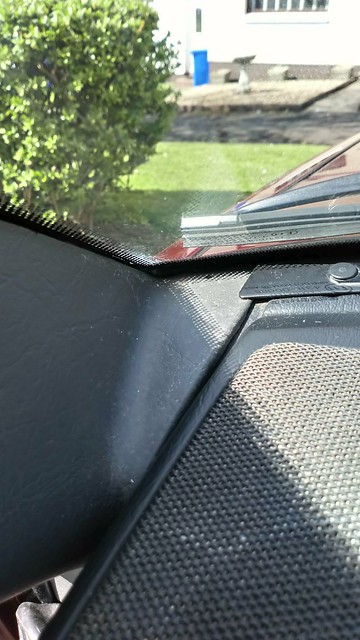 Once that was right in the corner, I pushed the trim back against the A pillar as tight up to the windscreen as possible and banged it with my hand. There was a big "click" and it appeared to all go into place. I have no idea how the top and bottom fixings went back into place, but they have just by banging it. The trim was totally secure even before I refitted the top screw. The next bit of trim with the grab handle slotted back into place, screws back in and the last bit of trim in the handle just pushes back in. Job done. |
|
|
|
| The Following 5 Users Say Thank You to Delta66 For This Useful Post: |
|
Sep 2nd, 2018, 22:09
|
#5 |
|
bob12
Last Online: Today 11:19
Join Date: Aug 2006
Location: Woking
|
Excellent
|
|
|
|
| The Following 2 Users Say Thank You to bob12 For This Useful Post: |
|
Sep 3rd, 2018, 10:15
|
#6 |
|
🤍💙💗

Last Online: Today 14:04
Join Date: Mar 2006
Location: Lichfield
|
It's best to remove the trim along the roof, remove the two grab handles and loosen the top B pillar trim screw. The sun visor gets in the way too, 8mm 1/4" socket required.
The middle and top clips are metal. The one on that 4th picture has pulled out of the trim. You just have to squeeze and slide it back on the trim. The bottom clip is one of those fragile white plastic ones that tend to break. The two upper clips and edging are more than sufficient to hold it anyway.
__________________
MY97 940 CD LPT Super Sports Edition 2 Turbo, Midnight Purple, 175,000 miles. 
|

|
|
| The Following 2 Users Say Thank You to baggy798 For This Useful Post: |
|
| Currently Active Users Viewing This Thread: 1 (0 members and 1 guests) | |
|
|


 Linear Mode

