
|
|||||||
| C30 / S40 & V50 '04-'12 / C70 '06-'13 General Forum for the P1-platform C30 / S40 / V50 / C70 models |
 Information
|
|
Guide to Pollen Filter changeViews : 70117 Replies : 201Users Viewing This Thread : |
 |
|
|
Thread Tools | Display Modes |
 Apr 19th, 2017, 11:59
|
#101 |
|
Premier Member

Last Online: Yesterday 19:04
Join Date: Feb 2017
Location: North East, Teesside
|
Well done, glad it all went well for you.
I'm still a few thousand miles away from doing this yet but this guide and all the extra tips will be invaluable.
__________________
 Thread V40 T2 R-Design - https://www.volvoforums.org.uk/showt...56#post2901756 Thread V50 D2 R-Design - https://www.volvoforums.org.uk/showthread.php?t=264890 - CRASHED |

|

|
|
Apr 21st, 2017, 11:51
|
#102 |
|
Junior Member
Last Online: Nov 10th, 2023 22:45
Join Date: Dec 2016
Location: Buxton
|
Just wanted to say thanks for this guide. Just done mine this morning - it did indeed take about an hour (but should be a lot quicker next time, now I've had some practice!).
Wouldn't have wanted to do this without the guide, it really was a life saver. Nice and clear, pictures especially helpful. |
|
|
|
|
Apr 25th, 2017, 15:30
|
#103 |
|
New Member
Last Online: Apr 26th, 2017 09:21
Join Date: Oct 2015
Location: salisbury
|
What model is this as I have v60 and need to check mine
|
|
|
|
|
May 20th, 2017, 14:01
|
#104 |
|
Member
Last Online: Apr 2nd, 2024 21:40
Join Date: Feb 2016
Location: West Lothian
|
Thanks for the post, Haynes didn't say to remove the bracket, I got the old one out with out it, but struggled to get the new one in, dropped a nut down the back, it can stay there for now.
|
|
|
|
|
Jul 6th, 2017, 18:28
|
#105 |
|
Premier Member
Last Online: Yesterday 19:04
Join Date: Feb 2017
Location: North East, Teesside
|
As the original has lost it's pictures, I changed mine today and took some to help everyone.
What a pain in the ass job, but only because of the CEM fuse box and it's bracket. If that wasn't in the way, the job would be so much easier and quicker. So without further ado, I give you a guide to changing the pollen filter; Tools used; Torx screwdriver set Ratchet with extender bar and 13mm socket Plastic Pry Tools Few bits of skin A lot of patience and a bit of brute force The new filter and the trusty old Haynes manual  pollenfilter by Pete, on Flickr pollenfilter by Pete, on FlickrI started by taking the insulation off from under the CEM unit 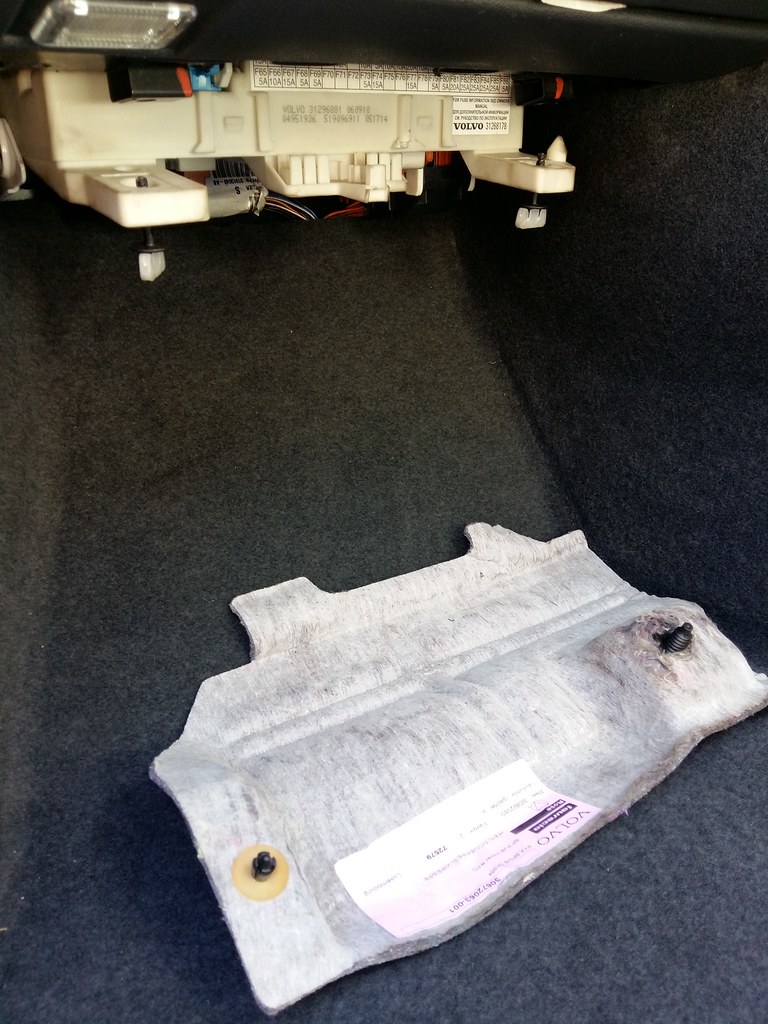 pollenfilter1 by Pete, on Flickr pollenfilter1 by Pete, on FlickrThis is held on with little push pin rivets 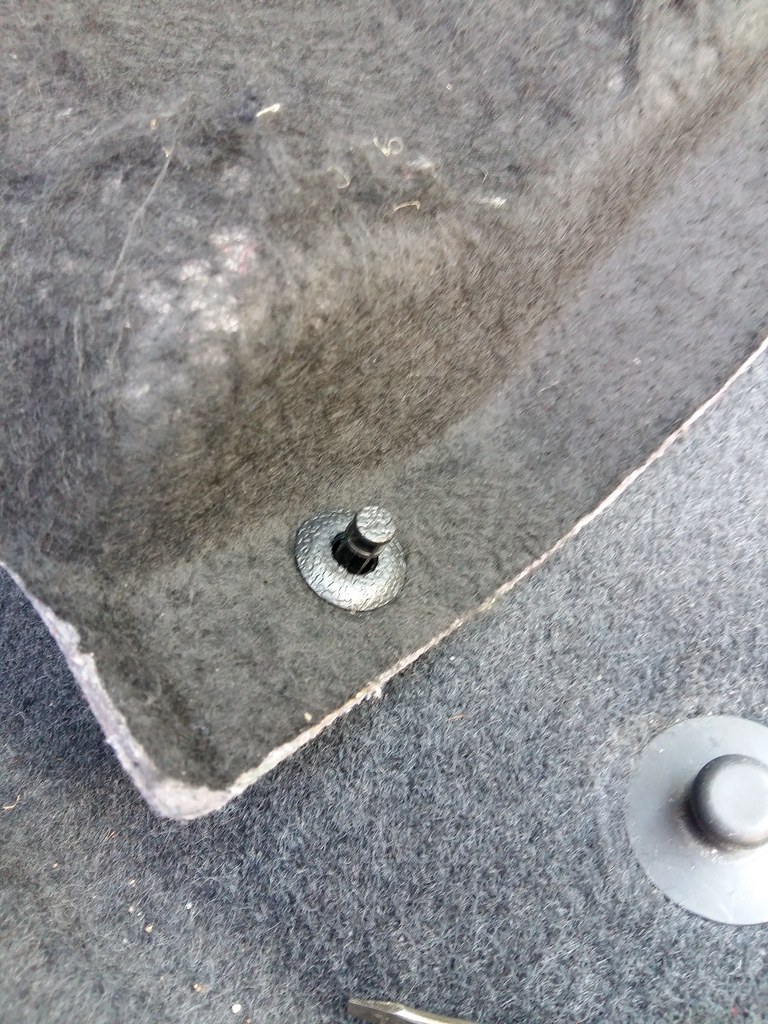 pollenfilter2 by Pete, on Flickr pollenfilter2 by Pete, on FlickrWell, one side was, the other side on mine has been butchered and fitted with a cardboard washer and larger plastic screw 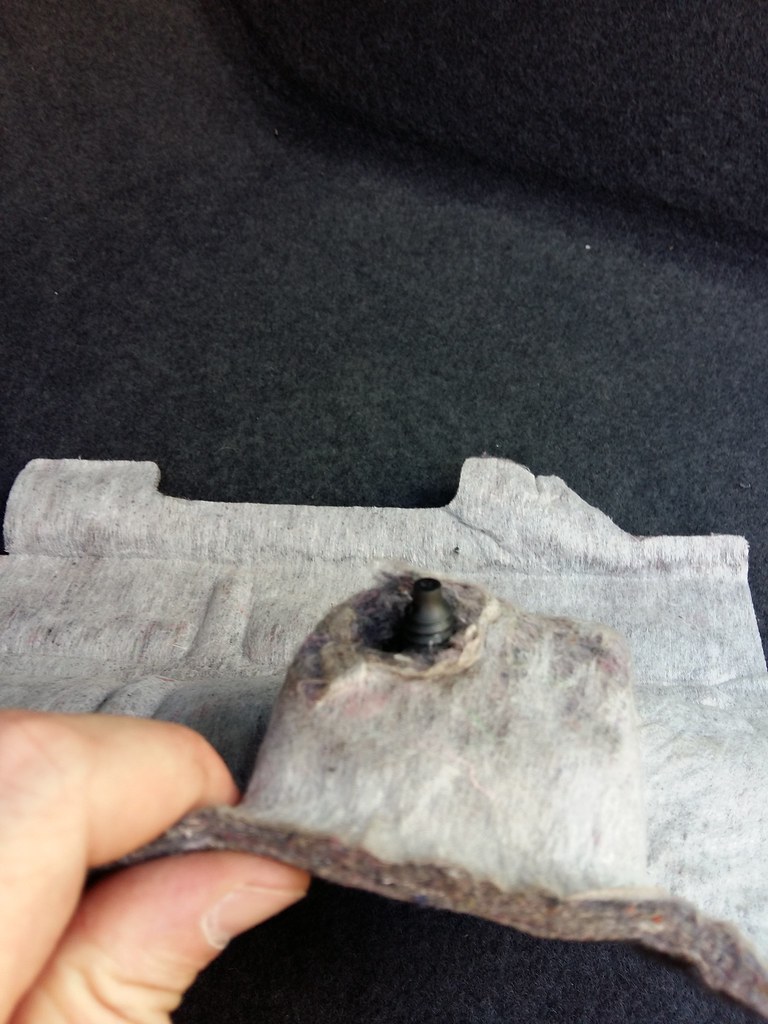 pollenfilter3 by Pete, on Flickr pollenfilter3 by Pete, on Flickr pollenfilter4 by Pete, on Flickr pollenfilter4 by Pete, on FlickrI then had a look at the area and I found it to be far too tight to remove and install a pollen filter so proceeded to remove the glove box I removed this piece of trim from directly behind the waterfall. This is necessary as the end of the glove box sits behind it. 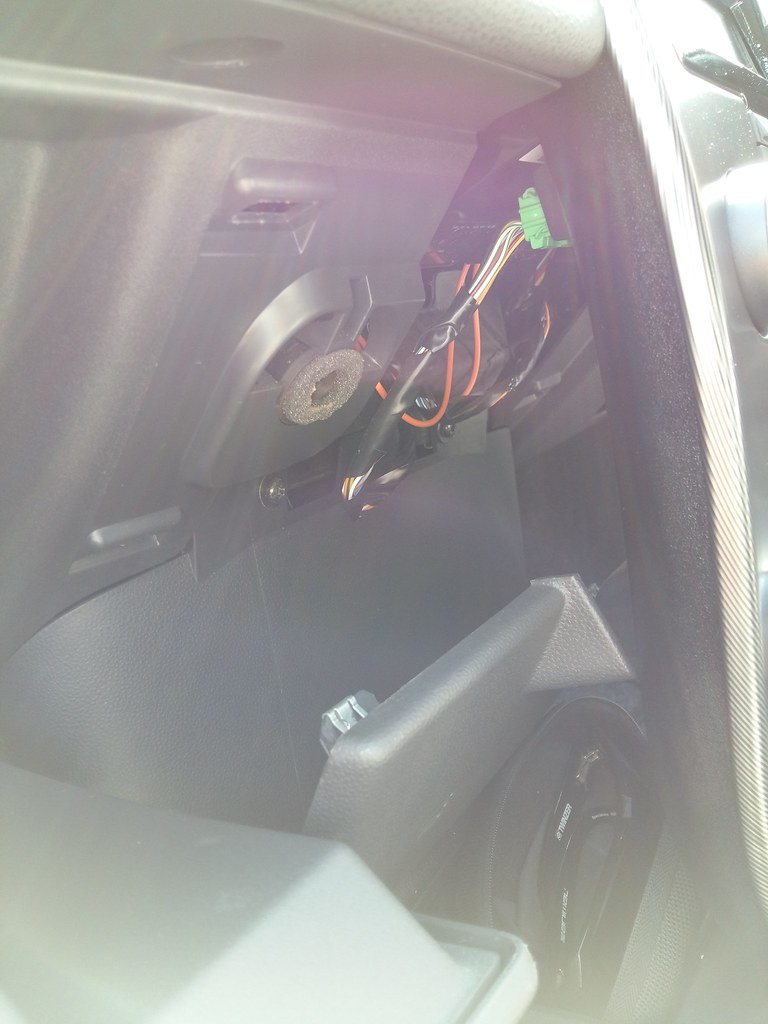 pollenfilter5 by Pete, on Flickr pollenfilter5 by Pete, on FlickrThen I took the trim off the passenger side of the glove box 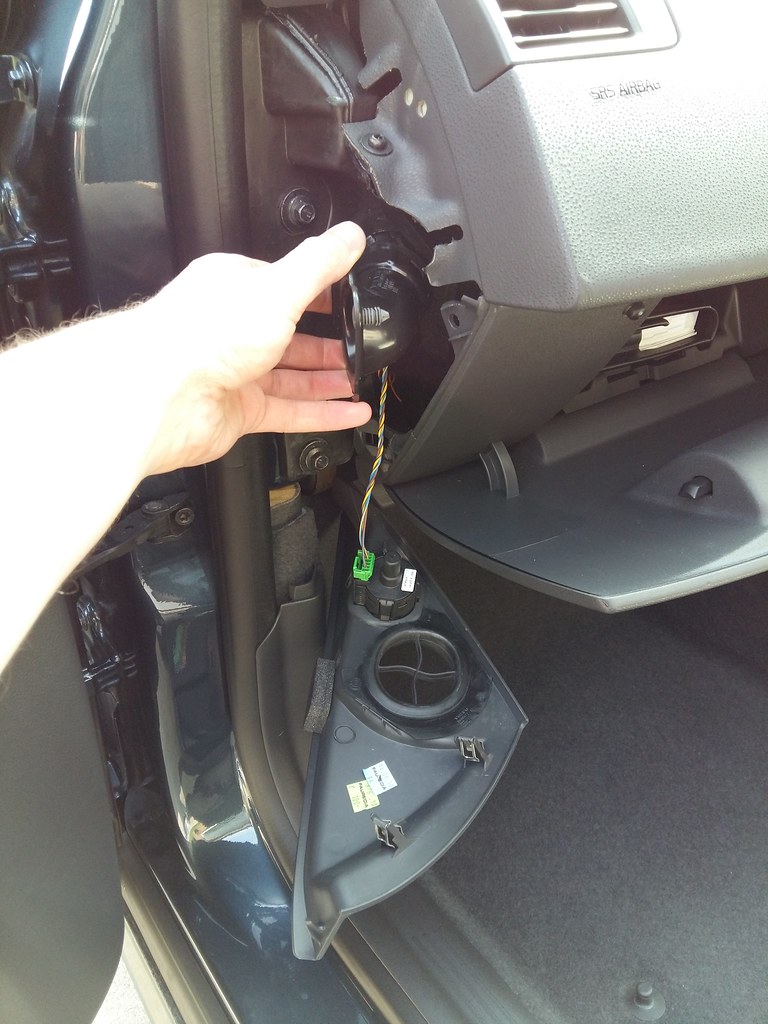 pollenfilter6 by Pete, on Flickr pollenfilter6 by Pete, on FlickrThen I removed the larger glove box, then the smaller inner glove box and I was presented with the below  pollenfilter7 by Pete, on Flickr pollenfilter7 by Pete, on FlickrA closer look and there's the pollen filter cabin  pollenfilter8 by Pete, on Flickr pollenfilter8 by Pete, on FlickrUnscrewing the white screw you can see above releases the door from the cabin and you can then see the filter 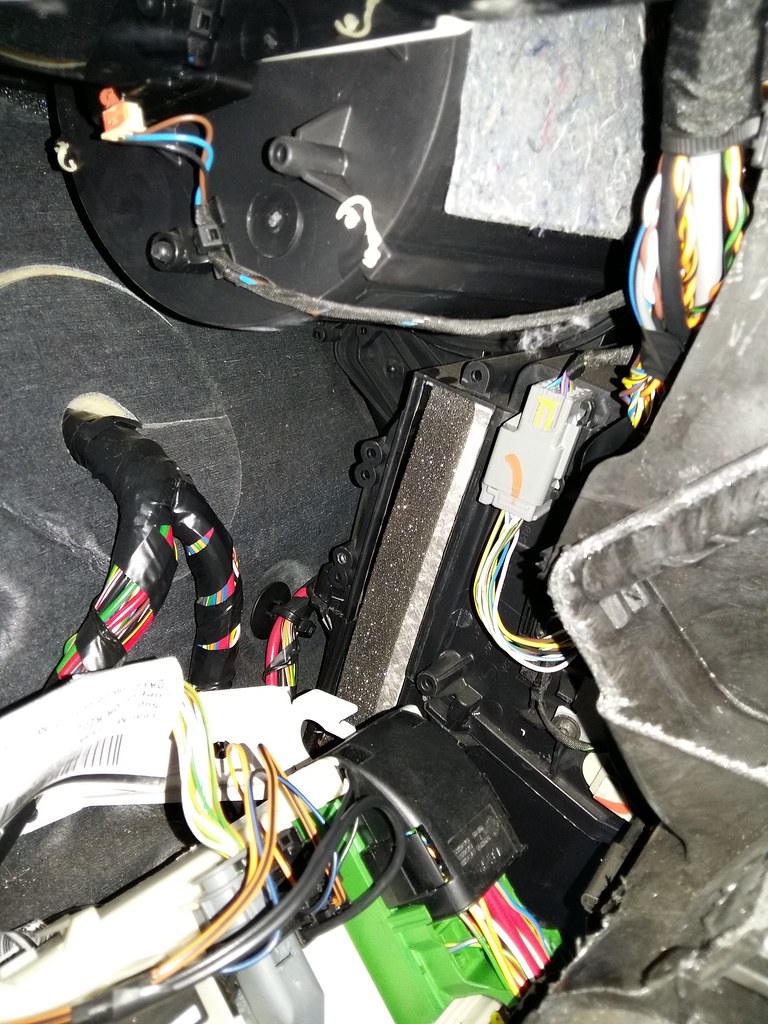 pollenfilter9 by Pete, on Flickr pollenfilter9 by Pete, on FlickrI then managed to pull the old filter out and put it up against the new one 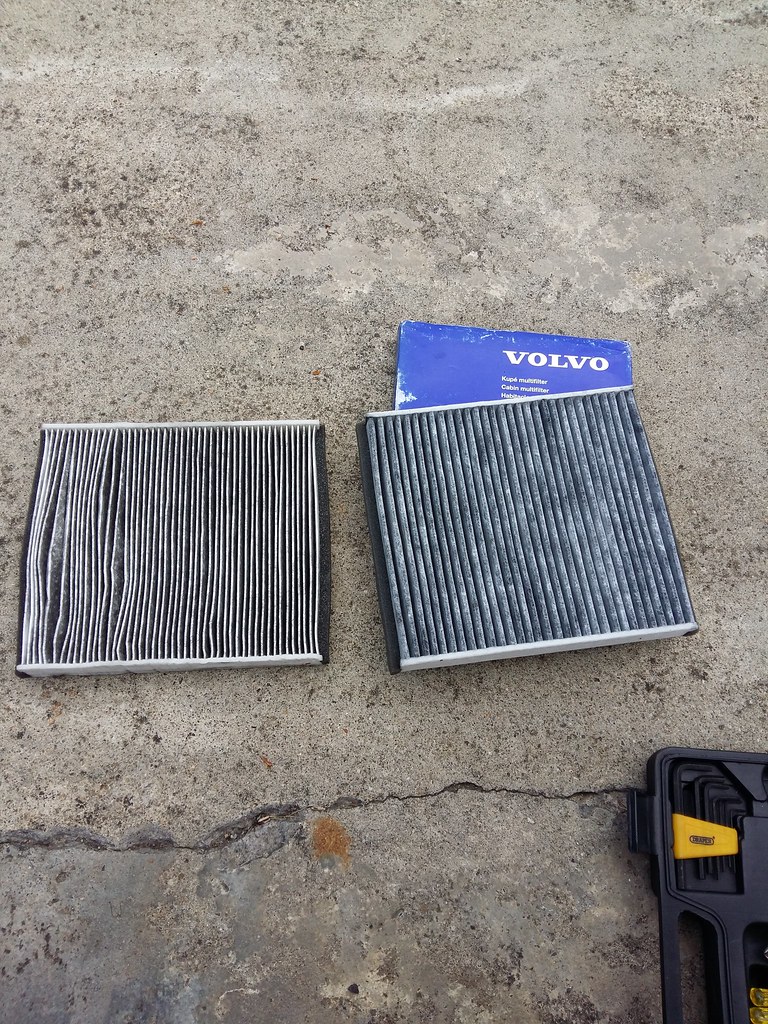 pollenfilter10 by Pete, on Flickr pollenfilter10 by Pete, on FlickrExactly the same size/dimensions, however the part number is 1 digit different. Visually it has thicker spines and is a lot more sturdier than the old one. This presented a problem when I tried to put the new one back in the same way I pulled the old one out. As it was far too stiff to manoeuvre into position, I had no other choice but to remove the CEM bracket holder. Firstly I had to get the CEM unit off the bracket which was a right pain. The below picture shows the guides on the CEM that have to be taken off the bracket 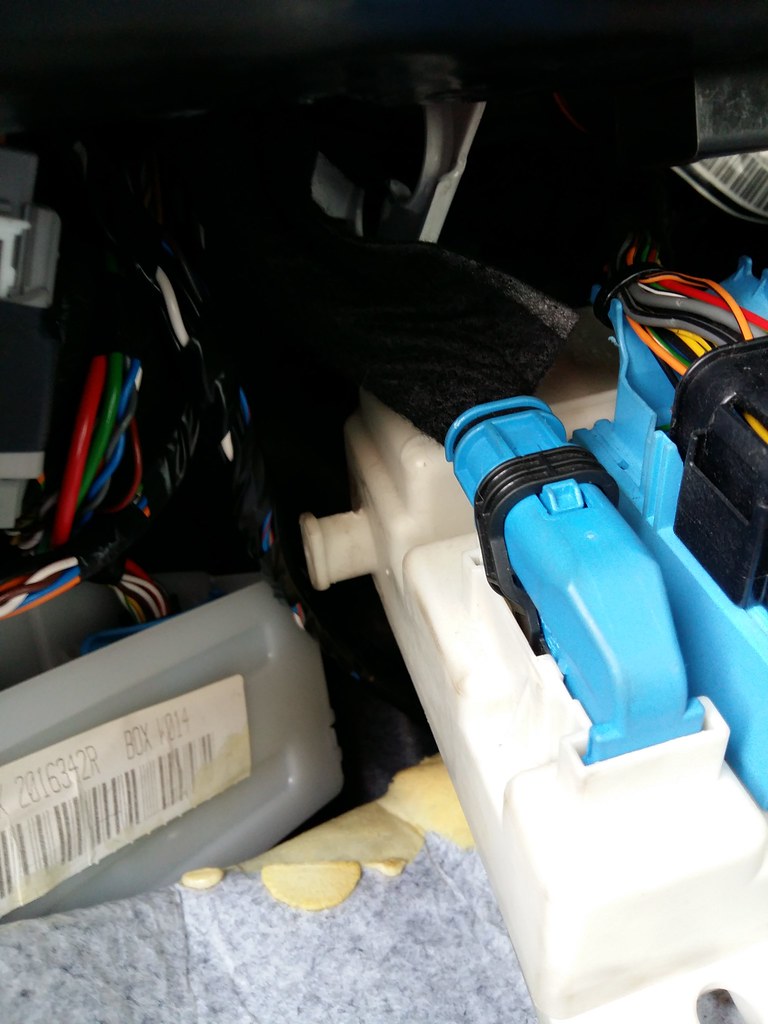 pollenfilter12 by Pete, on Flickr pollenfilter12 by Pete, on FlickrThe white bit on the left sticking off the CEM unit. It really is just a matter of moving it around as best you can to get it off. It does help with room if you pull the carpet down a little bit. Once that was removed from the bracket, it dropped down even further and allowed better access to the bolts holding the bracket on 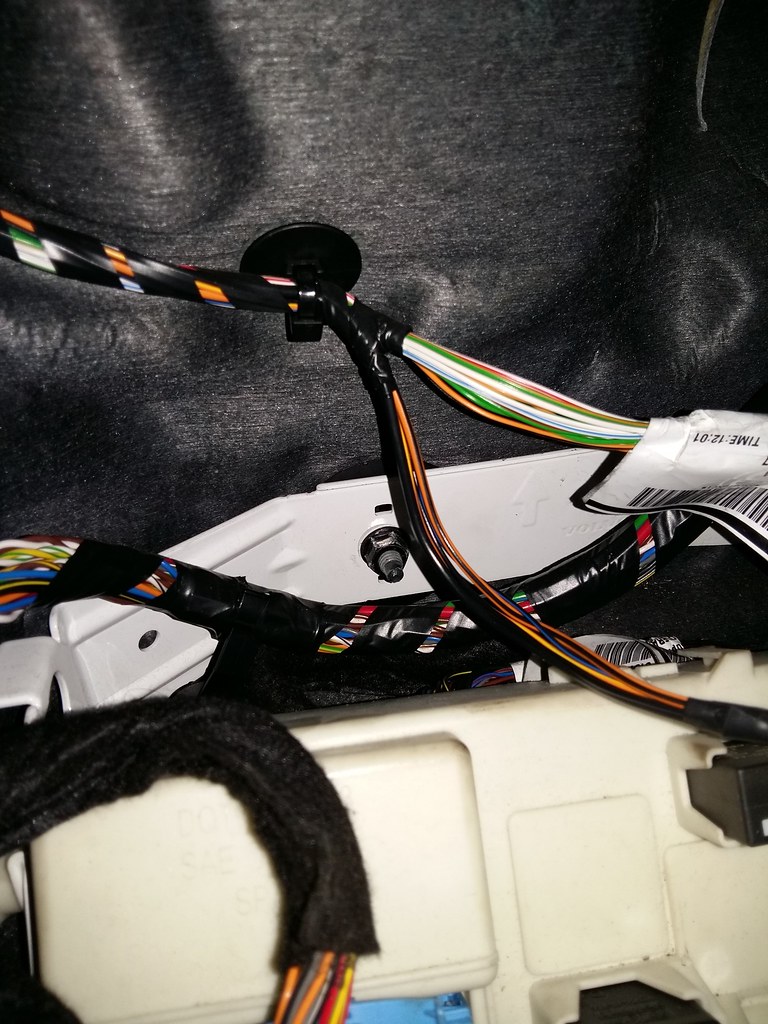 pollenfilter13 by Pete, on Flickr pollenfilter13 by Pete, on FlickrRatchet and long extension bar with a 13mm socket on to remove the nuts. Going off the other how to guide on here, be sure not to drop the nuts as they will go down behind the carpet that you have folded down. I ended up getting the nuts so far off then using my fingers for the last few turns. So this is how the bracket usually sits in front of the cabin filter cabin door 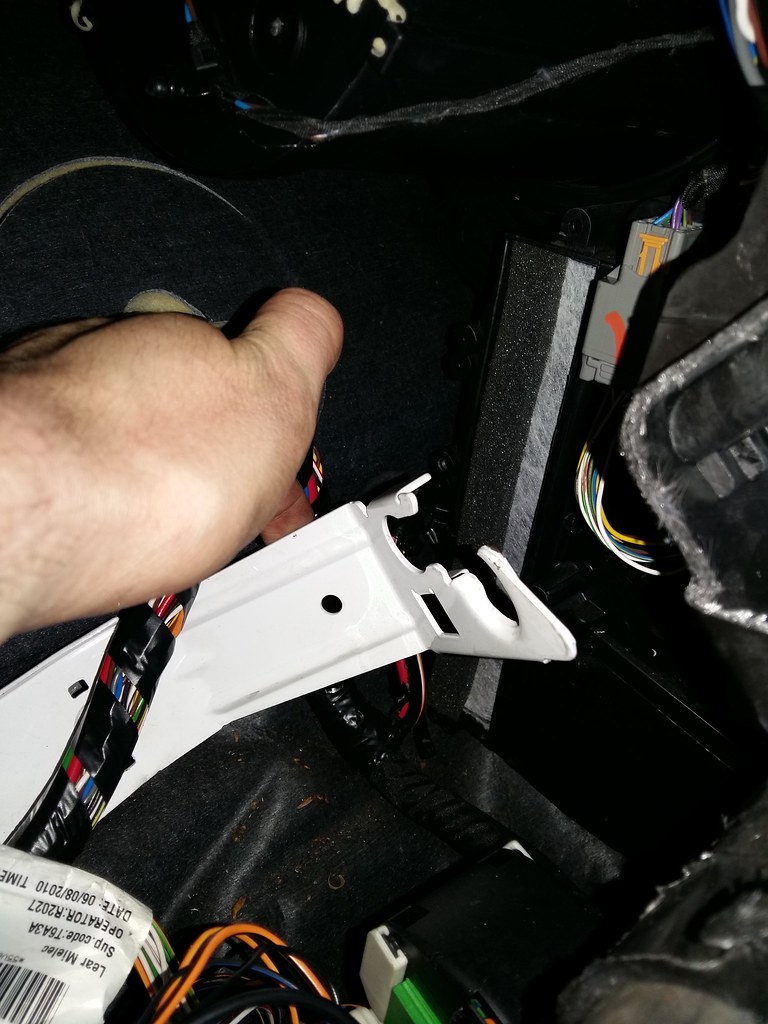 pollenfilter14 by Pete, on Flickr pollenfilter14 by Pete, on FlickrPretty much blocking access to it. Especially when you have quite a rigid cabin filter. But, once the bolts are off and the bracket is lowered, you get this access 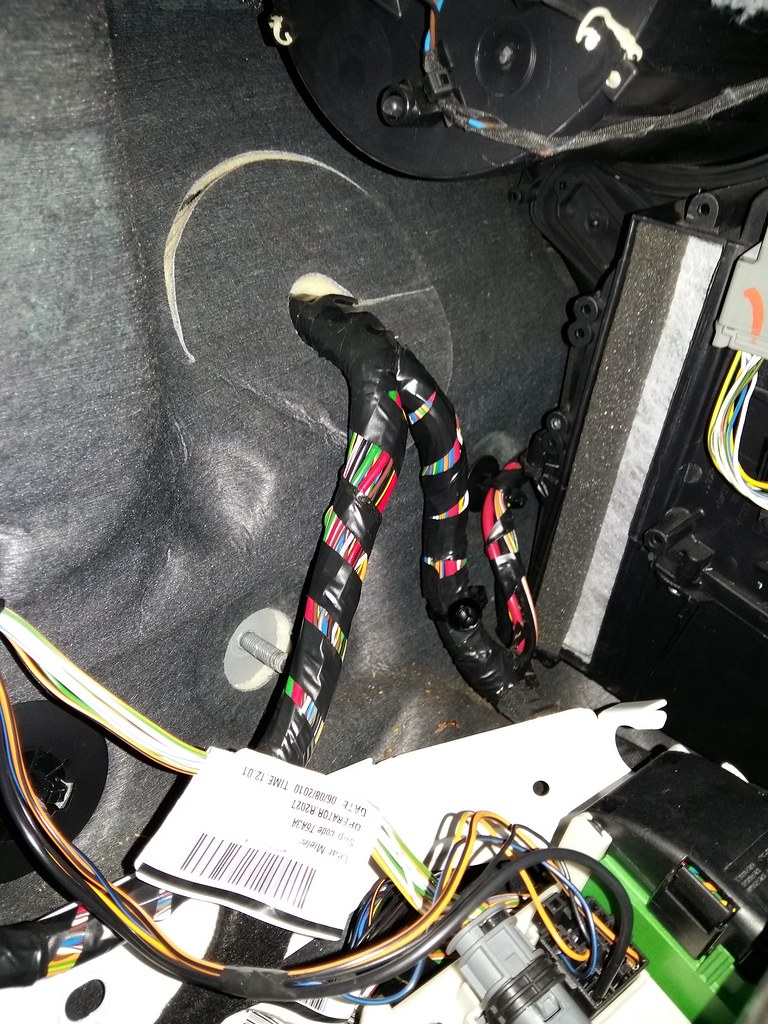 pollenfilter15 by Pete, on Flickr pollenfilter15 by Pete, on FlickrLOADS better. Just a shame it takes so much to get to this point With the bracket lowered out of the way, the new filter went in easily. The above picture has the new filter in place. All done and put back together.
__________________
Thread V40 T2 R-Design - https://www.volvoforums.org.uk/showt...56#post2901756 Thread V50 D2 R-Design - https://www.volvoforums.org.uk/showthread.php?t=264890 - CRASHED |
|
|
|
|
Jul 7th, 2017, 10:27
|
#106 |
|
WowIcanwriteAnythingHere!

Last Online: Mar 26th, 2024 16:05
Join Date: May 2016
Location: Dublin/Meath
|
Congrats on it!
 Thou shall not understand suffering who has not replaced pollen filter on P1... :P Thou shall not understand suffering who has not replaced pollen filter on P1... :PI would only add that in my case removing glovebox was absolutely not needed, however I chose to go with full CEM disconnection route. Its probably down to preferences, but found this way much easier. Also allowed me to contact-spray the connectors and check all relays.
__________________
2005 V50 T5AWD M66, Stage1 Hilton tune E-focus torque mount, E46 bi-xenon retrofit v2 , (also available in PDF form), DTSC fully-off mod, Brembo discs+ATE ceramic pads 
|
|
|
|
| The Following User Says Thank You to LizardOfBodom For This Useful Post: |
|
Jul 7th, 2017, 13:52
|
#107 | |
|
Premier Member
Last Online: Yesterday 19:04
Join Date: Feb 2017
Location: North East, Teesside
|
Quote:
You are correct. If you completely remove/unplug the CEM, you probably don't need to remove the glove box. I really wasn't up for messing with it though, so decided on the glove box method. I was also going to install my dash-cam, but half way into putting it all back together I forgot about it.
__________________
Thread V40 T2 R-Design - https://www.volvoforums.org.uk/showt...56#post2901756 Thread V50 D2 R-Design - https://www.volvoforums.org.uk/showthread.php?t=264890 - CRASHED |
|
|
|
|
|
Jul 23rd, 2017, 22:32
|
#109 |
|
New Member
Last Online: Jul 26th, 2017 14:15
Join Date: Jul 2017
Location: Limerick
|
First off I would like to say thanks for the guide. Was of great assistance to what was an otherwise patience testing job!!!
Just wondering if any one else had an srs airbag service urgent after doing this? I removed the glove box and disconnected the passenger airbag switch. However I forgot to disconnect the battery, which I think may be now causing the fault message. Any one else face something similar? |
|
|
|
|
Jul 23rd, 2017, 23:16
|
#110 | |
|
Senior Member
Last Online: Apr 26th, 2024 19:51
Join Date: Dec 2016
Location: Suburban Philly
|
Quote:
|
|
|
|
|
|
| Tags |
| vaiotag |
| Currently Active Users Viewing This Thread: 1 (0 members and 1 guests) | |
|
|


 Linear Mode

