
|
|||||||
| S80 '06-'16 / V70 & XC70 '07-'16 General Forum for the P3-platform S80 and 70-series models |
 Information
|
|
Guide to changing the Aux belts and tensioner.Views : 9537 Replies : 28Users Viewing This Thread : |
 |
|
|
Thread Tools | Display Modes |
 Sep 25th, 2013, 14:30
|
#1 |
|
Forum Support Team

Last Online: Nov 28th, 2022 17:33
Join Date: Jan 2009
Location: Here.... obviously!
|
Hi all
I changed my Aux belts and tensioners the other day and here is a guide to what I did. I tried to do this using my Haynes manual but it was completly wrong for my car. This guide is for my car, a 2009 V70 D5 R-Design (D5244T4 185bhp engine) Tools needed. Jack Axle stands Wrench 19mm Scoket 10mm Socket TX25 Torx bit TX40 Torx bit TX60 Torx bit Torque wrench Parts Needed 31330379 Tensioner 31330380 Aux Belt 30757613 A/C belt (From Rufe, these came to about £100.) Process First off you need to loosen the O/S/F (Drivers side front) wheel, jack up the car and supprt on axle stands, then remove the wheel. Once you have the wheel off, you need to remove the wheel arch liner. (Haynes suggested to remove the floor tray as well but I did it without removing it.) To remove the wheel arch liner you need to remove the 3 plastic nuts pictured with the 10mm socket -  Then you need to remove the 8 Torx screws, 3 on the rear arch and 5 on the front using the TX25 bit.   The arch liner clips onto the top of the arch and you need to push it up and inwards to remove it. Once you have the liner removed you will be able to see the A/C belt (on the right) and Aux belt and tensioner.   This picture shows the routing of the belt as seen from below.  To undo the tension on the Aux belt, place the TX60 Torx bit in the tensioner and rotate anti clockwise, following the direction arrowed. You can then slip off the aux belt.  Once you have the aux belt off, you need to remove the A/C belt. There is no tensioner for this and it is a stretch belt. I removed it by simply rotating the pulleys whilst pulling the belt towards me, gradually working it off. Next up is removing the tensioner. The bolt inside the centre of the tensioner is a TX40, however access is very limited and as you can see from the photo, my Torx bit wouldn't fit inside the tensioner becuase of the pulley. In the end, I had to place a TX40 bit in a 8mm socket as this would be the only thing we could fit inside. I reckon L shaped Torx keys - as seen here - would be the best bet for removing the bolt.  Refitting is the reverse of removal. Make sure the wheel nuts are tightened up correctly and to the correct 140 Nm Torque setting after you finish. Notes Back in Febuary of this year, I got my car stuck in mud. When removing the wheel arch liner there was a lot of dirt build up behind it. I took the opputunity to hose of the liner and inside the arch to remove this. Also doing the same with passenger side. If I do this again, I may treat the inside with a coat of waxoyl to help prevent corrosion, though with Volvo build quality I would hope it would not be neccesary. Last edited by tt82; Sep 25th, 2013 at 14:32. |

|

|
| The Following 9 Users Say Thank You to tt82 For This Useful Post: |
|
Sep 25th, 2013, 22:14
|
#2 |
|
Senior Member
Last Online: Jul 22nd, 2017 23:24
Join Date: Oct 2009
Location: Londonderry
|
Hi TT82. That's a great looking guide. But I got lost at the point where you take off the tensioner:
How many fixings hold it onto the engine? And why did you remove the bolt from the centre after you took it off (surely you just throw the whole thing away?). And is there not an idler to replace also? |
|
|
|
|
Sep 25th, 2013, 22:53
|
#3 |
|
Forum Support Team
Last Online: Nov 28th, 2022 17:33
Join Date: Jan 2009
Location: Here.... obviously!
|
Hi jp. The tensioner is held on by one bolt which goes through the middle. There is a locating pin on the opposite side which holds it in place. Access to this bolt is tight due to the inner wing and struts, thats why I took the photo with it off the car, just to show access to the bolt is restricted due to the pensioners pulley. If your TX60 bit is to wide you will struggle to get at the bolt. I did mean to write that it would be a good idea to change the bolt, as it would be a nightmare to remove if the thread got chewed up. The idler is changed along with the main cambelt change.
|
|
|
|
|
Sep 25th, 2013, 23:31
|
#4 |
|
Master Member

Last Online: May 10th, 2019 09:02
Join Date: Feb 2012
Location: Inverness, Scotland
|
Many thanks tt82, yet again you have come up trumps with an excellent guide and loads of photos!!
One question, is the tensioner bolt right hand or left hand thread? I did the belts on my sons's Audi a couple of years ago and snapped the tensioner bolt as it was a left hand thread - don't want to make the same mistake again!!!
__________________
2009 XC70 Geartronic SE Lux (185HP at the moment......) Porsche sold looking for a P1800....... |
|
|
|
|
Jun 4th, 2014, 08:01
|
#5 |
|
Senior Member
Last Online: Jan 10th, 2019 14:27
Join Date: Apr 2009
Location: Edinburgh & Aviemore
|
I'm planning this job soon...but the PHOTOS don't seem to be there any more on the guide???
__________________
2009 XC70SE Geartronic |
|
|
|
| The Following User Says Thank You to MartinK For This Useful Post: |
|
Jun 6th, 2014, 07:44
|
#7 |
|
Forum Support Team
Last Online: Nov 28th, 2022 17:33
Join Date: Jan 2009
Location: Here.... obviously!
|
I need to re-upload them as Imageshack have spat their dummy out and won't host for free anymore. It may be possible to ckick on them to get taken to the site in the mean time.
|
|
|
|
|
Jun 25th, 2014, 11:21
|
#8 |
|
Forum Support Team
Last Online: Nov 28th, 2022 17:33
Join Date: Jan 2009
Location: Here.... obviously!
|
Hi all
I changed my Aux belts and tensioners the other day and here is a guide to what I did. I tried to do this using my Haynes manual but it was completely wrong for my car. This guide is for my car, a 2009 V70 D5 R-Design (D5244T4 185bhp engine) Tools needed. Jack Axle stands Wrench 19mm Socket 10mm Socket TX25 Torx bit TX40 Torx bit TX60 Torx bit Torque wrench Parts Needed 31330379 Tensioner 31330380 Aux Belt 30757613 A/C belt (From Rufe, these came to about £100.) Process First off you need to loosen the O/S/F (Drivers side front) wheel, jack up the car and support on axle stands, then remove the wheel. Once you have the wheel off, you need to remove the wheel arch liner. (Haynes suggested to remove the floor tray as well but I did it without removing it.) To remove the wheel arch liner you need to remove the 3 plastic nuts pictured with the 10mm socket - 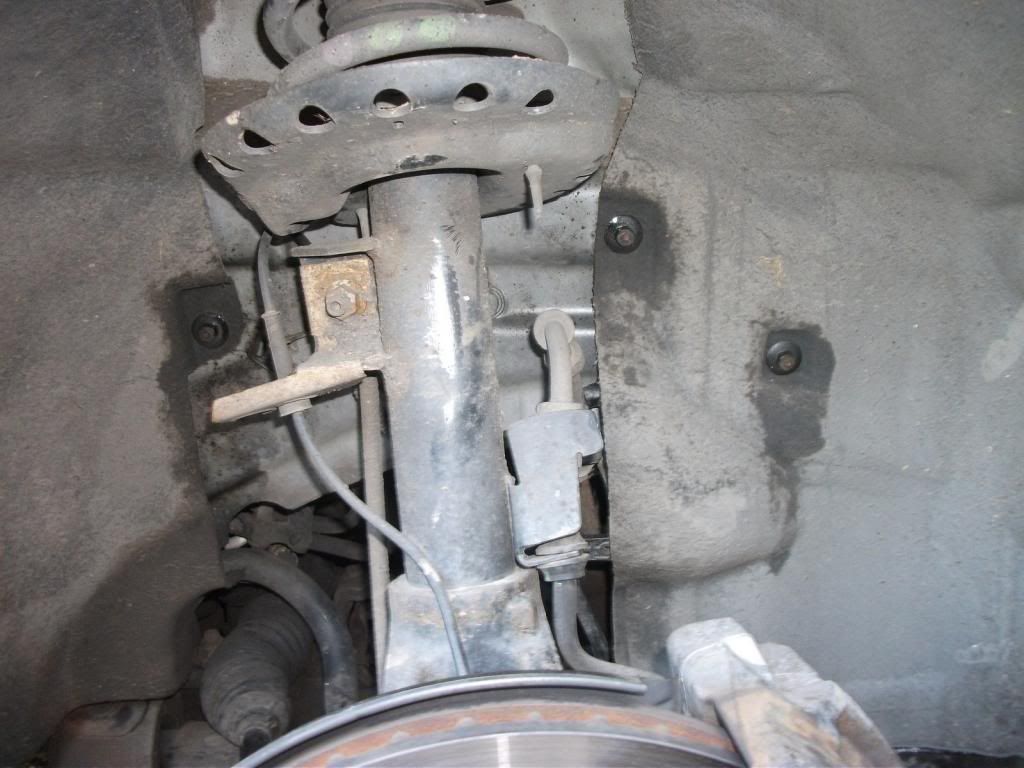 Then you need to remove the 8 Torx screws, 3 on the rear arch and 5 on the front using the TX25 bit. 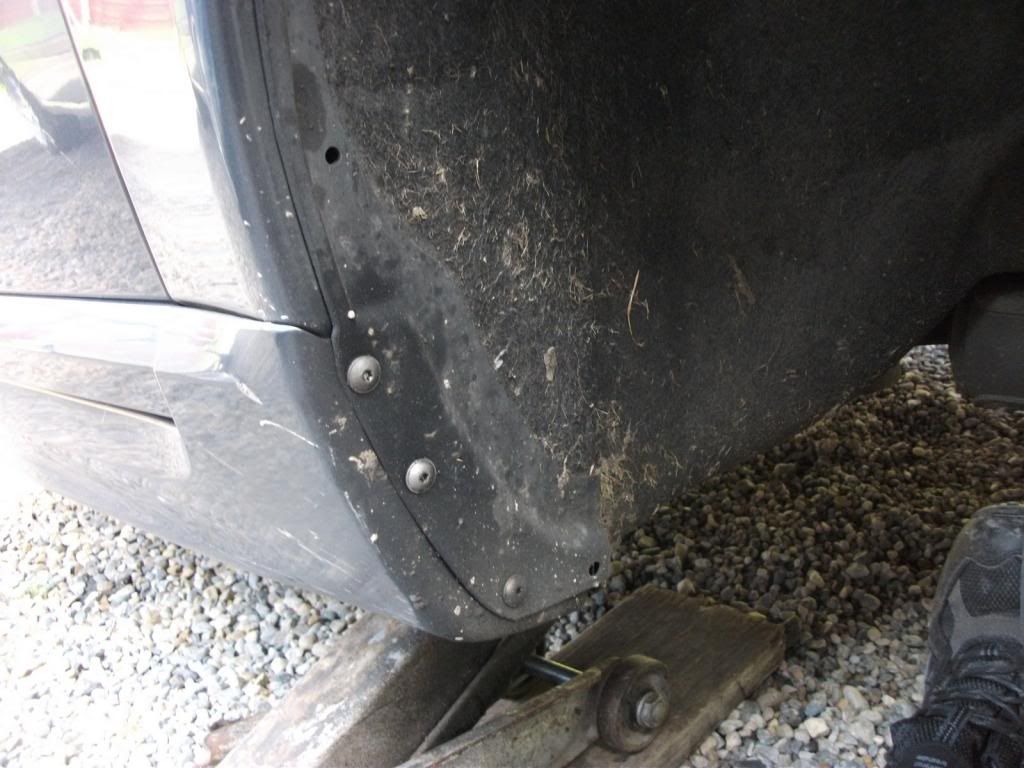 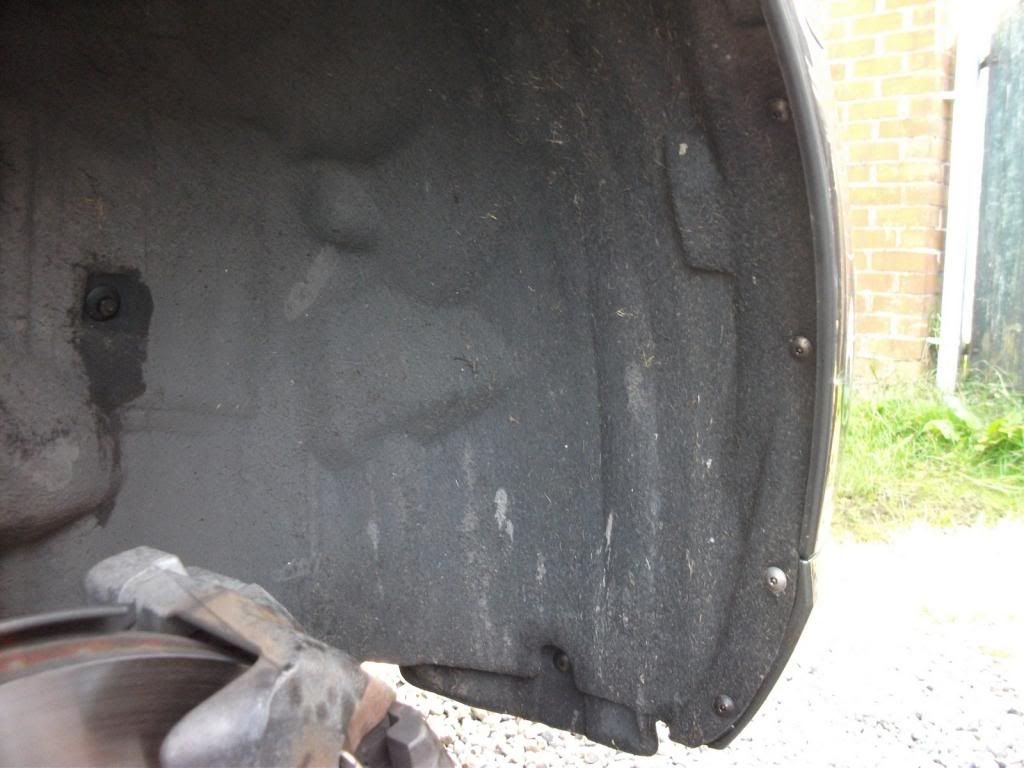 The arch liner clips onto the top of the arch and you need to push it up and inwards to remove it. Once you have the liner removed you will be able to see the A/C belt (on the right) and Aux belt and tensioner. 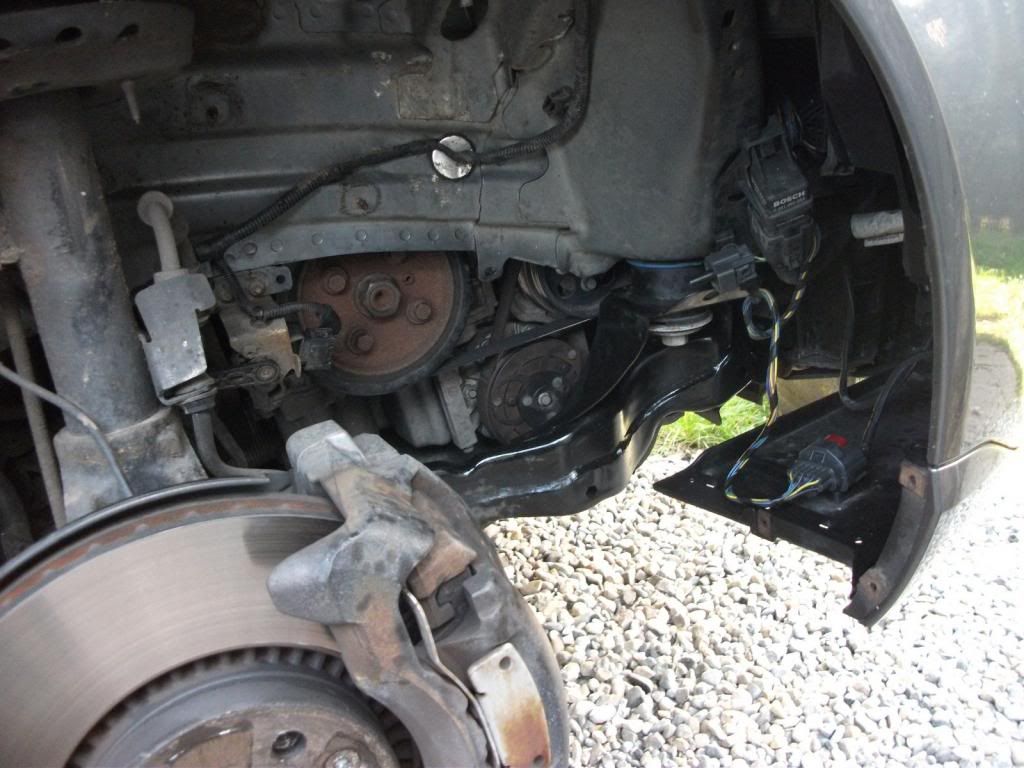 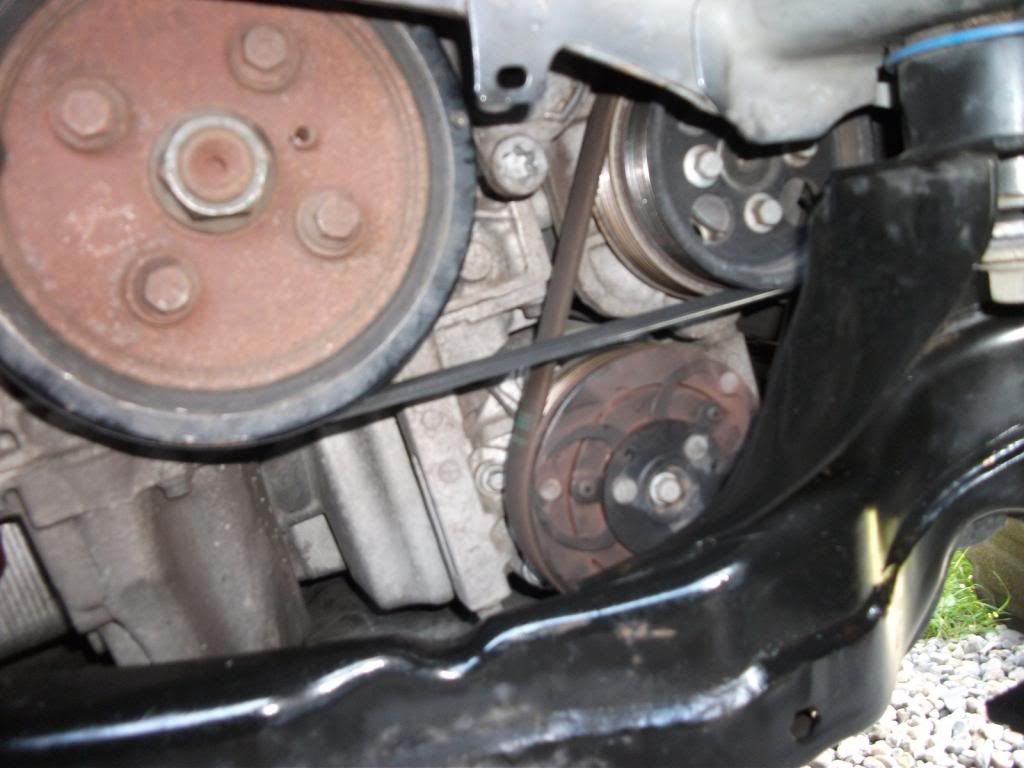 This picture shows the routing of the belt as seen from below. 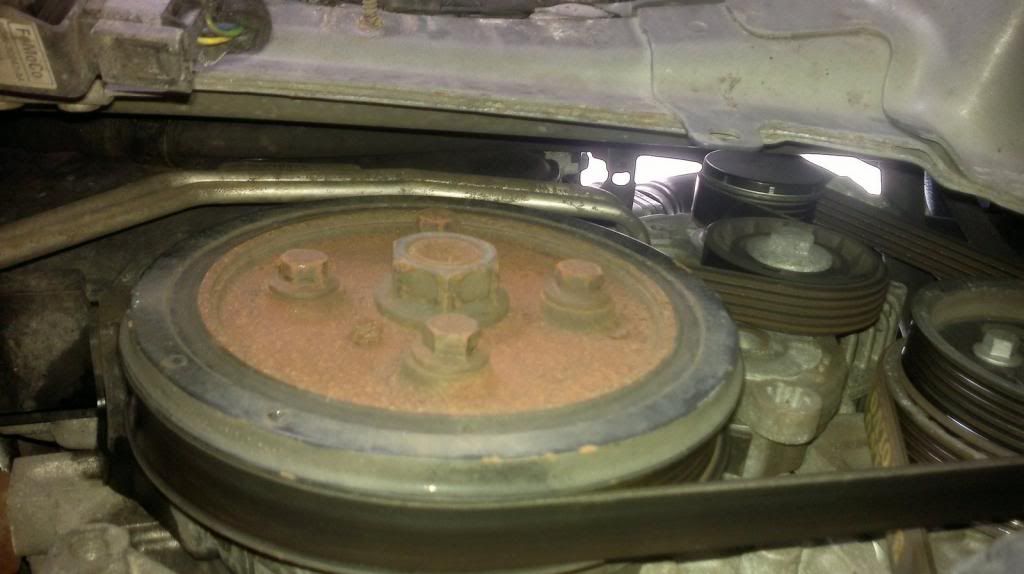 To undo the tension on the Aux belt, place the TX60 Torx bit in the tensioner and rotate anti clockwise, following the direction arrowed. You can then slip off the aux belt. 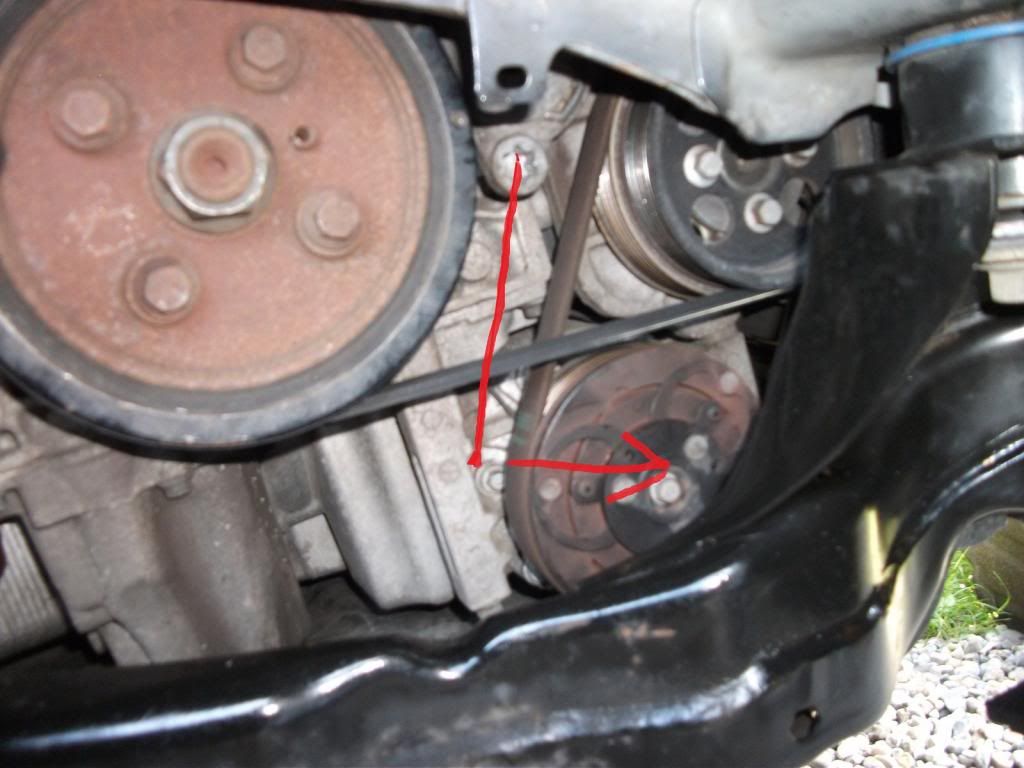 Once you have the aux belt off, you need to remove the A/C belt. There is no tensioner for this and it is a stretch belt. I removed it by simply rotating the pulleys whilst pulling the belt towards me, gradually working it off. Next up is removing the tensioner. The bolt inside the centre of the tensioner is a TX40, however access is very limited and as you can see from the photo, my Torx bit wouldn't fit inside the tensioner becuase of the pulley. In the end, I had to place a TX40 bit in a 8mm socket as this would be the only thing we could fit inside. I reckon L shaped Torx keys - as seen here - would be the best bet for removing the bolt. 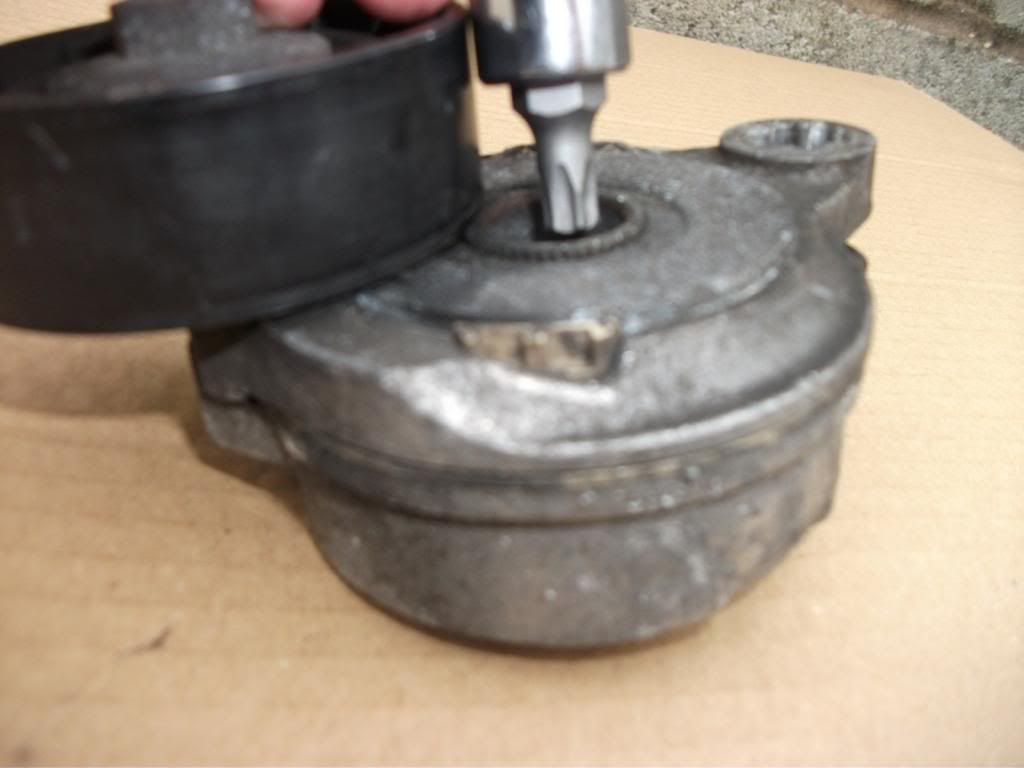 Refitting is the reverse of removal. Make sure the wheel nuts are tightened up correctly and to the correct 140 Nm Torque setting after you finish. Notes Back in February of this year, I got my car stuck in mud. When removing the wheel arch liner there was a lot of dirt build up behind it. I took the opportunity to hose of the liner and inside the arch to remove this. Also doing the same with passenger side. If I do this again, I may treat the inside with a coat of waxoyl to help prevent corrosion, though with Volvo build quality I would hope it would not be necessary. Last edited by CTCNetwork; Jun 26th, 2014 at 05:52. Reason: tidy up for articles |
|
|
|
|
Mar 15th, 2016, 11:25
|
#9 |
|
Junior Member
Last Online: Aug 17th, 2016 20:40
Join Date: Aug 2010
Location: cardiff
|
Hi,
Thanks for doing the write up. Did you notice any way of locking the tensioner to make fitting the belt back on easier? On the older tensioner you could wind it back and insert a 4mm bar or small screw driver through a hole to hold the tension off until you had fitted the belt. Thanks, Ampy. |
|
|
|
|
Mar 15th, 2016, 12:41
|
#10 |
|
Forum Support Team
Last Online: Nov 28th, 2022 17:33
Join Date: Jan 2009
Location: Here.... obviously!
|
No, I had to use a wrench with the torx socket to ease the tension and hold it until the belt is in place. I had help and found it easier to to have somebody align the belt on the top pulley and hold it there whilst I did the bottom pulleys.
|
|
|
|
| The Following 4 Users Say Thank You to tt82 For This Useful Post: |
|
| Currently Active Users Viewing This Thread: 1 (0 members and 1 guests) | |
|
|


 Linear Mode

