
|
|||||||
| 700/900 Series General Forum for the Volvo 740, 760, 780, 940, 960 & S/V90 cars |
 Information
|
|
Control arm (flying saucer) + strut bar bush issuesViews : 2065 Replies : 13Users Viewing This Thread : |
 |
|
|
Thread Tools | Display Modes |
 Aug 31st, 2013, 15:09
|
#1 |
|
Volvo 960
Last Online: Today 10:38
Join Date: Mar 2008
Location: Planet Earth
|
Hi chaps
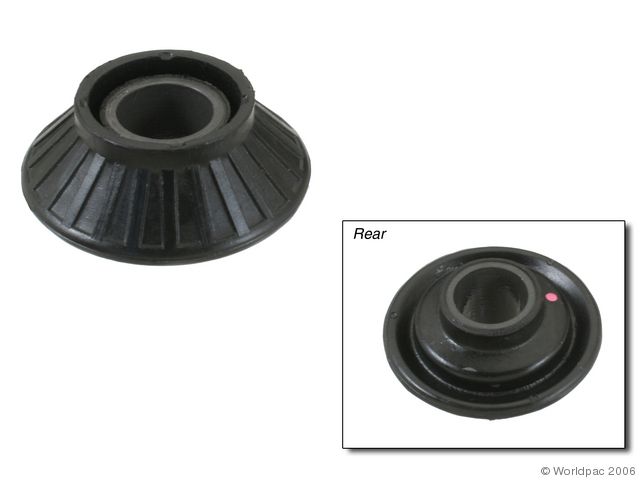
Had a go at doing the flying saucer bushes today as they are supposed to be pretty easy, they go where the front strut bar joins to the control arm. Mine were completely knackered as you can see by the below pics, they were flat as a pancake! The bush that connects the strut bar to the body also looked a bit dodgy (the bar looked twisted because the bush was wasn't keeping it square - see pic 4), luckily I had also ordered these bushes. I got plenty of plus gas on the two bolts/nut, they were tight but got them off with no dramas. This leads me onto a couple of issues, the first being that the strut bar to body bush looks like a press job doh!! Secondly there appears to be a metal washer bonded or tack welded to the control arm (do I leave this in place?)- will attach pics to next post. Last edited by yoda960; Aug 31st, 2013 at 15:23. |

|

|
| The Following 2 Users Say Thank You to yoda960 For This Useful Post: |
|
Aug 31st, 2013, 15:16
|
#2 |
|
Volvo 960
Last Online: Today 10:38
Join Date: Mar 2008
Location: Planet Earth
|
In the first pic you can see the metal bit that appears to be bonded to the control arm at the rear, its the same on both offside and nearside. The front of the control arm is bare on both sides as per photo 2. Do I leave that metal bit in place?
Lastly, anyone pressed the strut bar to body bush out/new one in with say a vice? (pic 3) Or is it a mechanic press only job? Hope that won't cost me too much! 
Last edited by yoda960; Aug 31st, 2013 at 15:24. |
|
|
|
| The Following User Says Thank You to yoda960 For This Useful Post: |
|
Aug 31st, 2013, 15:38
|
#3 |
|
Thank fossils for fuel!

Last Online: Yesterday 14:39
Join Date: Jan 2012
Location: London
|
Did this a week ago and when I undid the bolt and removed the arm the bushes came off like you have done then I cleaned out the hole and made sure all remnant's came off rubber and a metal bits that came with the old bush, I refitted the arm at the back with one side of the polybush in place and the metal tube in the middle, then placed the end poly bushe with 'grease' supplied and bolted on loose and made sure it was centered correctly it did so hand tightened it. Dropped the car a got fat bud to sit on the side working (to add weight) and tighten it up ( you got new bolts but I reused the old ones which I regret) job done.
Sorry if that no use but just fresh in mind, the metal ring or bits in hole came out with a flat head screwdriver, the rear is bent pic 4/5 thats odd! Regards Raz
__________________
'If you are not one of us, you are one of them' |
|
|
|
| The Following User Says Thank You to FossilFish For This Useful Post: |
|
Aug 31st, 2013, 16:01
|
#4 |
|
Thank fossils for fuel!
Last Online: Yesterday 14:39
Join Date: Jan 2012
Location: London
|
__________________
'If you are not one of us, you are one of them' Last edited by FossilFish; Aug 31st, 2013 at 16:10. |
|
|
|
| The Following User Says Thank You to FossilFish For This Useful Post: |
|
Aug 31st, 2013, 16:27
|
#5 |
|
Volvo 960
Last Online: Today 10:38
Join Date: Mar 2008
Location: Planet Earth
|
Hi Raz, thanks for the info. So you are saying that I need to remove the metal disk thing (with holes in) in pic 1 of my second post? I did have a quick go at it but it seems like its tacked on possibly? Did yours have that too?
Did you change your strut bar to body bush? (pic 3, post 2). I can't burn it out as it's got a metal outer sleeve, besides I think it might be a nightmare to get the new bush in there so i'll have to get a garage to do it. I've heard polybushes go in easier as they don't deform so i'm hoping its a quick and easy job for someone with a press! Last edited by yoda960; Aug 31st, 2013 at 16:36. |
|
|
|
| The Following User Says Thank You to yoda960 For This Useful Post: |
|
Aug 31st, 2013, 16:55
|
#6 |
|
Thank fossils for fuel!
Last Online: Yesterday 14:39
Join Date: Jan 2012
Location: London
|
One side came away without issue the other side bush was deteriorated and I used a screw driver to pull up bits of metal don't know if was part of the bush or what you are referring to ( can't remember to be honest) but clean it out as best as possible, the new blue polybushes should go in and slightly show either side. Just make sure to place the car on its own weight plus some so its not tighten at wrong angle and rates the bush. My arm to body bush was straight and in OK so left it as is. Someone will post a more useful post shortly:
__________________
'If you are not one of us, you are one of them' |
|
|
|
| The Following User Says Thank You to FossilFish For This Useful Post: |
|
Aug 31st, 2013, 17:15
|
#7 |
|
Thank fossils for fuel!
Last Online: Yesterday 14:39
Join Date: Jan 2012
Location: London
|
 I recon it stays in place this is a replacement pants rubber bush and the groves sit towards the metal. Doubt a welded plate needs to be removed, I remember reading the bush coming out has metal ring to in it so that might be what I was fishing out! I recon it stays in place this is a replacement pants rubber bush and the groves sit towards the metal. Doubt a welded plate needs to be removed, I remember reading the bush coming out has metal ring to in it so that might be what I was fishing out!
__________________
'If you are not one of us, you are one of them' |
|
|
|
| The Following User Says Thank You to FossilFish For This Useful Post: |
|
Sep 2nd, 2013, 15:14
|
#8 |
|
Steam Driven PC Owner.
Last Online: Jun 11th, 2024 15:05
Join Date: Dec 2004
Location: Not sure.
|
Early cars came with removable plates. You can buy them seperately if needed. The ones you have are later ones and stay put.
I didn't replace the rear bush as it looked to be in pretty good condition. I have cut bushes out with a hacksaw on the past but you do need to be careful not to cut into the suspension arm. If you hack about at them for a while they will be weakened anyway and will then be easier to press out. |
|
|
|
| The Following User Says Thank You to Steve940estate For This Useful Post: |
|
Sep 4th, 2013, 00:38
|
#9 |
|
Premier Member
Last Online: Jun 16th, 2024 19:56
Join Date: Jul 2009
Location: Holywood
|
Those polybushes don't look right as spaceship replacements, but its been a while since I did mine. I didn't have any bonded plates by the back, but the spaceships where rusted on (1995)
|
|
|
|
| The Following User Says Thank You to TonyS9 For This Useful Post: |
|
Sep 4th, 2013, 08:26
|
#10 |
|
Volvo 960
Last Online: Today 10:38
Join Date: Mar 2008
Location: Planet Earth
|
Those are definitely the spaceship replacements
 I also figured out that the metal disk thing left in the rear of the arms was part of the old bush as there was rubber behind it, the old bush must have been molded around this piece of metal. I thought it might have been tacked in or bonded into the arm as it was so rusted in, but it did come out with plenty of chiseling! I also figured out that the metal disk thing left in the rear of the arms was part of the old bush as there was rubber behind it, the old bush must have been molded around this piece of metal. I thought it might have been tacked in or bonded into the arm as it was so rusted in, but it did come out with plenty of chiseling! Attached a pic of the strut bars with the body bush pressed in, got a local garage to do it with their press. For the sake of £20 it was well worth it. Also attached is a pic of the arm with that crispy metal bit removed! Will be fitting these back today, then I need to remove the panhard rod to get new bushes fitted in that. |
|
|
|
| The Following User Says Thank You to yoda960 For This Useful Post: |
|
| Tags |
| poly bush, polybush, polybushes, superflex |
| Currently Active Users Viewing This Thread: 1 (0 members and 1 guests) | |
|
|


 Linear Mode

