

|
|||||||
| PV, 120 (Amazon), 1800 General Forum for the Volvo PV, 120 and 1800 cars |
 Information
|
|
Volvo X (Pro-Touring 1967 Amazon)Views : 85291 Replies : 626Users Viewing This Thread : |
 |
|
|
Thread Tools | Display Modes |
|
|
#41 |
|
Trader
Last Online: Aug 1st, 2014 05:07
Join Date: Feb 2011
Location: Madill
|
Here are some pics of the finished Replacement Trailing Arm/Panhard Bar kit for the later cars, and I do have the brackets to make them work for the early cars too.. You will also see the new 8.8 Ford rear axle conversion bracket kit, for the guys that dont want to use the heavy duty 9in Mod Light Ford we are using for our V8 Builds.. These brackets are offered in the Do it Yourself fold and weld set up, or we can weld them up for you for a fee.
Also pictured is the Rear Coil Over Conversion bar that puts all the weight load back into the original coil spring pockets, instead of installing on the inner sided of the unibody frame rails like most kits do. There is 4 inches of ride height adjustment with this kit, and that is at one inch increments by fliping coil over mount brackets around.. Rear Trailing Arm/Panhard Bar kit.. It comes with the standard Rubber Bushing rod end, or the optional Heim Joint set up pictured. As you can see, there is a redesign in the production models versus the earlier pictured arms in the build threads. We had changed to a swedge end set up, because it offers a bit more space, along with making them stronger. This bar set works with the Original Volvo rear axle, so it a direct replacement for all the original arms and bushings. 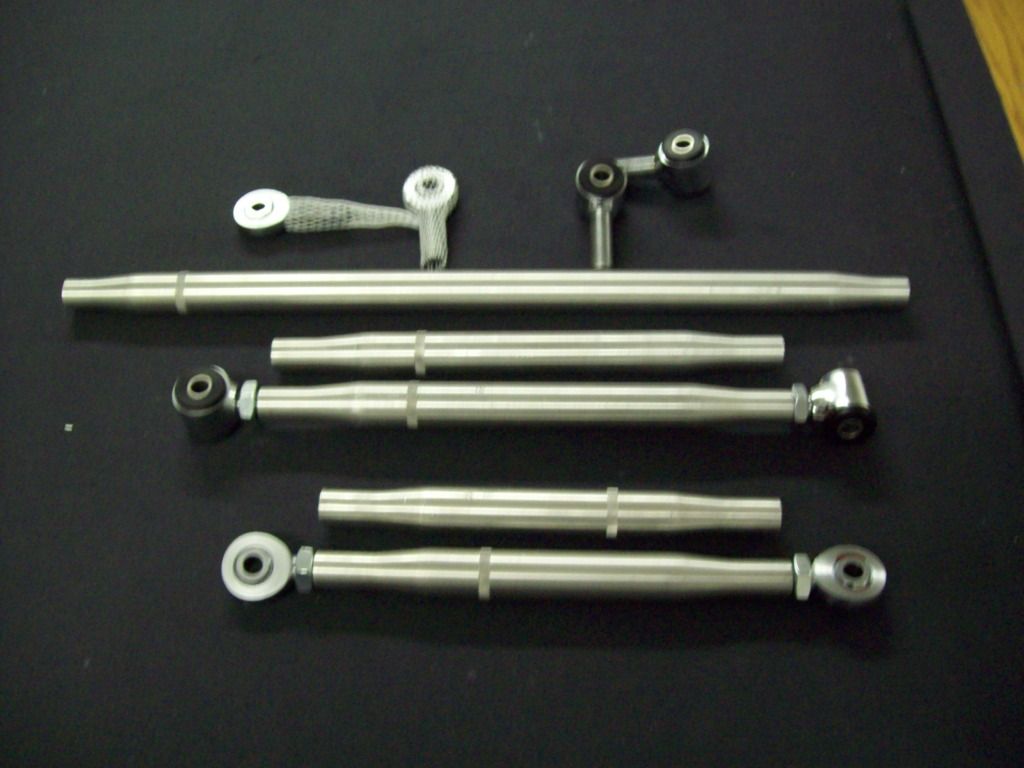 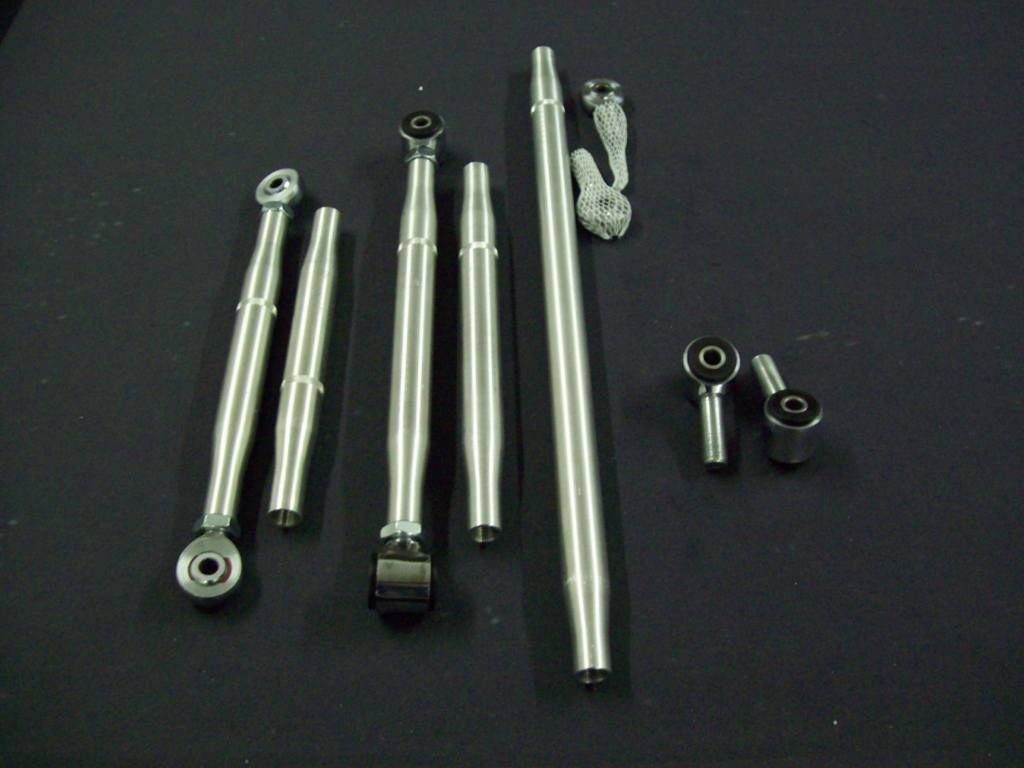 Here is the 8.8 Ford Axle Conversion Bracket Kit... You can see the Do it Yourself version, which are the flat foldable plates, and the finish welded brackets above them. This will make the Ford Mustang/Explorer conversion much easier. 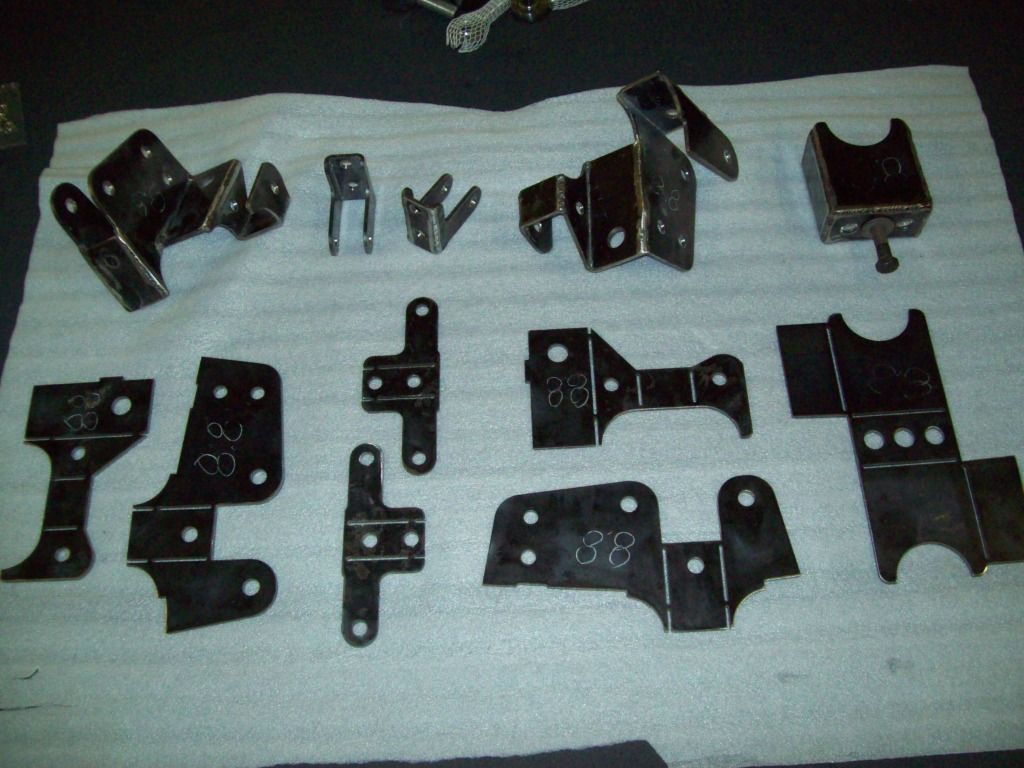 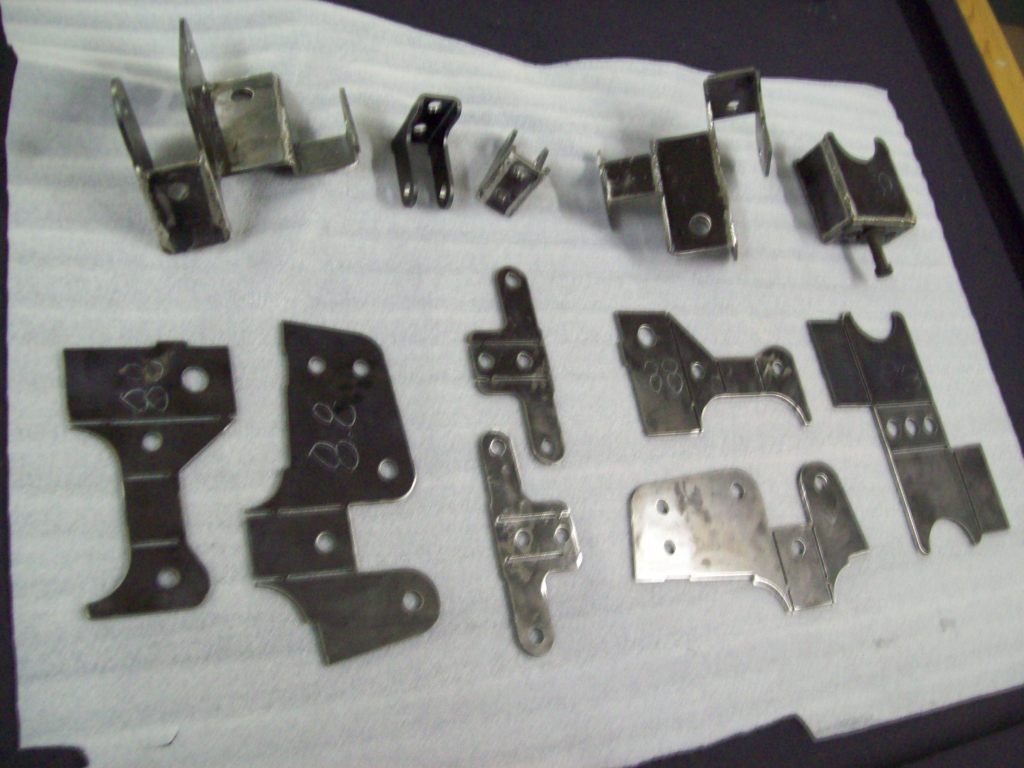 Here is the complete kit set up, with the Rear Coil Over Conversion Bar and Coil Overs. 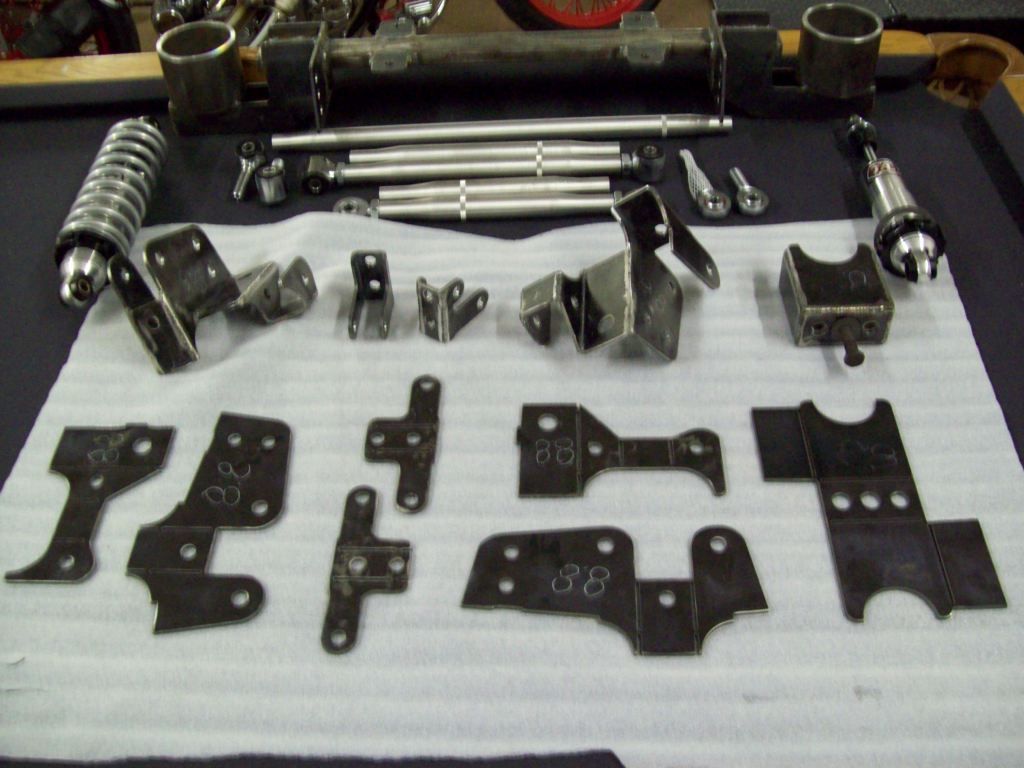 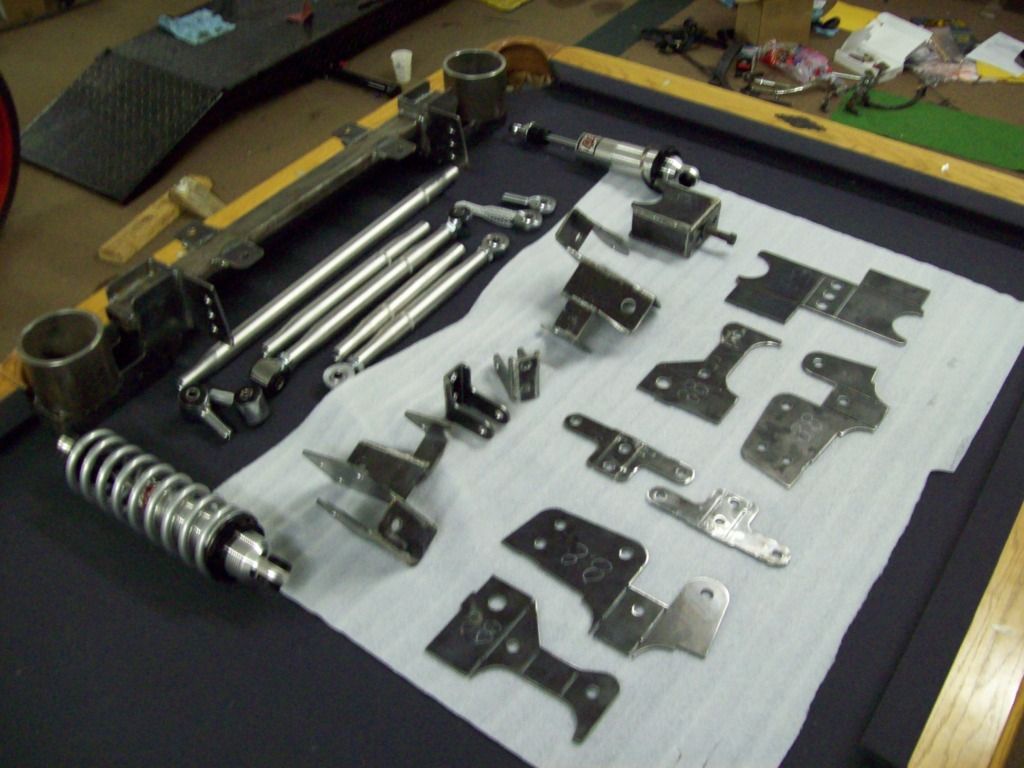 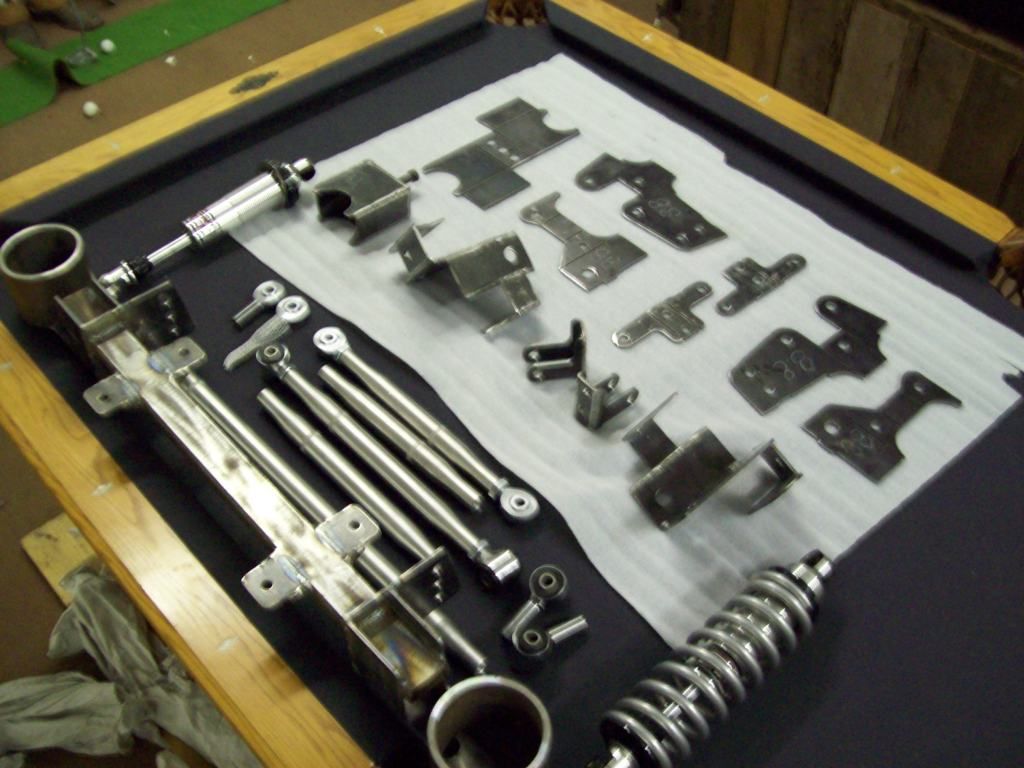
__________________
Robert Jackson Classic Auto Glass Innovations Flush Mount Glass Classicautoglassinnovations.com |
|
|

|
|
|
#42 |
|
Trader
Last Online: Aug 1st, 2014 05:07
Join Date: Feb 2011
Location: Madill
|
Well it turns out I will have to do a bit of flaring to allow the 265/35/18 to fit properly.. I cant belive the actual dimension difference between the 245's that will fit under there, versus the 265's.. I have a set of 225's, 235's, and 245's here, and you can barely tell the difference between all of them in the group, but you put that damn 265 next to the 245, and there is a huge visual size difference..
I didnt have to raise the actual arch, but it did have to come out 1.5 inches on the top.. It really seems like alot of extra work, just to gain that extra 1.5 inches, but the 265's look so much better under there.. I know by Pro-Touring standards, that isnt a very large tire. But in this body, and with this vehicle weight, I think it might do the trick. These old Volvo bodies actually start narrowing right after the doors, so the exaggerated rear flares, still dont stick out past the fron fender flares, when you are standing right in front or back of the car.. I used the masking tape (Duct Tape) analaysis on this, because it helps see proportions, with out the overwhelming contrast of welded metat, ground paint, ect. It hasnt grown on me yet, so I will sit on it a day or two before I start the other side. I still have to blend the bottoms into the rockers, but that shouldnt be too bad.. 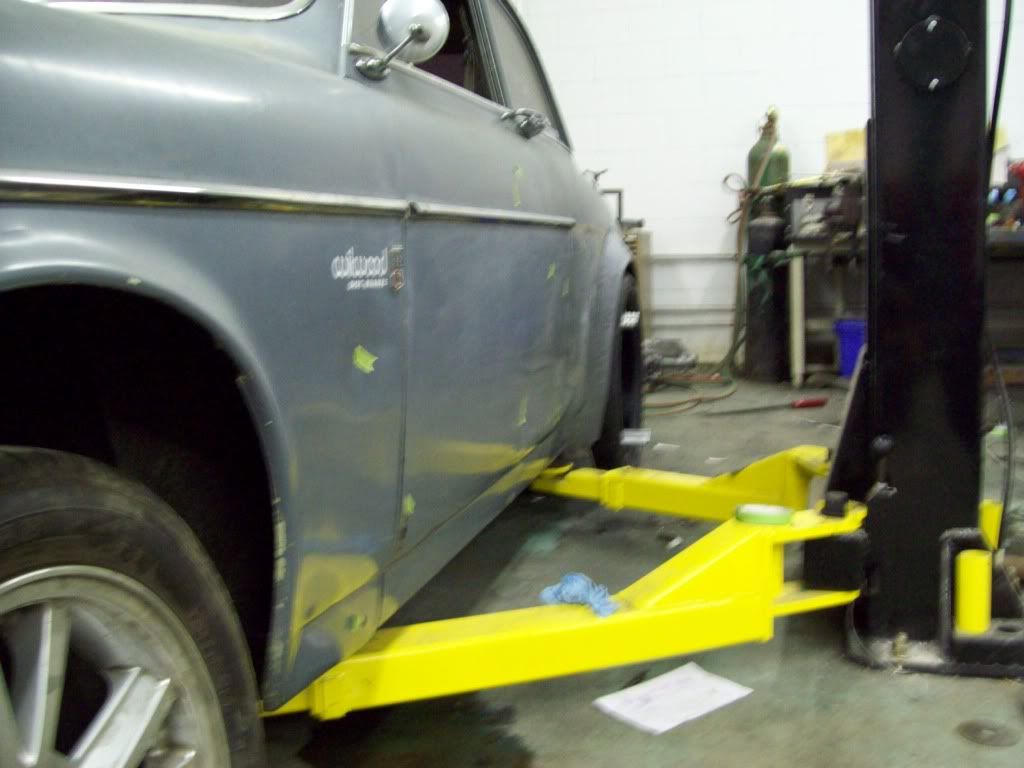 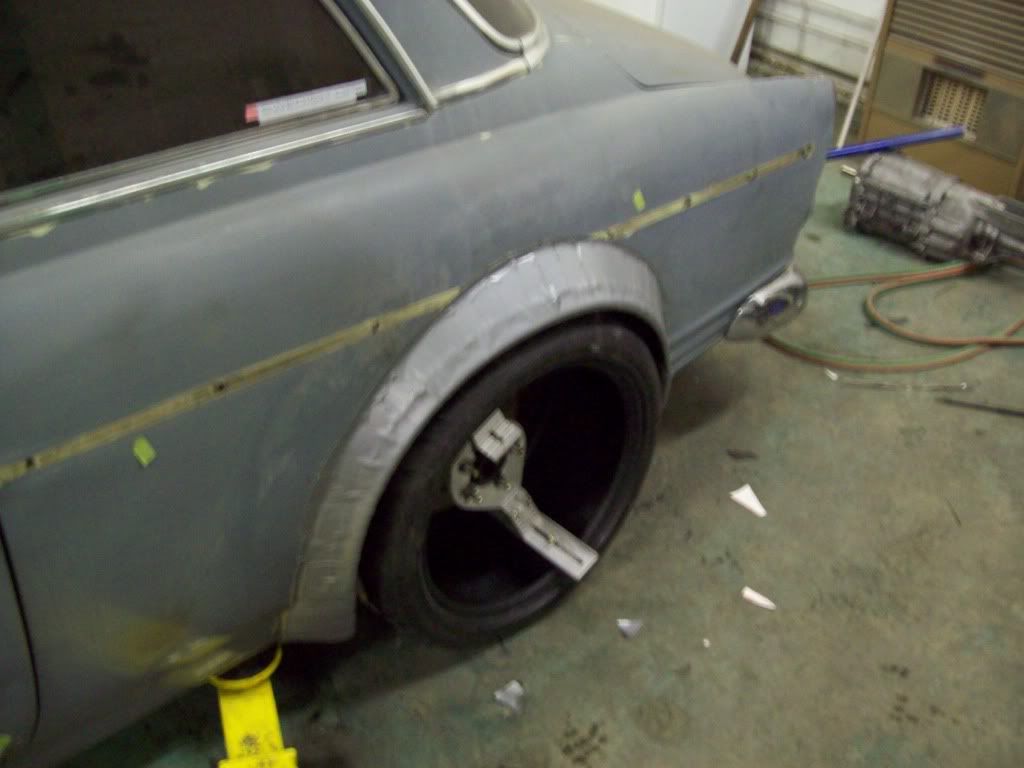 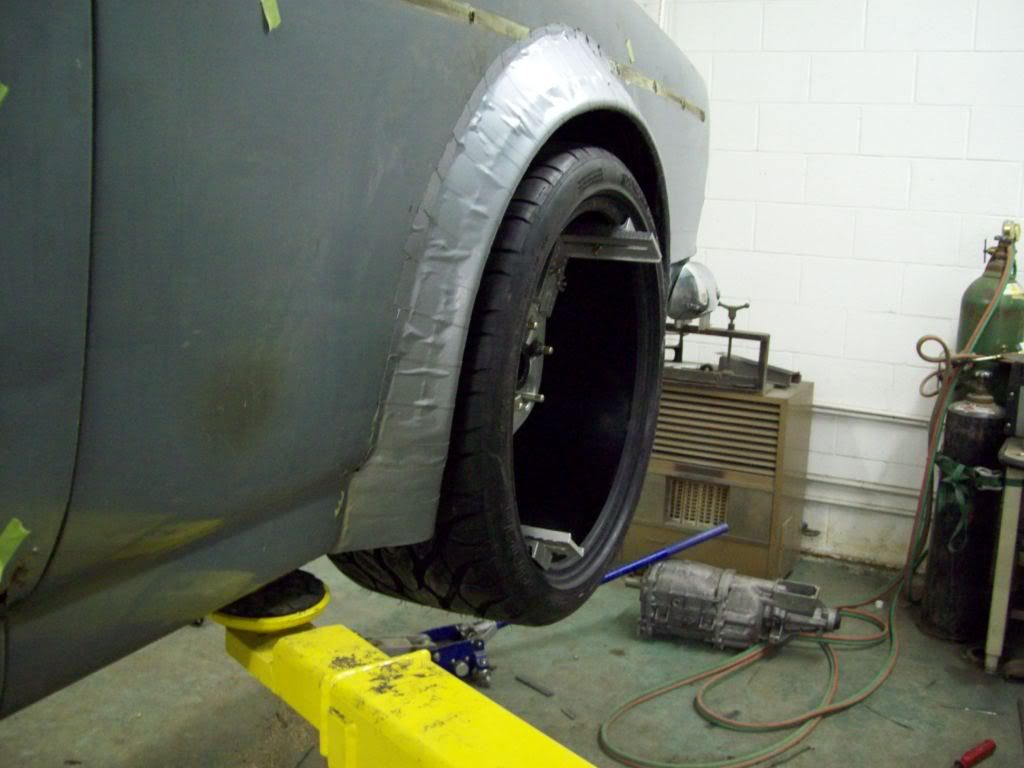 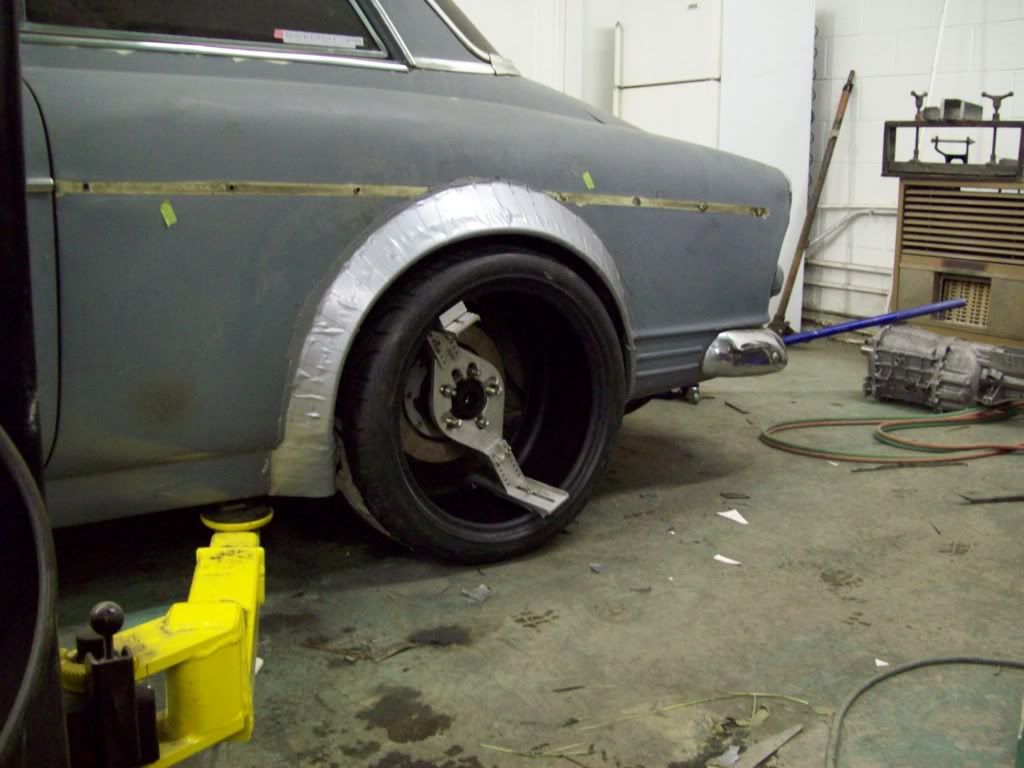  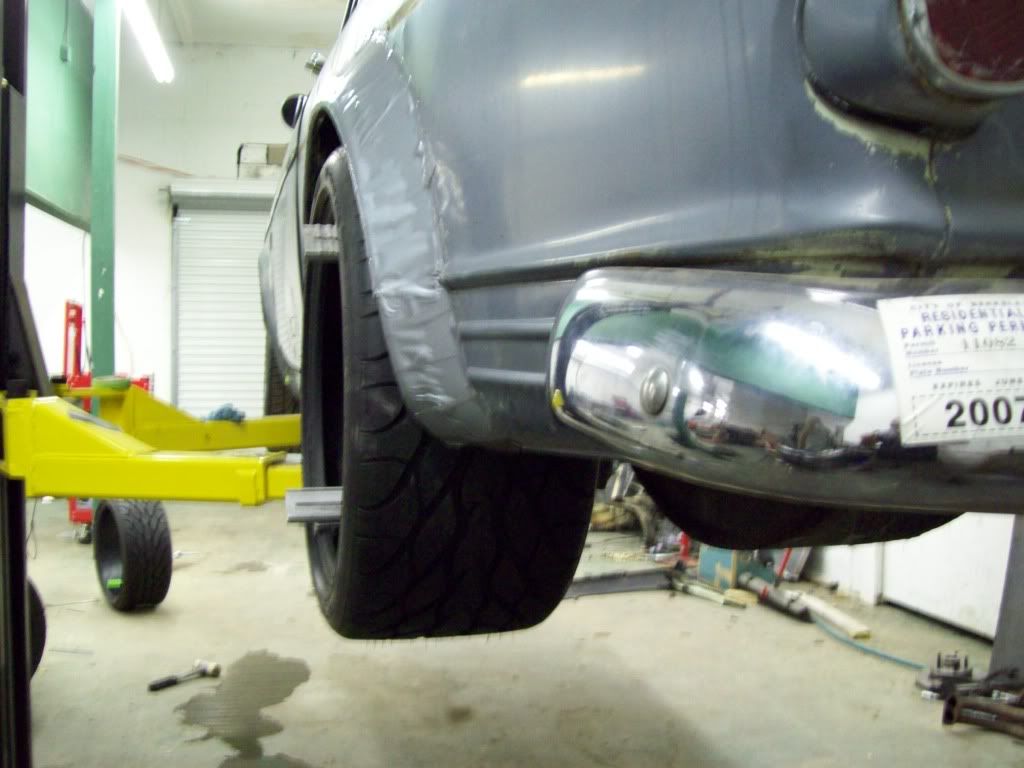
__________________
Robert Jackson Classic Auto Glass Innovations Flush Mount Glass Classicautoglassinnovations.com |
|
|

|
|
|
#43 |
|
Trader
Last Online: Aug 1st, 2014 05:07
Join Date: Feb 2011
Location: Madill
|
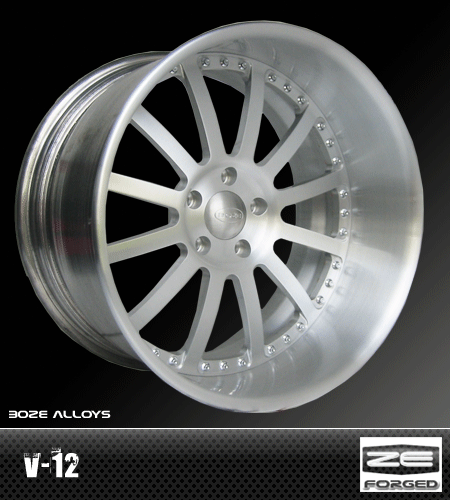
I have the Boze V12 Wheels in a 18x9.5 rear and 18x8 front started on, and I also have the 14inch Wilwood Front Disc in the Red 6-piston caliper option, along with the 13 inch Wilwood rear with the matching caliper option..
__________________
Robert Jackson Classic Auto Glass Innovations Flush Mount Glass Classicautoglassinnovations.com |
|
|

|
|
|
#44 |
|
Trader
Last Online: Aug 1st, 2014 05:07
Join Date: Feb 2011
Location: Madill
|
I am getting some of the body work done on the car this week, and at the same time doing some of the necessary body clean up mods. I have found that the Volvo P1800 trunk button is very easy to use on the Amazon, and I think it will potentially make the car much cleaner looking in the rear.. All you have to do is drill a hole for the P1800 button body to fall into, and the mechanicals of the P1800 button will actually work the Amazon trunk release, with no Mods..
I am also working on installing the license plate into the bumper, but I have to do a bit of contouring and tweeking still.. I am not set on it yet, but I think it all could potentially work out. I will also be removing the bumper guards, and plan on welding the bumper up, to make it a one piece bumper. Before, with the Amazon Trunk Latch, and original license plate position   The after, with the P1800 Button, and the relocated license plate. I am not sure about it yet, but I think it does have some potential 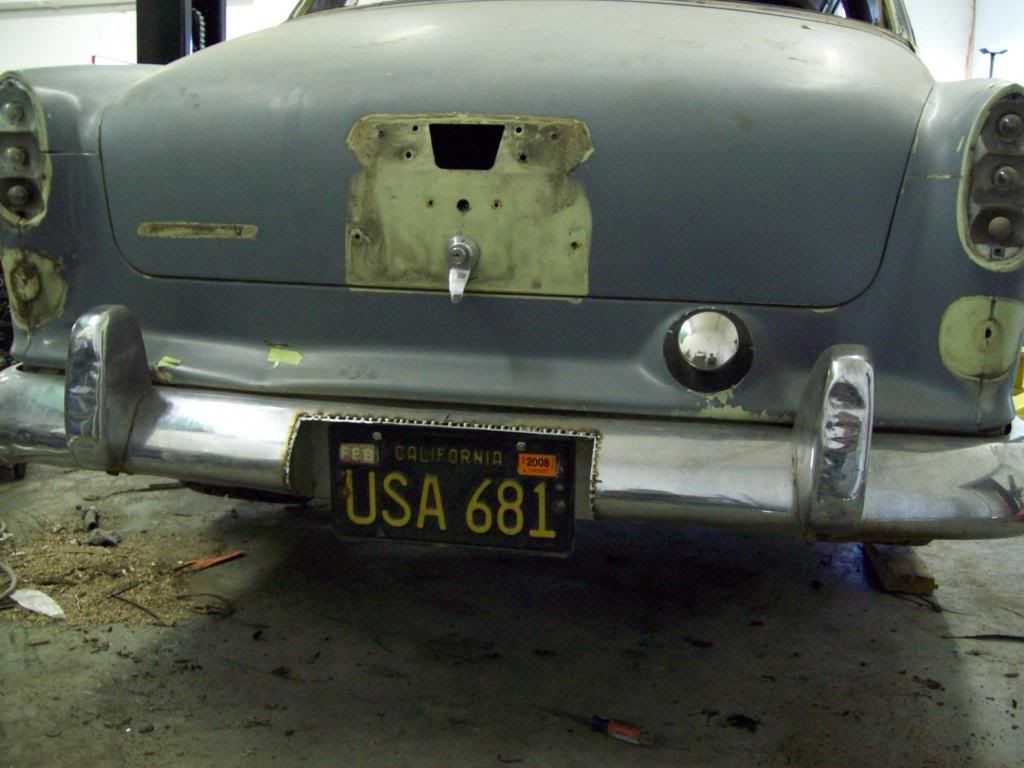 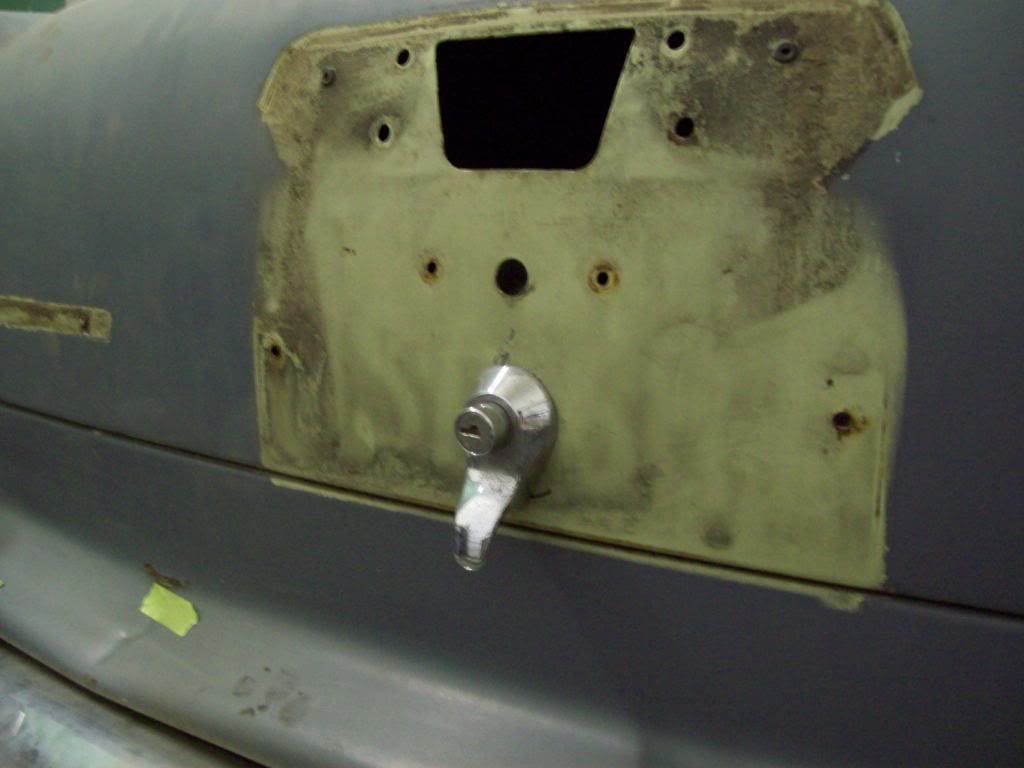 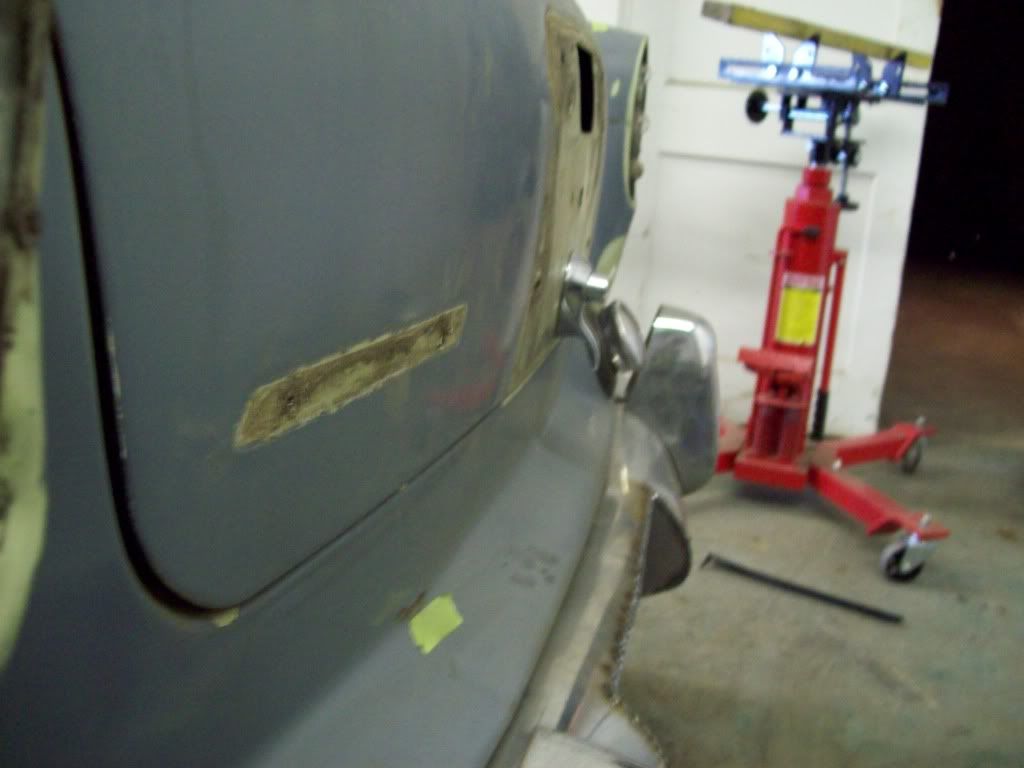
__________________
Robert Jackson Classic Auto Glass Innovations Flush Mount Glass Classicautoglassinnovations.com |
|
|

|
|
|
#45 |
|
Trader
Last Online: Aug 1st, 2014 05:07
Join Date: Feb 2011
Location: Madill
|
The body guy has started on the body work rough in, and I finally have my flares tweeked where I think they will work out fine.. Here are some pictures of the flares ground down, but I still have to do a bit more finish welding..
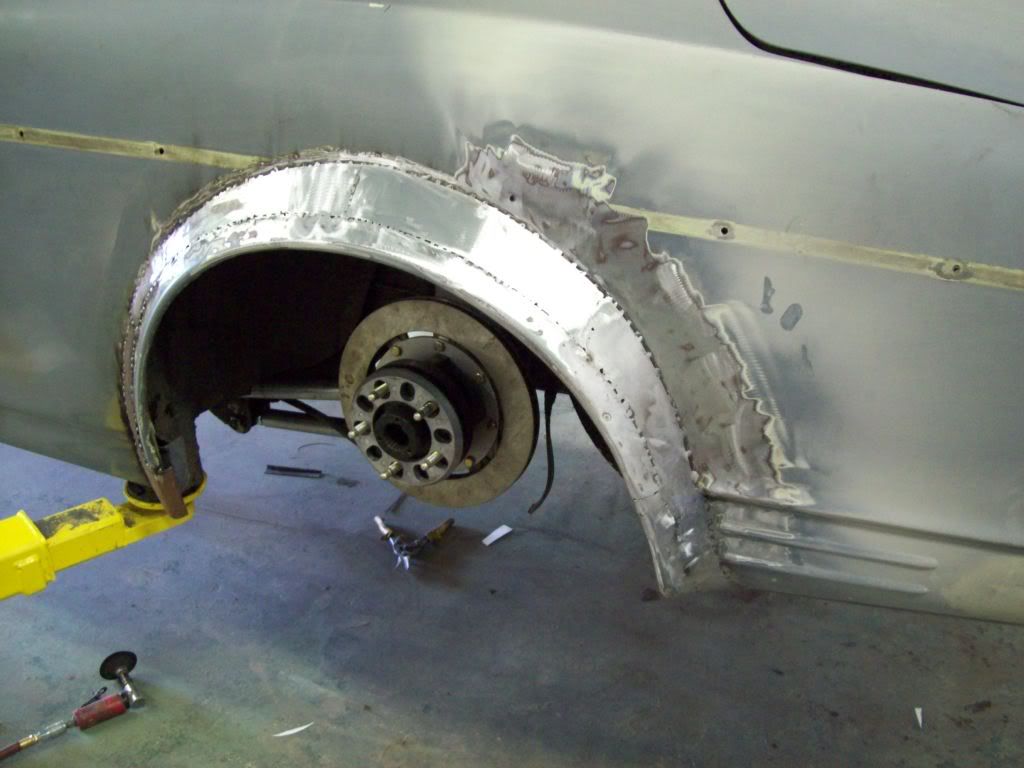 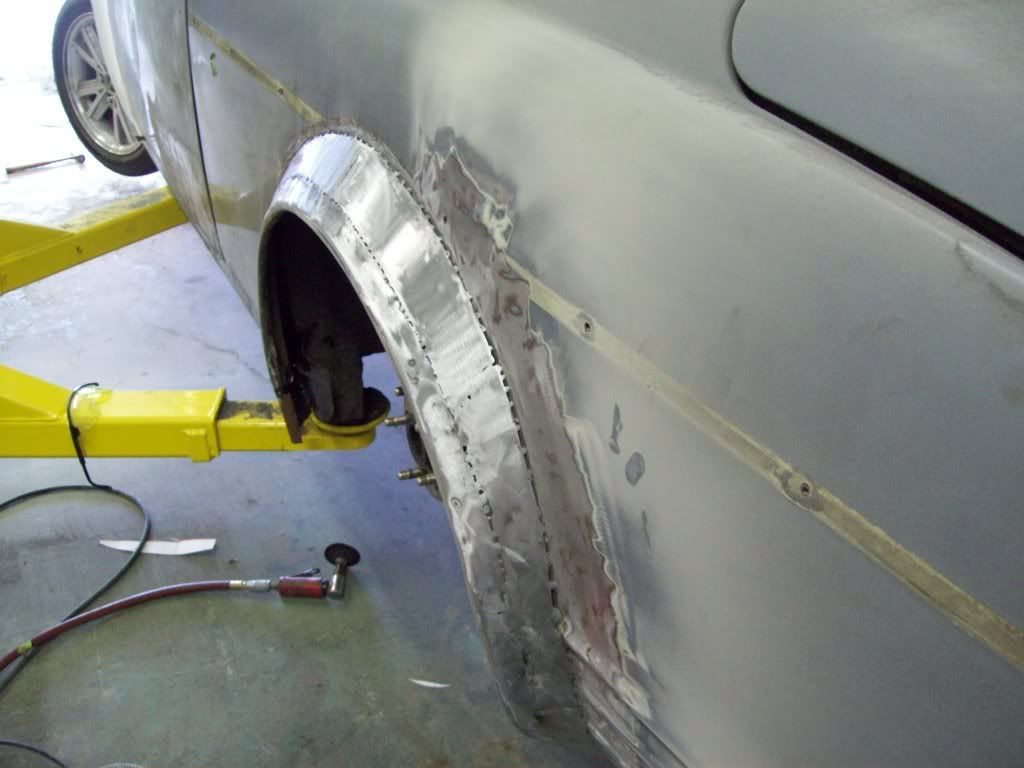 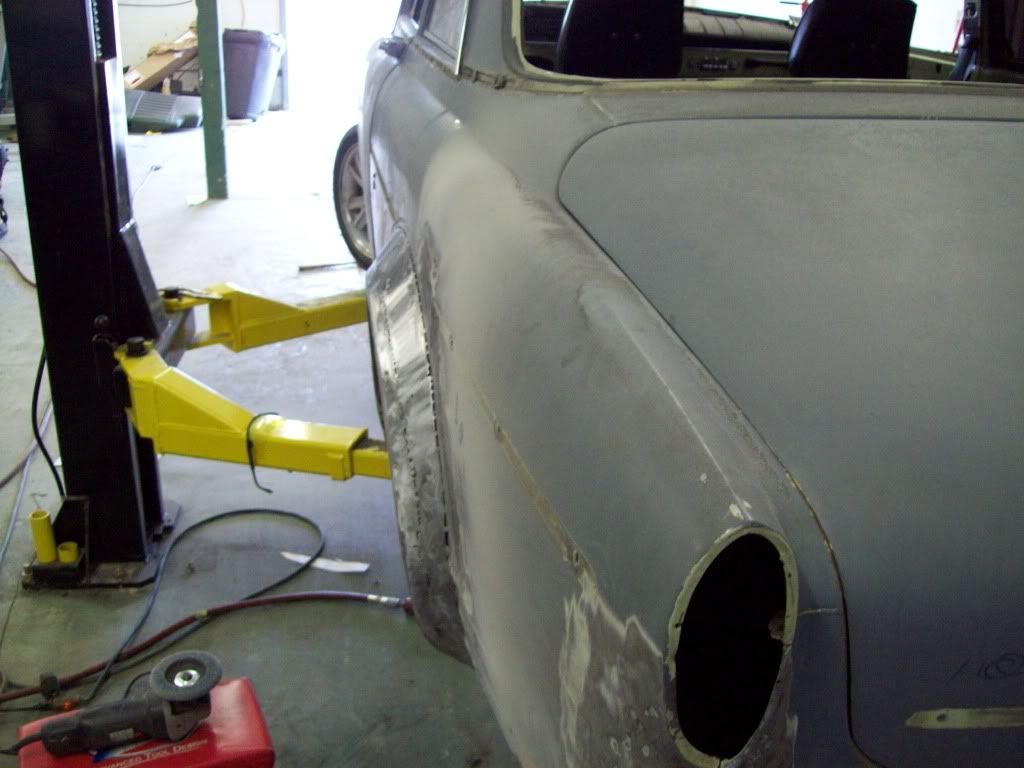 Here are some follow up pictures to the removal of the license plat bracket/trunk latch, and in these pics, the holes are welded up.. I also removed the fuel filler from the back, because with the horsepower I am running, I dont think I will be able to keep gas from sloshing out.. LOL We have our new Swedish Ops fuel tanks in the works, so I hope I have something done in time, so I dont have to temporarily run a fuel cell. 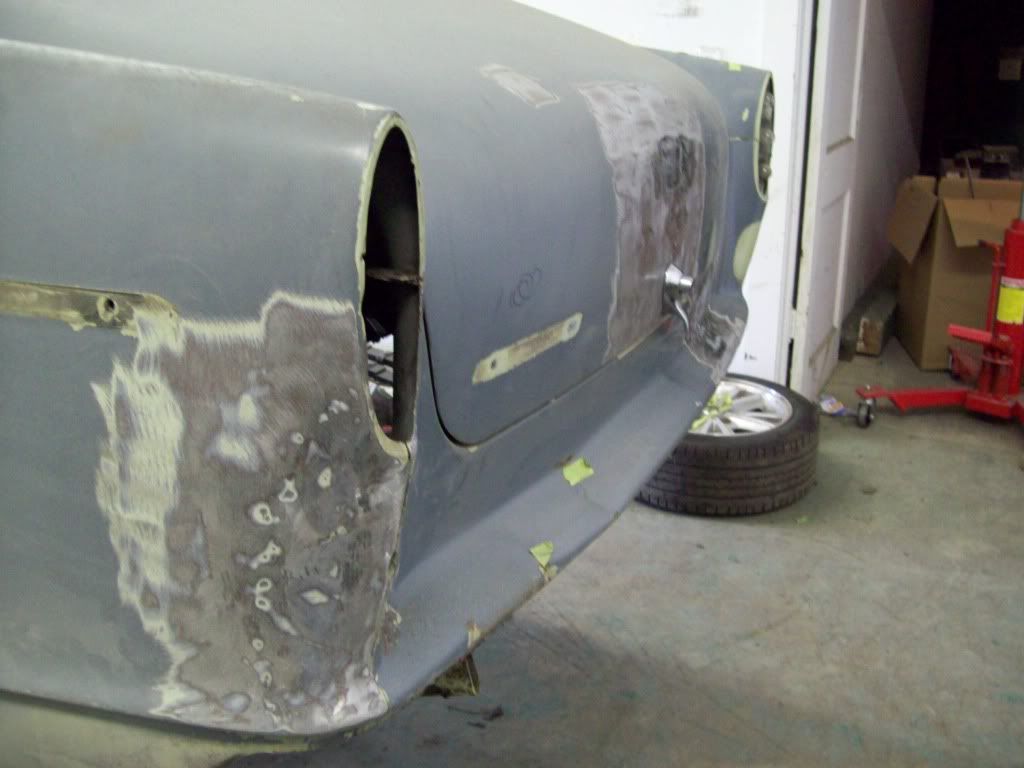 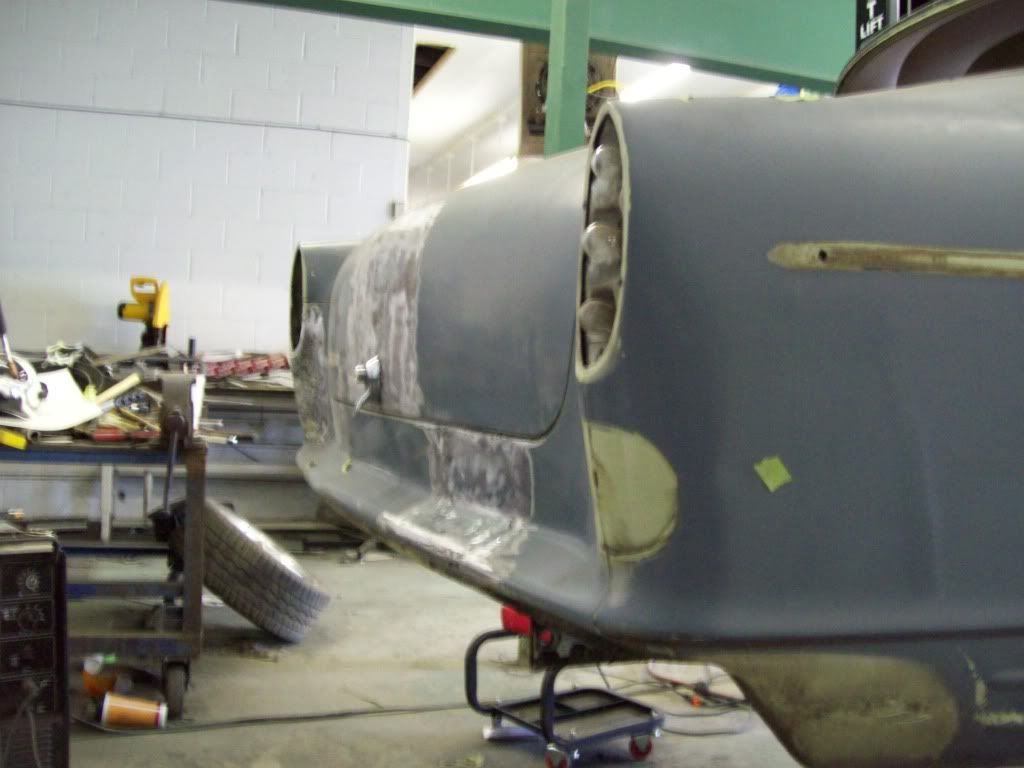 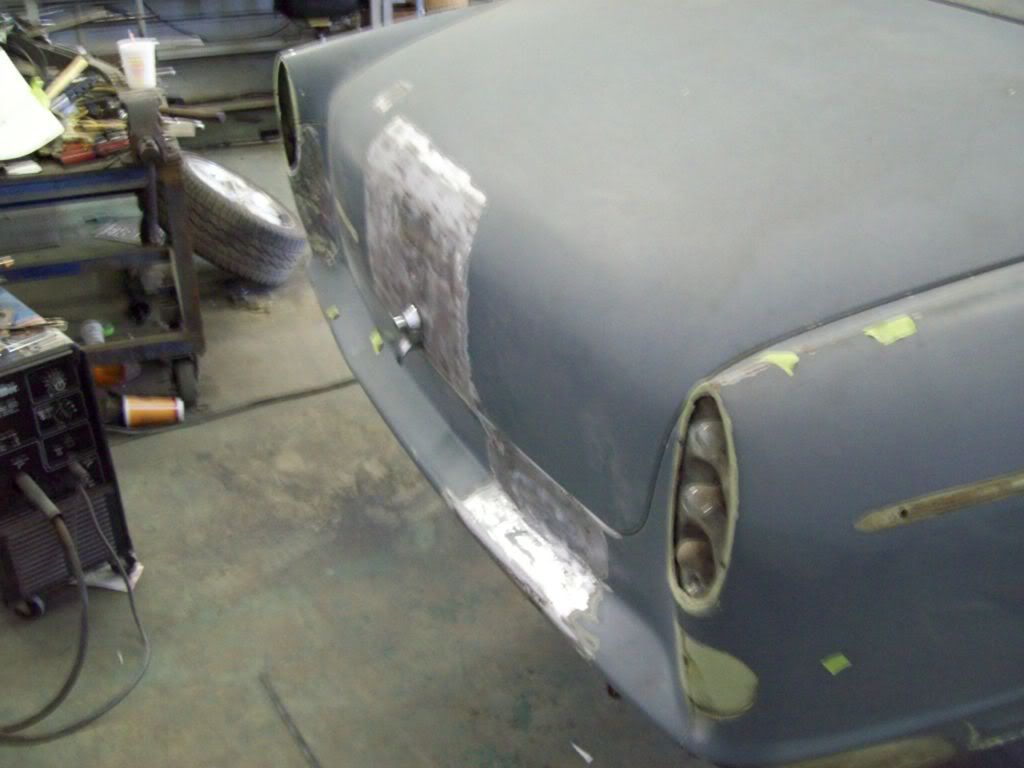 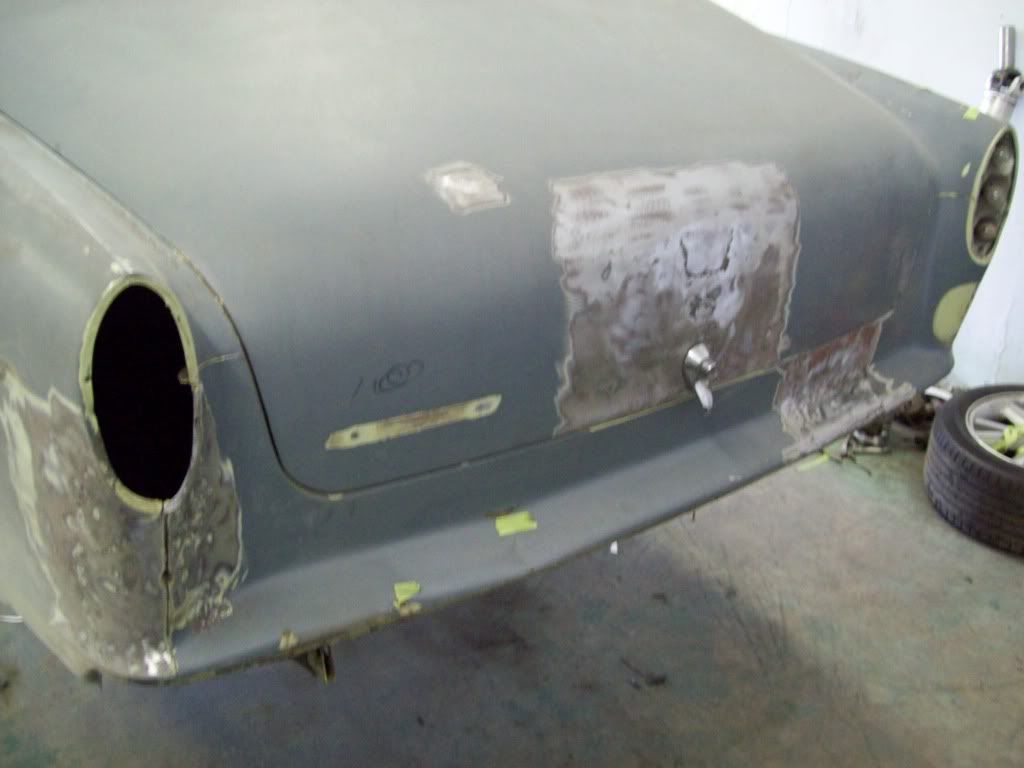 I have also removed my front marker/turn signal lights, because I will be adding the turn signals to the custom projector headlamps.. 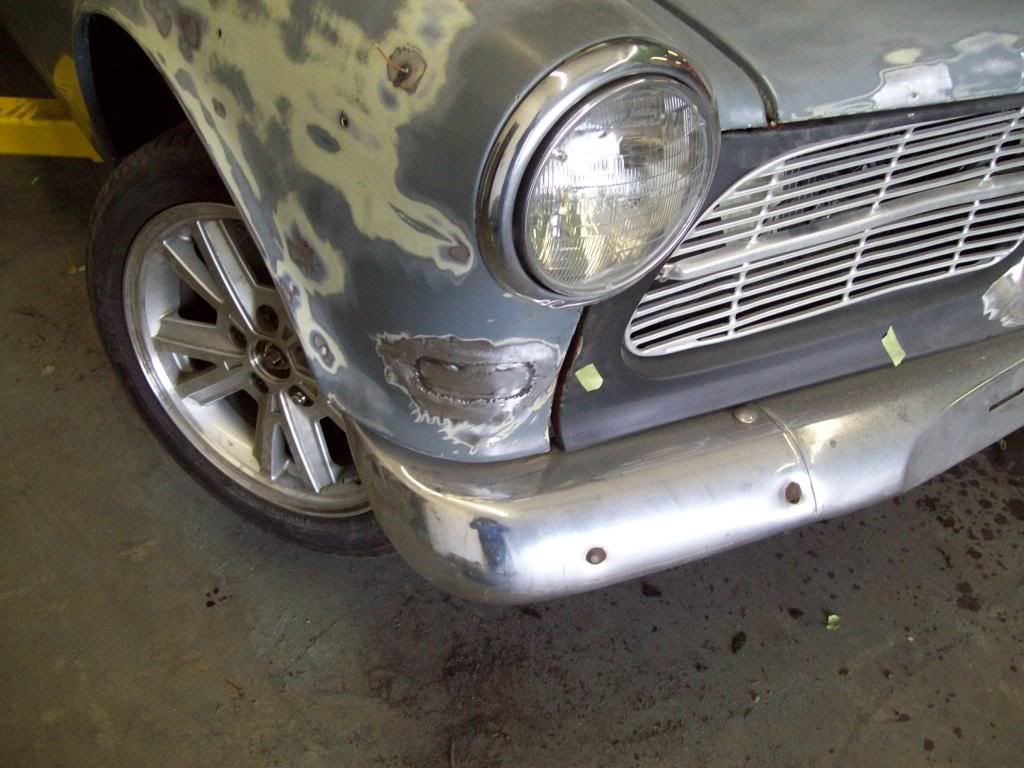 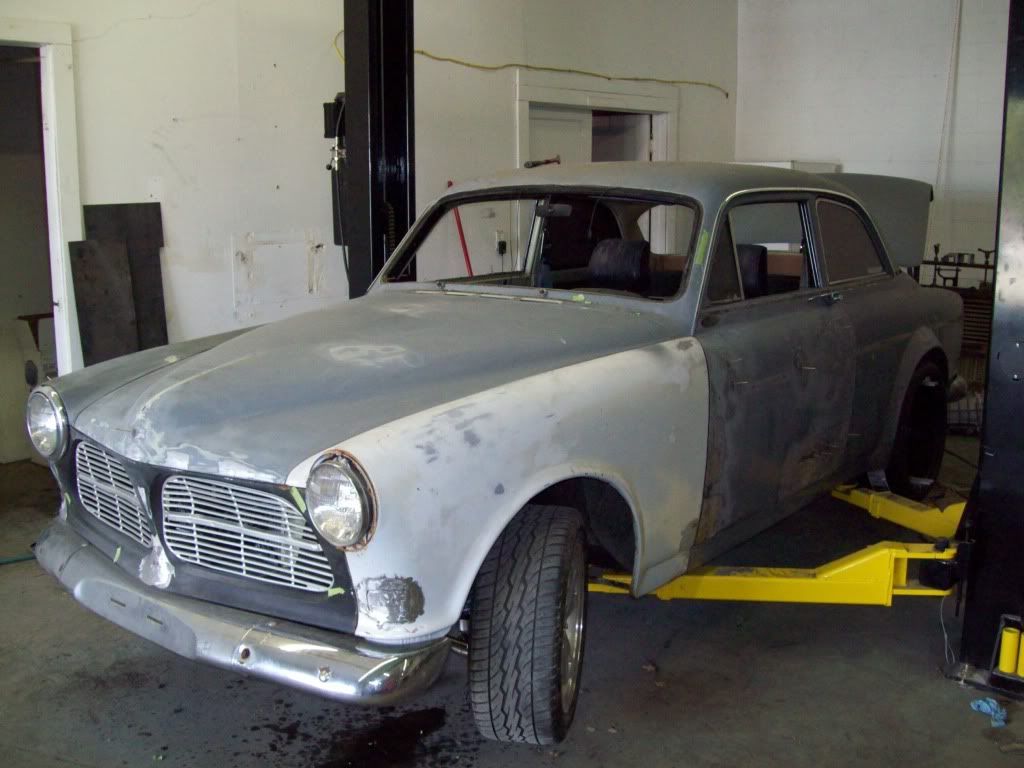 I have seen alot of these cars get built with extremely bulky late model seats, and I wanted to steer away from that.. I have been saving this seats for awhile, and I think they will fit the styling of the car.. They actually mounted to the factory Amazon Floor Mount, so I didnt have to change the floor at all.. I will be doing some extra bracing and attachments to the floor mount, because you cant be too safe.. 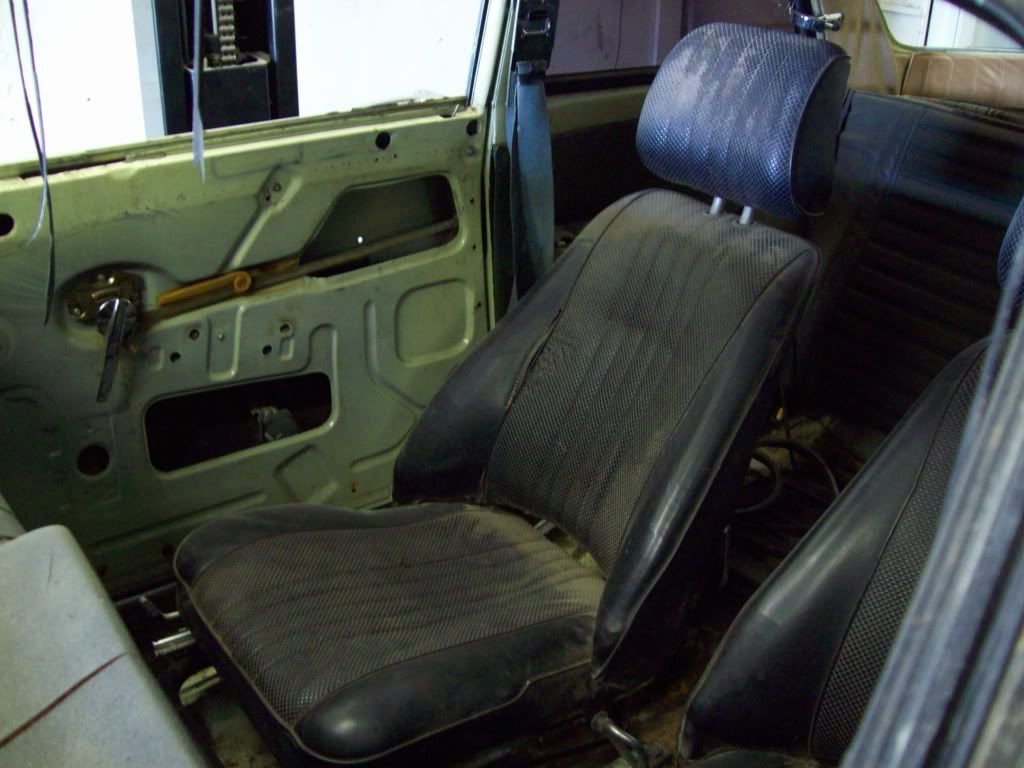 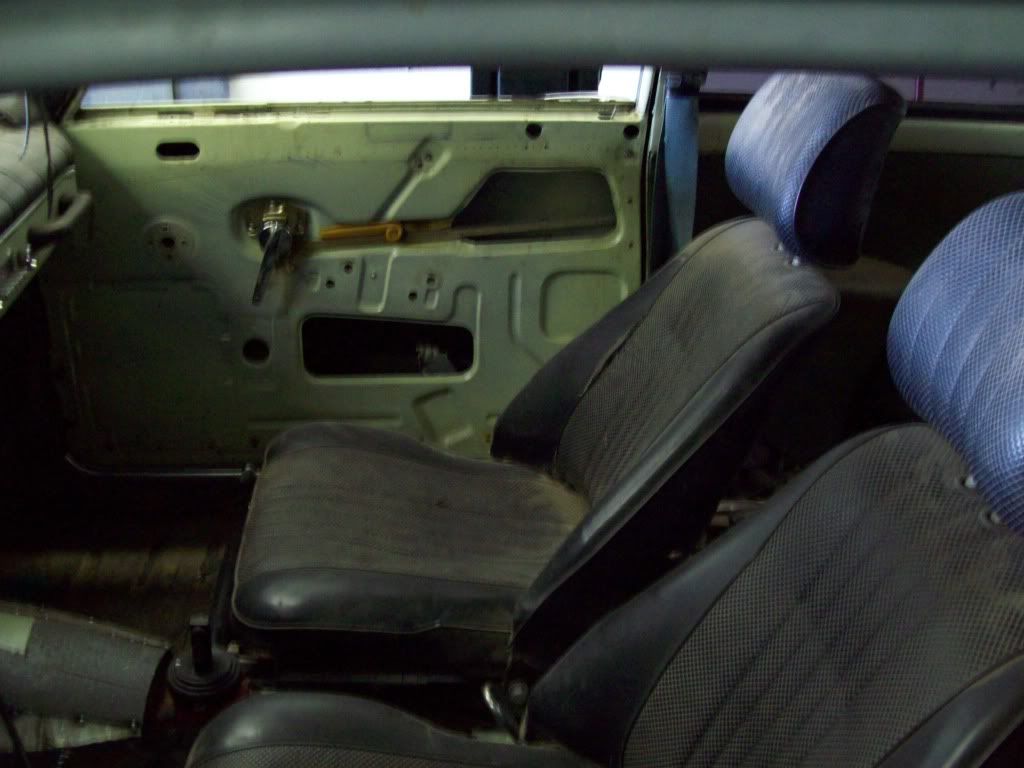
__________________
Robert Jackson Classic Auto Glass Innovations Flush Mount Glass Classicautoglassinnovations.com |
|
|

|
|
|
#46 |
|
Trader
Last Online: Aug 1st, 2014 05:07
Join Date: Feb 2011
Location: Madill
|
I am doing all this to work toward a body wrap, rather than doing the final paint.. I really like this color called Matte Pencil, and was planning on paying for the artwork time to have all the Swedish Ops logo's strategically placed about the car, along with all the logo's for the companies that are supplying parts for our products..
This color is awsome, and I think it will go awsome with the Brushed Aluminum Boze V12 wheels I ordered. 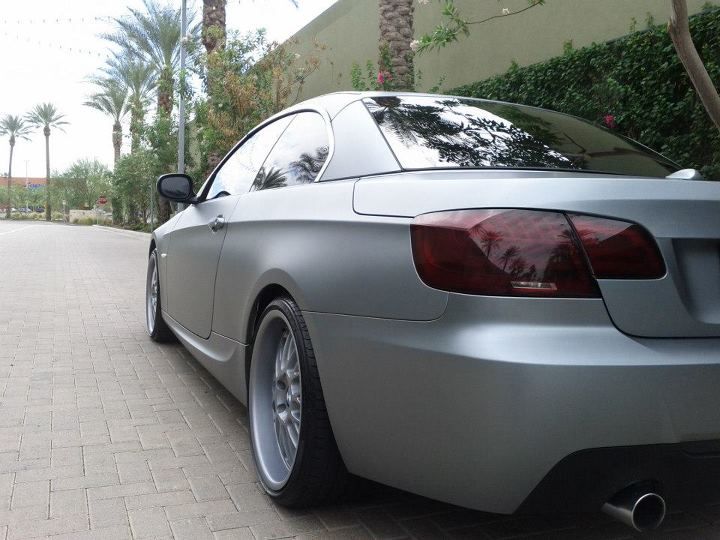
__________________
Robert Jackson Classic Auto Glass Innovations Flush Mount Glass Classicautoglassinnovations.com |
|
|

|
|
|
#47 |
|
Trader
Last Online: Aug 1st, 2014 05:07
Join Date: Feb 2011
Location: Madill
|
I am trying to sort out the dash modification that will allow some traditional guages, because the original Amazon cluster is really pretty small and the guage setup, doesnt allow much updating to the original cluster.. The P1800's I am working on, have a very easy update situation, so they arent any problems with an updated/factory set up..
Here is a pic of the original cluster set up. 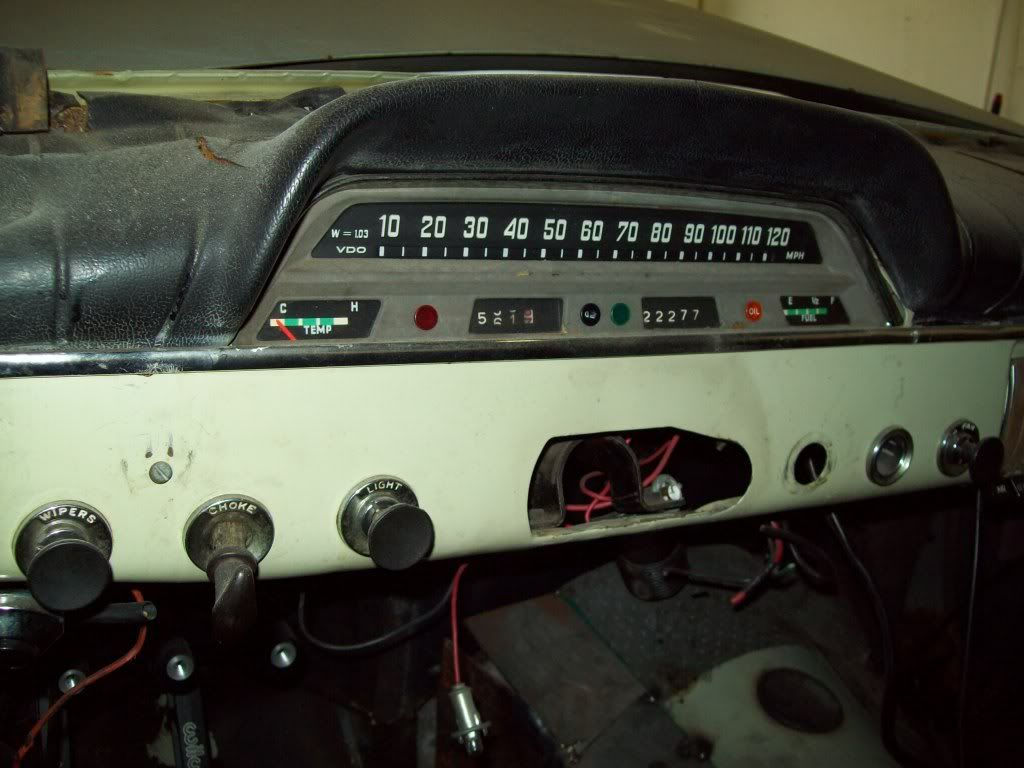 Here are some pics of the roughed in cluster/dash set up, and as you can see, it will give me all the necessary gauge options. In its postion, it is only about 1/2 inch taller than the original set up, and about 1.5 inches wider. I plan on having the dash top done in the same fashion as the original, and I think that will keep it sort of era correct looking. And if you look at the pics of the original, you will see that I will have a bit of hole filling for the uneccessary items like the Choke, but I do plan on using the original style wiper, lights, and other knobs, because I like the look. 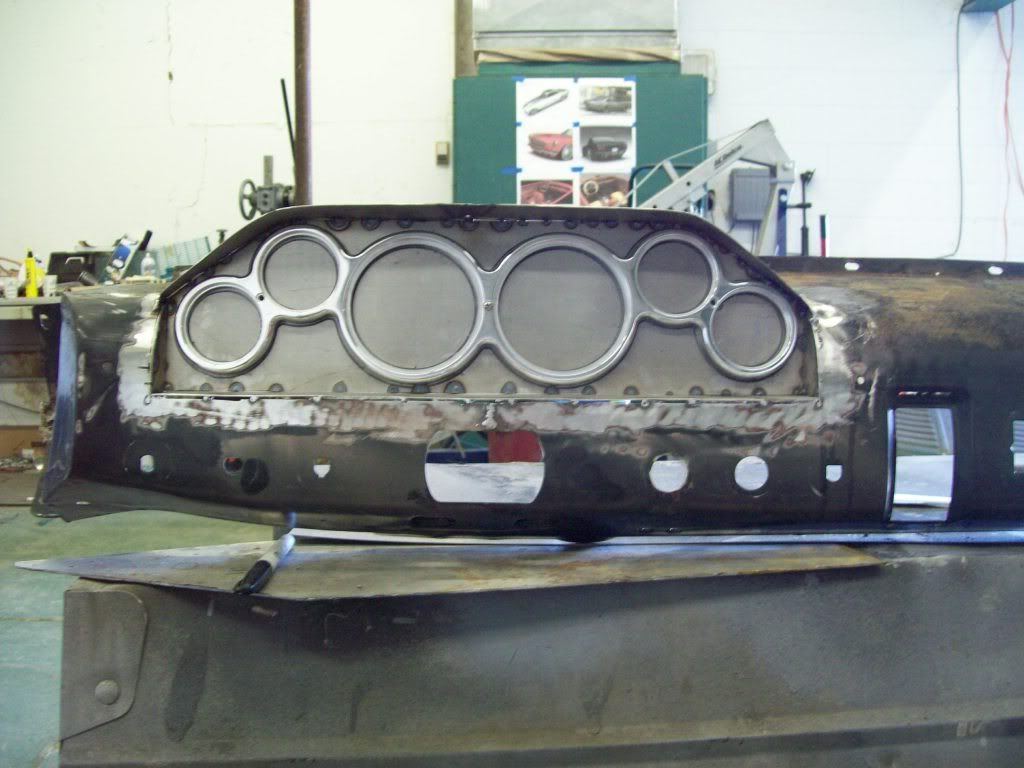 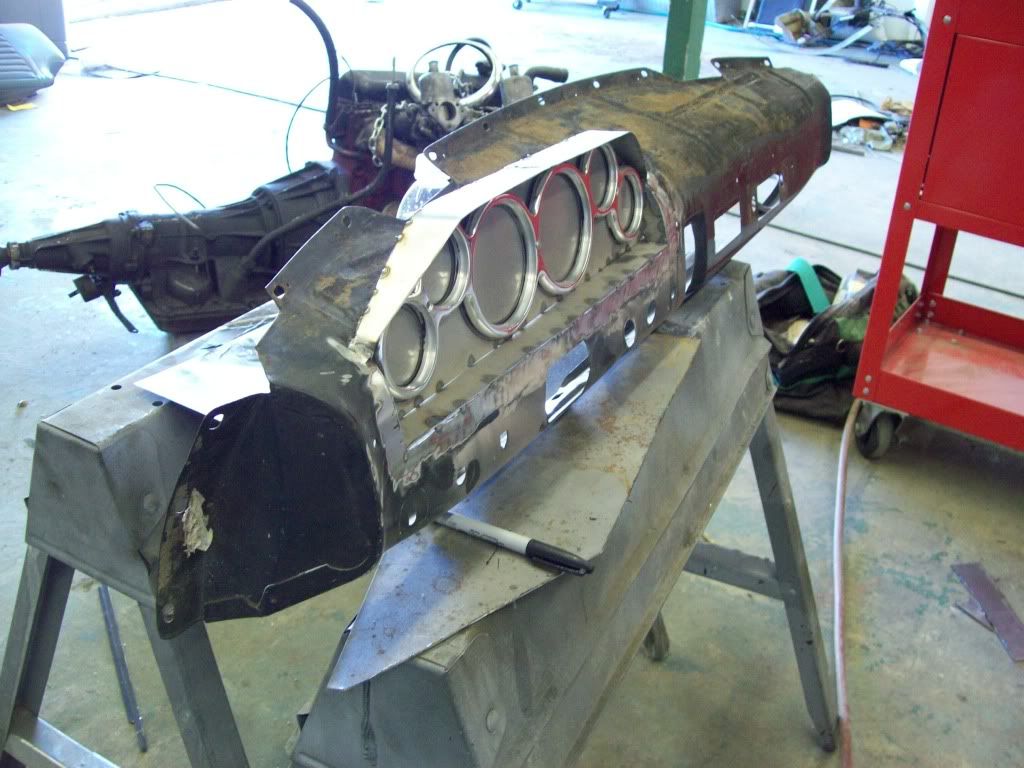 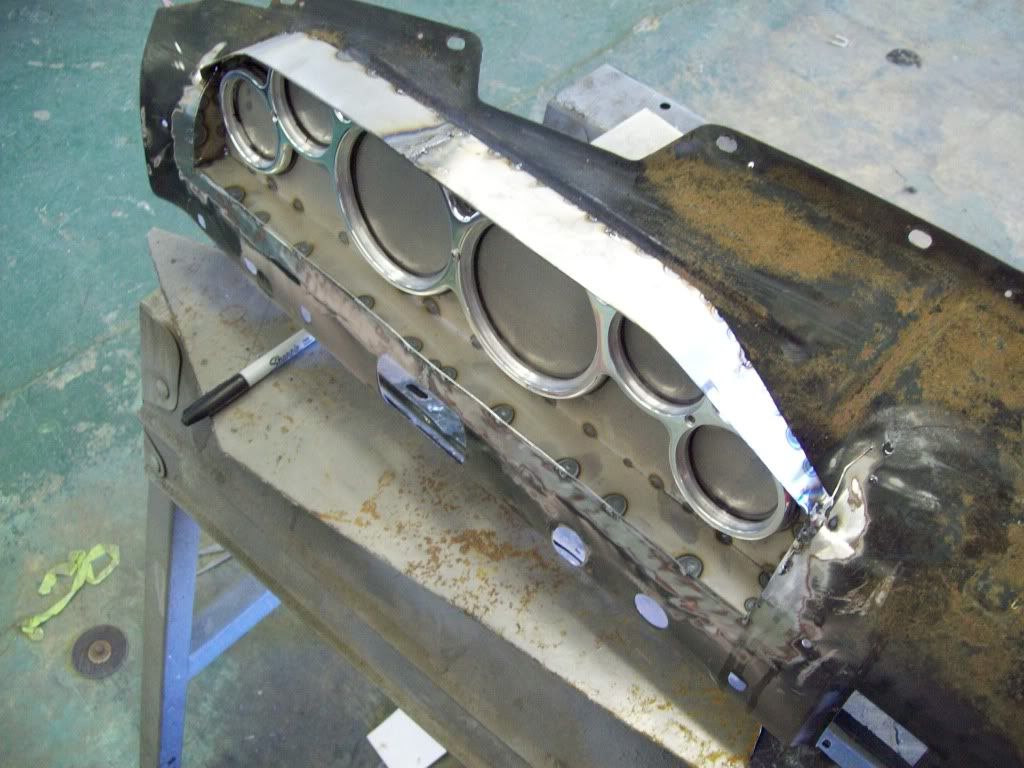 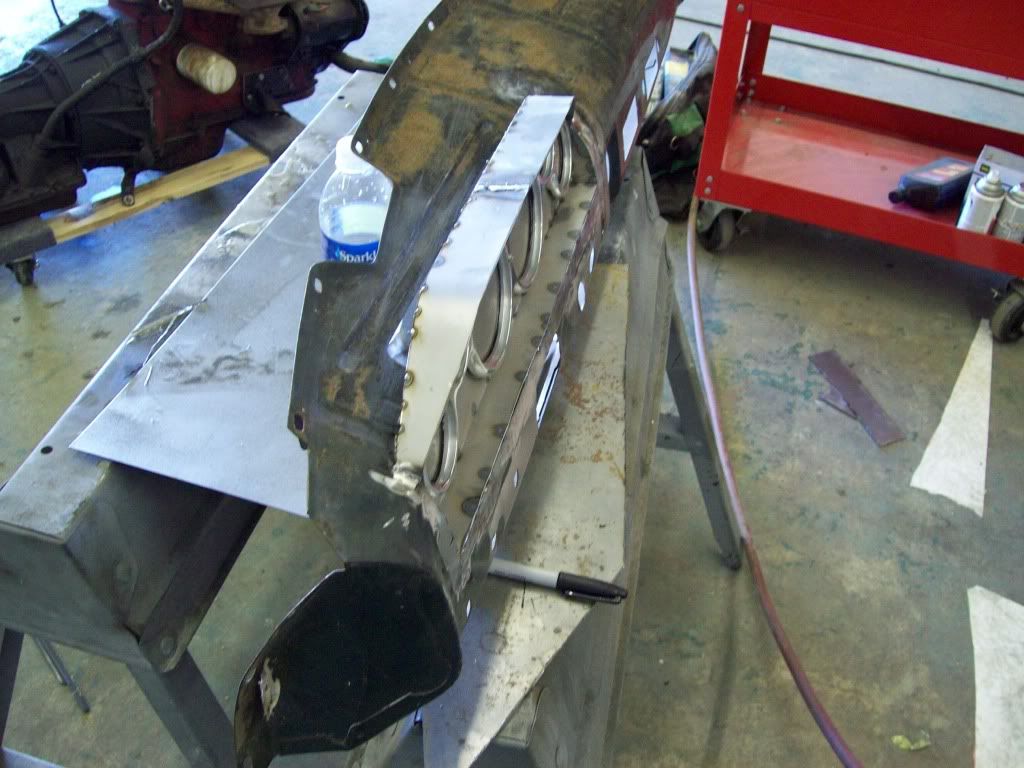
__________________
Robert Jackson Classic Auto Glass Innovations Flush Mount Glass Classicautoglassinnovations.com |
|
|

|
| The Following 5 Users Say Thank You to Iamtheonlyreal1 For This Useful Post: |
|
|
#48 |
|
Bury me in my Volvo
Last Online: Oct 18th, 2017 23:16
Join Date: Nov 2010
Location: Calgary (again!)
|
Hoooolllleee crap. I personally don't love all of the super-clean style (no trim, chrome) and fat tires, but to each his own. When it all comes together on wheels, I'm sure it will be pretty impressive.
Glad to see you finally cleaned the engine-bay!!
__________________
James |
|
|

|
|
|
#49 | |
|
Trader
Last Online: Aug 1st, 2014 05:07
Join Date: Feb 2011
Location: Madill
|
Quote:
I think you will be surprised at the overall look, and I wasnt a big fan of the flaring of the rear end, but it has grown on me.. I plan on leaving the chrome bumpers, grilles, window trim, drip rails, ect, so alot of it will remain.. I was trying to work something out with the side trim, but there really isnt any good way to transition them for the flares.. I dont mind chrome, I just dont care for uneccesary bulk, and that is why I felt the trunk area needed to be cleaned up.. As far as the engine bay goes, just wait till I show the pictures of the new LS6 in the hole, with all the finished accessories..
__________________
Robert Jackson Classic Auto Glass Innovations Flush Mount Glass Classicautoglassinnovations.com |
|
|
|

|
|
|
#50 |
|
Trader
Last Online: Aug 1st, 2014 05:07
Join Date: Feb 2011
Location: Madill
|
I am sure this will cause more questions than answers, but here is the new fill position for your upcoming fuel tanks.. I should have some pics of the new test fuel tank later this week or early next, which will show you how it all comes together.. We should be in a 14-16 gallon capacity, and it will only take up the space forward of the trunk hinges, which will leave about all the existing trunk space. It will also be in a safer position, when it comes to rear end collisions. With the Amazon/P1800 rear panel acting as a natural firewall, it is like these cars were made for this position fuel tank.
In the case of spillage, the is a drain system to the outside of the car, as most cars with closed in fuel fills do. The same drain setup, should also act as a vent for any fumes from the residual fumes during fill up, and the trunk seal will block the rest. The original fuel tank setups that I have encountered, tend to have a bit of leakage from the fuel sender gaskets at times, and I am sure this set up will offer less actual smell than the factory.. When these are done, they will bolt in, so there will be no need for welding.. As you can see, it mounts with the outer trunk hinge bolt, and the tab that is used for the spare tire strap. The only draw back to this tank for some, will be the elimination of the spare tire holder, but you can still haul a spare laying down if you wish. I will also have some pics of the OEM tank elimination plate, and for the performance guys, this plate will relocate your battery to a sub floor position that is centered at the back of the rear axle. If you didnt want to use it for a battery, it can be used as storage. 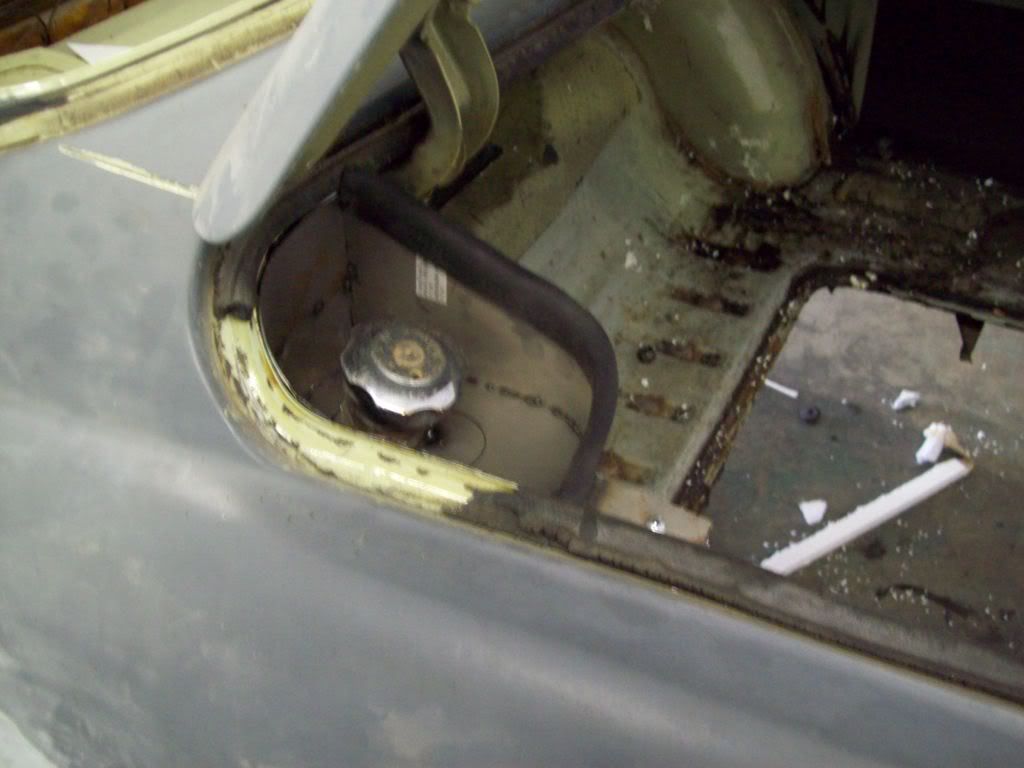 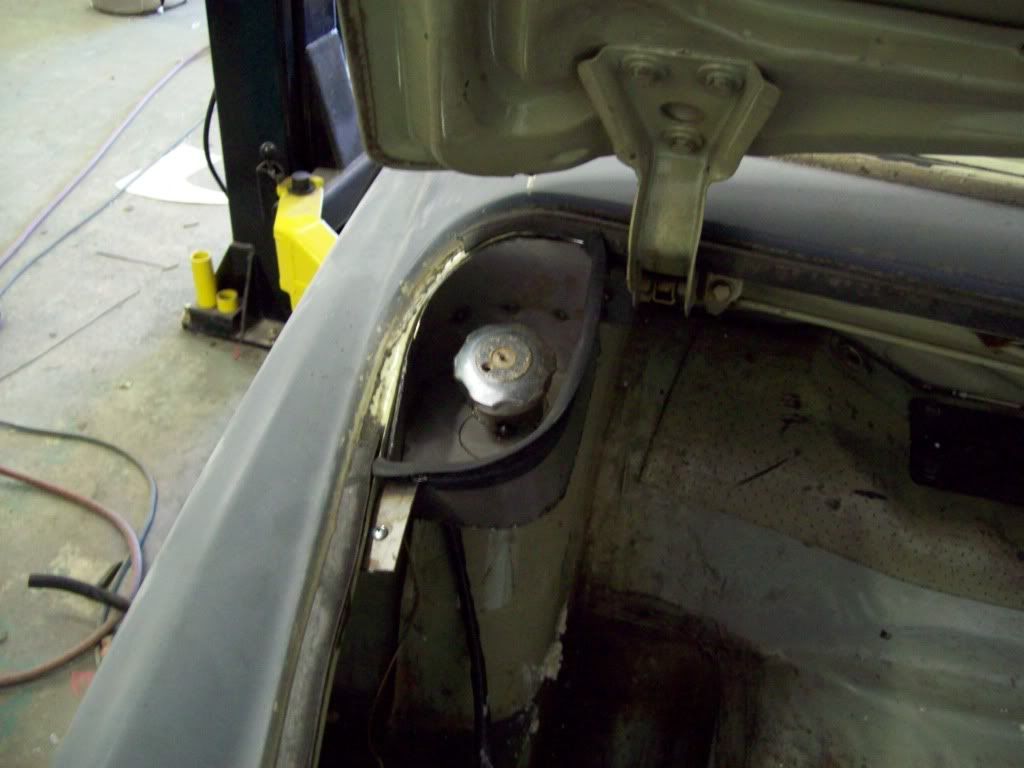 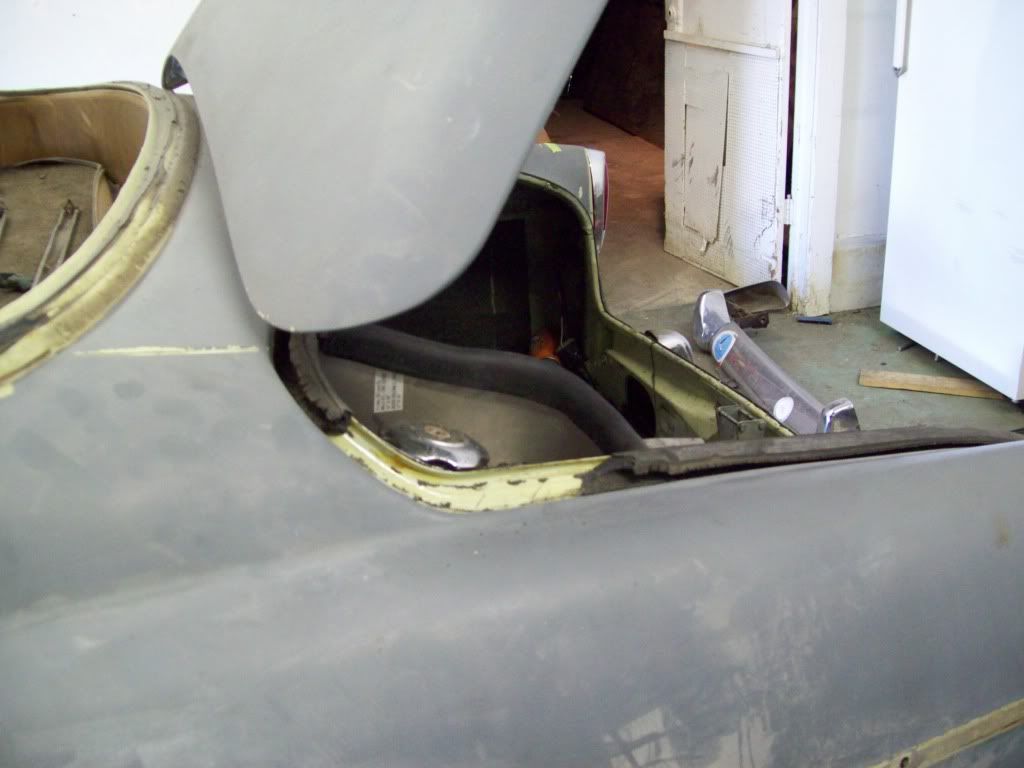 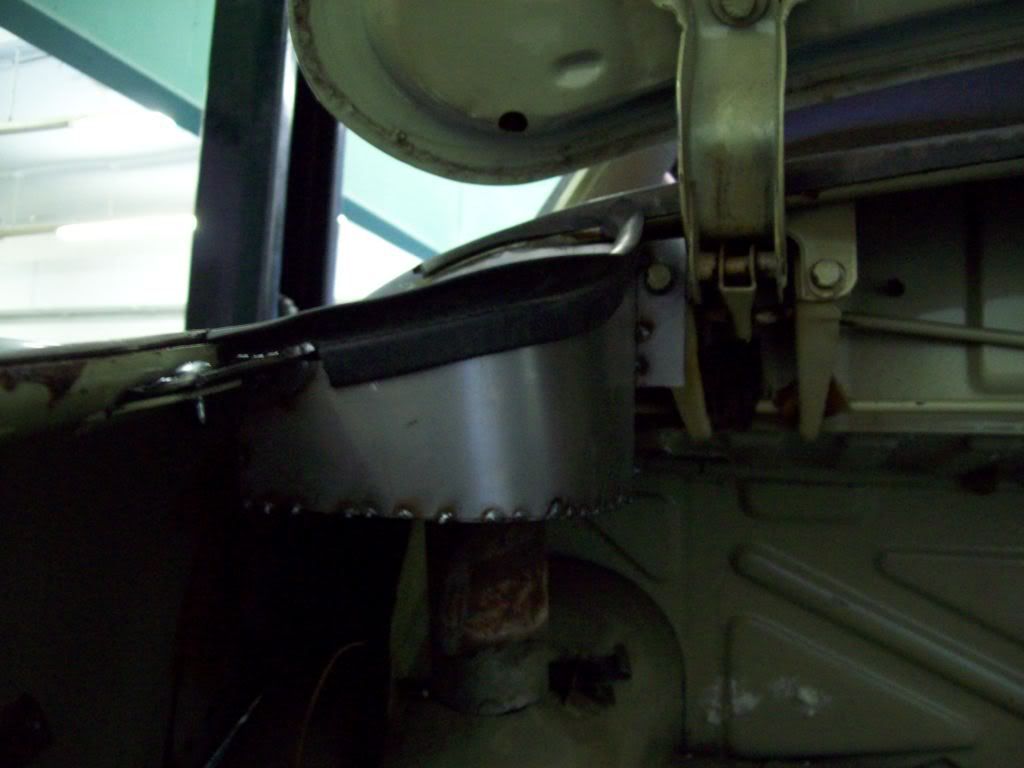
__________________
Robert Jackson Classic Auto Glass Innovations Flush Mount Glass Classicautoglassinnovations.com |
|
|

|
 |
| Currently Active Users Viewing This Thread: 1 (0 members and 1 guests) | |
|
|