
|
|||||||
| PV, 120 (Amazon), 1800 General Forum for the Volvo PV, 120 and 1800 cars |
 Information
|
|
Volvo X (Pro-Touring 1967 Amazon)Views : 85281 Replies : 626Users Viewing This Thread : |
 |
|
|
Thread Tools | Display Modes |
 Oct 22nd, 2012, 19:50
|
#61 |
|
Trader

Last Online: Aug 1st, 2014 05:07
Join Date: Feb 2011
Location: Madill
|
Got the first mock up tank in, but we left the back all off, so I can position the filler, baffles, and outlets for the productiong fuel tanks.. They will be in stainless, rather than the steel example here, because this one is only being used for mapping out accessories.. On the production fuel tank, the front, bottom, top, and back will all be one bent piece, with just two end caps welded on.
I haveent figured out the fuel capacity of this tank yet, but I am thinking I might have to reduce some of the size.. I was targeting about 14-16 gallons, and I think I will be closer to 20 gallons on this one, which I am not sure I want to carry that much fuel. I am also debating on an internal fuel pump, because I would rather have the smallest gaskete openings possible, being this tank is actually in the trunk. Pictured below is the tank without the back wall, so you can see the basic shape of the tank, and the actual space it is removing from the trunk... Most of the space being taken up, is the step up between the wheel wells, so there is still plenty of trunk room left. As you can see also, I made the gas filler tray seperate from the fuel tank, which will make service the tank much easier, because it just sets in place.   
__________________
Robert Jackson Classic Auto Glass Innovations Flush Mount Glass Classicautoglassinnovations.com |

|

|
|
Oct 22nd, 2012, 20:10
|
#62 |
|
Junior Member
Last Online: Jun 18th, 2019 16:41
Join Date: Aug 2011
Location: Camas, WA
|
That looks like a pretty slick setup. How will the fuel tank be secured to the car? Bolted on the side? How wide is the tank? I am curious if my mini-tub will exclude this as an option for me. Thanks for the info Robert.
Last edited by 68EFIvert; Oct 22nd, 2012 at 20:12. |
|
|
|
|
Oct 22nd, 2012, 20:22
|
#63 |
|
Trader
Last Online: Aug 1st, 2014 05:07
Join Date: Feb 2011
Location: Madill
|
For your application, I will be able to make a custom width, that isnt a problem. The Amazon's are going to bolt in, using the uppers Shock Bolts holes that are no longer being used, due to the coil over conversion bar. The P1800 will use a mount tabs at the floor, and in the interior package tray below the rear glass, which will make for a very simple install..
This is alot safer set up than the factory, because the fuel tank is secured in the high strength pocket between the wheel wells.. I will have some pictures of the OEM fuel tank delete, which will house the battery in a sub-floor position, centered at the rear axle.
__________________
Robert Jackson Classic Auto Glass Innovations Flush Mount Glass Classicautoglassinnovations.com |
|
|
|
|
Oct 22nd, 2012, 22:45
|
#64 |
|
Trader
Last Online: Aug 1st, 2014 05:07
Join Date: Feb 2011
Location: Madill
|
Dont you just hate it when someone comes around and makes you look like a dumbass? I have been debating on what to do about the stainless side moulding for a bit, because I do like the look of it. So I have cut, hammered, bent some old use trim I had, in order to figure out some way to use it.. The rear flare work got in the way of the trim, so tried to make it bend over the flare, along with cutting it before and after the flare, but none of looked worth a damn, so I told my body guy to start welding moulding holes..
Anyway, a friend of mine stopped by the shop today, and looked at it for about 20 seconds, and then said " Why dont you just raise its position?" At that moment I felt like a complete dumb ass, because I didnt come up that elementary solution.. The only thing that makes me feel a bit better is, I dont know how many other people looked at this situation, and no one else made that suggestion either. Anyway, here is the pics with the trim in its new position, and I dont think it will be that noticable over the stock location. Now I need to find a good source for some perfect new side trim, or some exceptional used pieces.   
__________________
Robert Jackson Classic Auto Glass Innovations Flush Mount Glass Classicautoglassinnovations.com Last edited by Iamtheonlyreal1; Oct 22nd, 2012 at 22:49. |
|
|
|
| The Following 3 Users Say Thank You to Iamtheonlyreal1 For This Useful Post: |
|
Oct 22nd, 2012, 23:32
|
#65 |
|
1800necwinner

Last Online: Today 09:59
Join Date: Oct 2008
Location: East Anglia ,Suffolk , uk
|
so glad your keeping the stainless trim
 its a key feature of the amazon ! its a key feature of the amazon !
__________________
 I grew up on classic volvos hence my passion for them born and breed into the lifestyle ! |

|
|
| The Following User Says Thank You to 123GT-AMAZON For This Useful Post: |
|
Oct 23rd, 2012, 11:53
|
#66 |
|
VOC Member

Last Online: Yesterday 23:46
Join Date: Jul 2006
Location: Chatham
|
Side trim is still available new from Volvo or VP.
|
|
|
|
|
Oct 26th, 2012, 20:11
|
#67 |
|
Trader
Last Online: Aug 1st, 2014 05:07
Join Date: Feb 2011
Location: Madill
|
I am waiting on my exhaust tips, so I can build the rocker cut out/box, but I did mock up the Magna Flow mufflers, and it appears this exhaust configuration will work.. I am debating on solid mounting the mufflers and exhaust tips, and using a small flex joint to attach the header pipe to the inlet of the mufflers.. I am wanting to keep a fairly tight tolerance with the exhaust tips running through the body, and I think that might be the best way to solve any rattling issues.?
Here are some pictures of the Magna Flow muffer placement, and if I solid mount them, I will pick them up just a bit higher. The are up there pretty tightly now, but I would like to have them totally above the rocker pinch weld, and they are very close to being there now.. These mufflers are just tacked up in a mock up position, so they are not at the exact hieght and perfectly centered/level, but you should get the idea. 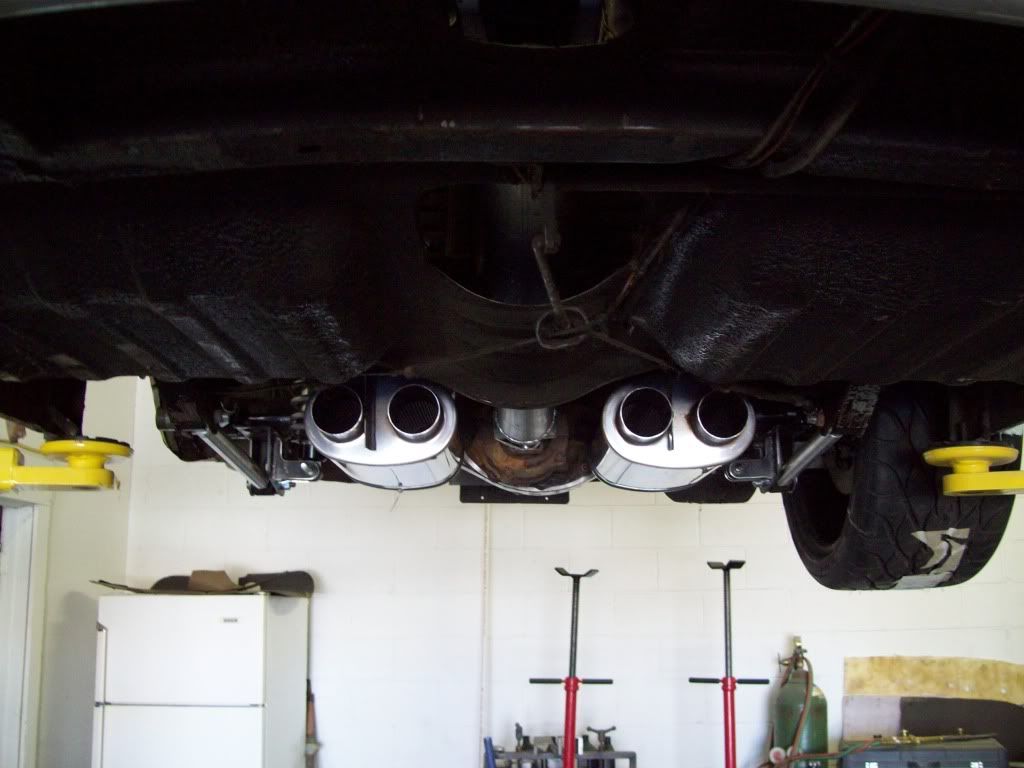 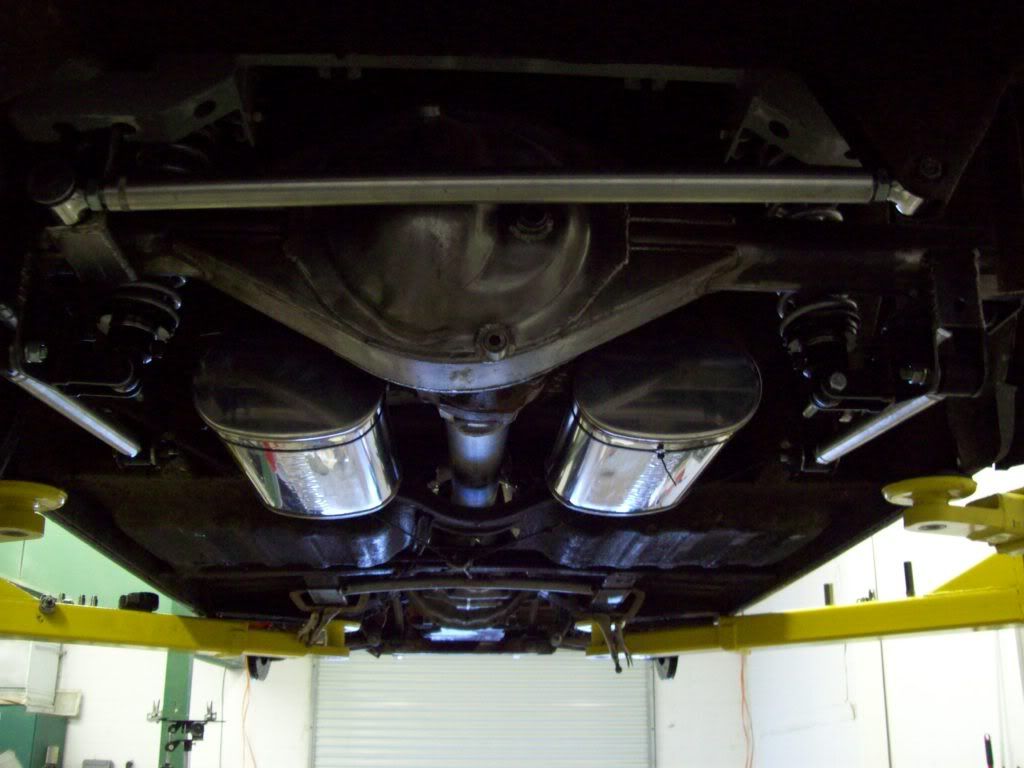 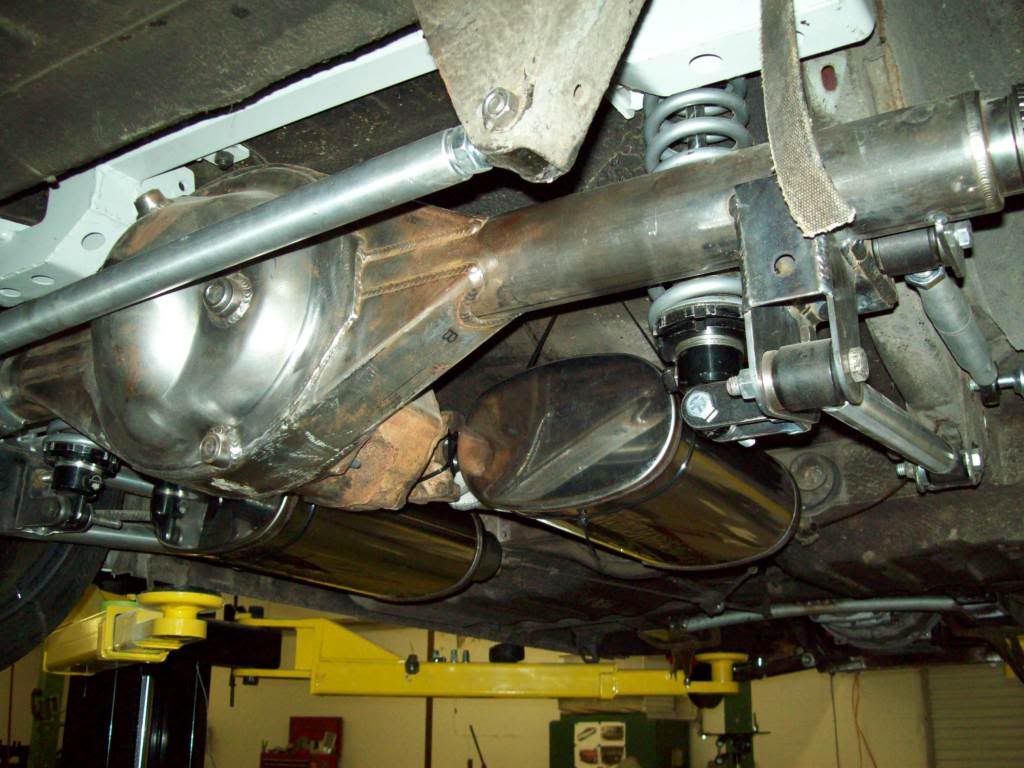 Here are a couple of pics of the Fuel Tank alterations.. As you can see, I brought the tank down in height a bit, because it worked out to be about 26 gallons, which is way too much fuel to carry. The tank is just under 18 gallons at this point, which should be about perfect. I have positioned the fuel pump/pick up and fuel level sensor, but have not installed the fuel pump pick up baffle yet.. These tank will work with an internally mounted fuel pump, along with a external or manual fuel pump, so it should fit alot of applications. 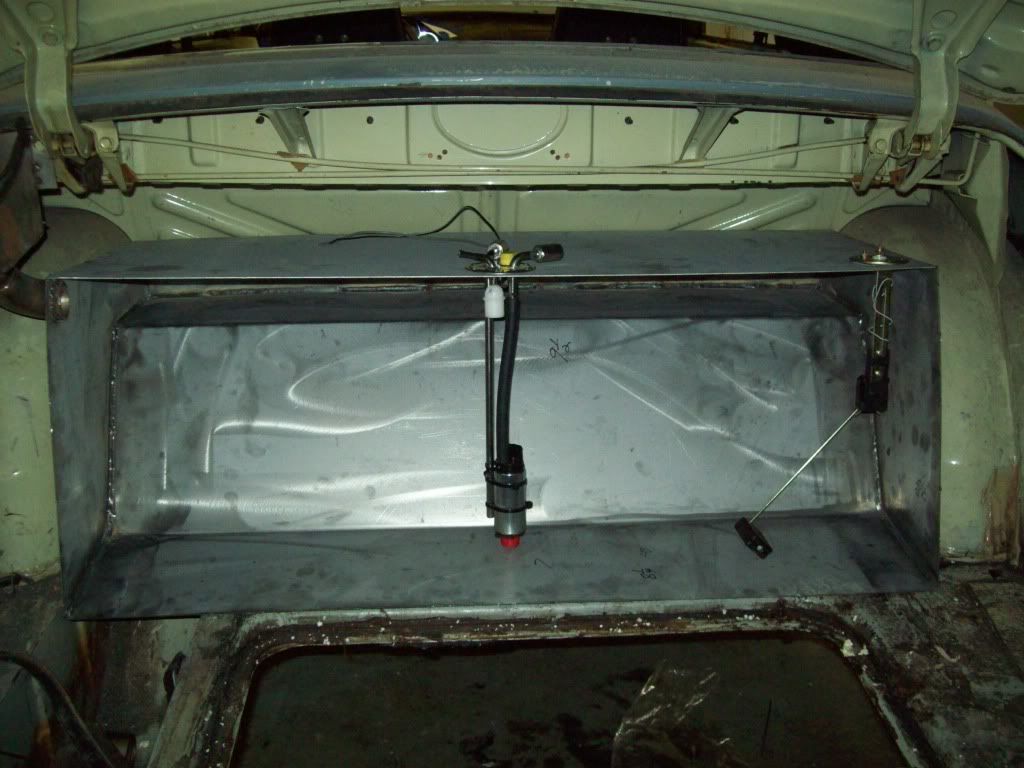 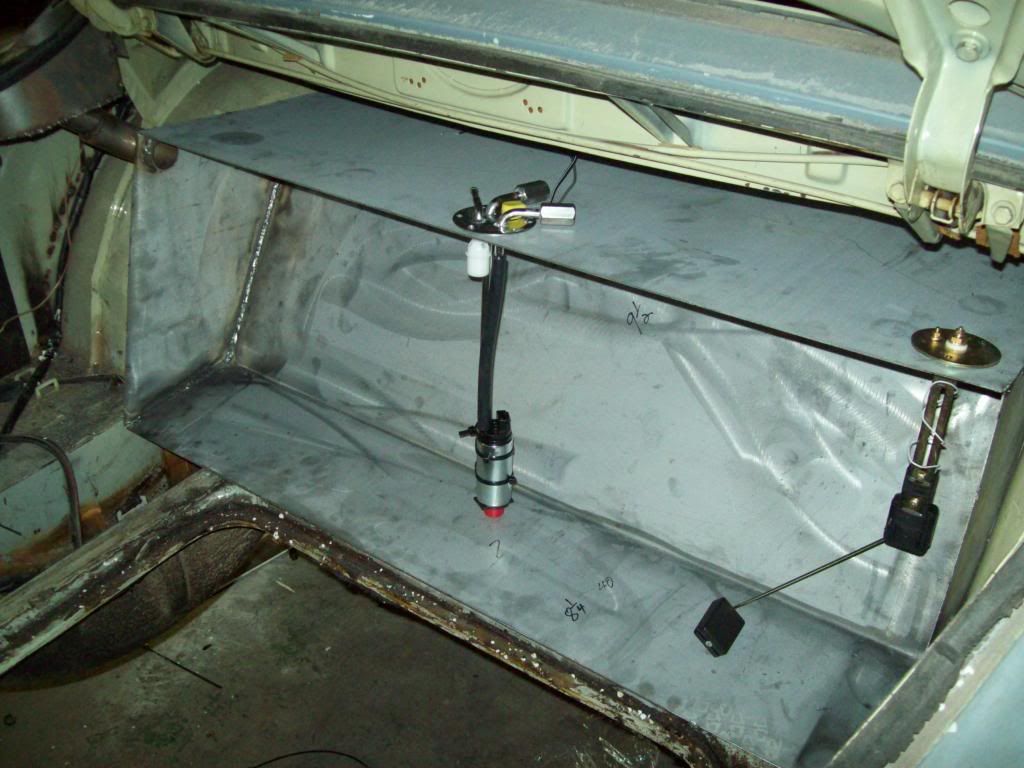
__________________
Robert Jackson Classic Auto Glass Innovations Flush Mount Glass Classicautoglassinnovations.com |
|
|
|
| The Following 3 Users Say Thank You to Iamtheonlyreal1 For This Useful Post: |
|
Oct 27th, 2012, 00:21
|
#68 |
|
Senior Member
Last Online: Nov 14th, 2016 01:07
Join Date: Feb 2007
Location: essex
|
Nice,
3 sugestions if you dont mind, 1, install a drain plug, 2, install full hight bafle plates, you will notice side forces when cornering and will reduse the forces that will make the fuel puke out of the filler cap. 3, dont forget the breather that needs to be vented outside of the car, if you have already mentiond these then just ignor me, there is to much for me to read at the mo' |
|
|
|
| The Following User Says Thank You to loon For This Useful Post: |
|
Oct 27th, 2012, 00:39
|
#69 | |
|
Trader
Last Online: Aug 1st, 2014 05:07
Join Date: Feb 2011
Location: Madill
|
Quote:
It will be about a 3in Wide x 10in Long x 1.5 Deep tray, that the filter/fuel pump will sit in, and that will keep the fuel pump primed in exteme manuevers.. That is a very common dimension for this style tank, and is what the fuel pump installation specs calls for. This is just the mock up tank, and I am only using it for the positioning of all the accessories, and that is why the back is off and a seperate piece.. The production tanks will be stainless steel, and the Top, Bottom, Front, and Back will all be one piece of bent stainless steel, with just the end caps welded on, which will make for a much cleaner unit. The vent pictured is a roll over safe vent, and will be vented to the outside.. I am debating the drain, because the tank is actually in the trunk, so there really wouldnt be a great place to drain it while in the car.?
__________________
Robert Jackson Classic Auto Glass Innovations Flush Mount Glass Classicautoglassinnovations.com |
|
|
|
|
|
Oct 28th, 2012, 01:06
|
#70 |
|
Trader
Last Online: Aug 1st, 2014 05:07
Join Date: Feb 2011
Location: Madill
|
The exhaust tips were just a bit tricky, and I know I going to have a bit of specialize pipe bending to get them hooke up, but it is doable.. I am planning on solid mounting the actual mufflers and exhaust tips, and have a small flex joint betweeh the exhaust header pipe to the muffler. I dont want to take any chances of exhaust tip rattle in the body, and I would like the air gap to be a constant.
Here are some pics of the basic layout, and I think they work out great, eventhough I would have actually liked them just a bit further back, but that wasnt optimal for exhaust pipe plumbing. The perspective will change a bit, once the car is on the ground, and it is out in the open. 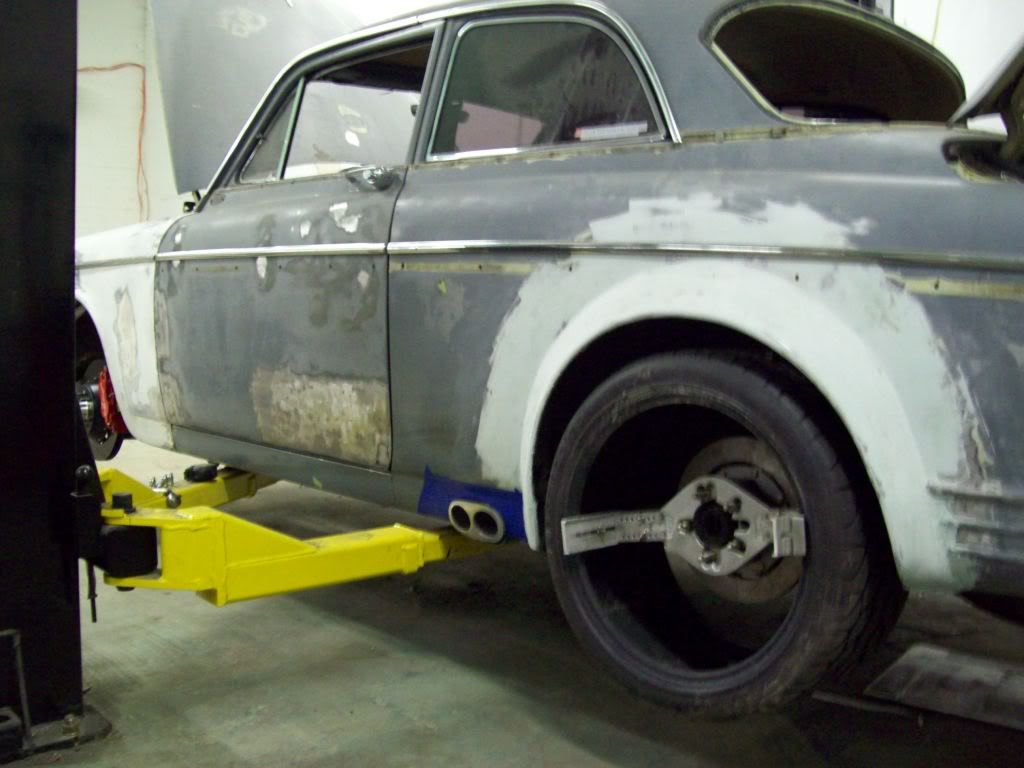 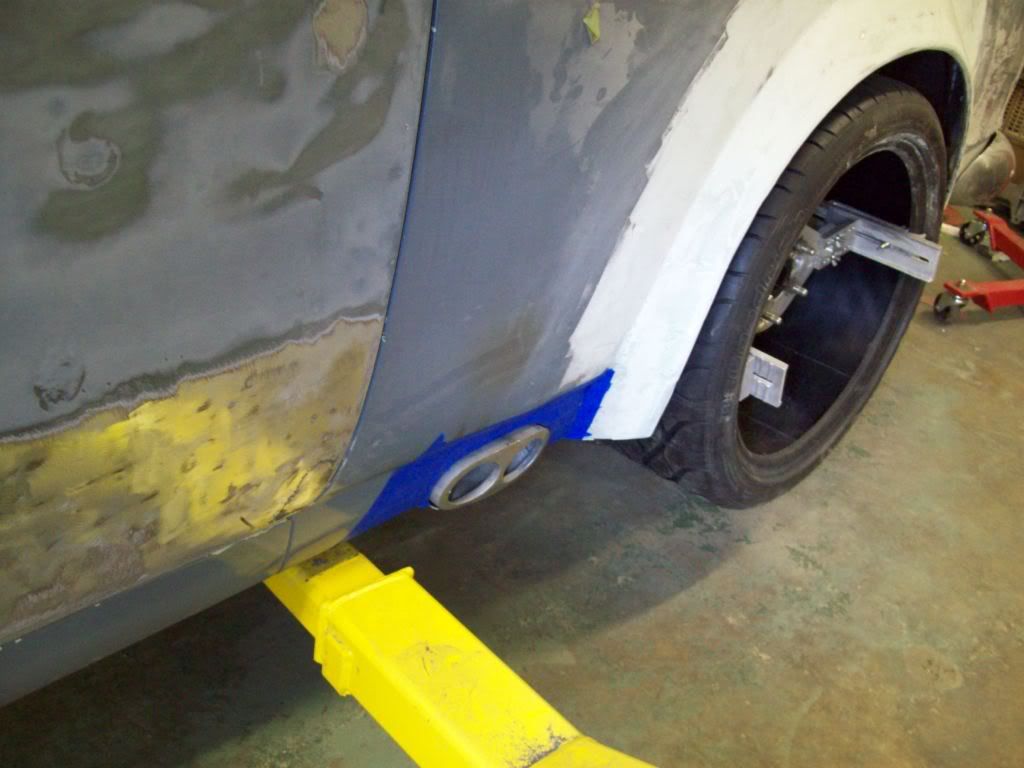 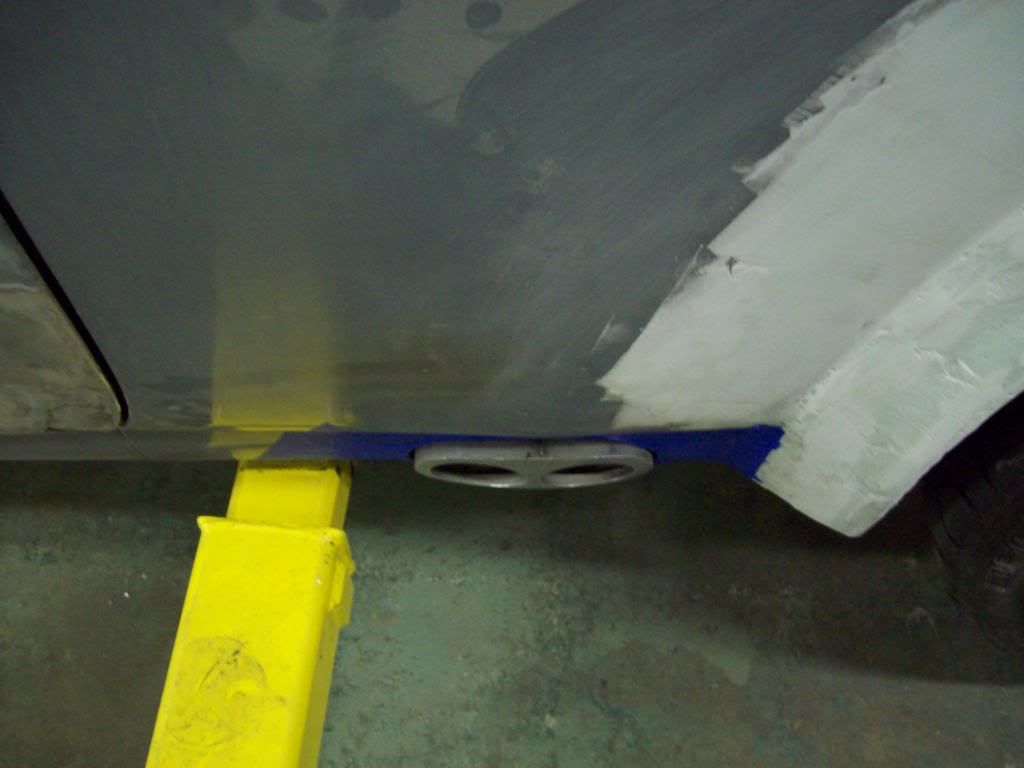 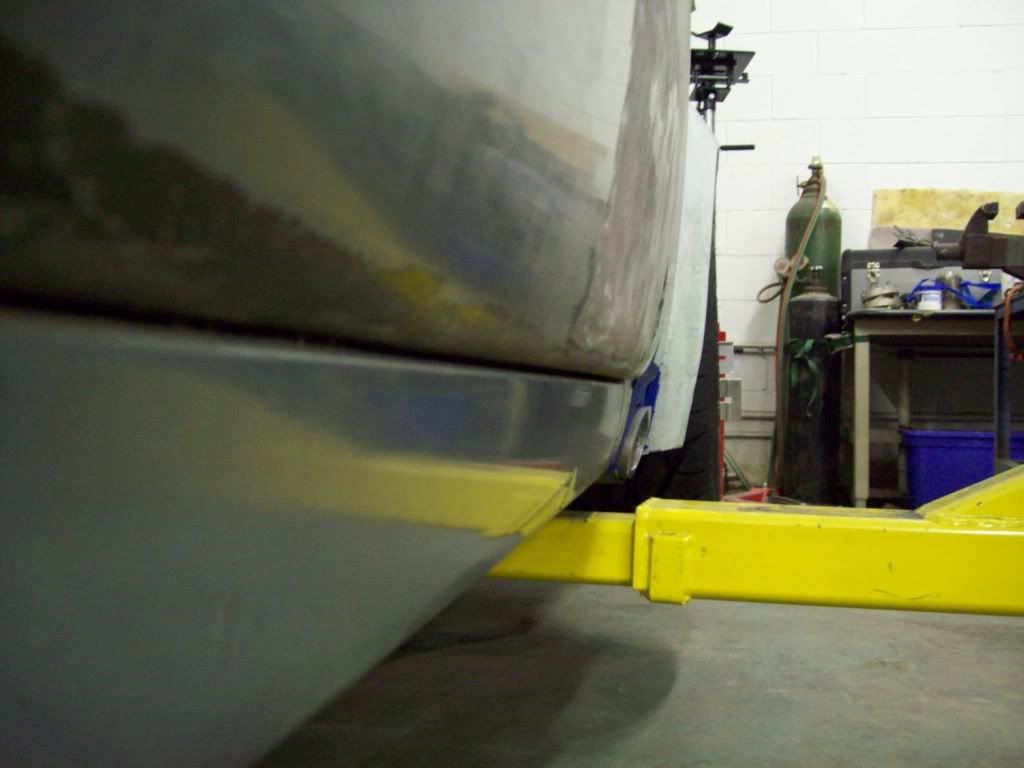 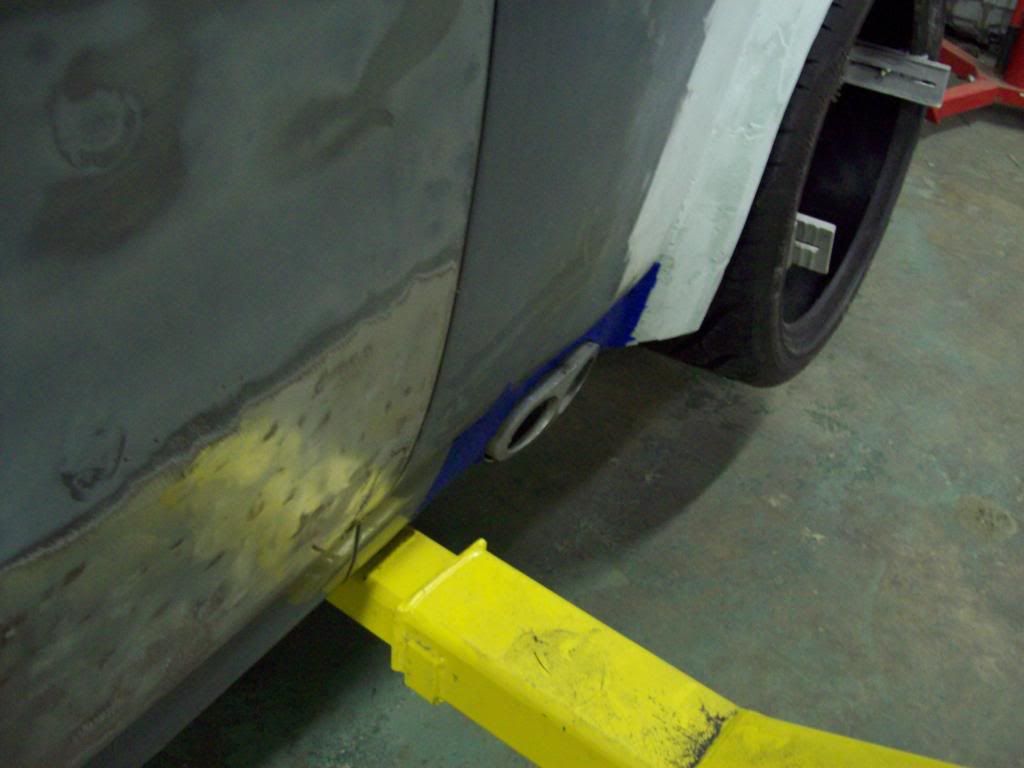  This is the box piece that I made to close off the cut hole.. There is access for proper finish welding to the body/rocker support, so I dont have any worry about any weaking of the body structure, and I dont see how it couldnt have actually strengthened it.. 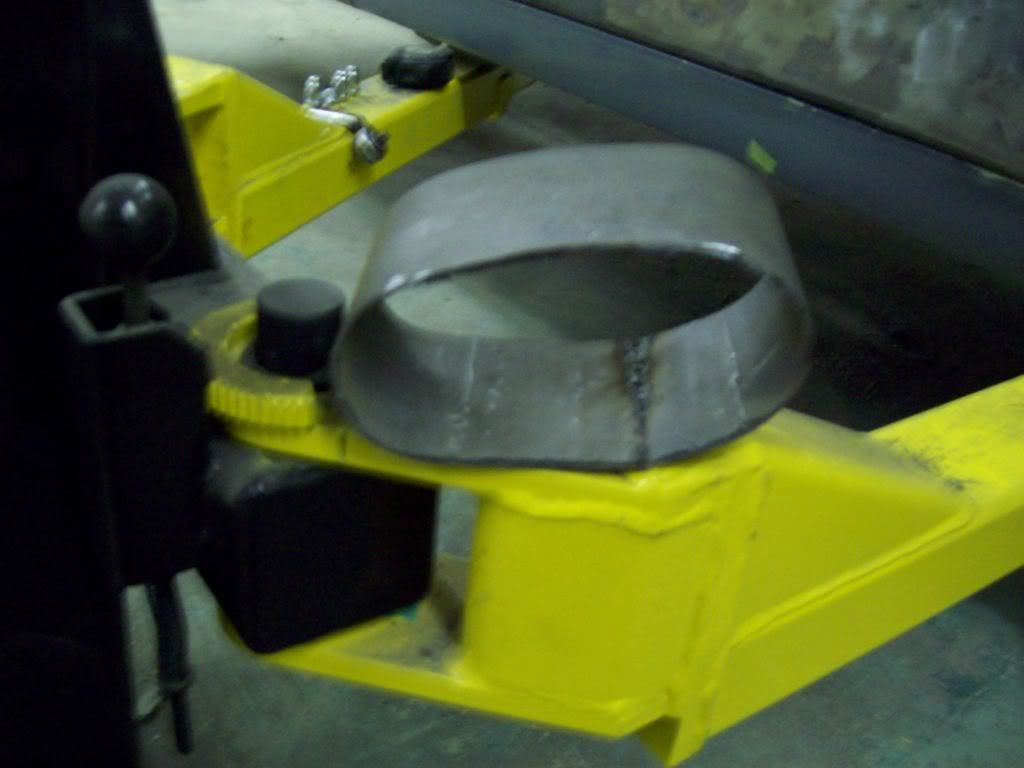
__________________
Robert Jackson Classic Auto Glass Innovations Flush Mount Glass Classicautoglassinnovations.com |
|
|
|
| The Following 2 Users Say Thank You to Iamtheonlyreal1 For This Useful Post: |
|
| Currently Active Users Viewing This Thread: 1 (0 members and 1 guests) | |
|
|


 Linear Mode

