
|
|||||||
| XC90 '02'15 General Forum for the P2-platform XC90 model |
 Information
|
|
D5 Intercooler replacement with picturesViews : 27546 Replies : 46Users Viewing This Thread : |
|
|
Thread Tools | Display Modes |
 Mar 11th, 2013, 20:06
|
#1 |
|
Premier Member

|
First off I'd like to thank D5Gill for the guide on how to do this originally which I've shamelessly stolen to help put this one together with a few pictures to help as well.
Mine has been leaking for quite a while and I've chosen to replace mine with a new rad as I didn't think the old one had done too bad considering. SO - hopefully the important bits are already covered to fix it - but the removal/refitting is still the same either way. However I didn't seem to need to do all the steps D5Gill needed to. So first up: Remove the headlamps - easy 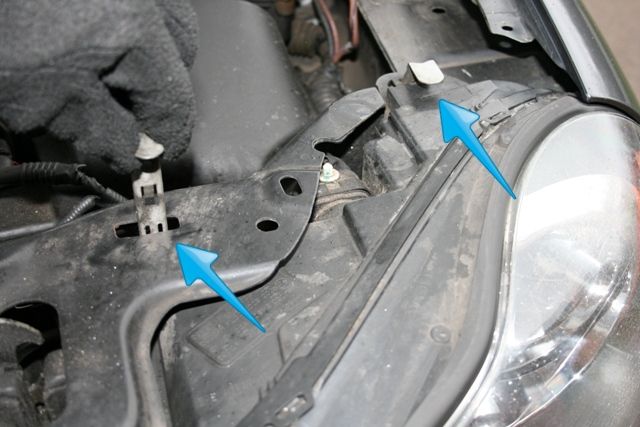 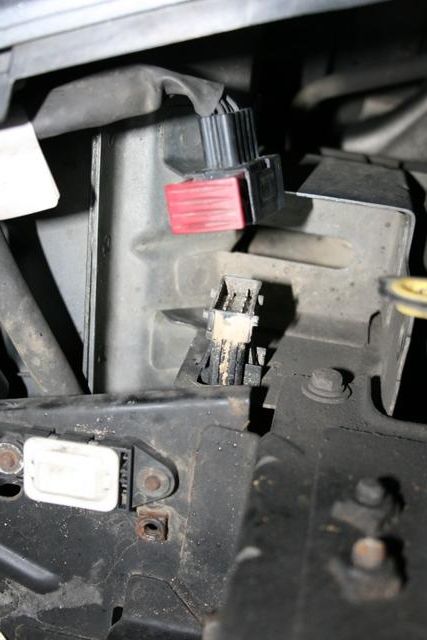 No need to unplug all the cables - just one (the red tag prises up to release the plug) 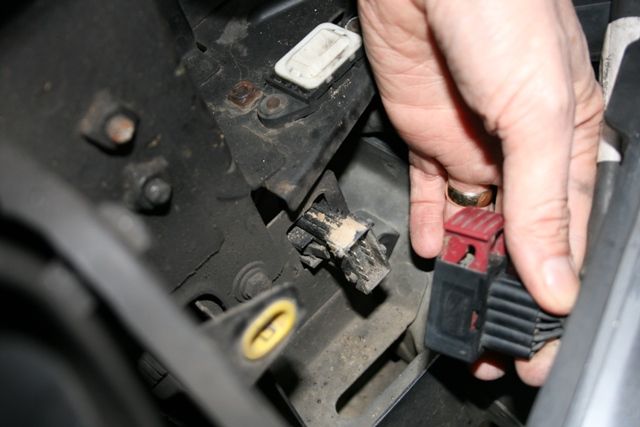 Remove air in take snorkel (10mm): 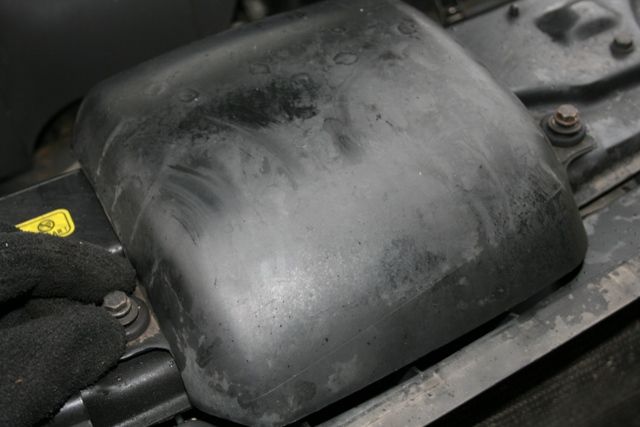 There is no clip on the other end of this - it just pulls out. The intercooler hoses at the rad end (7mm unless you've got a tiny screwdriver that will fit) 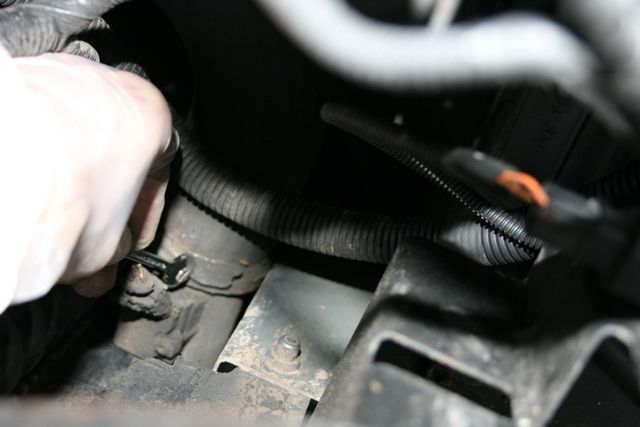 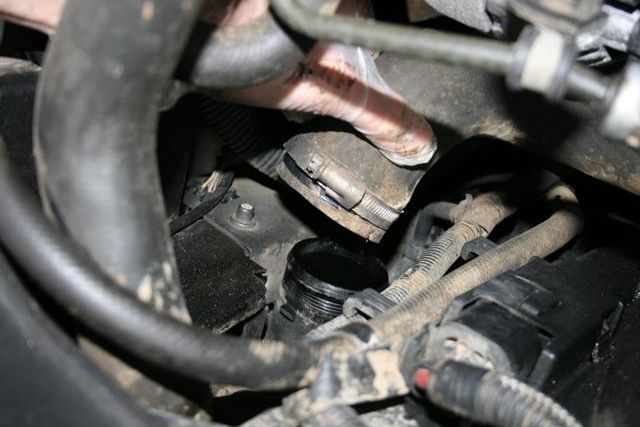 drivers side (rhd) Remove the sensor plug (swap the sensor to new rad when removed using a small star socket) 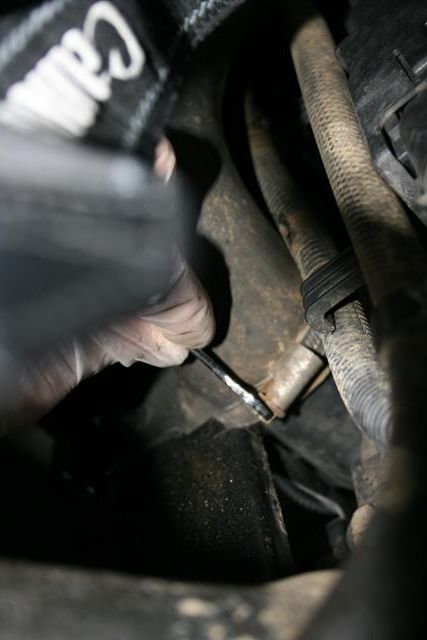 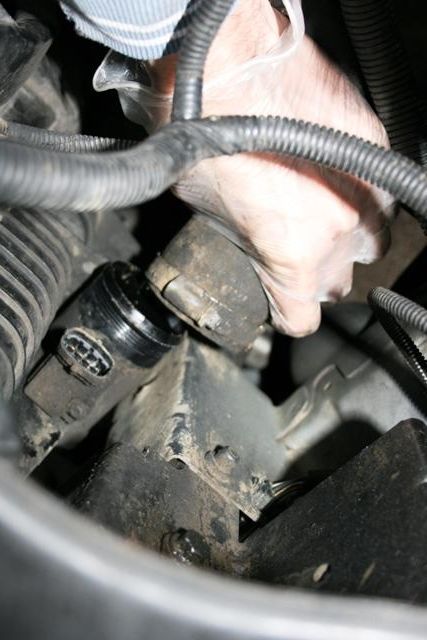 Passenger side Remove the wheelarch/bumper securing clip (push out the middle and release the clip) 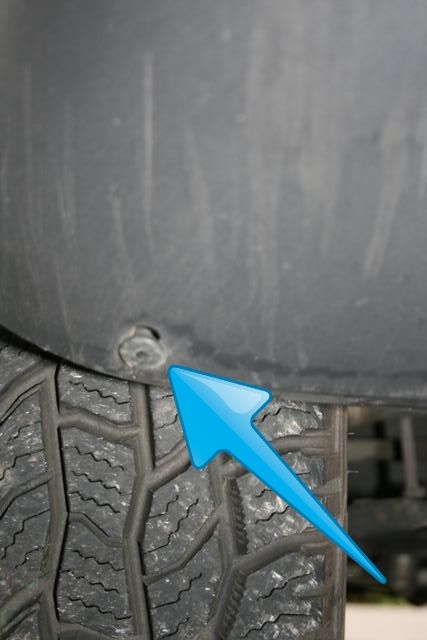 BUMPER REMOVAL Now comes what is probably the most challenging part of this job - the elusive bumper removal. There are quite literally 2 bolts that hold this damn thing on. But it's the hidden clips that will get your patience boiling. So for the first time on here (I'll probably post in a quick 2 minute guide seperately as well later) photographs of the little b**gers that you need to know about. OK the simple bit: 2 of these:  One of these (headlamp washer feed): 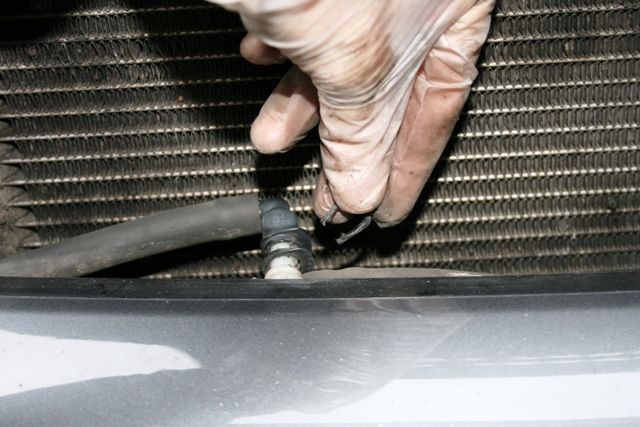 2 of these (Fog light) squeeze the spring clip in to release the plug. You can get to the passenger side from above, the drivers side from below: 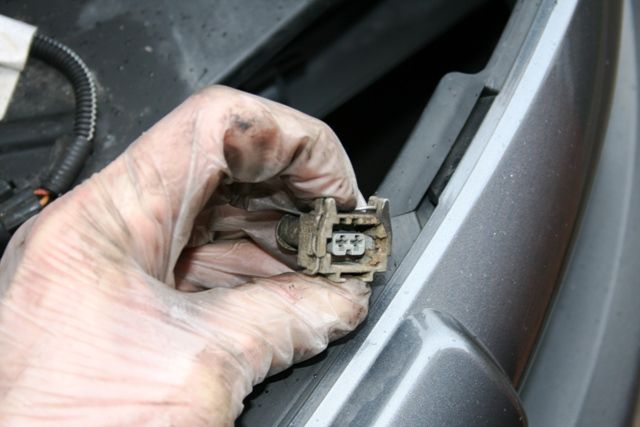 To release the clips at the side - some have suggested a hard pull (I'm sure it works - but you never know how hard is hard enough unless you know what you're fighting against) It sounds brutal and probably needs to be but if you know where the clips are, you can spring it off quite easily. So here they are: 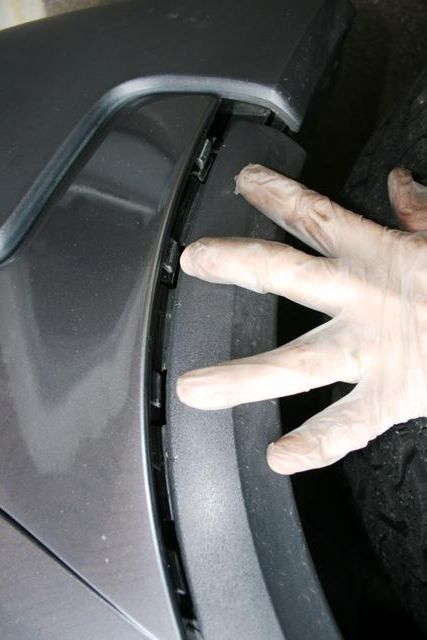 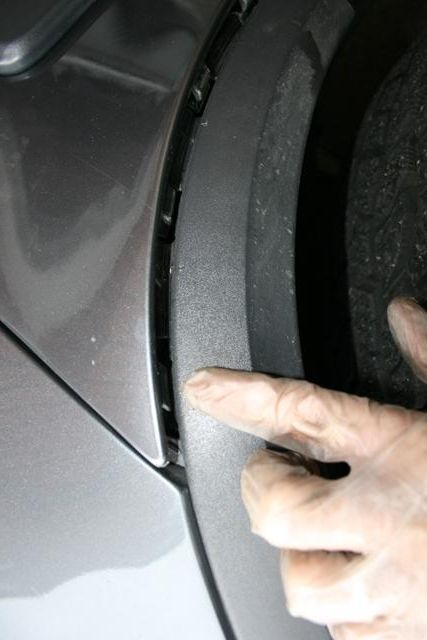 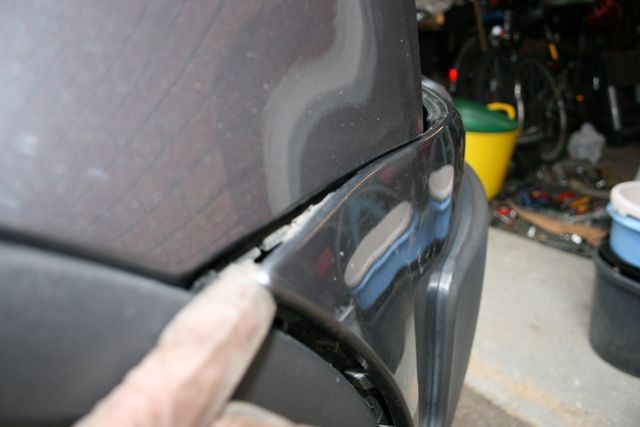 I used the handle of a plastic craft knife (with the blade removed) to prise between wheel arch trim and bumper trim to spring the vertical clips free. The clip along the horizontal edge is a U shaped channel and hooks over a guide behind it. It will spring off - but will also slide off when you pull it forward. The other side: 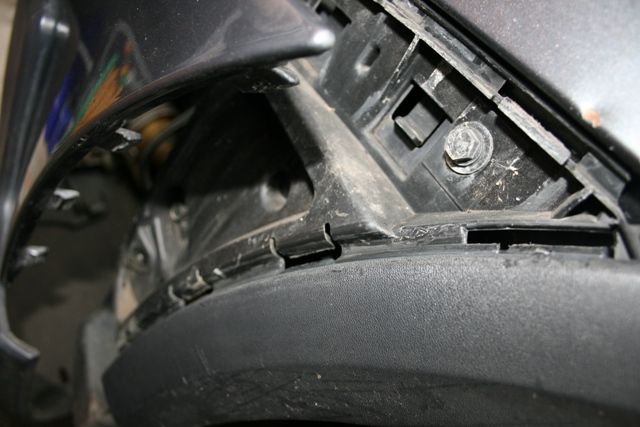 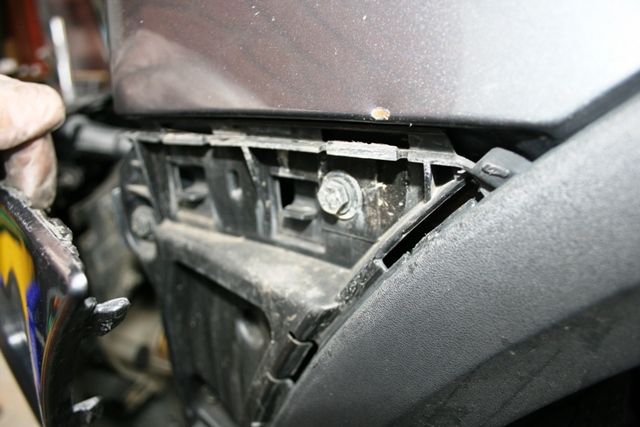 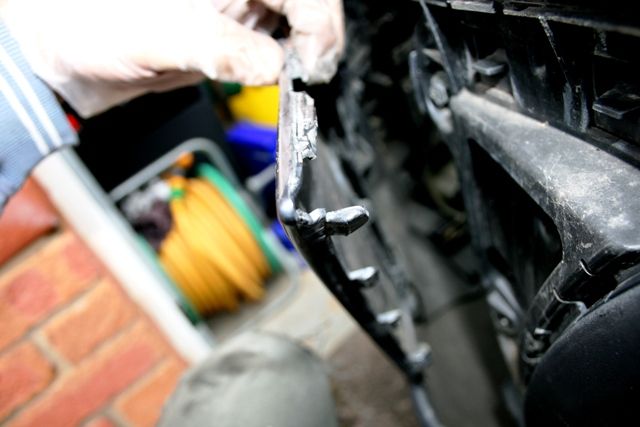 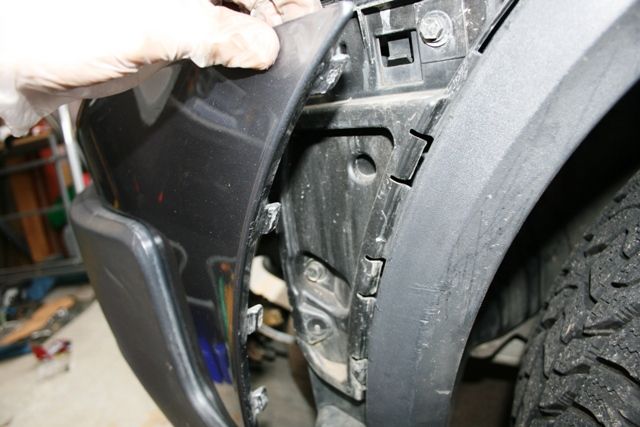 It will literally fall away once the clips are clear. make sure you have a soft surface to lay it on and marvel at how simple that was !! So you're now left with this: 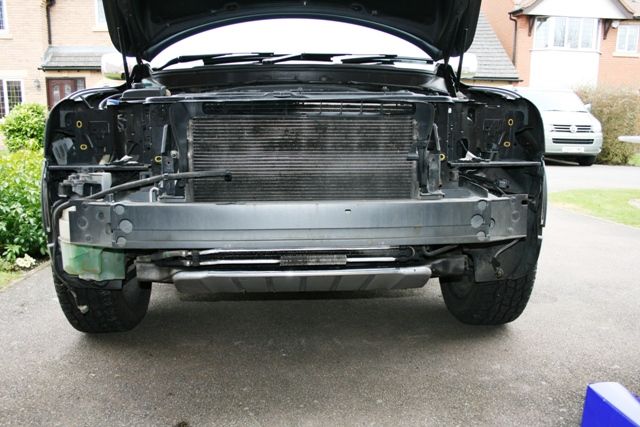 I then removed the lower skid guard - 6 bolts - fairly straightforward although the front mountings do have a small locating lug that needs to be lifted slightly to unhook it (i.e push the guard up towards the radiator and pull forward) You'll then see this: 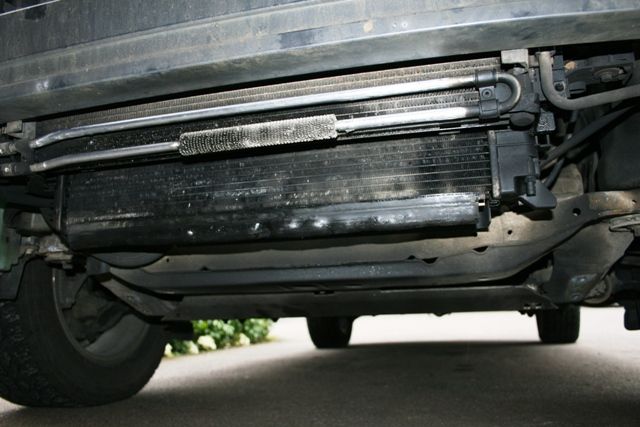 I removed these 2 bolts too - just gave a little bit of flexibility which came in useful 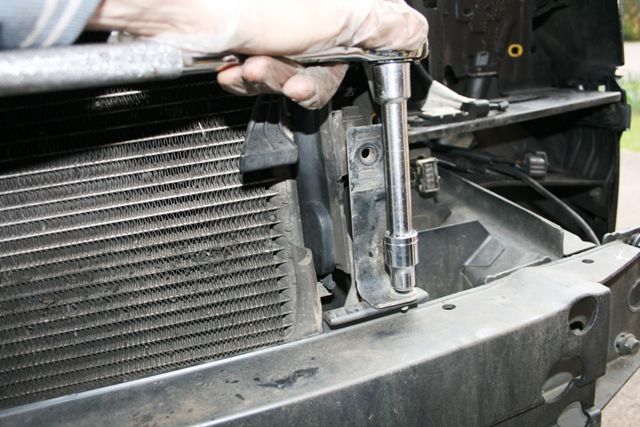 Remove this: 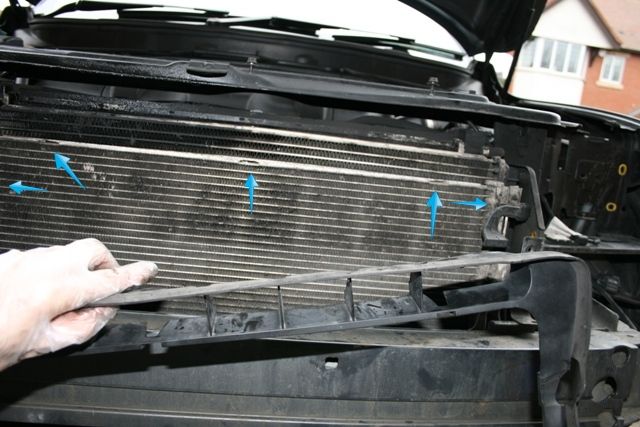 The two small rubber 'guides between the aircon rad and the beam across the front pull off easily and the clips are the same principle as the bumper/wheelarch clips - you can get your hand in the cross beam and push the centres out. D5Gill mentions "Detach the front coss member and guide it so that it will allow you to access the intercooler." I wasn't really sure which bit that was as the beam across the front didn't look like it was removable. the only other mounting seemed to be the radiator bolts here: 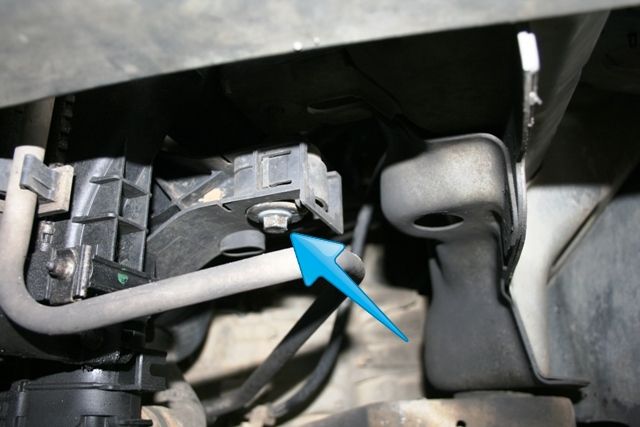 Releasing these each side lowered the whole sandwich. Undo the oil cooler brackets: 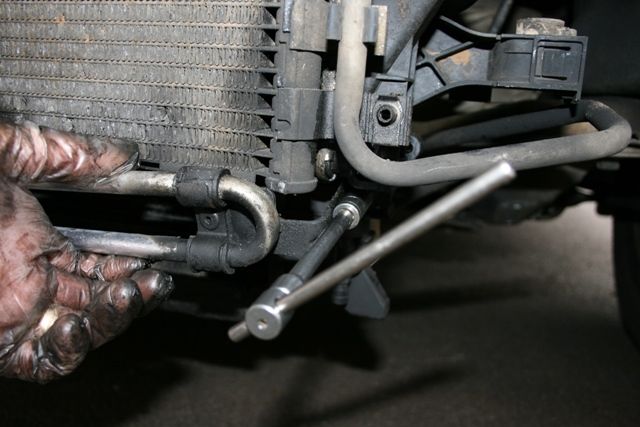 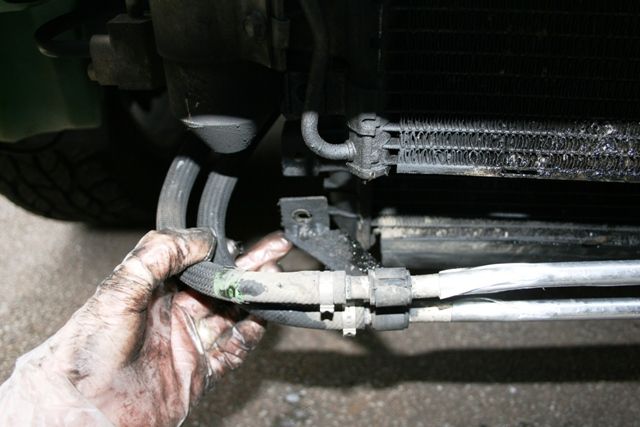 And then the four bolts holding the three rads together: Top drivers side: 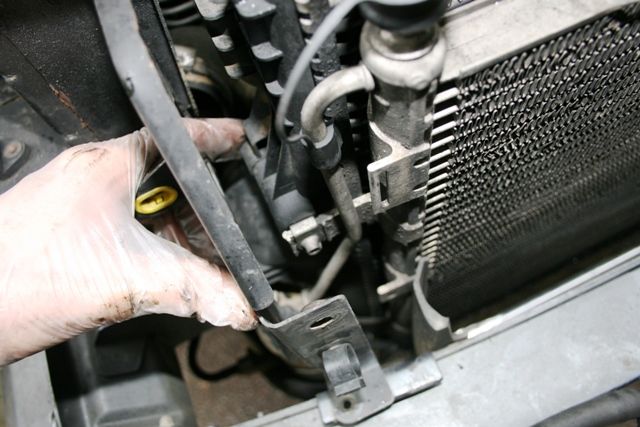 Top passenger side 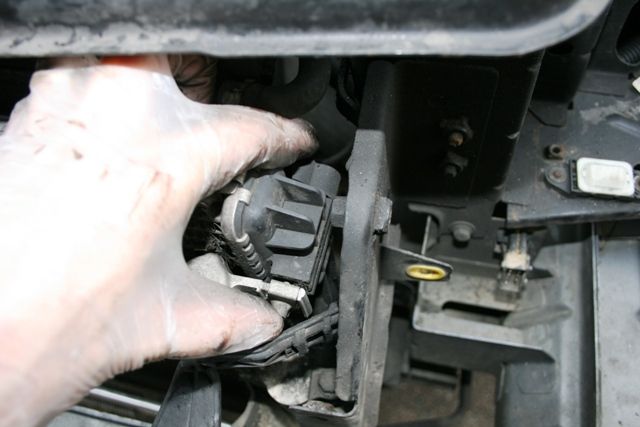 Bottom passenger side: 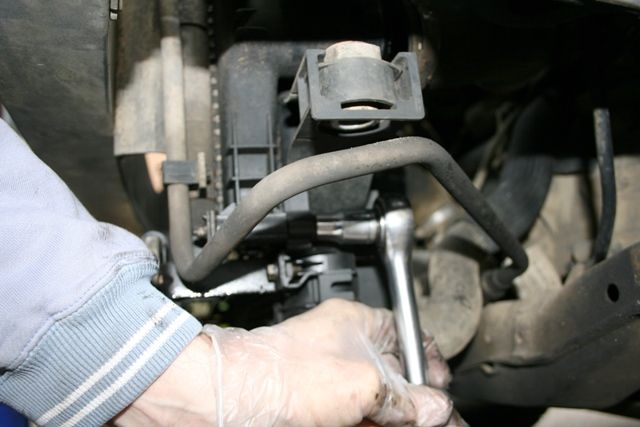 PITA bottom drivers side: 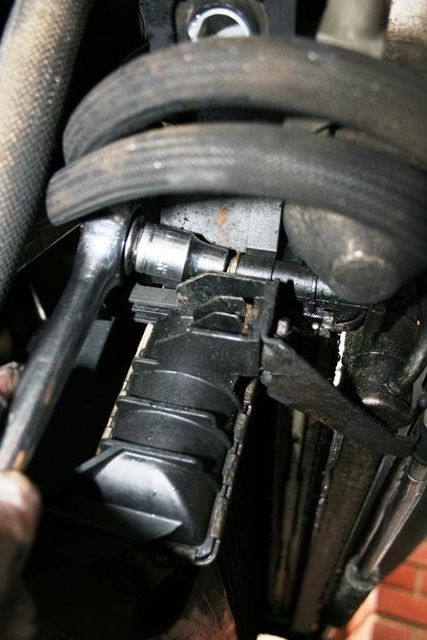 I had no cause to touch anything that looked like an airbag sensor on the front cross member of the subframe ?? At this point everything was loose and free to move. Note the water radiator is heavy unsupported and can be a bit of a handful when you're trying to juggle three radiators to get some space to slide the middle one out. This picture shows everything loose and the new rad repositioned - the arrowed bit I unplugged the cable to stop it getting stretched: 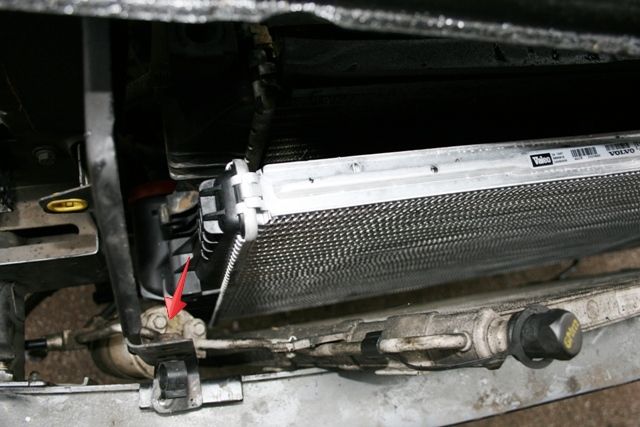 To get the rad out was a bit of a wrestle and I didn't think at first it would come out as the inlet and outlet pipes at each end snug round the water radiator. With a bit of logical will power and manouvering of the air con rad and water rad it popped out from the bottom. The new one went back in within 2 minutes (after I'd removed as much of Abingdon/CORE & Kirton as I could). Refitting they say is the reverse of the above !! I found it helpful as soon as I could to get the water rad bolts back in place to take the weight of the whole assembly so I could start to get the four sandwich bolts in place to help position everything back in alignment: 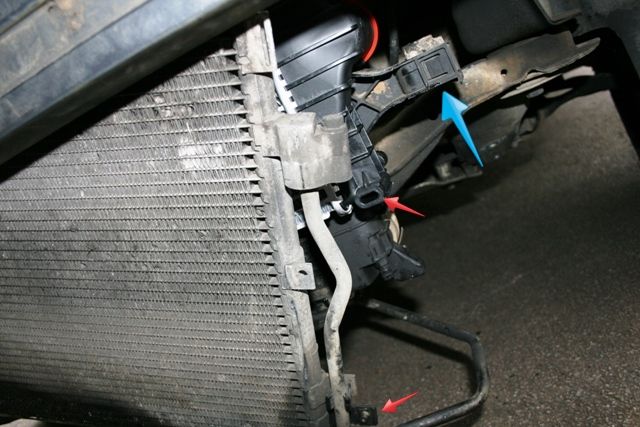 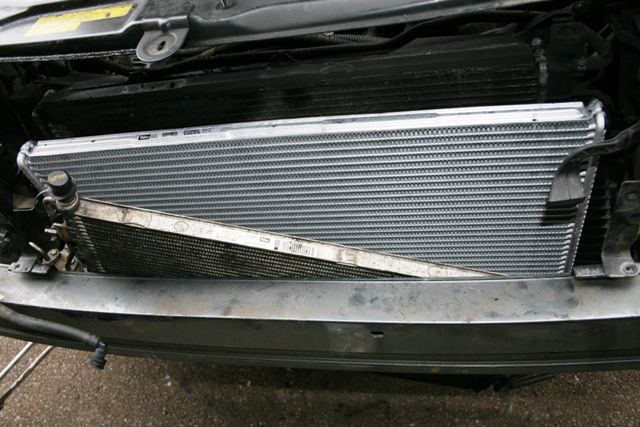 Being methodical I simply worked backwards bolting and clipping everything back together. Don't forget: the drivers side fog light cable, the cable to the air con rad, the washer jet feed pipe, the bumper/wheelarch clip. Mine is a 163bhp manual so I don't know if there are other bits on the 185 auto's that will be different and in the way - but I was suprised how little had to come off (once the bumpoer was off) to do this. The cross member and airbag sensors still puzzle me a bit as I touched neither. However a huge thanks to D5Gill for giving me the confience to give this a go - so this in conjuction with 'Gill's guide should be everything you need to have a go if you're handy with a spanner. Special tools 7mm small spanner, sockets 10mm - 14mm, small star key (rad sensor) and a stiff plastic thingy for poking and prising the bumper trim apart. At the time of writing the new rad was £225.42 + delivery from FRF - thanks Gents. Only regret I didn't have more time to clean up more of the oil - it was quite a mess behind there - maybe a summer project :-) Good luck - the thought of £200 still in my pocket makes me feel great. Cheers Ian. |

|

|
| The Following 19 Users Say Thank You to ianu For This Useful Post: |
| Currently Active Users Viewing This Thread: 1 (0 members and 1 guests) | |
|
|


 Threaded Mode