
|
|||||||
| PV, 120 (Amazon), 1800 General Forum for the Volvo PV, 120 and 1800 cars |
 Information
|
|
U.S. Build P1800. LS1 (V8) 5-Speed, Flush Mount Glass KitViews : 56983 Replies : 259Users Viewing This Thread : |
 |
|
|
Thread Tools | Display Modes |
 Feb 23rd, 2011, 20:59
|
#61 |
|
Trader

Last Online: Aug 1st, 2014 05:07
Join Date: Feb 2011
Location: Madill
|
It was Brillantly suggested on another forum to tape out the grill shell too, and post some pics...
Great idea.... Here are some pictures... 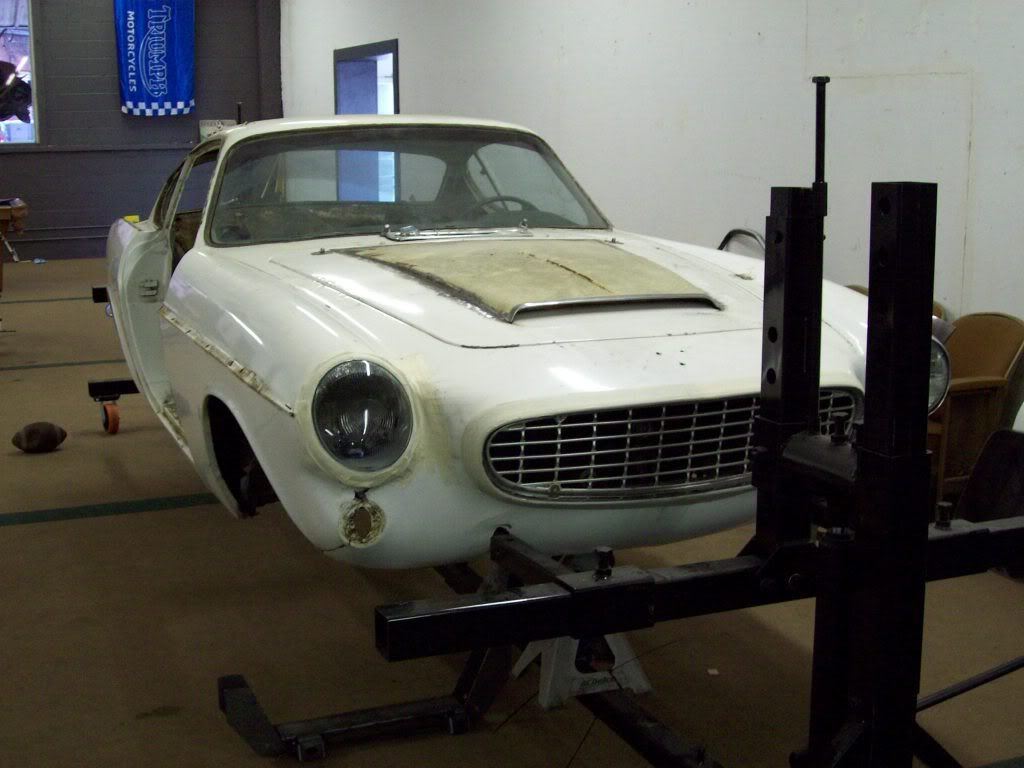 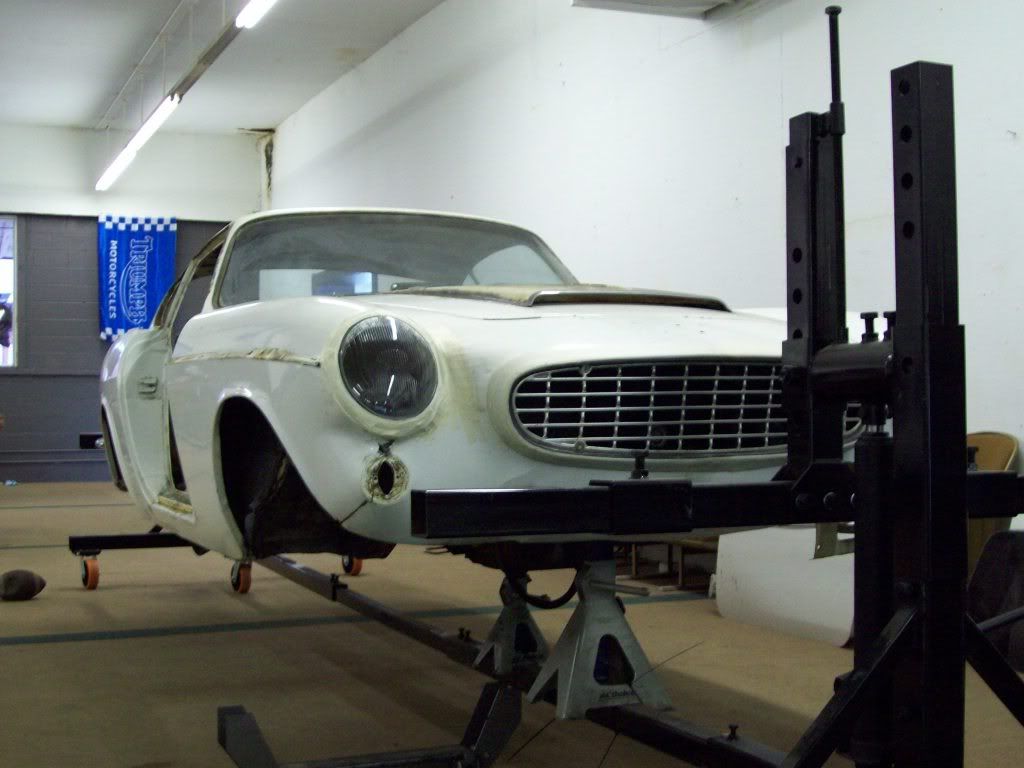 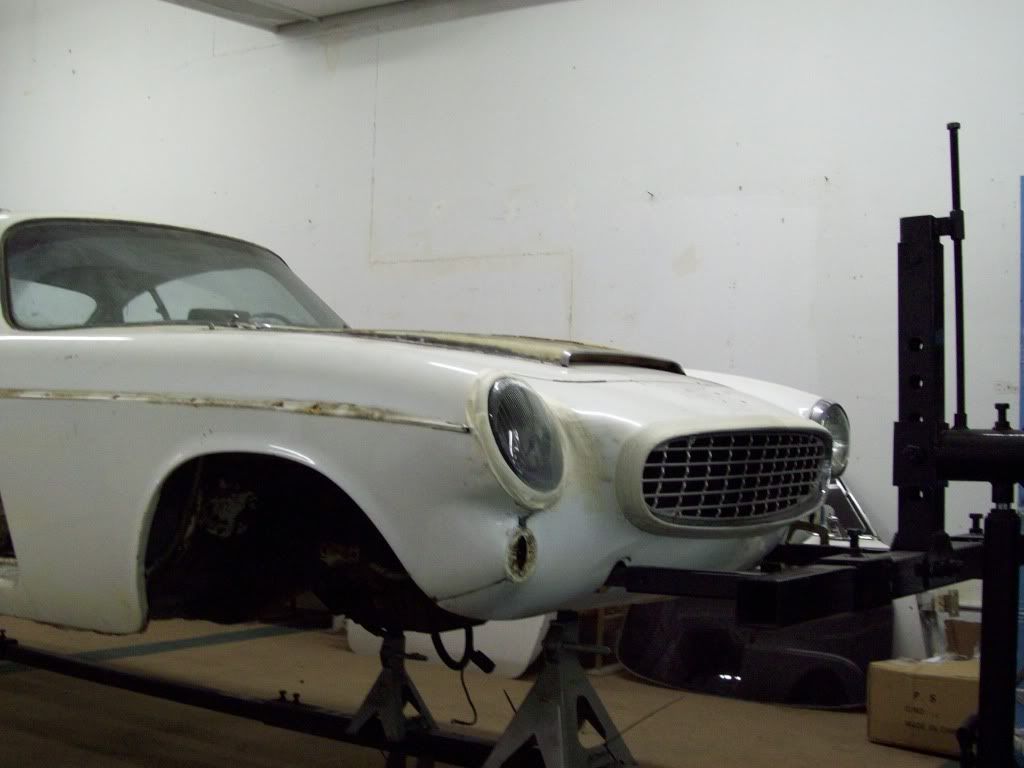 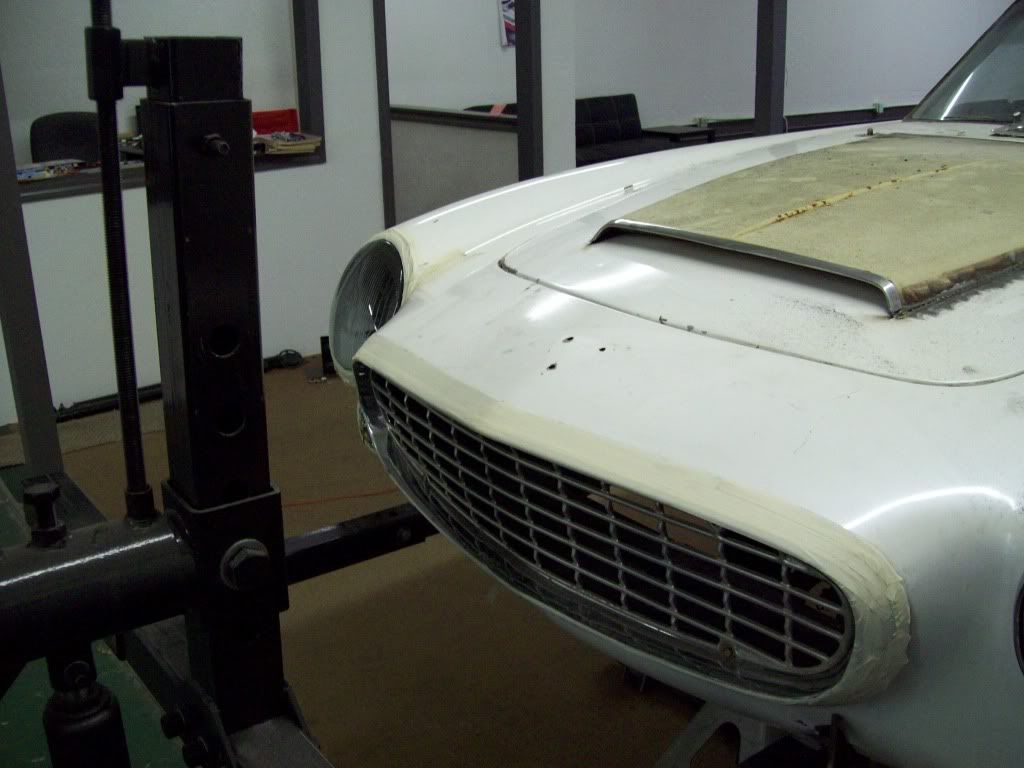
__________________
Robert Jackson Classic Auto Glass Innovations Flush Mount Glass Classicautoglassinnovations.com |

|

|
|
Feb 23rd, 2011, 21:12
|
#62 | |
|
VOC Member

Last Online: Jan 31st, 2024 18:34
Join Date: Jul 2007
Location: Wakefield, West Yorkshire
|
Definitely looking the business!
__________________
Thor - mist blue 1980 244GT Wafty - gold 1972 164 Automatic Whooshy - graphite grey 1989 240 GLT Turbo 2003 titanium grey V70R auto Quote:
|
|
|
|
|
|
Feb 23rd, 2011, 23:21
|
#63 |
|
Trader
Last Online: Aug 1st, 2014 05:07
Join Date: Feb 2011
Location: Madill
|
I was sitting at my desk, and had to take this pic.... I still cant believe how well that Donated hood scoop fits..
__________________
Robert Jackson Classic Auto Glass Innovations Flush Mount Glass Classicautoglassinnovations.com |
|
|
|
|
Feb 24th, 2011, 22:59
|
#64 |
|
Trader
Last Online: Aug 1st, 2014 05:07
Join Date: Feb 2011
Location: Madill
|
Ok guys... here is the next thing I am trying to tackle.. I am working on the front suspension, and I plan on using an upgraded Mustang II style with tubular control arms and Coil over shocks. The problem I am running into is, there is really no easy application for this, and I am wanting a bolt in cross-member/Suspension. I ordered a Mustang II crossmember kit from Paul Horton's Welder Series, and I am going to make the Volvo crossmember mounting harware work with it.. I dont want to weld the crossmember in for a few reasons, even though I know it will add to handling by stiffening the car. I just have my thing about easy component changing, due to service or damage.
I have a factory Mustang II crossmember coming to me, so I can rob the factory control arms and spindles off of it.. I am thinking I need to start with base reference, so I can determine if I need the shorter tubular control arms to get the correct track width and ride hieght for what I need. I have never built a crossmember, so this is a learning experience for sure.. Any suggestions as to what to look for or tricks would be greatly appreciated for sure.. Here Is what I am starting out with.. I have removed the mounting brackets and am going to stiffen them up by boxing them in and cleaning them up a bit.. Once they are done, it should be an fluid blend into the new crossmember.. My real trick is going to be attaching the Upper control arm attachments and the Coil over mounts to the crossmember instead of the body.. The U shaped hole in the body work of the Volvo is not wide enough to accomodate the full upper control arm, but I think there is more than enough room for it to be contained in the wheel house (Atleast I hope). Please keep in mind, I only have the crossmember tacked in place right now.. There isnt any rhyme or reason to where it is other than center to the body and height set to the engines position at this point. Until I get the stock components to put on it, there will be no brace work or dial in being done... 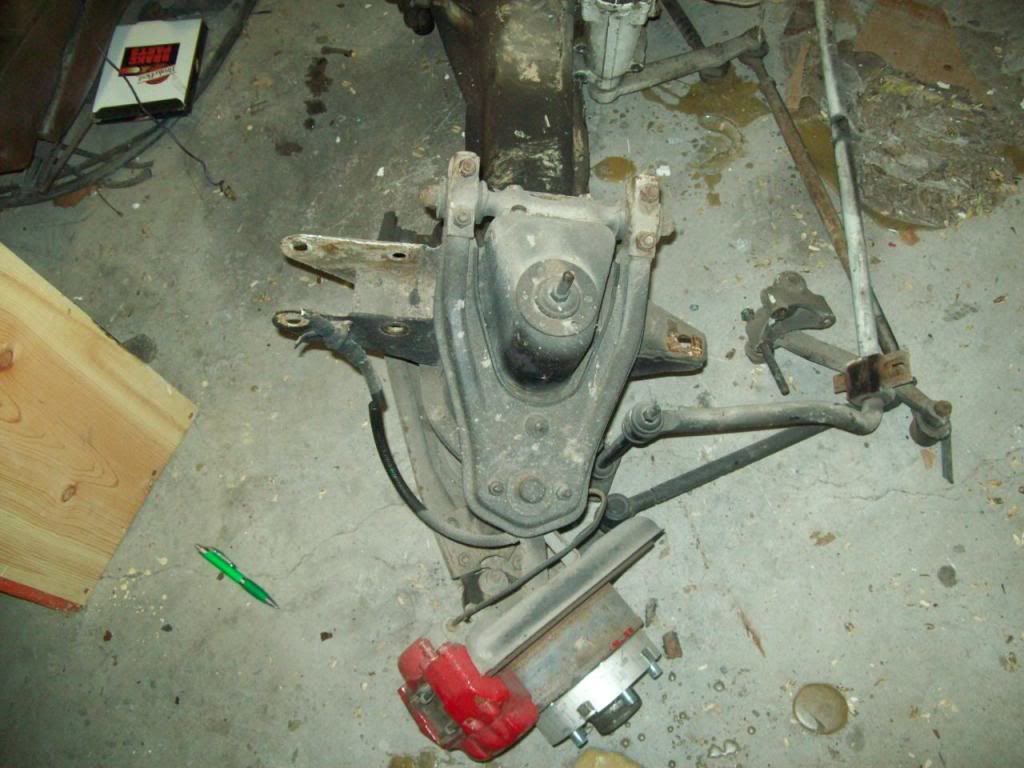 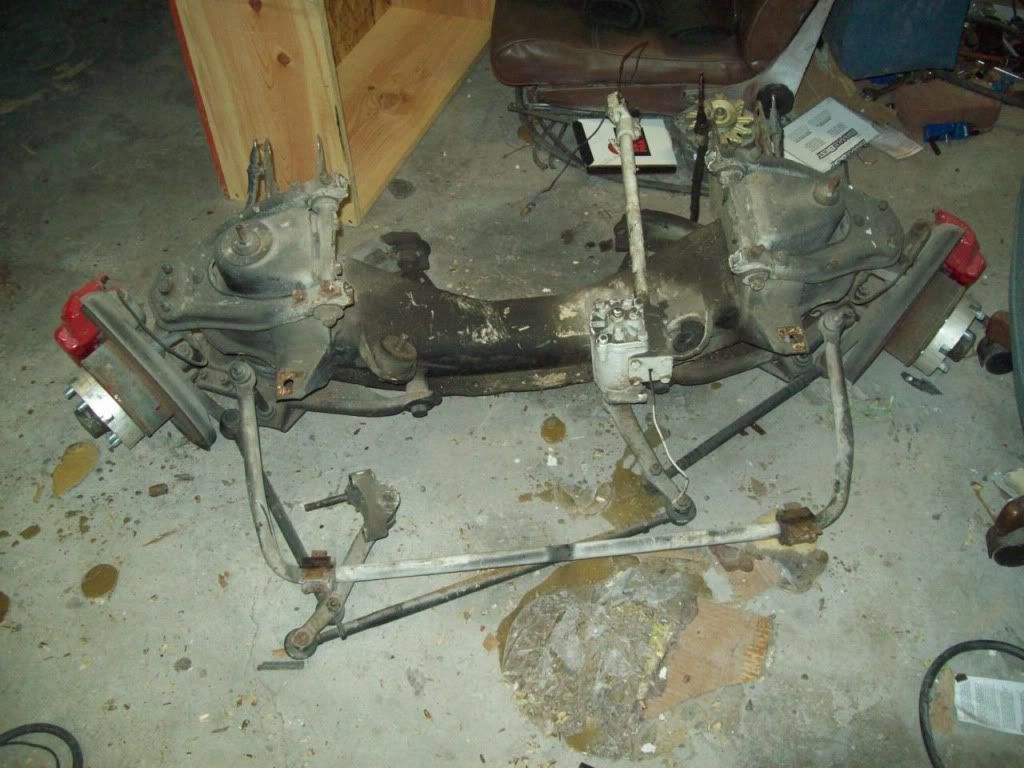 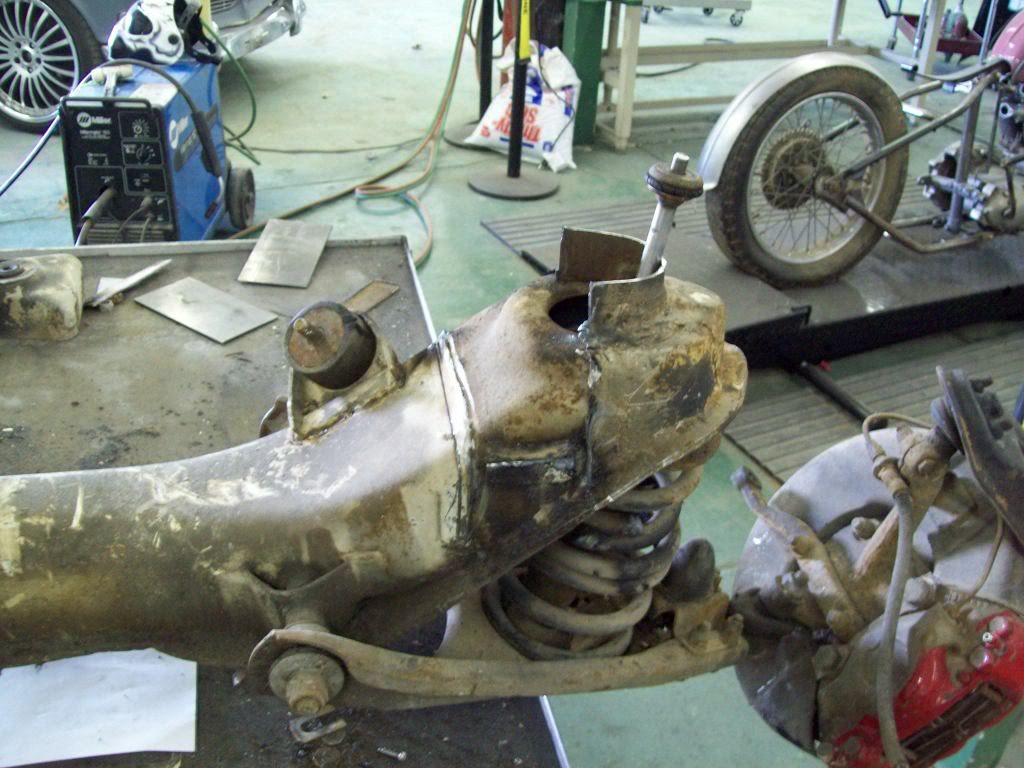 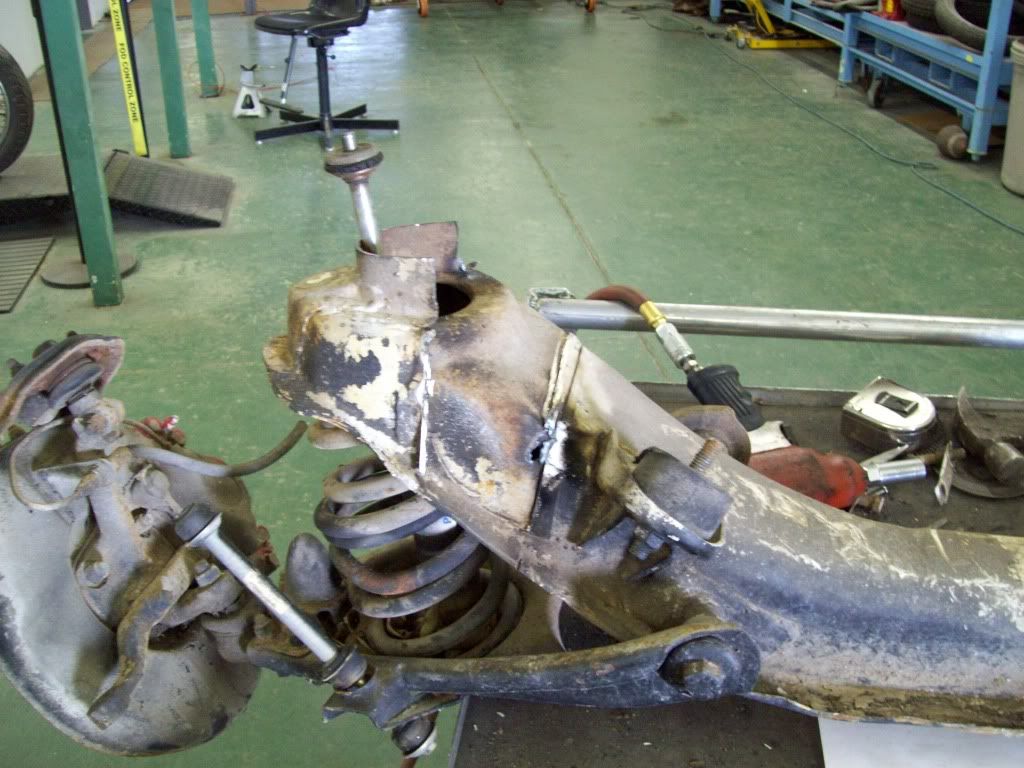 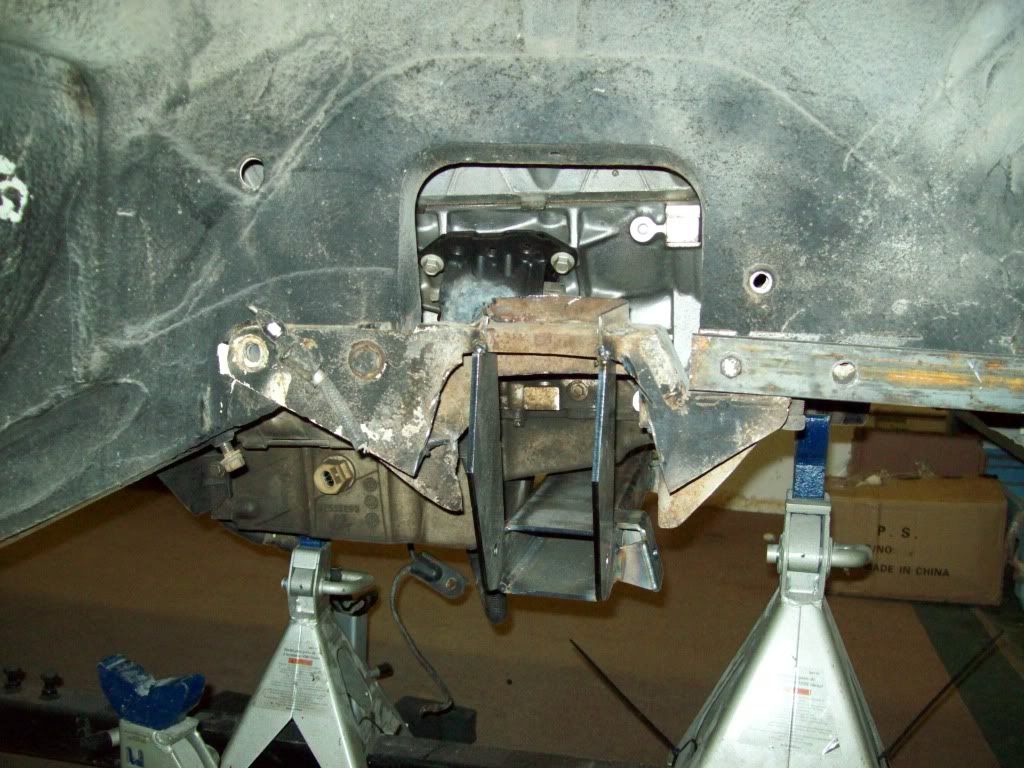 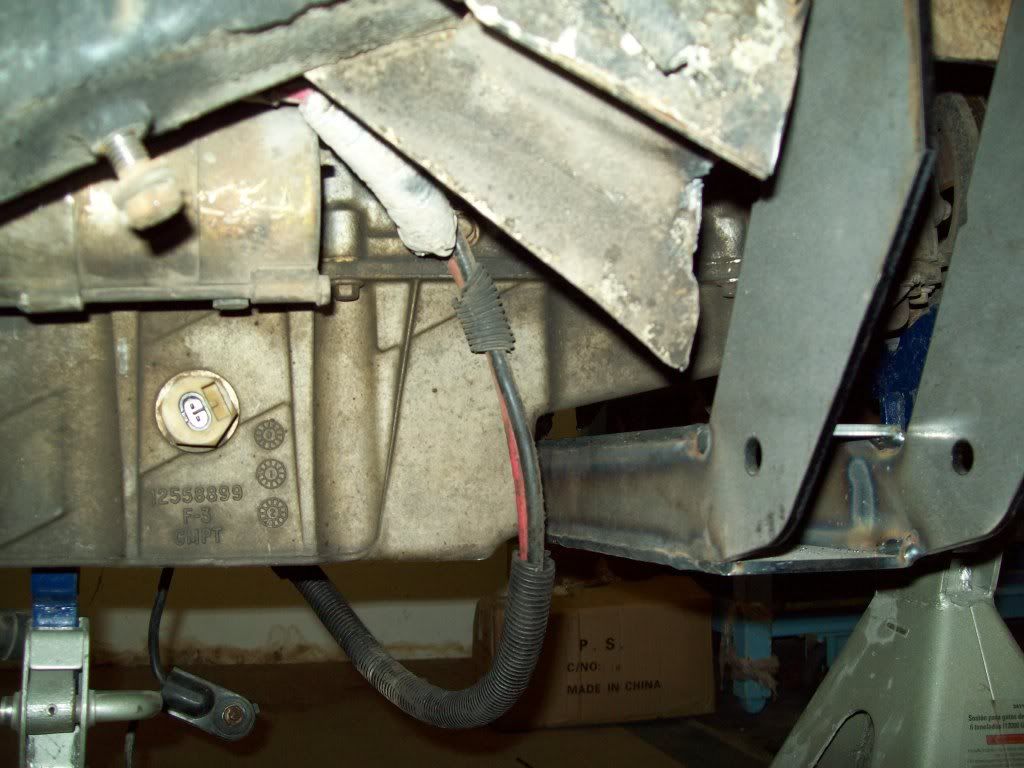 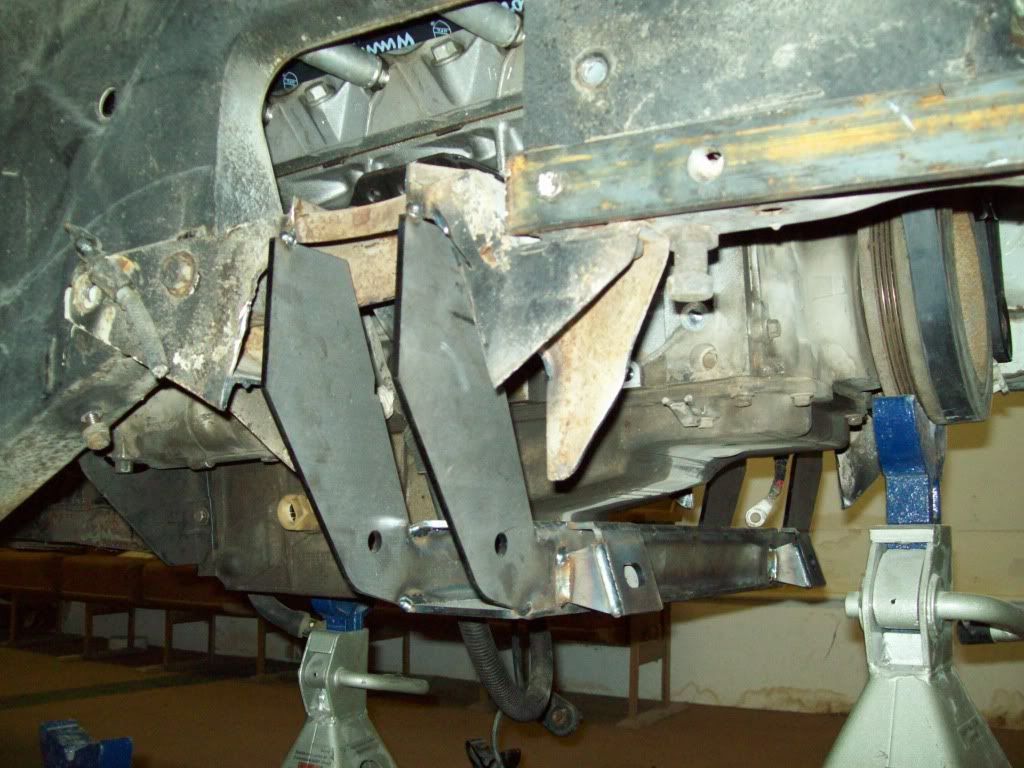
__________________
Robert Jackson Classic Auto Glass Innovations Flush Mount Glass Classicautoglassinnovations.com |
|
|
|
| The Following User Says Thank You to Iamtheonlyreal1 For This Useful Post: |
|
Feb 25th, 2011, 08:28
|
#65 |
|
Member

Last Online: Jun 11th, 2017 19:24
Join Date: Apr 2007
Location: Skipton
|
Thats a coincidence, im also working on a Mustang 11 conversion for my Amazon Estate. I am also using a Welder Series kit which hasnt arrived yet. Ive gone for the 56" kit, what about you. I am folding up my crossmember in reverse to give me the correct rack mountings for RHD. I then have the problem of sourcing a RHD rack. Flaming River do a nice billet RHD Mustang rack, quite expensive though. I may be able to modify the cross member to accept a Cortina rack, got to be carefull of bump steer though. I also dont know what length control arms i will need. Trouble is here in UK i dont have access to a standard Mustang set up to take measurements from. Also everything has to be imported from US which takes time. You are very lucky over there to have such a lot of tuning and modifying companies making really good stuff.
I will be watching your progress to see what you come up with re control arms, it could save me a lot of messing about. If i can get this sorted out then i will be able to offer a bolt on conversion to other members who want coil over suspension, rack and pinion steering, and access to a huge range of Mustang braking kits. |
|
|
|
|
Feb 25th, 2011, 16:06
|
#66 | |
|
Trader
Last Online: Aug 1st, 2014 05:07
Join Date: Feb 2011
Location: Madill
|
Quote:
As I have stated earlier in my thread, I am working with a couple of very notable companies to have these bolt on supspension kits available on the market. There is really going to be some custom work done to the upper control arms, because the Mustang II is too wide for the Volvo Access. When you shorten or lengthen control arms, it affects the performance range that the car is capable of, so we are trying to find the happy medium between track performance and daily driver. I will keep everyone posted if we get this sorted out, and I am sure there could be a demand for nice bolt in upgraded suspension kits. Not saying we are, just saying that my car is being built this this form of kit, because I want something that is servicable and replaceable..
__________________
Robert Jackson Classic Auto Glass Innovations Flush Mount Glass Classicautoglassinnovations.com |
|
|
|
|
|
Feb 25th, 2011, 19:00
|
#67 |
|
Trader
Last Online: Aug 1st, 2014 05:07
Join Date: Feb 2011
Location: Madill
|
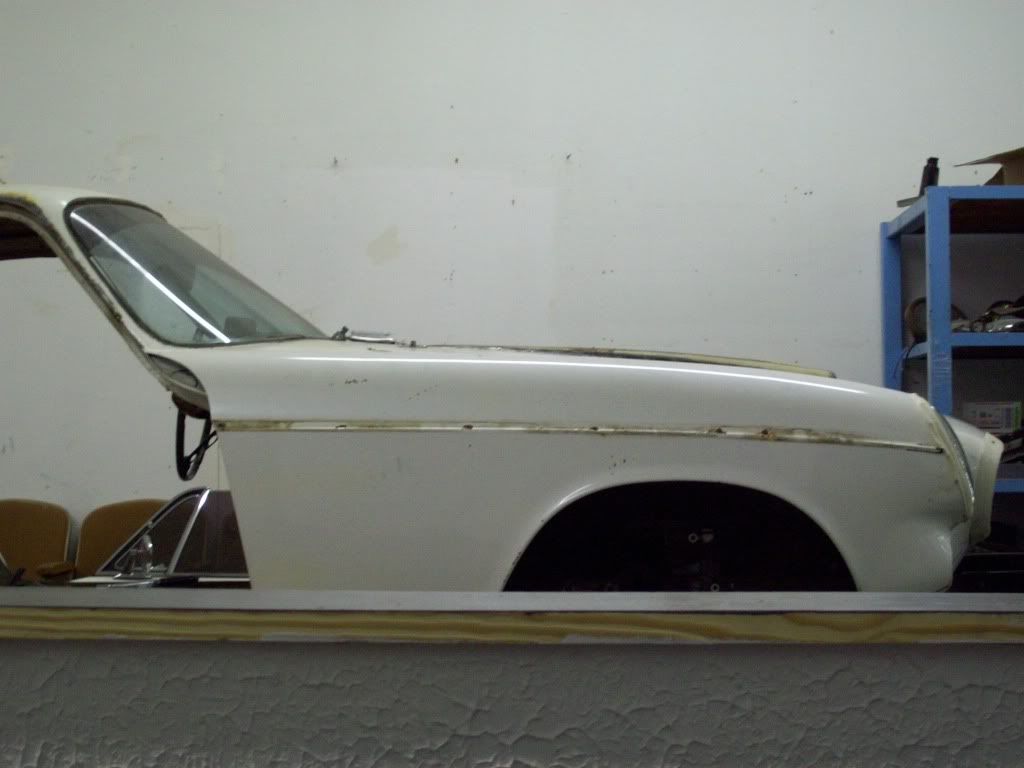
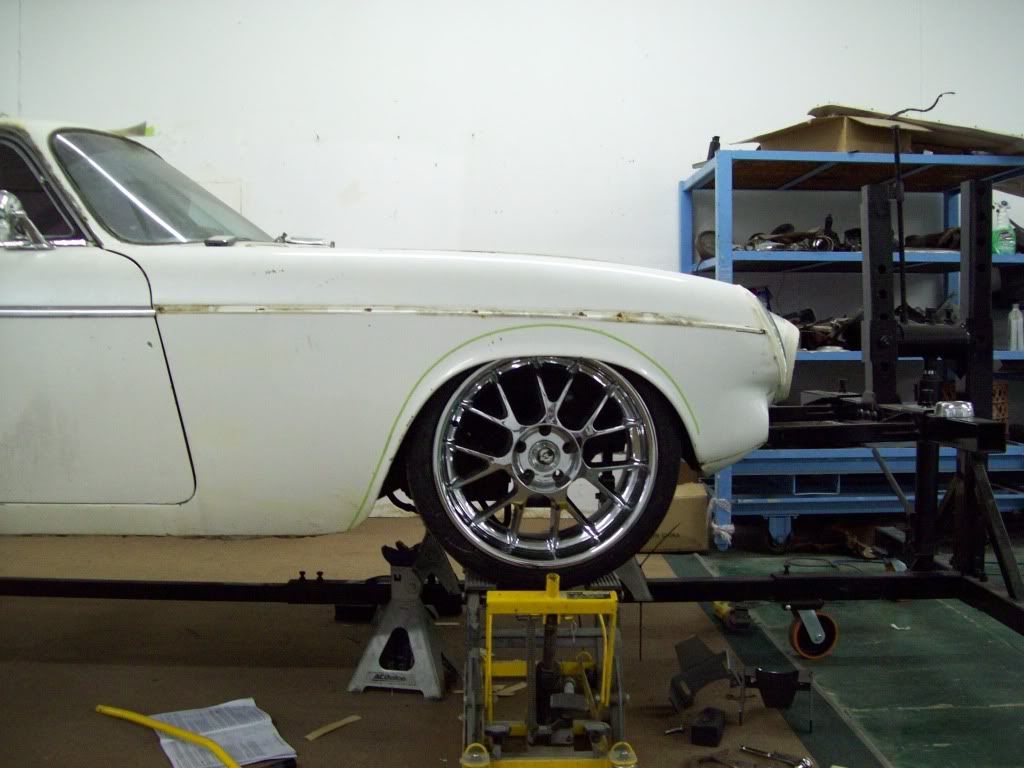
After trying to determine a few things, I think it is very clear that the wheel wells will have to be raised. That is a 19x8.5 rim in the front of the car, and in order to get the ride hieght about where I want it, you see where the wheel is located. It looks more like a drag/funny car, than an actual driver.. The car always sat higher than most, even when I had already lowered, it.. It really sat high in the front nose, it always looked incomplete in the very front end.. Even when the tire is in the position it is in right now, there is adequate room for steering if the actual opening was opened up enough to allow the tire to stick through.. Even if there is some tweeking that needs to be done to the inner fender, there really isnt a issue or to much labor involved.
I am going to have the wheel arches blend into the body line as pictured in the renditions, there seems to be plenty of room.. I really dont understand why the car was built in the fashion it was.. The wheel housing literally look like, if you pulled all the suspensiona and set the body on the ground, you can still stick the 19's in the wheel wells with plenty of travel clearance.. In the pics below, the bottom of the blue tape line is literally the wheel house roof, and it is wide enough to accomadate the tire... Plus, look at the size of the axle bump stop, and with the opening for the axle housing travel.. There is adequate room for the pumpkin to travel to the same level as the axle tubes... My plan is this.... I am going to find a few donor arches from and maybe tack them in place before I do any cutting to this car.. I should hopefully get an decent image of what it appears to look like, and I am not stuck into anything yet, because nothing has been cut.. 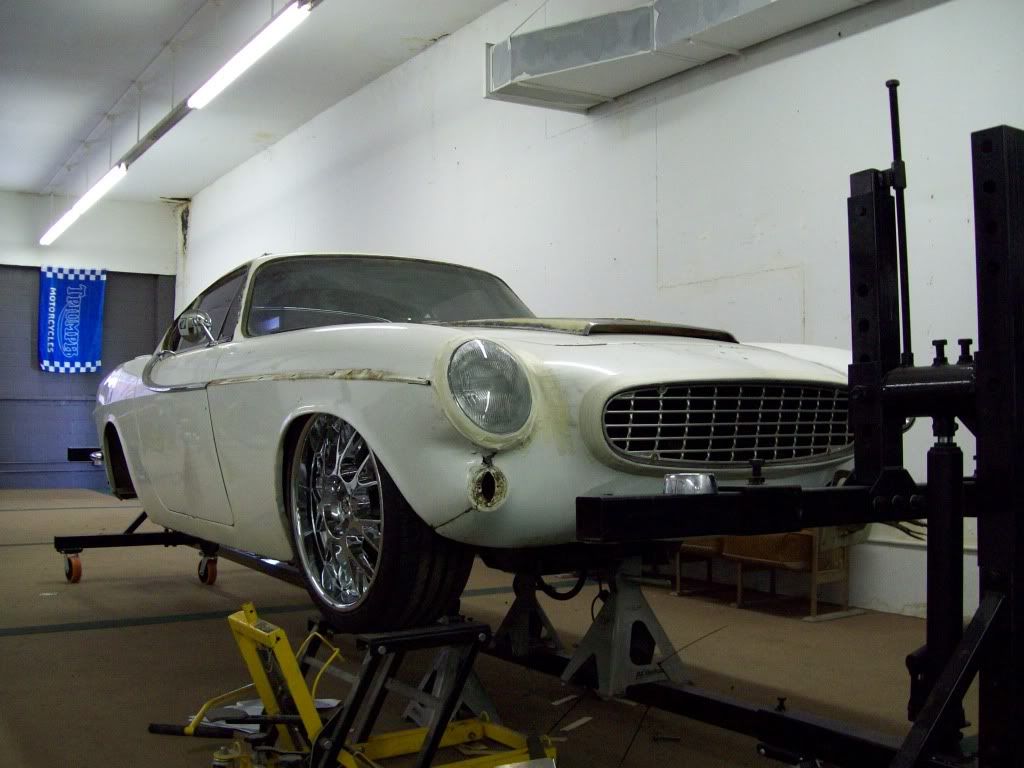 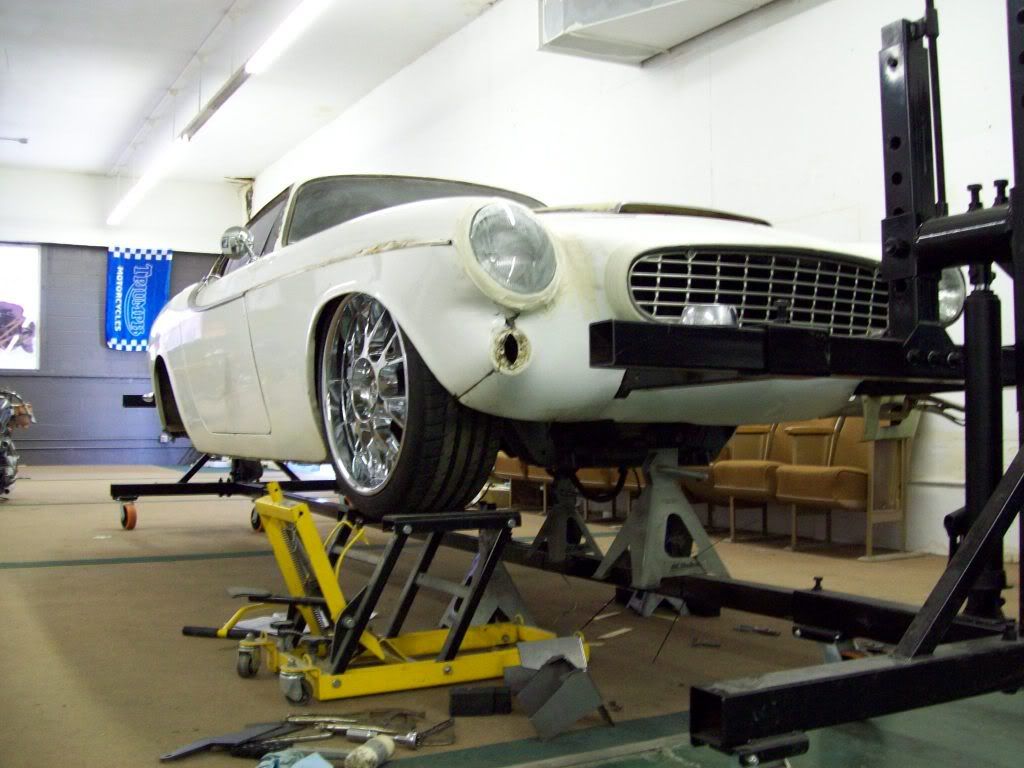 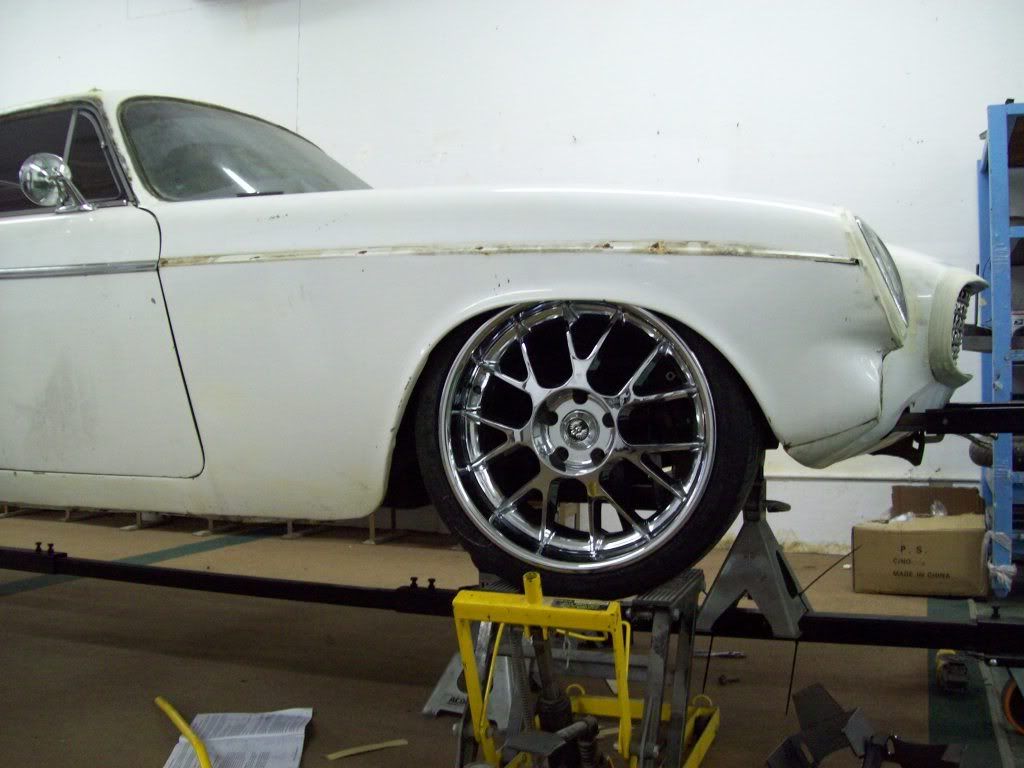 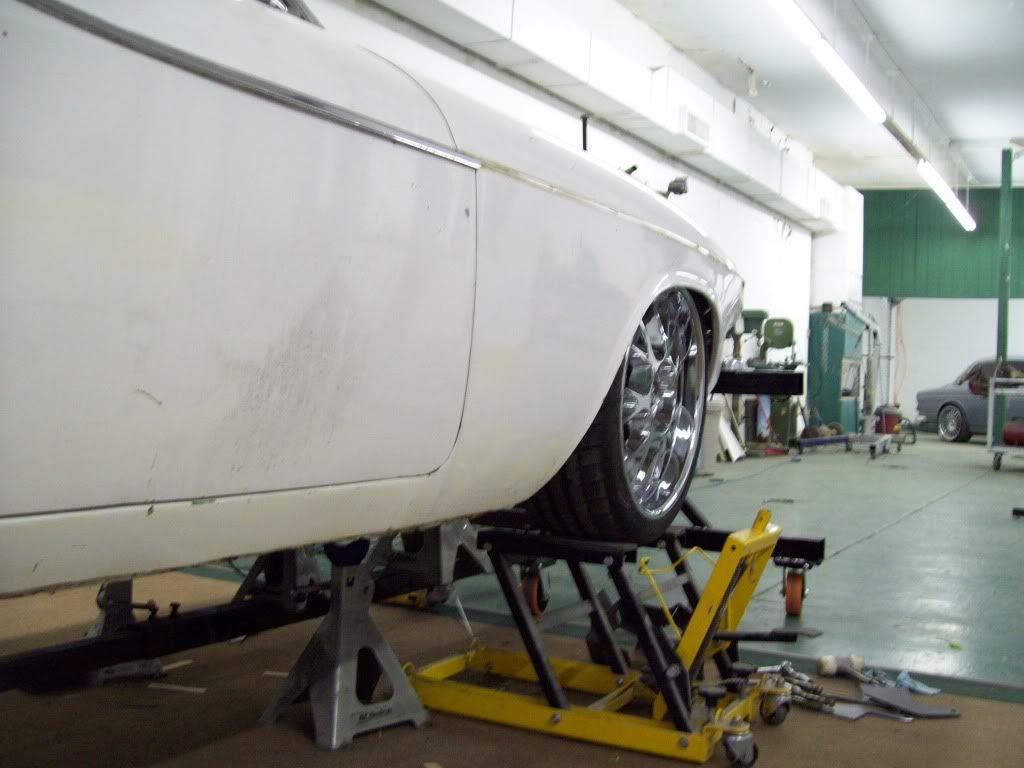 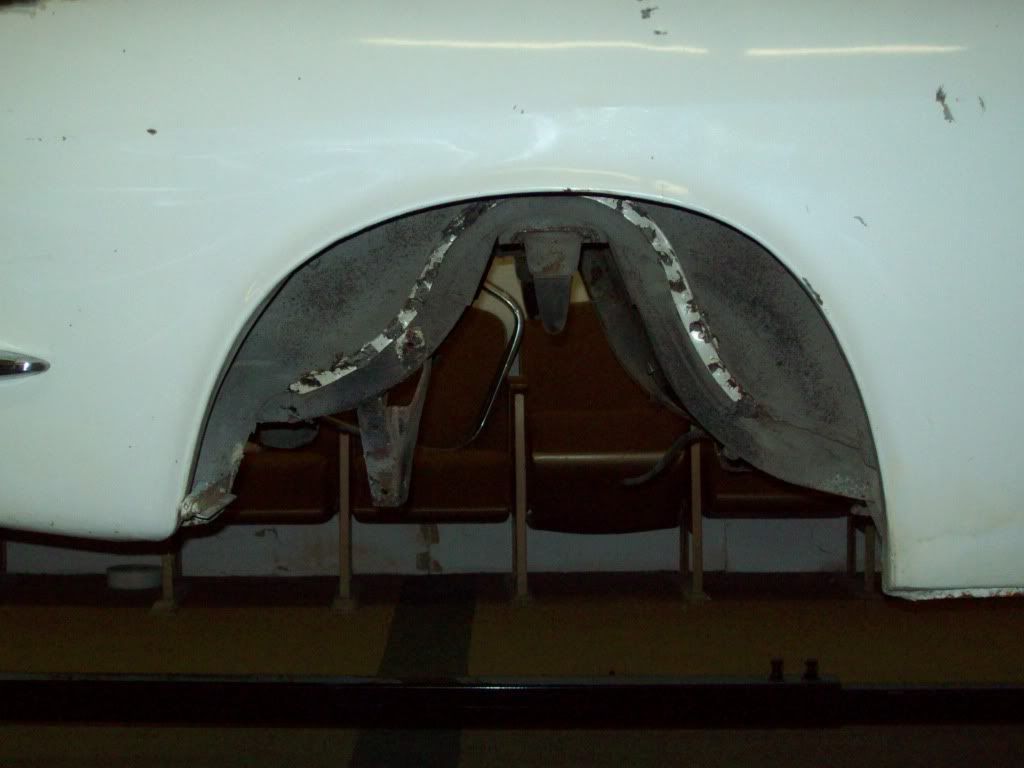 
__________________
Robert Jackson Classic Auto Glass Innovations Flush Mount Glass Classicautoglassinnovations.com Last edited by Iamtheonlyreal1; Feb 25th, 2011 at 19:10. |
|
|
|
|
Feb 25th, 2011, 19:16
|
#68 |
|
New Member
Last Online: Feb 25th, 2011 21:38
Join Date: Feb 2011
Location: Edmonton
|
Hate to be a pest, but I'm currently working on getting my P1800 running this summer on new wheels, may I bother you with just giving me the answer on this, who made your wheels on the P 1800 and what is the offset?...are they the medium offset...did you run a spacer...yadda yadda...thanks! I'm not fabbing anything, the body is done, and I just wanna run a nice diameter wheel which will fit. I was looking at your first wheels on the P 1800 before you started working on it. Crazy fabbing by the way, very cool.
Last edited by xrstopher; Feb 25th, 2011 at 19:23. |
|
|
|
|
Feb 25th, 2011, 19:52
|
#69 | |
|
Trader
Last Online: Aug 1st, 2014 05:07
Join Date: Feb 2011
Location: Madill
|
Quote:
__________________
Robert Jackson Classic Auto Glass Innovations Flush Mount Glass Classicautoglassinnovations.com |
|
|
|
|
|
Feb 25th, 2011, 19:53
|
#70 |
|
Trader
Last Online: Aug 1st, 2014 05:07
Join Date: Feb 2011
Location: Madill
|
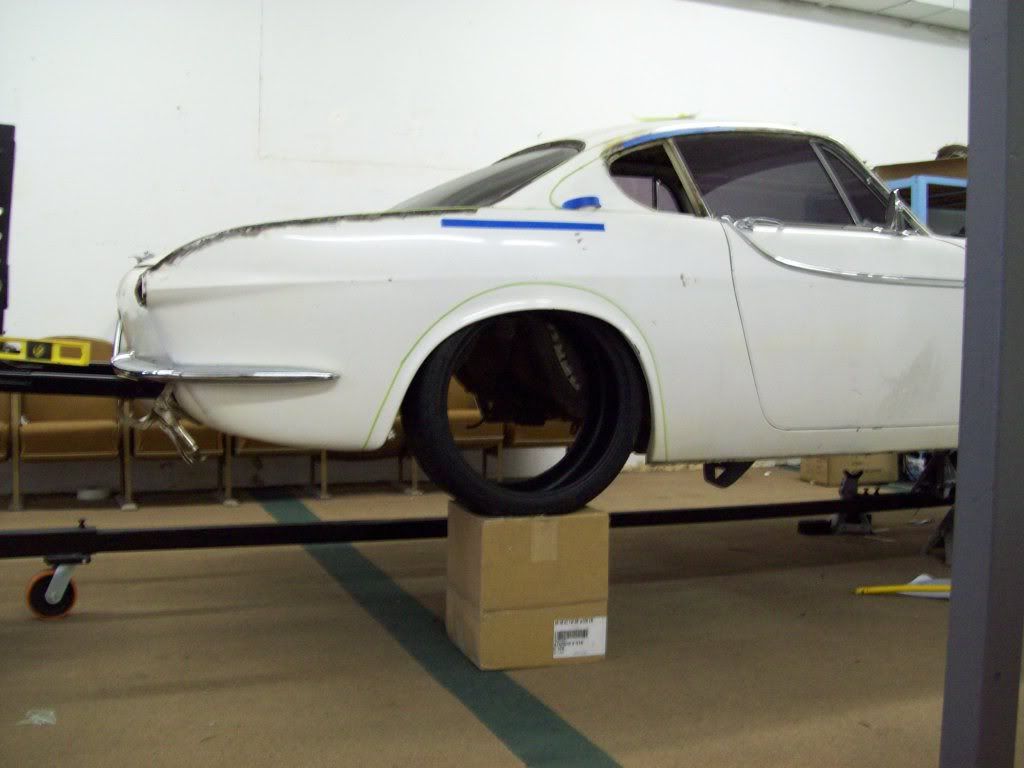
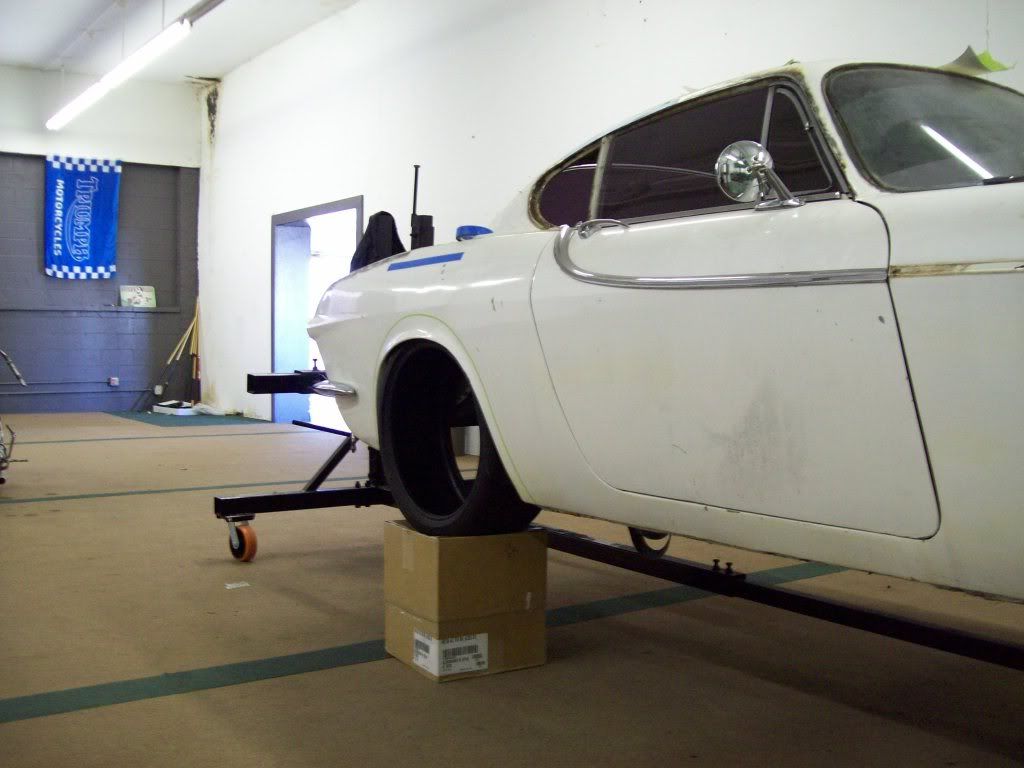
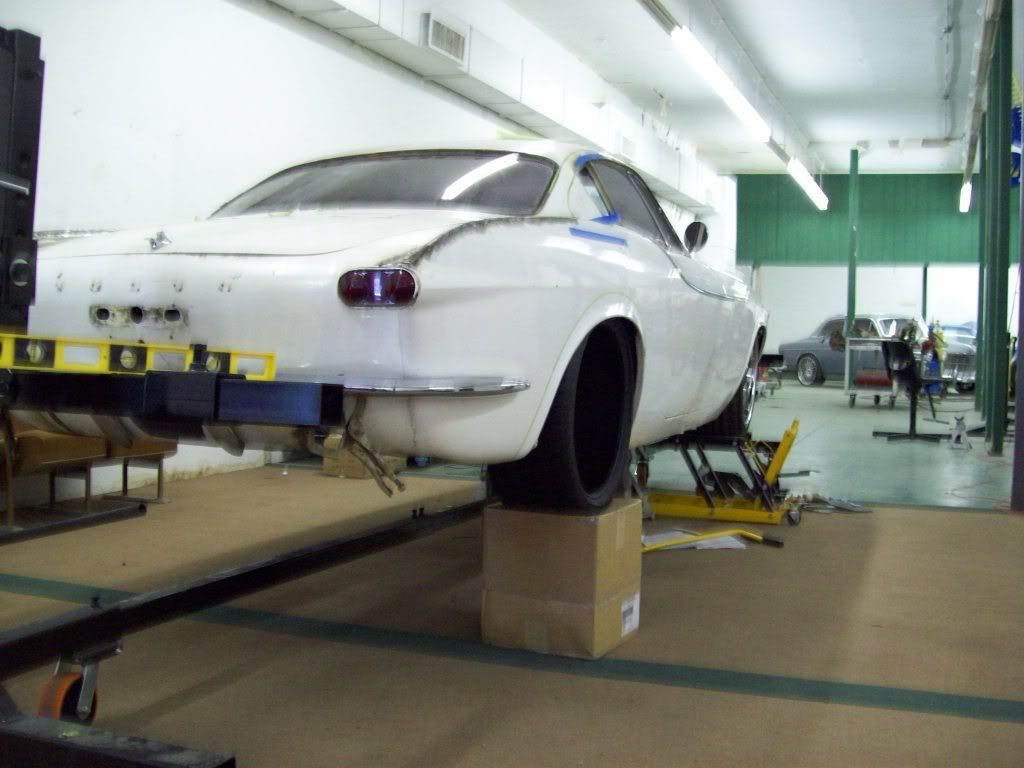
Here are a few pics to the rear clearance area, and some ballpark taped out wheel well lines... That is a 245/35/19 inch tire in the hole there. Once the quarter lip is extended up and out a bit, I am pretty sure I can get a slightly larger tire in there with very little hammering.. ha ha
__________________
Robert Jackson Classic Auto Glass Innovations Flush Mount Glass Classicautoglassinnovations.com |
|
|
|
| The Following User Says Thank You to Iamtheonlyreal1 For This Useful Post: |
|
| Currently Active Users Viewing This Thread: 1 (0 members and 1 guests) | |
|
|


 Linear Mode

