
|
|||||||
| S40 / V40 '96-'04 General Forum for the Volvo S40 and V40 (Classic) Series from 1995-2004. |
 Information
|
|
Guide: How to remove and replace a fuel pressure regulatorViews : 6402 Replies : 2Users Viewing This Thread : |
 |
|
|
Thread Tools | Display Modes |
 Mar 25th, 2013, 01:25
|
#1 |
|
Senior Member

Last Online: Aug 10th, 2016 10:05
Join Date: Jun 2012
Location: Wolverhampton
|
Ok,
I don't have all the images that i'd like for this rough guide as it was intended to help out a forum member that needs to do this job. Hopefully i can explain the process where the images end clearly enough for you to get through and hopefully, other members who have done this can add to it in order to clarify anything i may have omitted or missed altogether. Oh, and the disconnected fuel rail i use in the picture is a spare one i have and is used purely for illustration. Right. First things first, you'll need some tools and accessories. A pair of straight long nose pliers. A pair of bent long nose pliers. A T30 torx screwdriver or socket bit. A flat head screwdriver (roughly 6inch+ in length). Either a 1/2 inch or 1/4 inch rachet with a deep 10mm socket and a small extension bar. A thin length of strong steel wire bent in a U shape at one end. A short length glass jar. A can of silicon spray (best for rubber parts) or WD40. A bench vice if you have one. (Not vital but can make life easier.) First thing you need to do is to remove 15amp fuse as per the picture. This is for the fuel pump and we're removing it to drain the fuel line as best we can.  Once this is removed, go to your fuel cap and unscrew it but leave it just sitting in loosely. This should relieve the back pressure and allow for the fuel to drain out of the line. Next, we need to start the car and run it until it cuts out. Once it does cut out try restarting the car a few times, waiting around 30 seconds or so between starts, until it will not fire up at all. Don't put your foot on the accelerator at all at this stage as the car will cut out more or less straight away as there will be too much air in the mixture. We need the fuel to burn off. Next, You want to unscrew the black dust cap on the end of the fuel rail as highlighted in green in the picture.  Hold a jar at the end of the fuel rail and using the wire, push the valve pin in. Hold it in until the rail has de-pressurised and all of the fuel has come out. Put the lid on the jar and put to one side or pour it back into the fuel filler using a funnel. Next, we want to unplug the injector cables as highlighted in red. Once done use your bent long nose pliers to undo the clips holding the cabling to the fuel rail. This should allow for a bit more room to work. Next, undo the two 10mm bolts (highlighted in blue) holding the fuel rail to the intake manifold. put them to one side where they're safe. Don't pull the fuel rail up yet. We still have a couple of more things to do first but while we are still doing those other things, it will be a perfect time for you to spray the silicon spray at the base of the injectors where they fit into the intake manifold. Next, undo the bolt that holds the bracket for the intercooler pipe as per the red square in the picture.  It should be a 10mm bolt and to access it you just go underneath the pipe as the red arrow suggests in the image. Once undone, pull back slightly to free it and just slide it along the intercooler pipe to keep it out of the way. The next thing we need to do is remove the pipe as per this picture for more access.  This has a release washer (for want of a better word) highlighted in red at it's base. Using your flat head screwdriver, prise it up gently and as you do, pull up on the pipe and it should release. Also, to the left of that there is a small black pipe with a spring clip sitting holding it in place. you need to free that too. Next, we need to release the fuel line going into the fuel rail.  As per the picture, using your long nose pliers, push back on the small plastic retainer which sits inside the silver hub and and at the same time, push from behind the hub towards the pliers and the retainer should insert fully. When it does, pull on the pipe from the behind this hub and it should come free from the black pipe going towards the fuel rail. Make sure you have some rags to collect any remaining fuel. Now we can remove the fuel rail. Gently wiggle the rail, almost like you were turning a steering wheel, and pull up at the same time. The silicon spray should have had time to work and make the removal fairly easy. Once free you can take to a work bench or table. When you have it on a table, take off the small hose and then undo the 4 torx head bolts (which i think are T25's) as per the picture holding the retaining plate onto the rail itself.  Be careful here as you don't want to damage this plate as it holds the injectors into the rail to stop them blowing out when the fuel line is pressurised. Once it is free, slide it back and it put it to one side. Now, i don't have any pictures of the regulator at this point but there are two methods in which to remove it from the black plastic housing it sits in. The first is to twist and pull the housing little by little so it comes away form the rail. The second is to remove the regulator in situ. The first is probably the best method as it makes removal of the actual regulator from the housing much easier. The second method puts a strain on the housing which could result in it snapping off and leaving part of the plastic housing sitting in the hole. This means a brand new regulator housing would be needed and i doubt they'll be cheap. Personally, i would go for the first option. And because you are replacing the regulator, if you have a bench vice you could easily remove it from the housing by gripping the actual regulator itself in the vice and pulling housing away until free. Again, a twisting motion while pulling should free it. Once removed, it is basically the reverse of this guide to refit. A couple of things to note. Either take a photograph or make a mental note of under part of the fuel rail with the existing regulator still in. You want to refit the new regulator in the exact same position/orientation otherwise you will have difficulty refitting the rail and the hoses coming off the regulator will most likely get pinched cutting off fuel. Also, i would recommend buying a new set of O-rings for the injectors. They come in pairs for the top and bottom but i have no idea if they come as a per injector pack or a pack of 8 for four injectors. What i do know about them after speaking to FRF is that if they do come in a per injector pack, you are looking at the best part of £38 delivered at discount. Still, they are worth replacing if you car has done 100+k miles and it is a small outlay if you're not expecting to replace them again for another 100k or more so miles. I hope this is of help to any of you who are planning on doing this job. If you have any questions then please ask and i, or other members whom have also done this job will help you where we can.
__________________
1999 V40 1.9T4 |

|

|
| The Following 5 Users Say Thank You to chomerly For This Useful Post: |
|
Aug 20th, 2014, 14:15
|
#2 |
|
Junior Member
Last Online: Dec 23rd, 2019 05:27
Join Date: Sep 2012
Location: Sydney
|
Thanks for the guide. Ive taken out all my injectors to replace the o rings and now I've forgotten which notch on the injectors the plate should slide into. There are two on the injectors so I'm not sure.
|
|
|
|
|
Aug 16th, 2017, 19:43
|
#3 |
|
New Member
Last Online: Aug 21st, 2017 06:10
Join Date: Jun 2017
Location: GL
|
hellow, i just replaced the FPR on my volvo t4 1999.
is not that hard to do it. took me around 2 hours without anz hurry ... the engine was also hot as i come back from work at 5pm and i startedworking on it at 6pm ( don@t reccomend working on a hot engine  ) )no special tools needed for this job. just extra care. i used plenty pf wd oil and carb cleaner. First of all .... the FPR from VW will not work on Volvo t4 engines !!! dson't buy it iven looks the same, but his function is different. when is no vacuum or pressure thecircuitis closed on VW one. on volvo one, circuit is open. the genuinevolvo FPR will fit... this must be the holy grail of FPR because is expensive as f**k.... the VW one is 12$ nd thatone is 140$ quickguide : take off 15amp fuse for fuel pump, start engine 3-4 times until won't start. take off the pressurerelease cap from the right sideand press it until no fuel squirts out. ...take off the fuel line wuick release from right side of engine , unscrew air duct screw tha't near by , take off the connectors of the injectors and 2 wiring plastic holders, takeoff 2 screws that hold the rail and gently grab and wiggle it until you take it out. from that is as statedabove. unscrew 3 bolts that hold the metal holder, take it off, wiggle FPR with the housing out, unscrew the ring think and take FPR out. take care with injectors at it can fall out. just clean very good the orings and squirt some wd on them when you take them off and alsowhen you put them back. some pictures VW vs Volvo .... don@t buy VW one as the car will not start 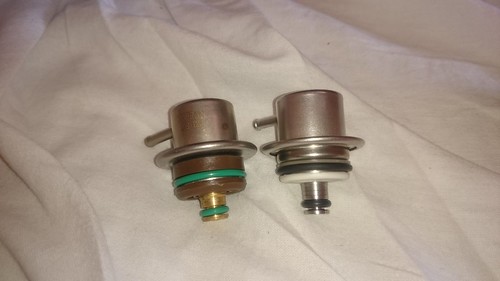 DSC_4449 DSC_4449 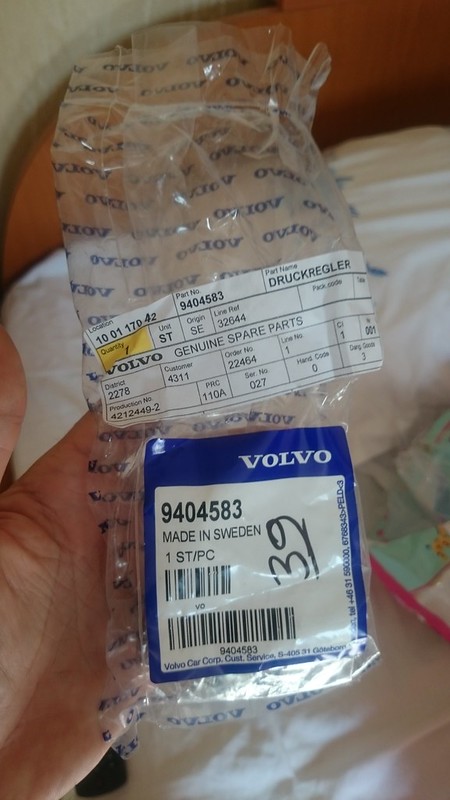 DSC_4448 by 56cali56, on Flickr DSC_4448 by 56cali56, on Flickr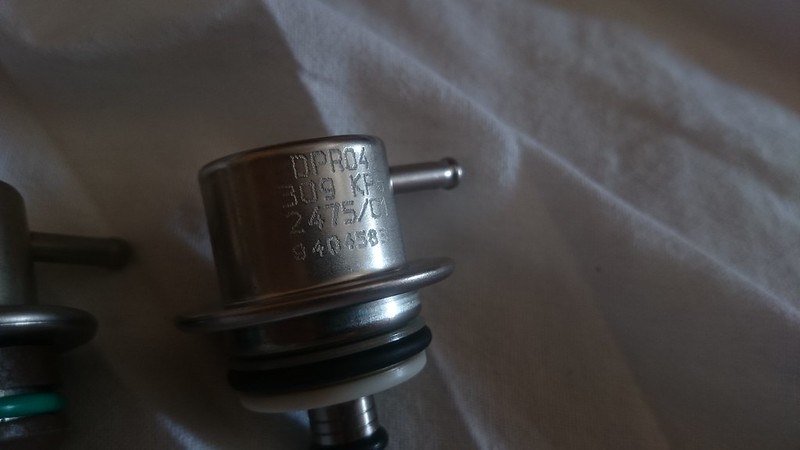 DSC_4450 by 56cali56, on Flickr DSC_4450 by 56cali56, on Flickrand with the rail ... etc: 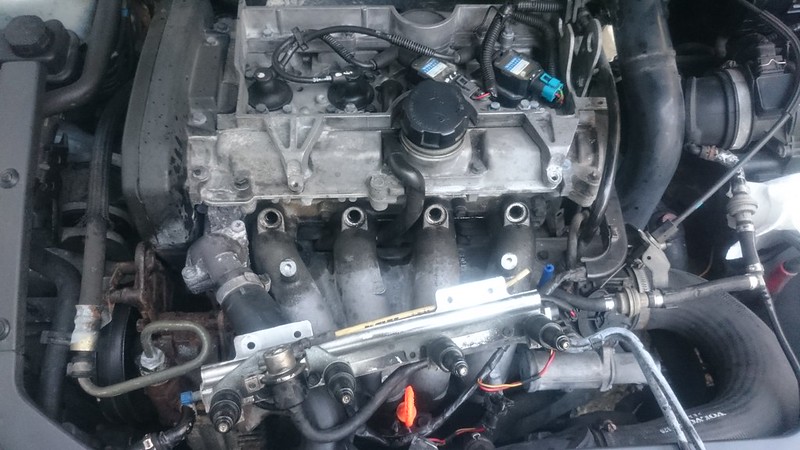 DSC_4453 DSC_4453 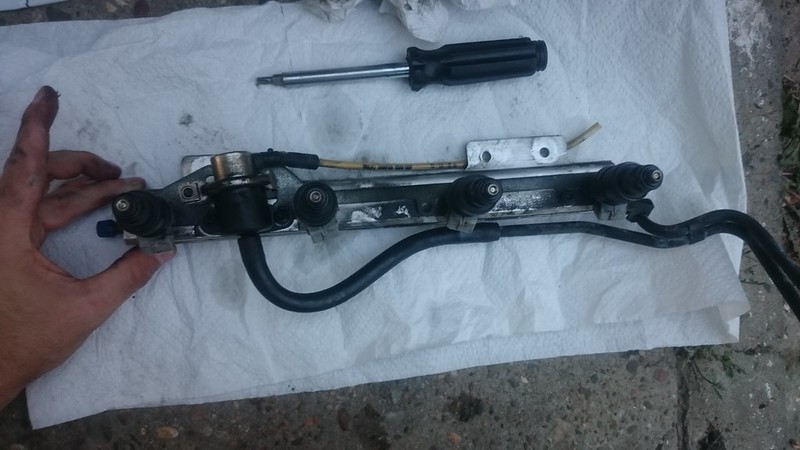 DSC_4458 by 56cali56, on Flickr DSC_4458 by 56cali56, on Flickr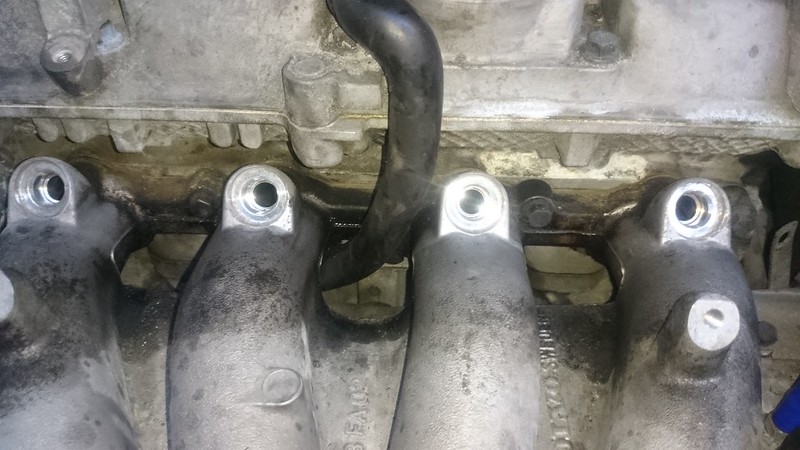 DSC_4461 by 56cali56, on Flickr DSC_4461 by 56cali56, on Flickr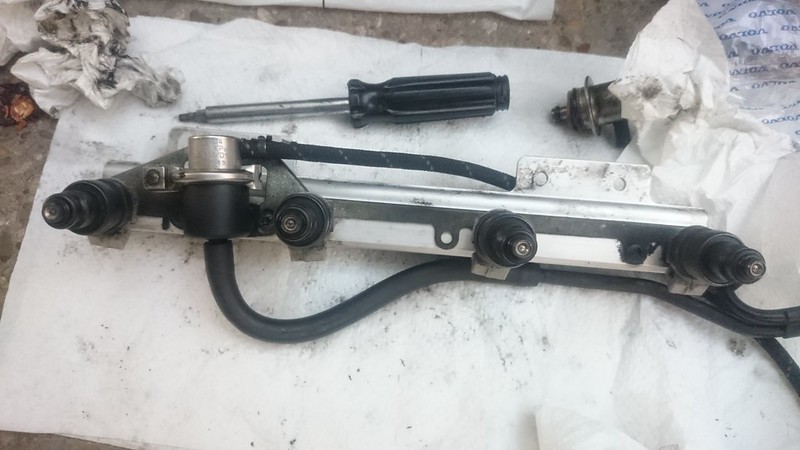 DSC_4463 by 56cali56, on Flickr DSC_4463 by 56cali56, on Flickr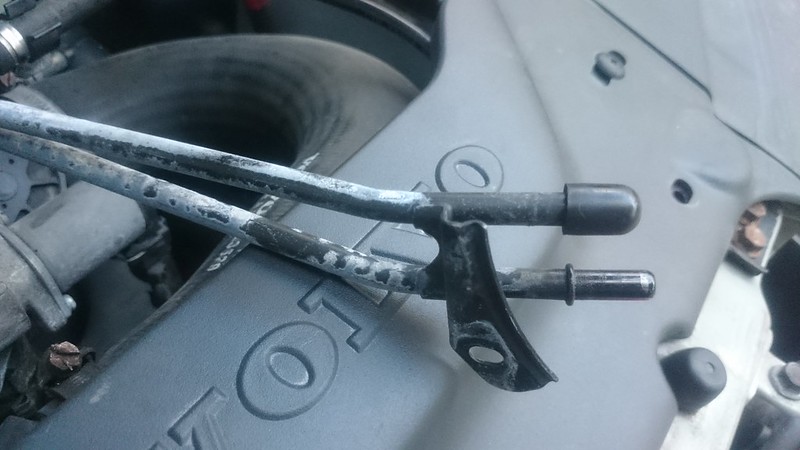 DSC_4454 by 56cali56, on Flickr DSC_4454 by 56cali56, on Flickr
|
|
|
|
| The Following User Says Thank You to nutzu For This Useful Post: |
|
| Tags |
| fpr, fuel pressure regulator |
| Currently Active Users Viewing This Thread: 1 (0 members and 1 guests) | |
|
|


 Linear Mode

