
|
|||||||
| 700/900 Series General Forum for the Volvo 740, 760, 780, 940, 960 & S/V90 cars |
 Information
|
|
Chris1Roll's return to 700 ownershipViews : 9925 Replies : 133Users Viewing This Thread : |
 |
|
|
Thread Tools | Display Modes |
 May 12th, 2023, 05:59
|
#21 | |
|
Premier Member

Last Online: Today 15:39
Join Date: Jan 2020
Location: Corby del Sol
|
Quote:
I'd agree about getting a set of 15" Volvo alloy wheels, they would look very smart and cost very little. I acquired a set of Pholus wheels (from a 940), reconditioned then myself and they only cost about £60: https://www.volvoforums.org.uk/showp...postcount=2076 I think they look smart and still have them on my current 240. Well done on the cheap (free) endoscope! 
__________________
... another lovely day in paradise. 
|
|

|

|
| The Following 2 Users Say Thank You to Othen For This Useful Post: |
|
May 12th, 2023, 22:42
|
#22 | ||||
|
🤍💙💗

Last Online: Today 18:14
Join Date: Mar 2006
Location: Lichfield
|
Quote:
Occasionally, Mr Volvo abandons reason for madness and has done goofed up over the years. The 'low friction' B230 design? Dumb B234F design? Heck, there is that recent issue with the piston design on some of the modern engines. Quote:
"Old ATF formulations had high detergency because of the naphthenic base oils and the animal-derived liquid wax ester; past motors oils did not have high detergency. Today's ATF's have little detergency, current motor oils have high detergency, 24 times the detergency of current ATFs." Modern motor oils are incredible and ridiculously cheap for the product really.😮 Quote:
You could swap in a 940 B230F lump, should be cheap as chips as no one wants them. Non interference, later design with 13mm rods, practically indestructible. Don't bother telling the DVLA, they would never check.😉 Quote:
__________________
MY97 940 CD LPT Super Sports Edition 2 Turbo, Midnight Purple, 175,000 miles. 
Last edited by baggy798; May 12th, 2023 at 22:49. |
||||

|
|
| The Following 3 Users Say Thank You to baggy798 For This Useful Post: |
|
May 12th, 2023, 23:43
|
#23 | |
|
Master Member
Last Online: Apr 9th, 2024 17:25
Join Date: Jul 2021
Location: United Banana Republic of Portugal
|
Quote:

__________________
Proud owner of a 1997 940 2.3 lpt Manual with 501,000km. |
|
|
|
|
| The Following User Says Thank You to SalvadorP For This Useful Post: |
|
May 14th, 2023, 19:00
|
#24 |
|
Senior Member
Last Online: Today 07:00
Join Date: Aug 2006
Location: Cannington
|
Various packages have arrived over the previous few days:
 I had ordered an INA tensioner, but an SKF one turned up. Thats not a problem though. I had a couple of hours spare yesterday afternoon so I had a bit of a potter about. Someone had suggest to leave the valve clearances for now, as if a tweaked valve worked its way back to shape, the clearance would close back up again. Sounds logical on the face of it, so I have decided to leave them for a couple of thousand miles. The gasket needed replacing anyway so I've not lost anything. The last person to fit the rocker cover had done so with silicone over the gasket all the way around, so I spent quite a while removing that from all the surfaces and inside the camshaft housing. There was quite a lot of oil leaking from the filler cap, even just at idle so a new seal was fitted to the cap. I'm not sure if someone has tried repainting the rocker cover, of if it came like it from the factory, but the paint went right up onto the sealing surface and was flaking off in places, probably not conducive to a good seal, so I cleaned that up to a nice smooth shiny surface. 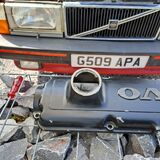 With the new seal, the cap fitted a lot more tightly. So then I was in a position to position the new gasket and refit the cover. 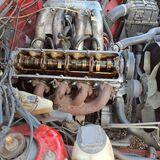 I had a flash of inspiration at this point, since the injectors are fitted directly to the head on this car, removing them would give me a view of the intake valves. The endoscope fits nicely through the hole. Aside from varying levels of dirtiness, I didn't see anything to get excited about: Cyl 1: 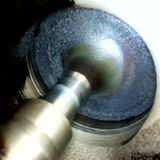 Cyl 2: 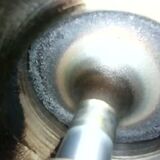 Cyl 3:  Cyl 4: 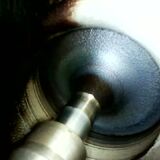 Cyl 3 being cycled: https://youtu.be/lrC72s-ibb8 Doesn't look bent to me. Predictably enough the 34 yr old injector seals were all dried up and offered no resistance when being removed and re-inserted, so they'll all need replacing now. I also found that my Aug 1989 car has the " 'up to '88' " design of flametrap, rather than the " '88 on" version, so I have ordered the wrong one, so I'll need to get the right one ordered. I'm also a bit dubious about the amount of tension the cambelt tensioner spring is actually applying, it doesn't seem like much - when the nut is loose, you can still see the edge of the hole for the retaining pin, so for the sake of £3.30 I think I'll add that to the order. I then set about cleaning up a the oily gunk that had built up around the back of the head from the leaky cap and cover. I got bored of that quite quickly, but while I had my hand behind there I came across this oddly shaped spring just hanging loose on the kickdown cable next to the heater pipes - any ideas where it should live? 
|
|
|
|
| The Following 4 Users Say Thank You to Chris1Roll For This Useful Post: |
|
May 15th, 2023, 13:34
|
#25 | |
|
Premier Member
Last Online: Today 15:39
Join Date: Jan 2020
Location: Corby del Sol
|
Quote:
One of the things about older motor cars is that the more one looks, the more one will find wrong, at some point one has to let go and not look any more. It is of course sensible to change the injector seals and the tensioner spring - but where will it stop...  ? ?I always find a smug satisfaction in improving older motor cars and motorcycles by just putting them together properly and rectifying decades of bodges. In this case it will be nice for you to achieve an oil leak free motor without all that silicone and stuff. Well done. 
__________________
... another lovely day in paradise.
|
|
|
|
|
| The Following 4 Users Say Thank You to Othen For This Useful Post: |
|
May 21st, 2023, 22:27
|
#26 |
|
Senior Member
Last Online: Today 07:00
Join Date: Aug 2006
Location: Cannington
|
More waiting on parts required, most of which is my own fault!
The tensioner spring, correct flametrap and injector seals arrived from Brookhouse on Friday, imagine my disappointment when I realised that rather than ordering one set of 'fat' and one set of 'thin', I had ordered one singular of each.  Completely my own fault. Simon and I had a laugh about it when he rang to check that I only wanted 3 of each on my latest order. Completely my own fault. Simon and I had a laugh about it when he rang to check that I only wanted 3 of each on my latest order.Never mind, I can get the belts on and everything else done. Except I had previously decided to not bother replacing the rear timing cover as 'it was only cracked in one place". Cambelt back off, thought I would wipe out the oily mess that the rocker cover / filler cap leaks had created and the second I touched the rear cover it disintegrated into about 15 pieces. 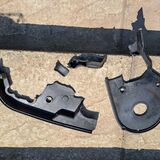 The belt would be exposed, and while its unlikely a stone or something might find its way in, I'd rather not risk it. Partsmonster was cheapest at £17 delivered, we'll see what the quality is like when it arrives, its only a piece of moulded plastic. I ended up removing the power steering pump bracket to get the remnants off, it seemed easier than removing the intermediate pulley. Of course the cam pulley had to come back off again. Since my old belt has no teeth on it I have created my own Top Tip - the crank holding tool does a good job of holding the cam sprocket, braced against the water pump. I fitted the new flametrap, the one that came off didn't actually have a trap in it. The hose and the port into the manifold were clear, but I replaced the small hose as it was quite hardened. I'd forgotten how awkward it was to get to on the injection motors. Gapped the new plugs ready to go in - they were more like 0.9mm out of the box, now set to 0.7mm Then I decided to prepare the injectors for the arrival of the new seals. I had found Laird Scooby's very detailed thread from almost a decade ago: https://www.volvoforums.org.uk/showthread.php?t=183640 Quite a relaxed time sat in the garden: 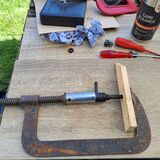 The thin seals were hardened so they were more like plastic than rubber and three of them snapped when I removed them. The fat seals actually seemed fine, but are being replaced anyway - I gave up trying to maneuver them off and carefully cut them instead. I actually cleaned the plastic holders with soap and water in the utility sink. Everything is now nice and clean in plastic bags. Next I spent some time with the carb cleaner, some rags and the vacuum cleaner cleaning the ports in the head, so when the seals arrive everything should go straight back together. Next up was a the cooling system clean out. The coolant in it was red(ish) so most likely the wrong OAT type. Hopefully that hasn't caused too many problems. I found pretty much what I expected under the thermostat housing, given that there was clear silicone splurging out round the edge of it. Some corrosion of and pitting on the head and in the housing: 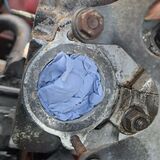 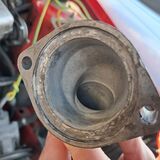 I've seen much worse before now, mind. I do wonder if any of it was caused by the silicone if it was acid curing. The thermostat seal is all hard and splitting but the thermostat itself is fine so I'll just get a seal. I'm currently vacillating between putting it back together with a new seal and a smear of some plumbing sealant (if its ok with hot water and corrosion inhibitor it should be ok with coolant) or cleaning out and filling the pitting with some JB weld applied with a stanley blade or similar. (back in the day we made new seats in the block for the cylinder liner seals on a 1957 B275 tractor with a product called belzona, that tractor is still going today) Inside the block and radiator is nice and clean. The radiator is a volvo one, but I don't think it is the original - it doesn't look 34 years old, at least. Flushed out the heater matrix - removed the top hose and then used a section of bike inner tube cable tied to it to adapt to the hosepipe fitting. I noticed this crazing on the header tank: 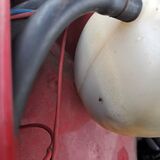 Probably not urgent, but I'll add it to the 'soon' list.. Next up I decided to get the oil changed. When I was removing the old filter I noticed a scotchlock connector on the charge warning wire on the alternator, with the wire that used to be joined to it snipped off. With that, it fell off - a perfect example of why not to use scotchlocks: 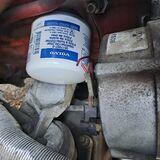 While I was clearing up the ubiquitous oil spill that comes with removing the filter on these cars, I noticed that the starter cable and earth wire that run on the crossmember were chafing together - there was quite a divot in the earth and a smaller one one the +ve. A bit of 10mm fuel hose cable tied over it wil solve that for the next 34 years: 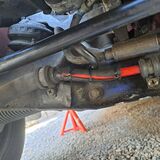 (I had run out of any more substantial cable ties!) Overall quite a productive few hours just taking my time and pottering about over the past couple of days. 
|
|
|
|
| The Following 3 Users Say Thank You to Chris1Roll For This Useful Post: |
|
May 23rd, 2023, 07:28
|
#27 | |
|
Premier Member
Last Online: Today 15:39
Join Date: Jan 2020
Location: Corby del Sol
|
Quote:
 ). ).I've never owned a 740, but it is heartening to note the problem areas are exactly the same as 200s: plastic timing covers, leaky cam cover and filler caps, thermostat housings, crappy wiring in the engine compartment (especially down near the alternator) and the wires under the engine chaffing. None of these cost much to fix, but it is better to do them properly as you are now than bodge them as the PO has. Well done .I think the thermostat housing will be fine with a bit of WRAS grease on the gasket. 
__________________
... another lovely day in paradise.
|
|
|
|
|
| The Following 3 Users Say Thank You to Othen For This Useful Post: |
|
May 28th, 2023, 00:32
|
#28 |
|
Senior Member
Last Online: Today 07:00
Join Date: Aug 2006
Location: Cannington
|
The rest of the injector seals arrived on Tuesday, so I popped them in that evening - a much firmer fit in the head.
Thursday evening I JB-welded the pitting on the thermostat housing and the head. First up, mangle another tool to make myself a miniature filling knife: 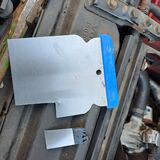 Then clean up the corrosion as far as possible and thoroughly degrease. I also found this area of damage on the housing: 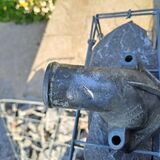 It wasn't covered by the hose, and the tubing appears to be double-skinned at this point so it wasn't going to leak. I can only assume someone jammed a screwdriver in there to remove the hose and damaged it. I cleaned it up and jb-welded that too. Once it had gone off, I sanded it smooth this morning. one of the bits I had filled had slightly sunk, but I had to remind myself it only had to be shallow enough that the -fairly thick -rubber gasket would seal, it didn't need to be billiard table smooth: 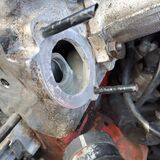 With that done I set about putting everything back together. The rear timing cover, a professional parts sweden item, was Okay - there is a warp in it at the top, which I am hoping will straighten with some heat cycles now it is fixed to the outer covers.It's not rubbing on anything. The new tensioner spring was considerably stronger than the one that came off, so that is reassuring. 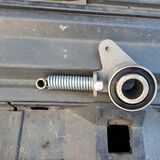 For those of you with a similar level of OCD - aligned V-belts: 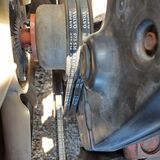 I also had the rad hoses off and cleaned them out and inspected - cleaned up the water pump inlet, which wasn't too bad, then reassembled with some new stainless steel clamps. I had actually ended up using the Hexeal antifreeze to fill up the C70, so I needed some more. I ended up getting it from Smith and Allan for £16 delivered, but it is twice the strength - the hexheal stuff says to use it neat for protection to -37, but the Smith and Allan stuff you dilute 50% for that, so works out better value. Not that I am ever going to see -37 mind you, but having sufficient corrrosion protection is important. With the new plugs fitted, away we went - it took a bit of cranking to fire up (I assume because I had the injectors off etc). I need to borrow a decent tacho to set the idle speed, initially it was somewhere about 550-600 at a guess, when spec is 900. was a bit lumpy! All ran up to temperature fine, and there were no leaks from any of the hoses or the 'stat. The viscous coupling seems to be in good condition, there was a definite difference in the amount of air being moved between cold and when the lower rad hose got warm. Stopped and restarted instantly a few times. It has also moved under it's own power for the first time in a month - only the 2ft forward and back available in the parking space though. *** I did take a flyer on that NOS Bosal rear silencer, I thought I may as well when I put the part number that is stamped on the one currently fitted to the car into Skandix and it told me in big red letters that it wouldn't fit! Evri took 10 days to deliver it, and must have dropped it on the way as one of the pipes was slightly tweaked, but I soo straightened that out. 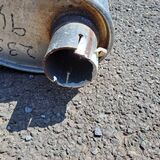 The old one looked surprised: 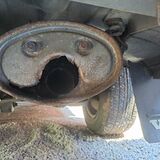 Getting it detatched from the over-axle pipe was predictably awkward. After removing (snapping) the clamp and belting the silencer rearward with the lump hammer a few times I decided that was 1) an exercise in futility, and 2) more likely to detach something further upstream, so I decided to cut the silencer off as close to it as possible, then cut longitudinally on what was left to free it. I should have gone and borrowed the mini grinder at this point, but sometime later with the hacksaw and it was off. I lost about 5mm of the over axle pipe - nothing to worry about. This looked serviceable from underneath, I'll have to fabricate a new top strap: 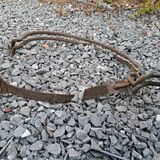 This looks promising: 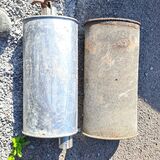 Ah. 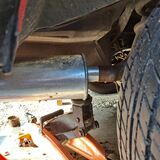 I had already predicted this! the diameters are different. (Or, depending on how you look at it, the same size) Time for a sleeve. The extra hanger bracket stops just short of the towbar bracket. I'll probably cut it off, and there will be no problem with clearance then: 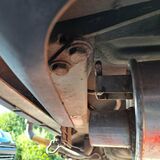 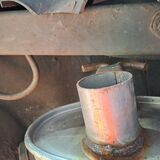 Talking of the towbar, I'm in two minds about whether to remove it. From the history it was fitted from new, but I don't think it was ever used - note in the history about the caravan wiring being disconnected and coiled up. ITs a weird swing out affair that required the rear valance to be mangled. It would be quite nice to replace that with a whole one.  The tailpipe is serviceable but tatty. To be honest, I have never been a fan of the 700's bendy tailpipe, so I may just get something that comes out straight. Overall I'm quite pleased with that as a purchase, a lttle bit of fettling and it'll be on, and will last much longer than anything one can buy new these days. (I put a Klarius box on a V40 we had and while it did kind of fit, the quality wasn't the best.) So depending on when I can get a sleeve to fit the box, we should be good to tax + insure from 1st June. We're away Thursday and Friday, so hopefully maiden voyage next weekend
|
|
|
|
| The Following 5 Users Say Thank You to Chris1Roll For This Useful Post: |
|
May 28th, 2023, 02:58
|
#29 | |
|
🤍💙💗
Last Online: Today 18:14
Join Date: Mar 2006
Location: Lichfield
|
Quote:

__________________
MY97 940 CD LPT Super Sports Edition 2 Turbo, Midnight Purple, 175,000 miles.
|
|
|
|
|
| The Following 8 Users Say Thank You to baggy798 For This Useful Post: |
|
May 29th, 2023, 07:25
|
#30 | |
|
Premier Member
Last Online: Today 15:39
Join Date: Jan 2020
Location: Corby del Sol
|
Quote:
Well done, you will have that motor car running and riding in no time. 
__________________
... another lovely day in paradise.
|
|
|
|
|
| The Following 3 Users Say Thank You to Othen For This Useful Post: |
|
| Currently Active Users Viewing This Thread: 1 (0 members and 1 guests) | |
|
|


")
 Linear Mode

