
|
|||||||
| S40 / V40 '96-'04 General Forum for the Volvo S40 and V40 (Classic) Series from 1995-2004. |
 Information
|
|
Scratch Removal Guide (For the Brave)Views : 14145 Replies : 51Users Viewing This Thread : |
 |
|
|
Thread Tools | Display Modes |
 Jul 16th, 2010, 18:49
|
#1 |
|
Master Member

Last Online: Nov 13th, 2020 06:29
Join Date: Mar 2010
Location: The Land of Ice & Snow
|
Ok, I know I said in the main Volvo forum last week I'd get a little pictorial up how to get scratches out the car.. I've been busy/lazy (delete as deem necessary) so I have only today got out with the camera and done it.
Anyway, you have to be a bit brave as title suggests and just go at it without remorse for the car, but it's worth it in the end  This works for me, like a charm infact, but if you attempt this and don't get the desired results, on your head be it, this is merely a guide. ------------------------------------------------------------- What you need: 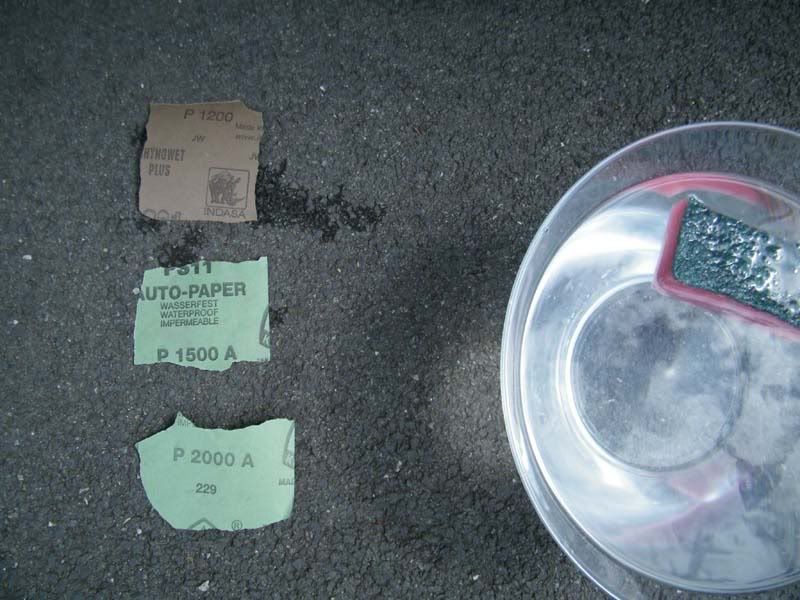 I use 1200, 1500 and 2000 grade sandpaper (WET) and a bottle of T-Cut. I then use a bottle of turtle wax but this is optional. Step 1 - Locate the scratch:  In my case, a good old fashioned keyed scratch from when SWMBO used to be a teacher the kids were at the cars every lunch time with their keys. (Ignore the premature sanding marks before I realised I was doing a pictorial) ------------------------------------------------------------ Step 2 - Apply your wet 1200 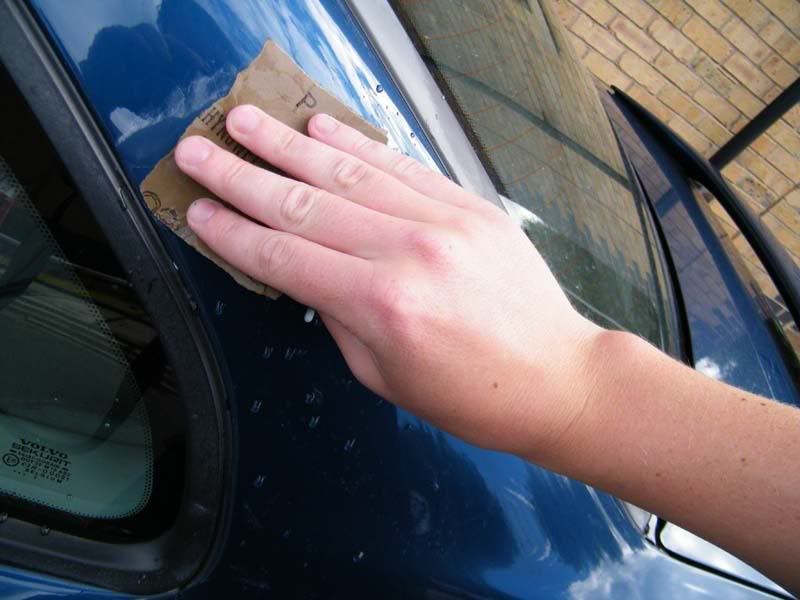 Soak your sandpaper in bowl of luke warm water for 5 mins. I use a large clear glass fruit bowl so I can go a long time without fetching new water (it gets cloudy caused by grime, road film and clear coat coming off the car). Each time you sand, dip your paper in the water - try and keep the area your sanding really clean with plenty of fresh water so you can see exactly whats happening. If you use a small bowl of water, it'll go cloudy after a couple of dips with your sandpaper and you won't be able to see where your sanding - bad times. Once you are reasonably happy the scratch has all but disappeared with 1200, move onto your next grade of sandpaper: 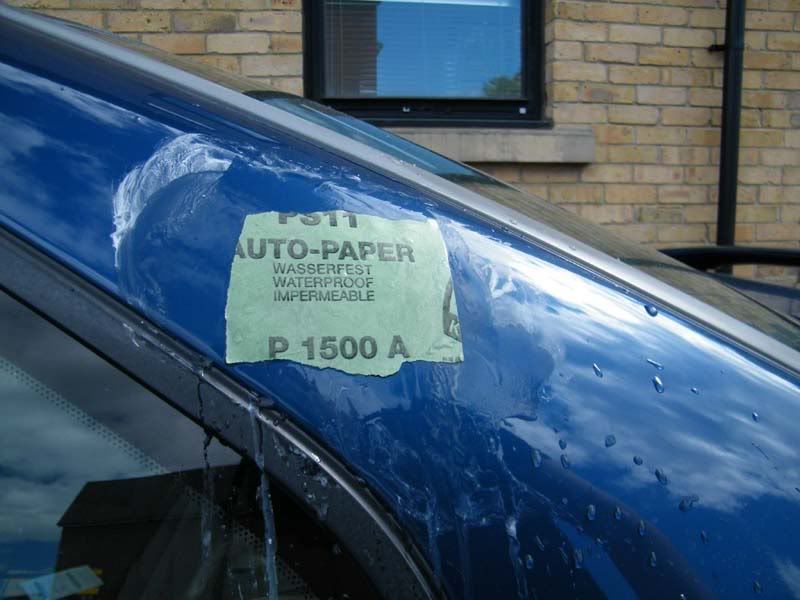 After you have sanded with 1200, 1500 and 2000 (give it an extra going over with 2000 when it comes to t-cutting it will make your life much easier! (There isn't much cut in 2000 grade so don't be afraid of spending a good 5 mins sanding with 2000) you will be left with something similar to this: 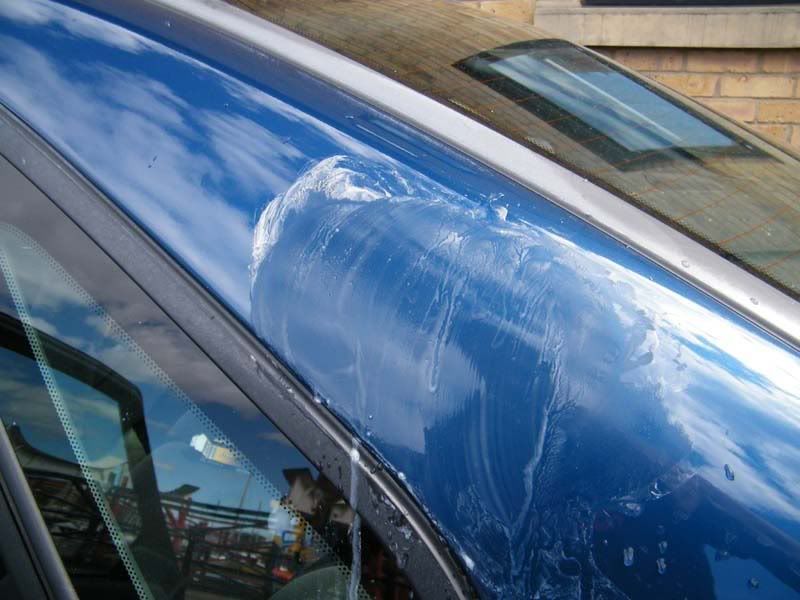 Now dry the area and, look at what you've done to your beautiful paint work and proceed to next step. This is what it looks like dry just after sanding: 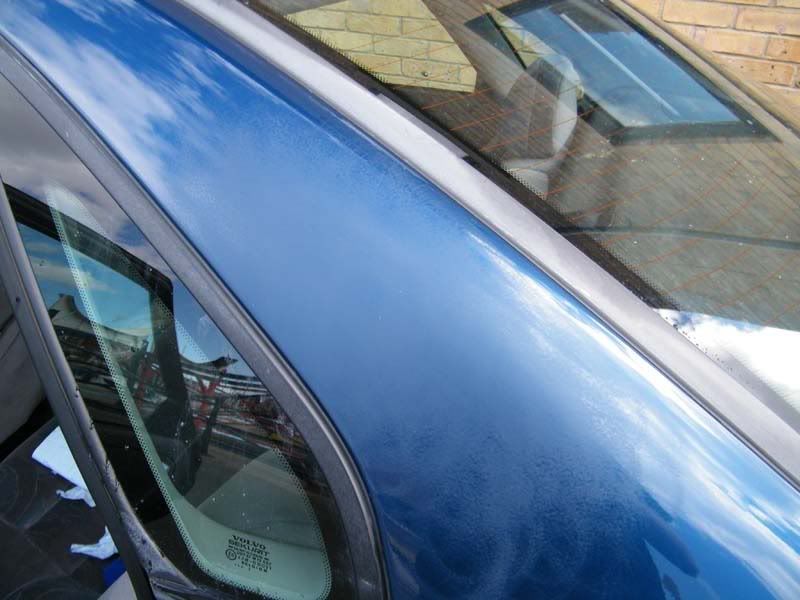 ---------------------------------------------- Step 3 - Apply T Cut. It all depends how long you sanded for with 2000 grade as to how many times you will have to T-cut. The more you sand with 2000 the less T-cutting you have to do. I only t-cut this scratch once. This is what it looks like waiting for t-cut to dry: 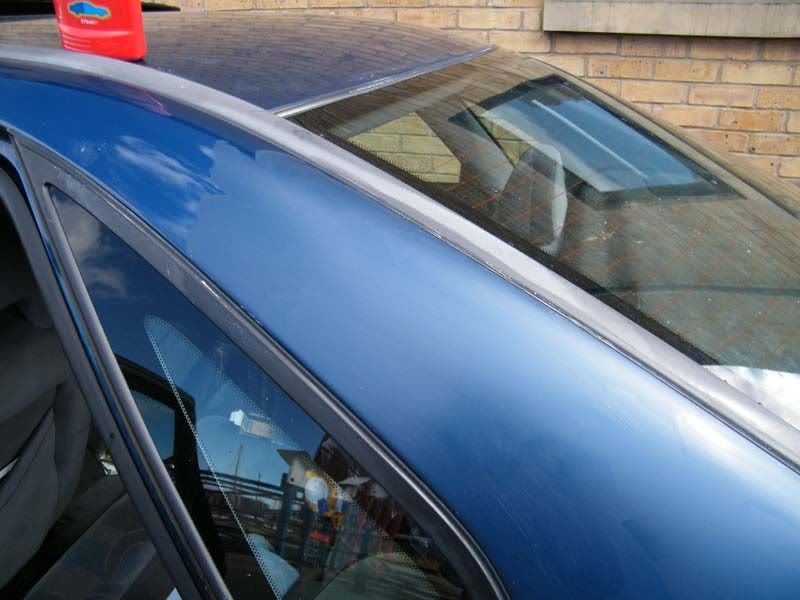 Now wipe off your Tcut and admire your handywork: 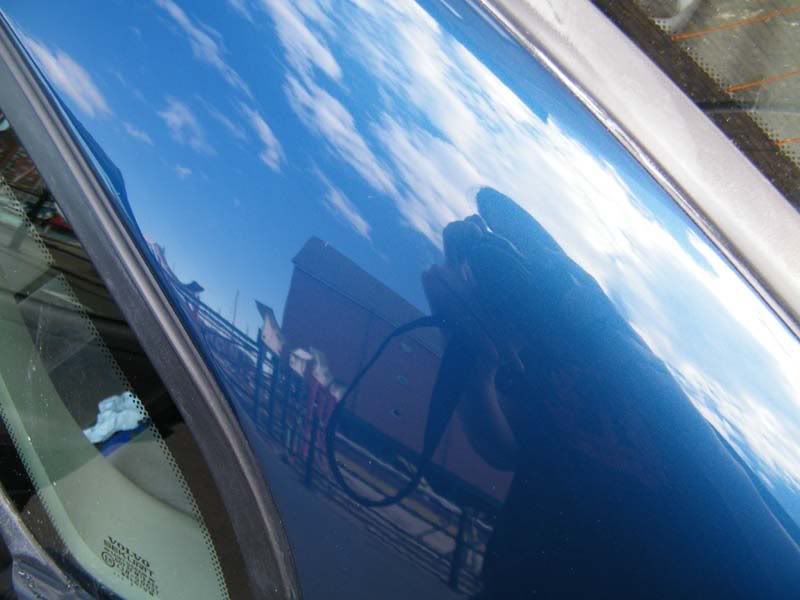 Et voila! You now have a scratch free motor, or in my case, one less scratch. In my case I always give the area a quick wax. Here it is after I waxed it: 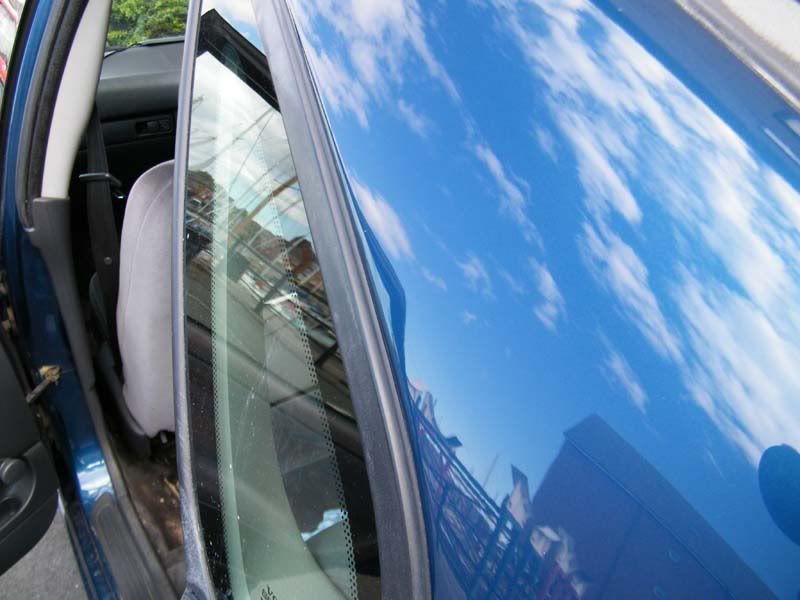 From the momnent I started sanding to the last wipe of wax was 15 mins. Not bad eh I also done my tailgate. This was hard work, took about an hour, but I did sand,t cut (3 times!), polished and waxed the entire tailgate .Before shots (yet more keyed damaged): 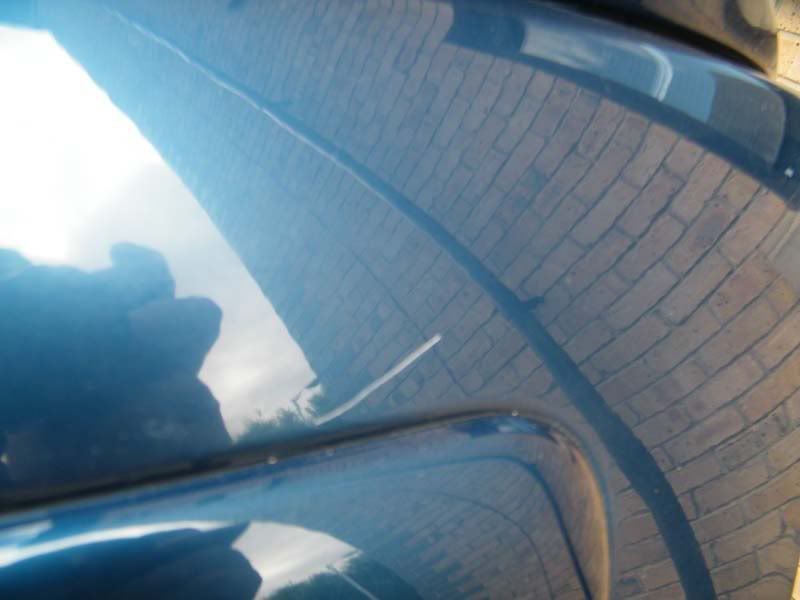 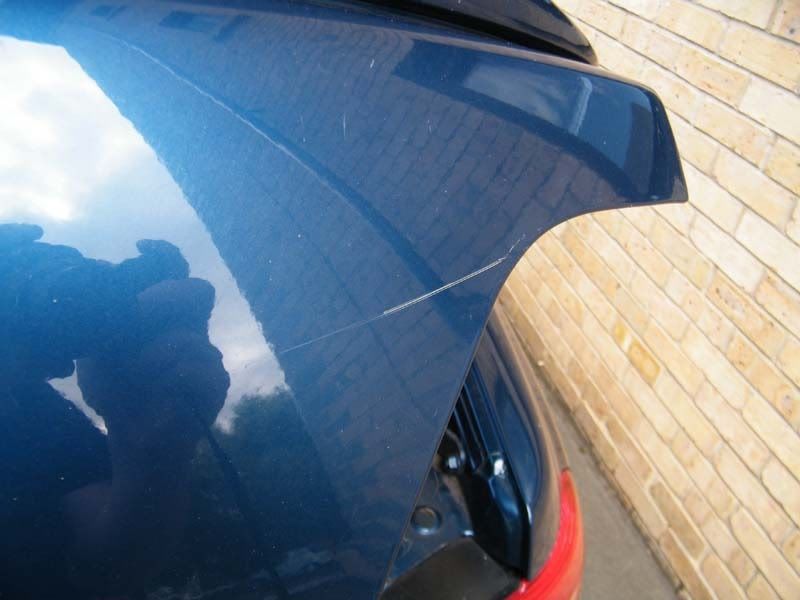 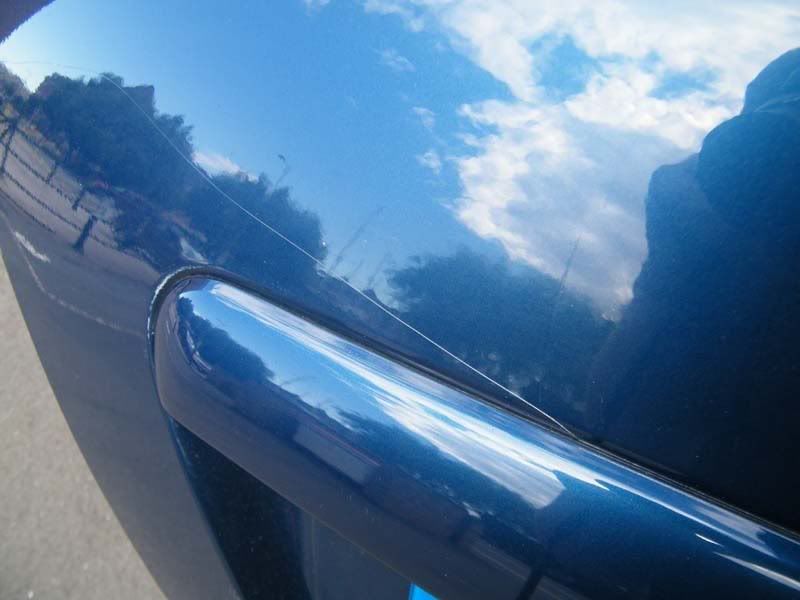 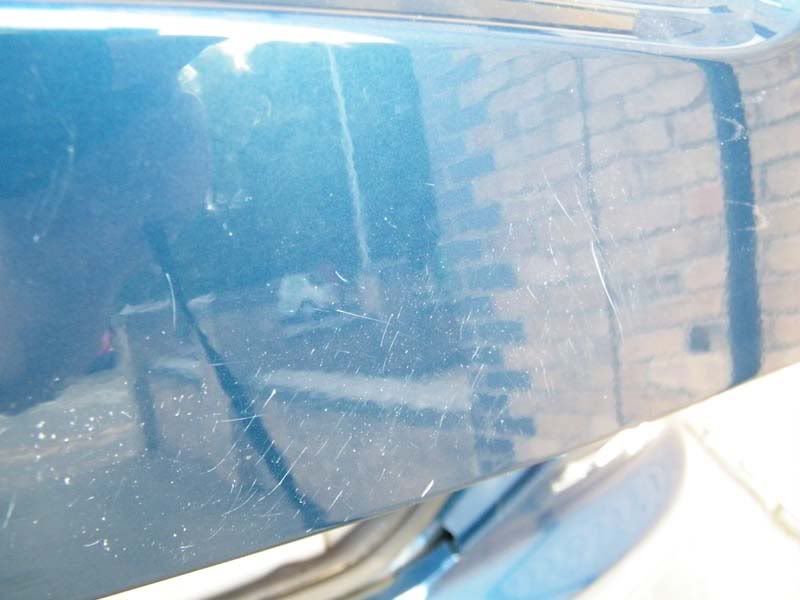 Sanded: 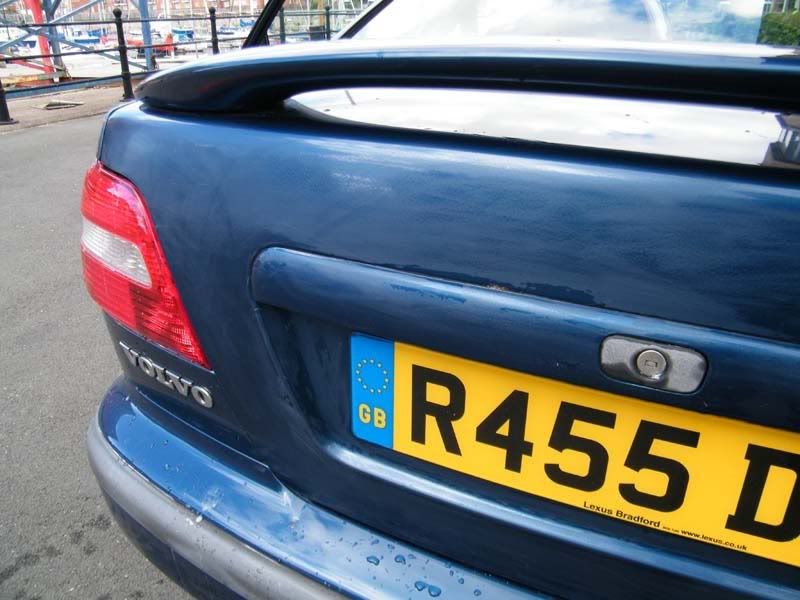 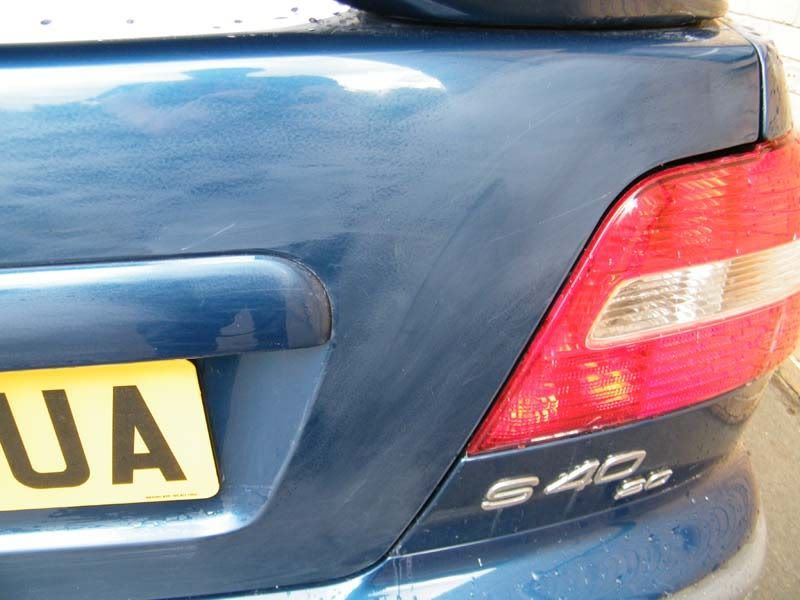 Finished Article: 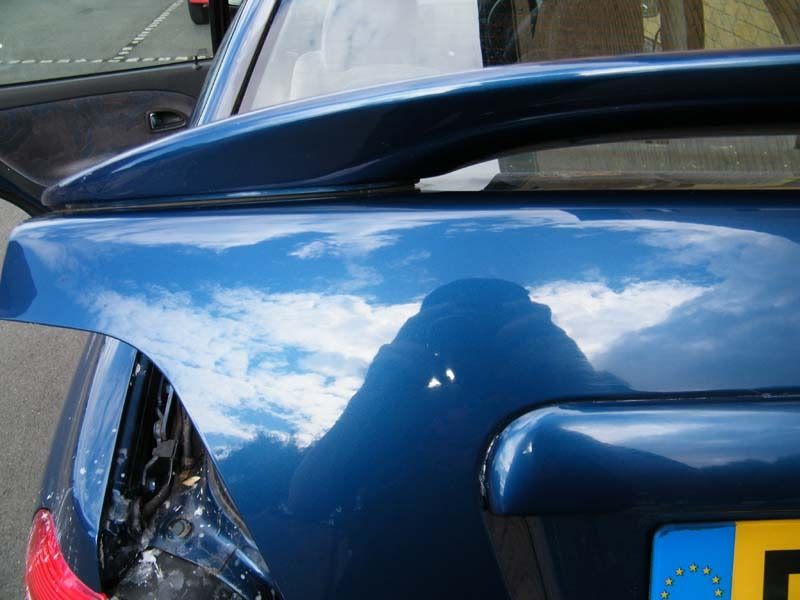 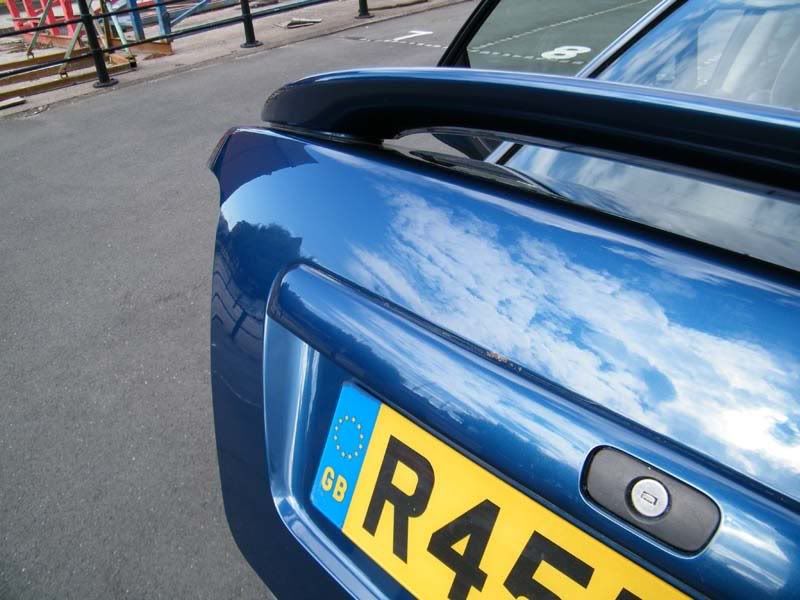   - My advice, just take it steady, if when your done the scratch is still there, just repeat process. But if you go at it too eager and burn through the paint, then there is no help for you. But don't be afraid  give it a go you'll be surprised what you can polish out! give it a go you'll be surprised what you can polish out!
__________________
|

|

|
| The Following 27 Users Say Thank You to Volvon For This Useful Post: |
|
Jul 16th, 2010, 19:46
|
#2 |
|
Junior Member

Last Online: Aug 12th, 2014 09:49
Join Date: May 2010
Location: Manchester
|
Good write up and not for the faint harted.
 Done this many times to cars over the years ,be careful and you will be ok and add a bit of fairy to the water helps a bit. You can allways go stright with the 2000 W/D ,rub, T-cut/g12 ect. and repete, till you get a good finish and wax after. |
|
|
|
|
Jul 16th, 2010, 20:02
|
#3 |
|
Premier Member
Last Online: Oct 26th, 2023 20:42
Join Date: Jun 2010
Location: Thurrock
|
It looks VERY impressive.
Is this really sandpaper, as in glasspaper, or wet and dry abrasive, that we used to nick name emery cloth or paper? |
|
|
|
|
Jul 16th, 2010, 20:24
|
#4 |
|
VOC Member

Last Online: May 16th, 2013 20:28
Join Date: Jul 2008
Location: West Sussex
|
A good write up.
A general rule of thumb is that if your finger nail 'catches' the scratch, it is through the lacquer and paintwork. In this situation the scratch will need to be filled, flattened and the surrounding area primed, painted and lacquered. I do this (SMART Repairs) for a living (www.smart-pro.co.uk) and it is surprising what can be repaired without having to resort to a body shop for a panel respray. Do use a quality wet and dry paper when tackling such repairs (Indasa Rhino as per the photos) is a good make.
__________________
1999 V40 T4 Last edited by Terminator; Jul 16th, 2010 at 20:30. |
|
|
|
|
Jul 17th, 2010, 00:25
|
#5 |
|
Premier Member

Last Online: Aug 24th, 2012 12:10
Join Date: Jun 2010
Location: Plymouth
|
You know i'm going to be doing this very soon! lol
Any tips for blending new paintwork in to old? i want to avoid respraying whole panels if possible,... You've seen the state of bits i have to repair lol
__________________
 [gone]98 V40 - T4 CD[/gone] [mine]Renault Laguna II Tractor[/mine] [theMrs]97 V70 2.5 turbo AWD[/theMrs] |
|
|
|
|
Jul 17th, 2010, 07:40
|
#6 | |
|
VOC Member
Last Online: May 16th, 2013 20:28
Join Date: Jul 2008
Location: West Sussex
|
Quote:
In my experience it is very difficult to get a good match using off the shelf spray cans; I use compressed air fed spray guns which can be adjusted to get perfect atomisation and flow. Silvers and Metallic Blacks are the worst colours for matching by the way!
__________________
1999 V40 T4 |
|
|
|
|
| The Following User Says Thank You to Terminator For This Useful Post: |
|
Jul 17th, 2010, 09:38
|
#7 |
|
Premier Member
Last Online: Aug 24th, 2012 12:10
Join Date: Jun 2010
Location: Plymouth
|
hickley valtone are my paint supplier of choice, i've used them before and they colour matched a 1990 BMW 3 series (gun metal grey) perfectly
.Hoping they can do the same with the volvo. Unfortunately all i'm gonna be armed with is Spray cans and lots and lots of G3 , T-Cut :\
__________________
[gone]98 V40 - T4 CD[/gone] [mine]Renault Laguna II Tractor[/mine] [theMrs]97 V70 2.5 turbo AWD[/theMrs] |
|
|
|
|
Jul 17th, 2010, 13:01
|
#8 | |||
|
Master Member
Last Online: Nov 13th, 2020 06:29
Join Date: Mar 2010
Location: The Land of Ice & Snow
|
I'm no expert on spot repairs, Terminator the man for that. Check this video out: its even the same colour as our cars
You will probably need to increase your flash times and coats with spray cans though.
__________________
|
|||
|
|
|
|||
| The Following User Says Thank You to Volvon For This Useful Post: |
|
Jul 17th, 2010, 14:51
|
#9 |
|
Senior Member
Last Online: Mar 24th, 2015 13:53
Join Date: Nov 2008
Location: Farnborough
|
Thanks for the guide, got a few little scratches and chips, will give it a go on a small area on the roof before progressing to more visible areas
Btw, did you use coloured T-Cut, or just plain ? Also, my understand is that T-Cut is a mild abrasive, surely once you have repaired an area and re-waxed, it will need regular re-waxing since the t-cutting and sanding would of removed the protective finishing paint layer ?
__________________
Current: 07/57 C30 T5 SE Geartronic with toys Past: 01/X S40 T4 SE@162k, 94/M 460 1.8Si |
|
|
|
|
Jul 17th, 2010, 17:18
|
#10 | |
|
VOC Member
Last Online: May 16th, 2013 20:28
Join Date: Jul 2008
Location: West Sussex
|
Quote:
__________________
1999 V40 T4 |
|
|
|
|
|
| Currently Active Users Viewing This Thread: 1 (0 members and 1 guests) | |
|
|


 Linear Mode

