
|
|||||||
| XC90 '02'15 General Forum for the P2-platform XC90 model |
 Information
|
|
How to change parking sensor at homeViews : 20027 Replies : 13Users Viewing This Thread : |
 |
|
|
Thread Tools | Display Modes |
 Sep 8th, 2014, 21:23
|
#1 |
|
Volvo Ocean Race

Last Online: Apr 14th, 2019 11:45
Join Date: Aug 2014
Location: Slovenia / Serbia town Novi Sad
|
At first sorry for grammar mistakes. Feel free to correct it.
How to solve parking sensor not working and how to determine which sensor is to replace and not all but without going to Volvo service and paying VIDA check just to know which sensor is generating fault. At first I will place some photos and instruction how to remove rear bumper, arrive to sensors, removing some other parts and for this you will need nothing special but few tube keys 13 or 17 if Im not wrong... Tubular one - tape to fix bolts when you placing back as if bolts fail down forget that you will took it out from small holes... Ok lets start. p.s. all photos is mine from my work on my car and freely available for Volvo owners to use it without R. 
__________________
XC90 2.5T AWD 2006 VOR edition with 197.000 km Update: 09.Febr.2019 from Sept. 2014 I made up to 305.000 km 
|

|

|
|
Sep 8th, 2014, 21:25
|
#2 |
|
Volvo Ocean Race
Last Online: Apr 14th, 2019 11:45
Join Date: Aug 2014
Location: Slovenia / Serbia town Novi Sad
|
At first order new sensor check if is correct one as exist 2 models as I know
on market. Forget cheap Chinese copys as this crap will not work or will made soon problems at already sensible Volvo electronics. 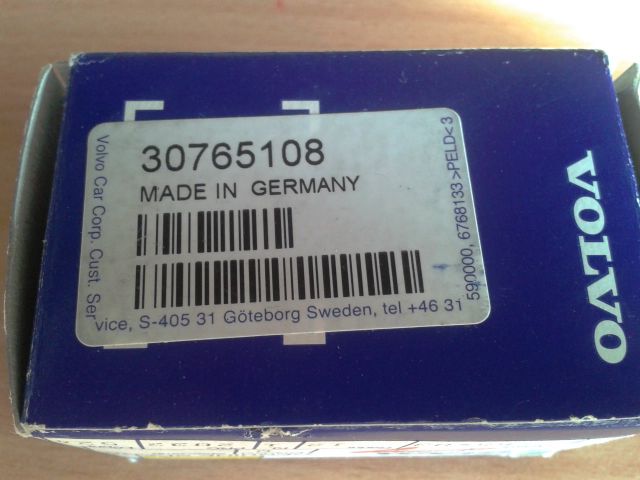 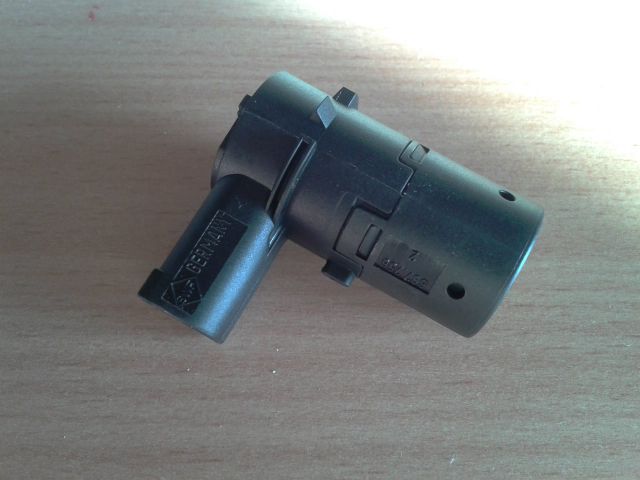
__________________
XC90 2.5T AWD 2006 VOR edition with 197.000 km Update: 09.Febr.2019 from Sept. 2014 I made up to 305.000 km
|
|
|
|
| The Following User Says Thank You to Volvo Ocean Race For This Useful Post: |
|
Sep 8th, 2014, 21:27
|
#3 |
|
Volvo Ocean Race
Last Online: Apr 14th, 2019 11:45
Join Date: Aug 2014
Location: Slovenia / Serbia town Novi Sad
|
Now instructions for Talibans from the begining.
Open the trunk of course. Pull this level UP to open first cover.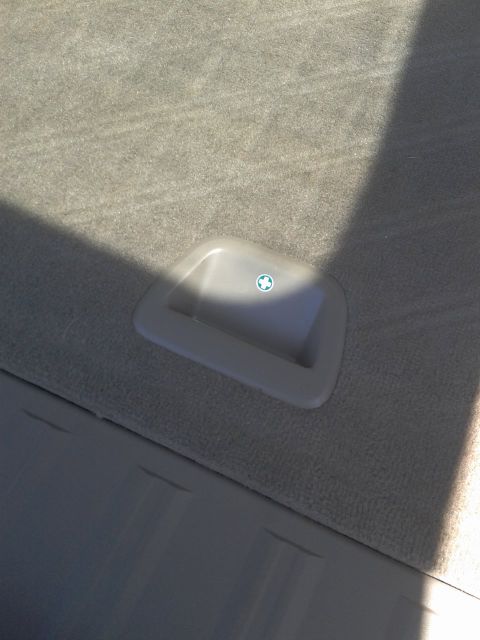 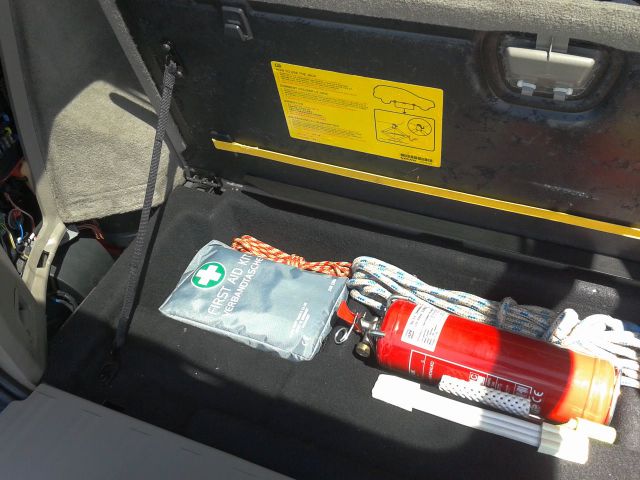 Remove the belts hooks on both sides. If you have 7 seats maybe this cover is a little bit different. 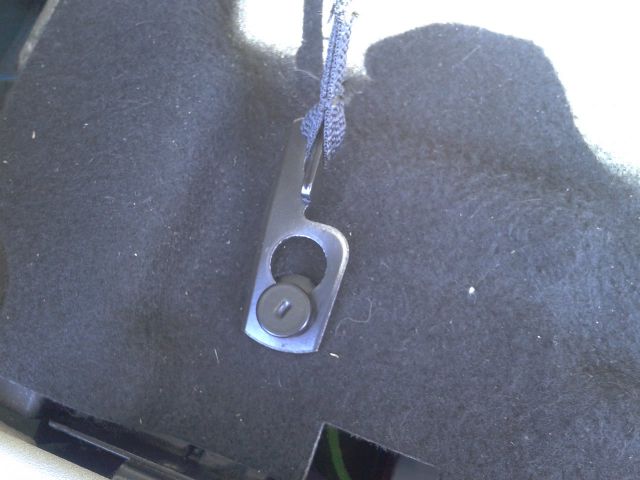 
__________________
XC90 2.5T AWD 2006 VOR edition with 197.000 km Update: 09.Febr.2019 from Sept. 2014 I made up to 305.000 km
Last edited by Volvo Ocean Race; Sep 8th, 2014 at 21:30. |
|
|
|
| The Following User Says Thank You to Volvo Ocean Race For This Useful Post: |
|
Sep 8th, 2014, 21:35
|
#4 |
|
Volvo Ocean Race
Last Online: Apr 14th, 2019 11:45
Join Date: Aug 2014
Location: Slovenia / Serbia town Novi Sad
|
Remove triangle cover.
 Than you can spot small black level pull it up and remove cover on the left or right side - UK / EU left/right. 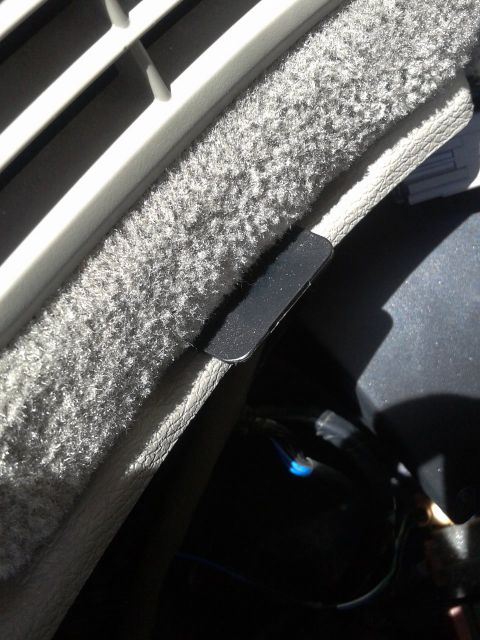 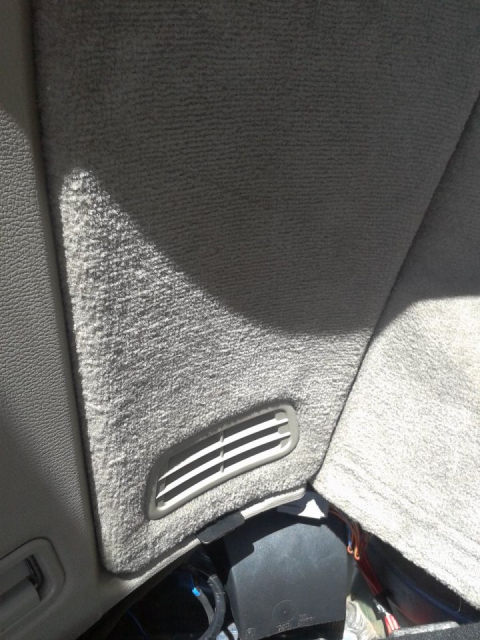 Now you can spot REM and one gray box. This box DONT TOUCH DONT REMOVE this is alarm level sensor and must be on this position and on this place. Some cars dont have level sensor with alarm. Under the left side you can spot BLACK box this is the PARKING SENSOR MODULE. 
__________________
XC90 2.5T AWD 2006 VOR edition with 197.000 km Update: 09.Febr.2019 from Sept. 2014 I made up to 305.000 km
|
|
|
|
| The Following User Says Thank You to Volvo Ocean Race For This Useful Post: |
|
Sep 8th, 2014, 21:38
|
#5 |
|
Volvo Ocean Race
Last Online: Apr 14th, 2019 11:45
Join Date: Aug 2014
Location: Slovenia / Serbia town Novi Sad
|
This is PARKING MODULE !!!
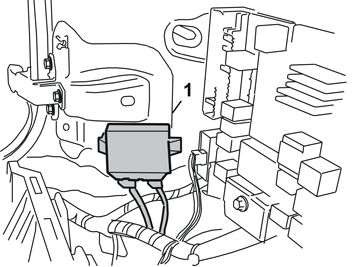 Its attached on body (or better to write WAS attached with Velcro tape) and from nice sunshine Velcro tape is dryied and of course module is hanging around... 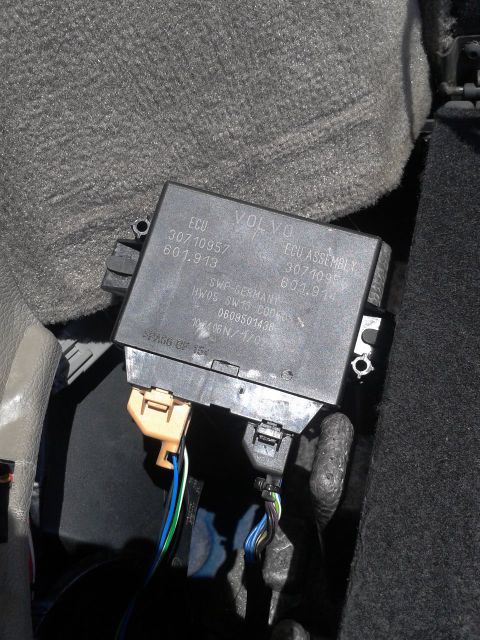 Left connector orange one is for power and signals and right one is wires going to parking sensors. If you have also front sensors middle connector will be placed (of course in middle LOL) Spot small levels on connectors, remove it slightly pulling down. To open the module DO NOT PUSH DEEP screwdrivers just in middle tooth push it a little and cover will go away... Check it if you will spot water marks and humidity condensate like on mine, clean it with alcohol from farmacy or good contact spray. NOT WD40 NOT.!!! 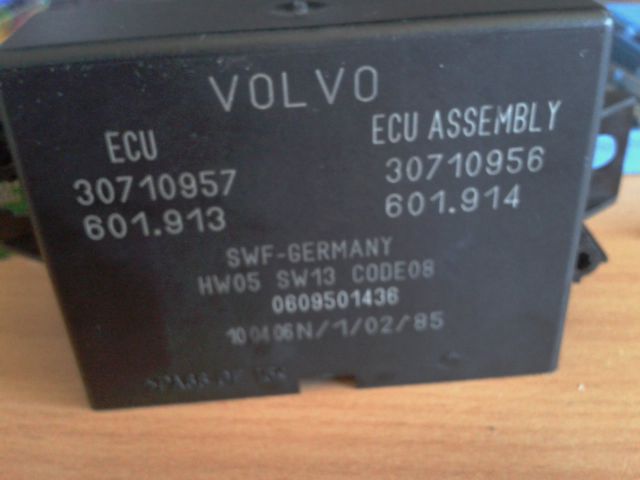 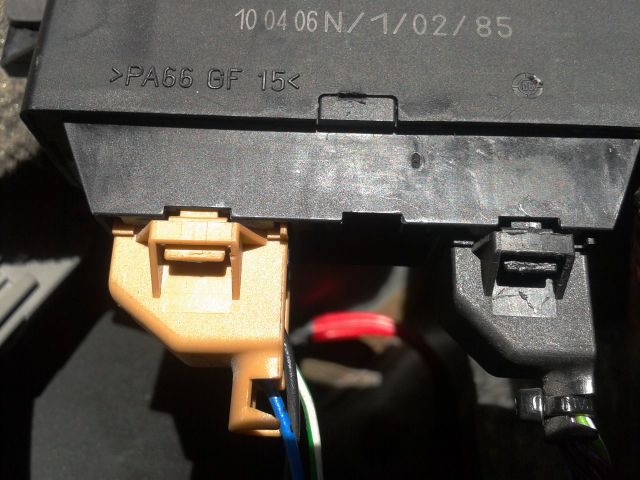
__________________
XC90 2.5T AWD 2006 VOR edition with 197.000 km Update: 09.Febr.2019 from Sept. 2014 I made up to 305.000 km
Last edited by Volvo Ocean Race; Sep 8th, 2014 at 22:06. |
|
|
|
|
Sep 8th, 2014, 21:47
|
#6 |
|
Volvo Ocean Race
Last Online: Apr 14th, 2019 11:45
Join Date: Aug 2014
Location: Slovenia / Serbia town Novi Sad
|
Now dinner time...I will continue with complete photo and procedure
without need of any special tools or computers from Volvo. This procedure I tested worked and will even reset warning that parking sensors are off. Trust me its work. There is no need to reset or modify anything or touching some electronics if you folow my procedure this was tested 2 times. Once on my car another time on friends XC90. Both 2006 models. But mine is Petrol Turbo his is dirty Diesel hahaha.
__________________
XC90 2.5T AWD 2006 VOR edition with 197.000 km Update: 09.Febr.2019 from Sept. 2014 I made up to 305.000 km
|
|
|
|
|
Sep 8th, 2014, 22:02
|
#7 |
|
Volvo Ocean Race
Last Online: Apr 14th, 2019 11:45
Join Date: Aug 2014
Location: Slovenia / Serbia town Novi Sad
|
This is module electronics.
You can spot some white signs of condens water on it... I clean it with 75% of alcohol from Farmacy. 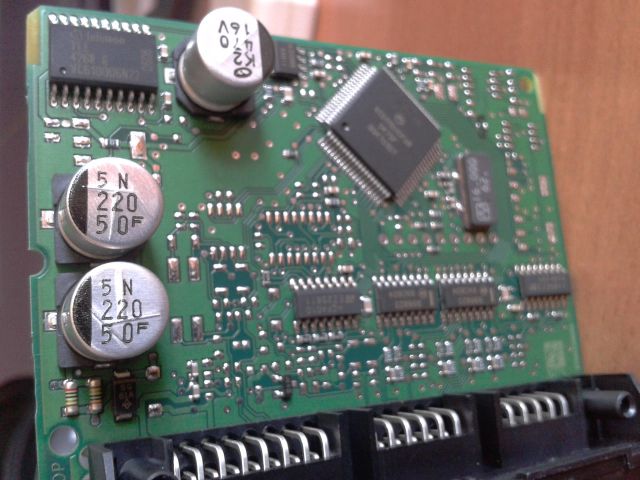 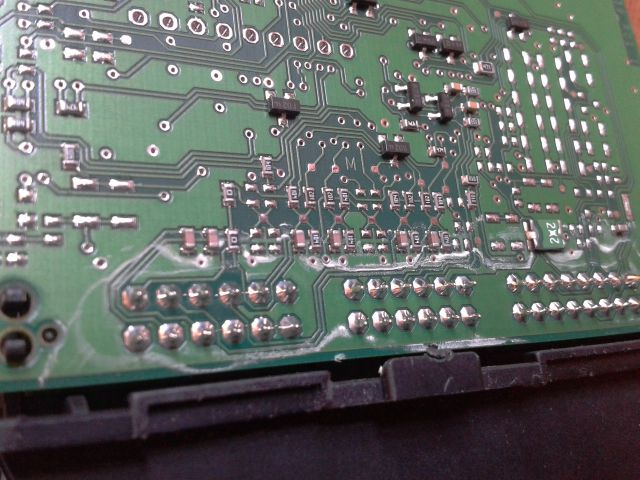 Or use good contact cleaner. 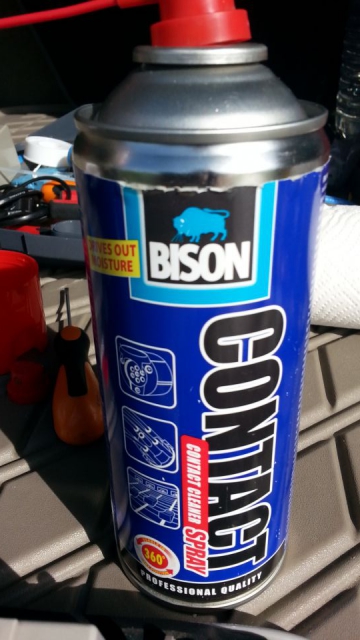
__________________
XC90 2.5T AWD 2006 VOR edition with 197.000 km Update: 09.Febr.2019 from Sept. 2014 I made up to 305.000 km
|
|
|
|
| The Following User Says Thank You to Volvo Ocean Race For This Useful Post: |
|
Sep 8th, 2014, 22:11
|
#8 |
|
Volvo Ocean Race
Last Online: Apr 14th, 2019 11:45
Join Date: Aug 2014
Location: Slovenia / Serbia town Novi Sad
|
Now you will need 1-2 hours to remove rear bumper in proper way.
Take a time, dont be nervous, keep calm as you will need it... At first be sure that you have new sensor as you will need it at least 1 (no matter how many is broken or nomt working). This procedure is to find which one is faulty and replace it. In my case was just 1. If there is more you will need at first to mark with water resistant marker all sensors one by one with numbers from the begining of the cable harness to first one 1. 2. 3. 4 (the last one is at the end of cable harness) Ok? This is important to mark all as in procedure later you will need to remove one by one (with NEW one) to determine which one is faulty. 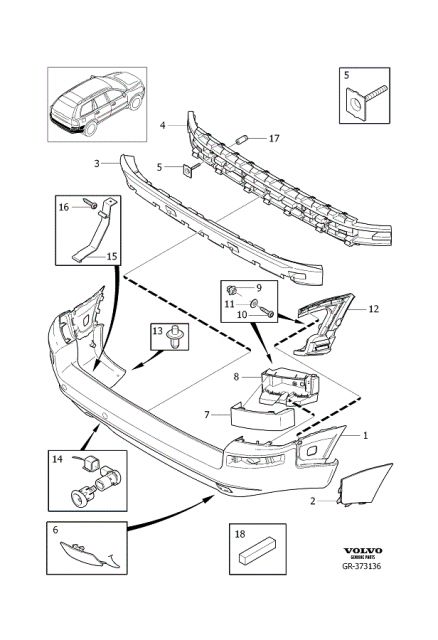 At first on photo this looks WOW compllicated. No its not.
__________________
XC90 2.5T AWD 2006 VOR edition with 197.000 km Update: 09.Febr.2019 from Sept. 2014 I made up to 305.000 km
|
|
|
|
|
Sep 8th, 2014, 22:15
|
#9 |
|
Volvo Ocean Race
Last Online: Apr 14th, 2019 11:45
Join Date: Aug 2014
Location: Slovenia / Serbia town Novi Sad
|
On photo bolts numbered 17 (5 from inside) there is 4 of them. They have some kiind of tube on it to reach it deep inside the bumper support.
You will need long tube key 13 or 17 I dont remember. This bolts is hidden under back side left 2 right 2 in middle is battery. You will not need to remove battery at all. !!! I was and was mistake. Bolts holes are covered with sponge. Slightly remove it to find a bolts. Take care - there is also another bolts no need to remove just 4 of them. When you rewind the bolts - pull slightly out or you will lost it in deep cavern of rear metal part of body. I will try to find my photos of this soon... FIRST you need to drill 2 rivets on both sides at the end of the lower part of bumper with number 13. Pull slightly towards you colored cover 7, remove 8, screw 10, pull colored triangle cover Nr. 2 away this you will need patience. Do this on both sides L and R. Check tooths how they are inserted in bumper to not broke it. Use soft cloth to take it in hand. NOOOOO SCREWDRIVERS NO METAL LEVELS or you will scratch it for sure. This is 4 taking a bumper nothing else. 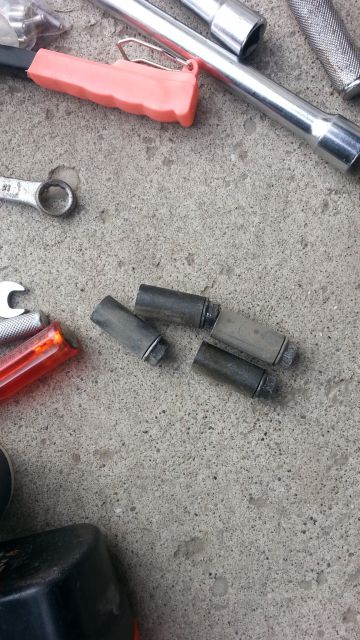 DONT FORGET when you will return this bolts take a tape around the key to not loose it - after being screwed tightly just push out key. Forget small tape on it. This will help for sure.
__________________
XC90 2.5T AWD 2006 VOR edition with 197.000 km Update: 09.Febr.2019 from Sept. 2014 I made up to 305.000 km
Last edited by Volvo Ocean Race; Sep 8th, 2014 at 23:06. |
|
|
|
|
Sep 8th, 2014, 22:25
|
#10 |
|
Volvo Ocean Race
Last Online: Apr 14th, 2019 11:45
Join Date: Aug 2014
Location: Slovenia / Serbia town Novi Sad
|
Now remove Parking module cables, the cable with lot of small
wires going through one sponge to bumper. Remove sponge from body and push connector in hole before you pull bumper away from body. Remove only metal cover of battery and plastic protector as we will need many times to remove + positive from battery to reset module...after I will explain. 
__________________
XC90 2.5T AWD 2006 VOR edition with 197.000 km Update: 09.Febr.2019 from Sept. 2014 I made up to 305.000 km
Last edited by Volvo Ocean Race; Sep 8th, 2014 at 22:29. |
|
|
|
| The Following User Says Thank You to Volvo Ocean Race For This Useful Post: |
|
| Currently Active Users Viewing This Thread: 1 (0 members and 1 guests) | |
|
|


 Linear Mode

