
|
|||||||
| S80 '06-'16 / V70 & XC70 '07-'16 General Forum for the P3-platform S80 and 70-series models |
 Information
|
|
Guide: Power Steering Pressure & Return Hose ReplacementViews : 6394 Replies : 0Users Viewing This Thread : |
 |
|
|
Thread Tools | Display Modes |
 Apr 7th, 2017, 12:33
|
#1 |
|
Premier Member
Last Online: Jan 3rd, 2024 14:43
Join Date: Feb 2012
Location: Toronto Canada
|
...for Engine B6324S2, V70 3.2l
Over the last few seasons Ive had to top up the power steering fluid on occasion and have wondered where it was all going. Well, the leak (or rather one of the leaks) got bad enough that I had to replenish the fluid over a period of four weeks. It just so happened that I was changing over to my summer tires and when I looked in the front passenger side wheel arch I noticed a thick layer of gunk on the control arm, most of the steering boot and a greenish oil all over the small hoses covered in metal flex pipe. A further inspection revealed that the return line was leaking badly where it loops above the wheel arch and becomes a solid line. The entire flex portion is covered with heat resistance shielding so Its difficult to tell exactly where the leak originates from but Im fairly certain that it comes from the joint between the rubber and the metal pipe. Based on the amount of gunk in and around the control arm, Im going to guess that this leak was there for quite some time. Coincidentally or not, about 18 months ago I replaced my torque mount as it was showing signs of fatigue. Im wondering whether the extra engine movement reduced the lifespan of the flex hose on the return line. Return hose leaks: 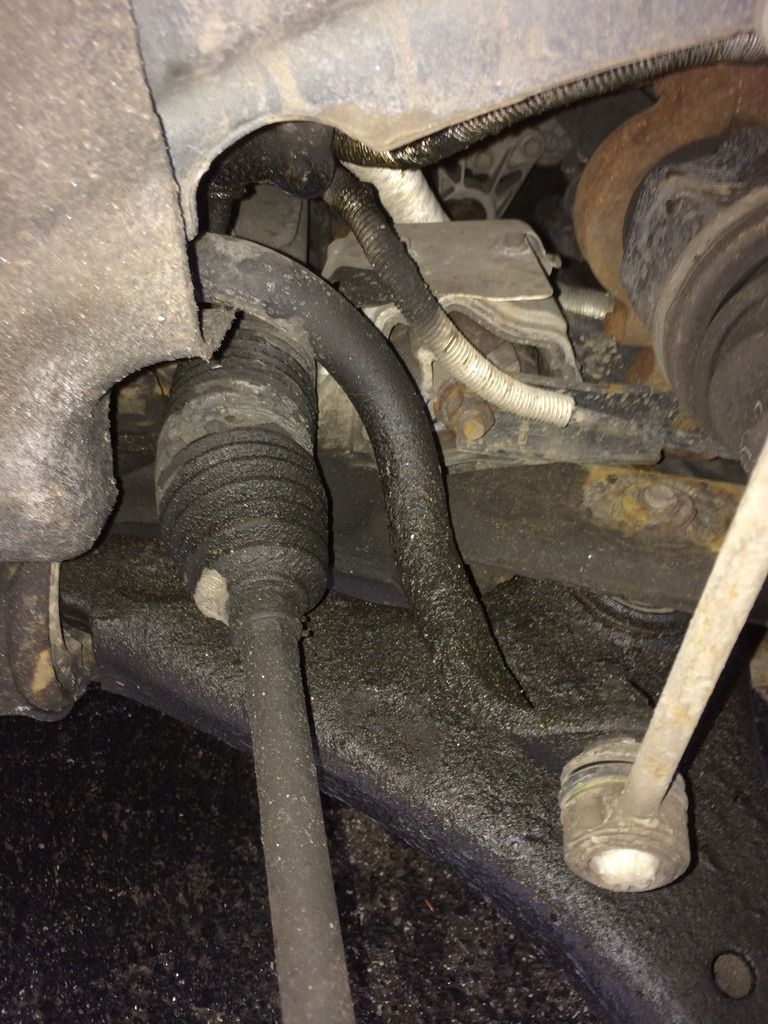 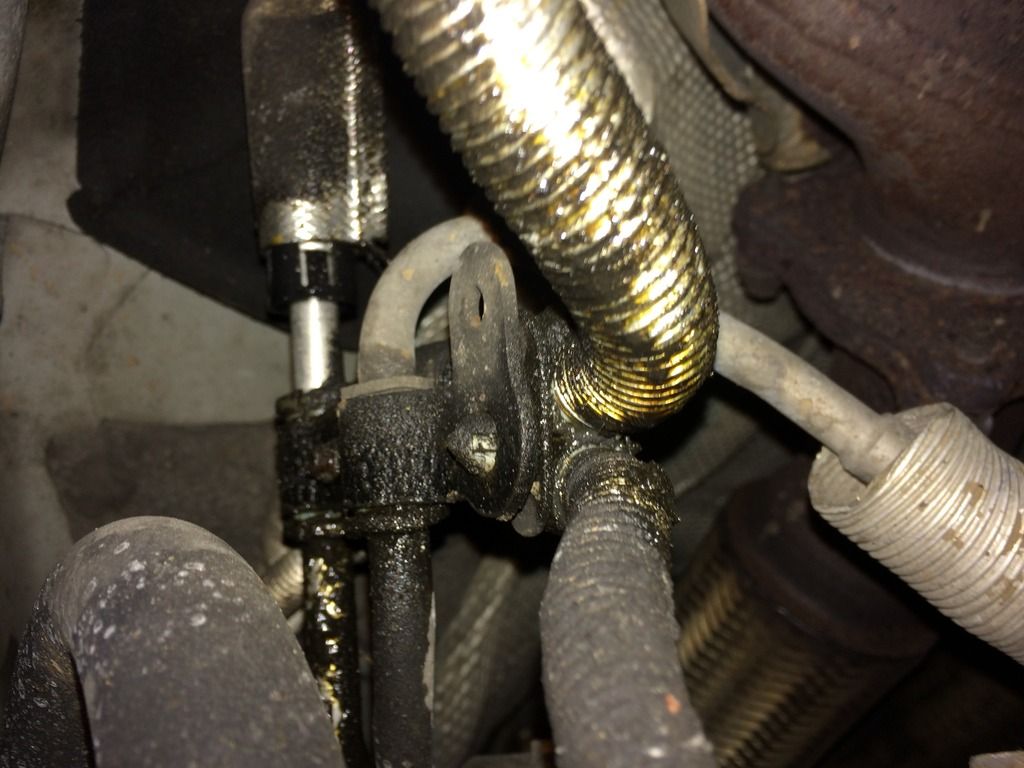 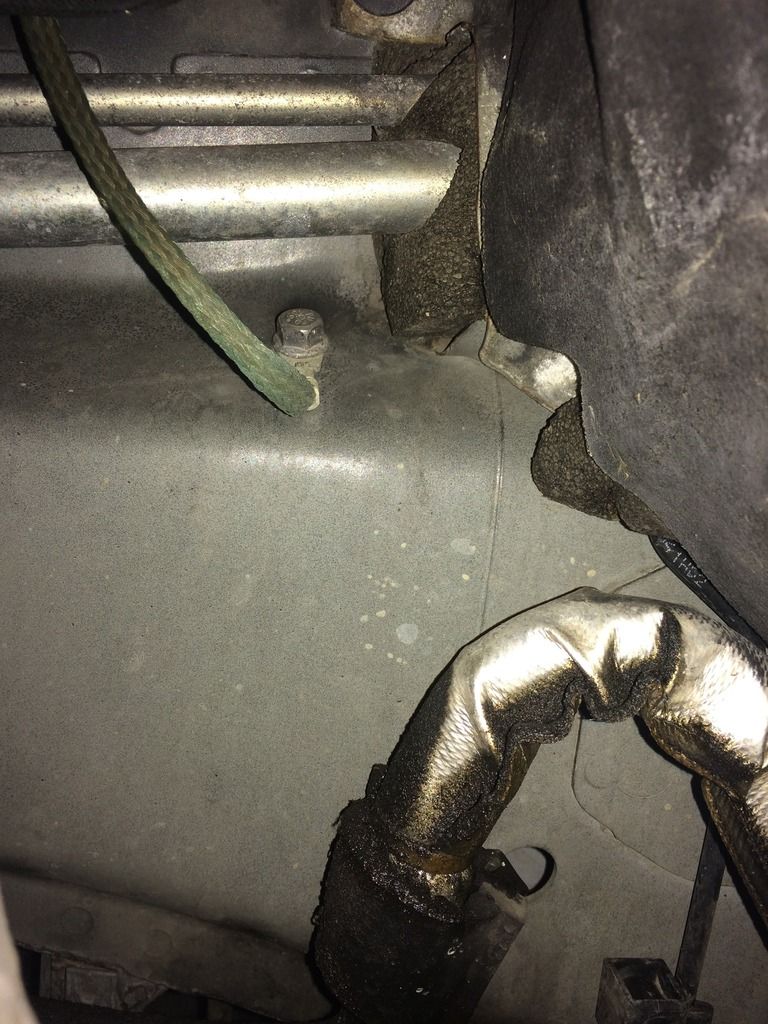 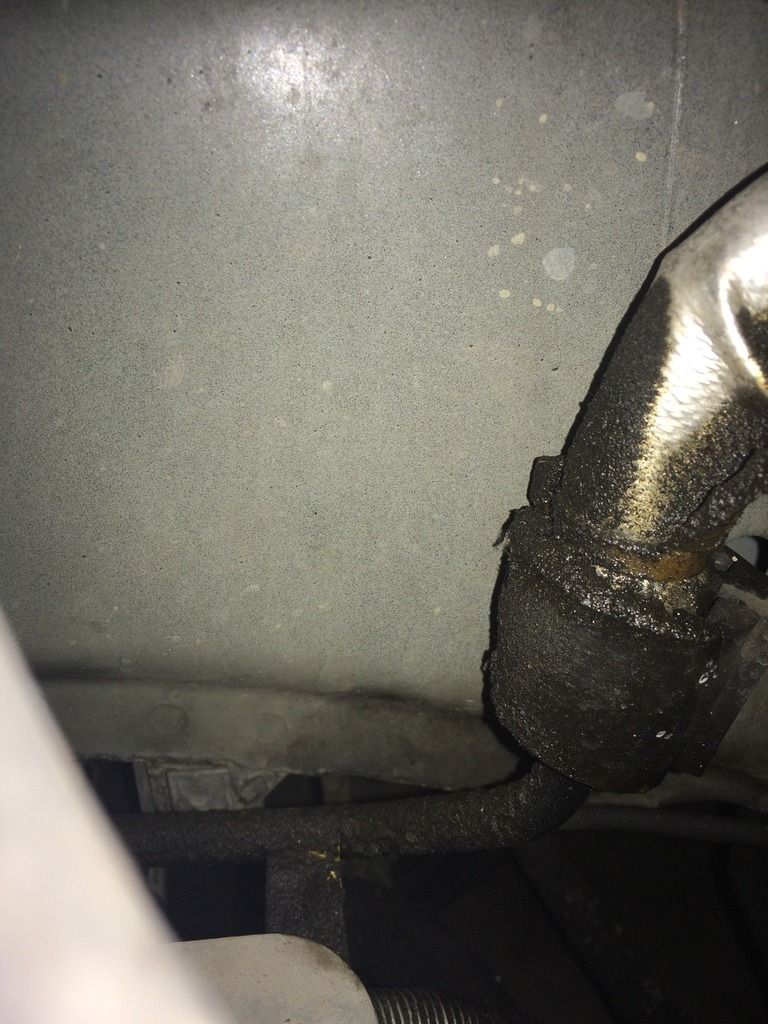 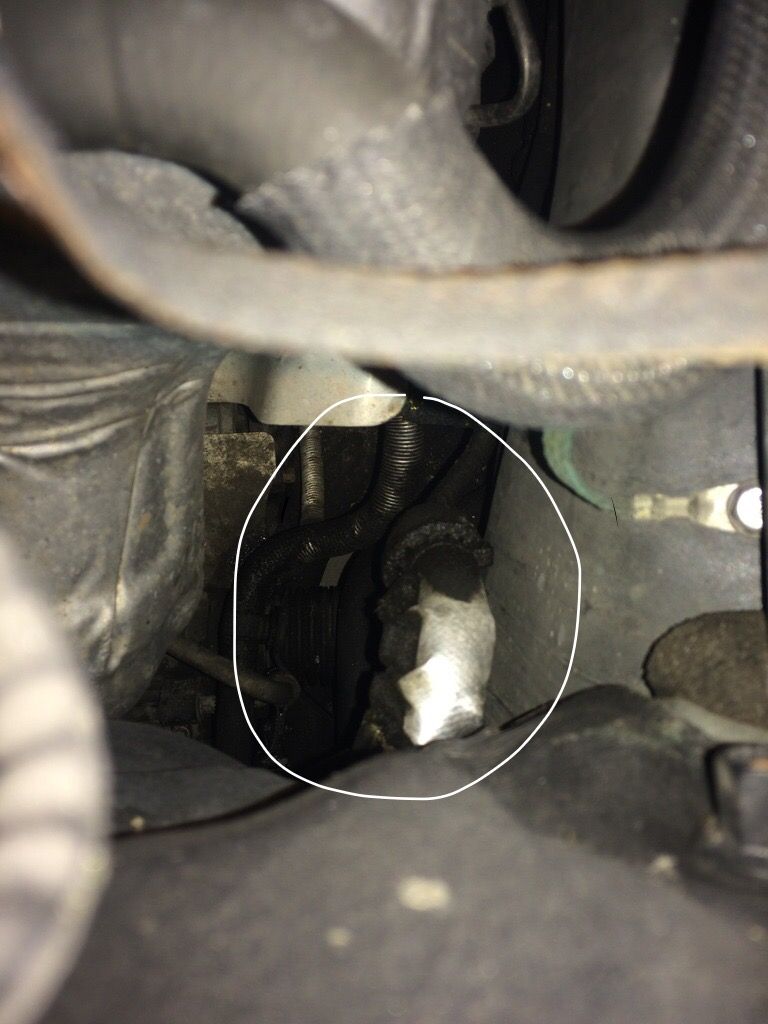  I then took a good look at my pressure line. It was fairly rusty on the underside of the engine (again at the joint between the flex pipe and solid line), on both sides. But no leak was evident. Based on my dealership telling me that they often see the pressure pipe leaking over time I inspected the end closest to the power steering pump and noticed weeping at the joint between the flex hose and the solid line (again!). It was a minor leak but considering the pressure that this line takes I figured I might as well do both lines while the p/s system was drained. 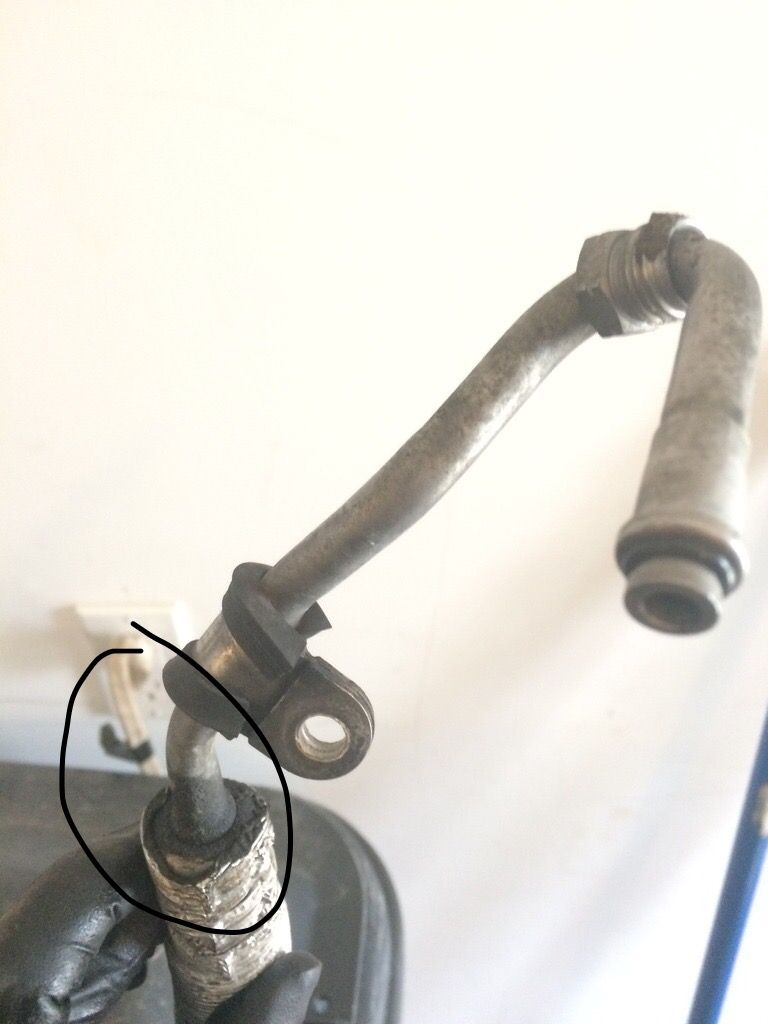 Job Commentary This is not an especially long job nor is it especially difficult but it does require at least an hours worth of lying under the vehicle messing about. If you are doing the return hose only, the job is very straight forward and you could get it done in under an hour If you are doing the pressure line, its more like a 2-3 hour job assuming all goes well. As far as tools are concerned, you will need: o Eye protection o Jack, jack stands o Lots of paper towels and brake cleaner o Something to rest your head on as you stare at the underside of your Volvo o A large sheet of plastic to cover the ground you are working on o 3/8 ratchet, 3/8 sockets 8mm, 10mm, 13mm and 14mm o 18mm spanner o A small swivel ratchet (1/4) + ¼ sockets o A pipe cutter (if you are unable to disconnect the pressure hose) o 19mm socket and breaker bar to remove wheel o Lots of plastic gloves o A few flashlights o Rust inhibitor to spray on stuff along the way as you come across corrosion o Quick connect removal tool like volvo 999-7242 which is light blue and 3/8 o Power steering fluid (Pentosin CHF11 or 202 1 litre) o New return hose (#31202355) o New pressure hose (#31329911) Step 1: Jack up front end of car nice and high if you are replacing the pressure hose you will appreciate the extra space! Step 2: Empty the p/s reservoir of fluid Use a turkey baster to suck all the fluid out into a container for disposal you will be putting fresh fluid in later. The attached video demonstrates how to do this as a first step in flushing the fluid Video link courtesy of volvosweden: https://www.youtube.com/watch?v=Op6vqOlutTE&t=285s Step 3: Use plastic bags and or towels and sheets to cover the ground in and around the p/s hoses and keep a container on standby for catching fluid. Be sure to cover the entire work area. Any leaking fluid tends to find very circuitous ways down the control arm and the subframe. Step 4: Remove the wheel arch inner cover and the undercarriage cover The wheel arch cover is taken off by removing the three plastic nuts on the back face of the cover as well as the multiple torx screws around the arch. Once these have been removed, start from the front corner and push inwards to dislodge the cover from the inside edge of the arch. Be forceful! Note how the liner is tucked in just in and up from the arch. Step 5: (Optional) Cut return hose at a convenient spot to cleanly drain p/s fluid into a funnel and container I found it very awkward to reach the end of the return hose in behind the bumper and foresaw some issues in being able to direct the fluid to a container in a clean manner so I sliced through the rubber part of the pipe as it takes a 90deg bend near the RHS fog light. This allowed me to wedge a funnel and container in just below this area so as to catch all drained fluid. Step 6: Release both ends of the return hose Use the 3/8 plastic tool (light blue in colour) to release both quick connect ends. These need to be fully inserted to be effective. I had to use my Channelock pliers to help the one along located in behind the bumper. Once the tool is fully inserted the pipe comes right off. Note that the tool IS NOT fully inserted in the first pic. The second pic demonstrates how it should be inserted to disconnect the pipe. 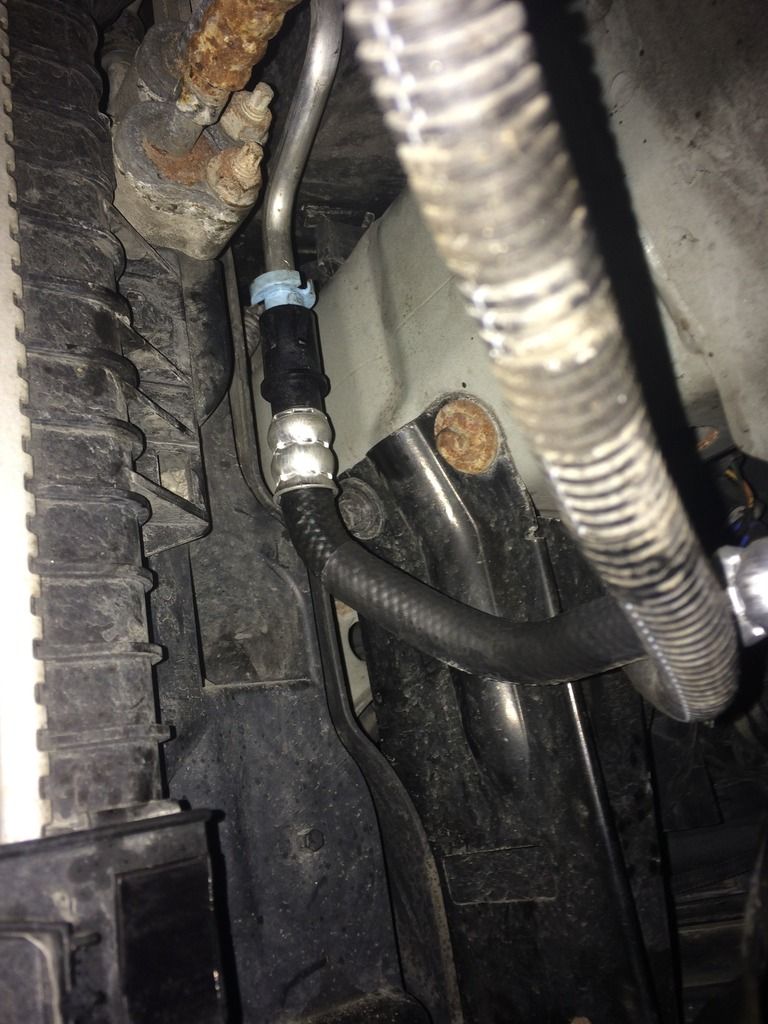 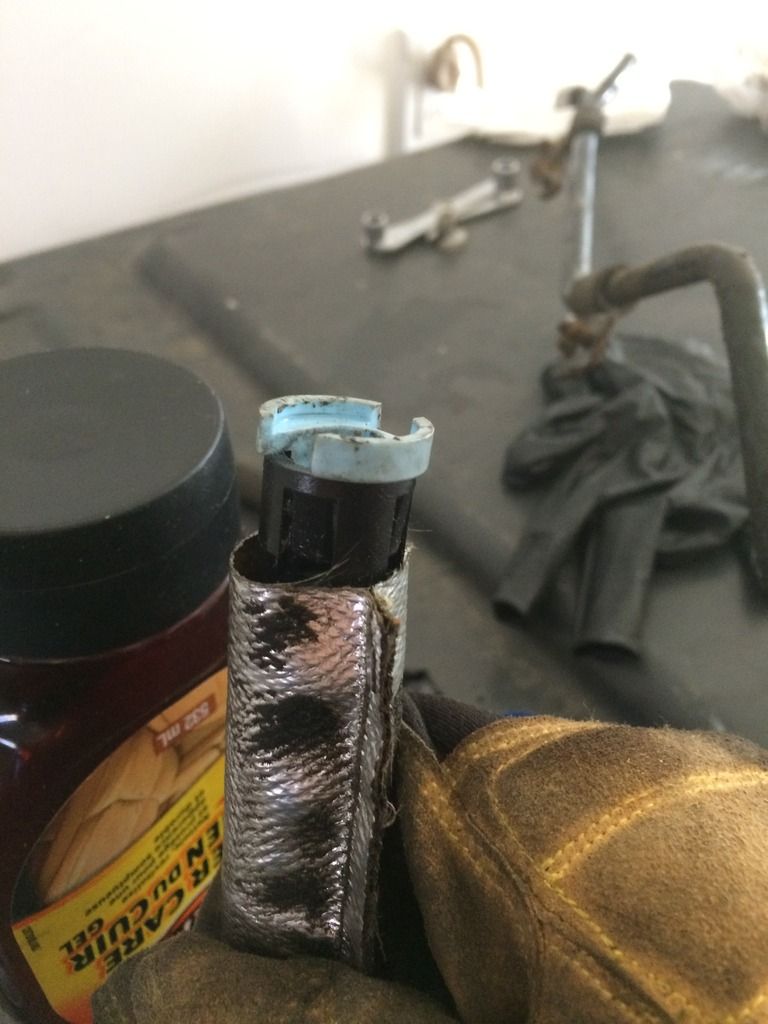 IMPORTANT NOTE: ANY MOVEMENT IN THE STEERING WHEEL BEYOND THIS POINT WILL RESULT IN FLUID GUSHING OUT OF THE RETURN HOSE FITTING ON THE RACK! ASK ME HOW I KNOW Step 7: Remove the rack pipe clamp and the plastic clamp that holds two metal-clad hoses There is a clamp that holds the two steering rack hoses in place near where they connect to the pressure and return hoses. You may be able to do the job without removing this but it sure makes things easier if you simply take it as well as the plastic retaining clamp right out. It can be taken apart using an 8mm socket inserted from the inside of the clamp. Simply pop the two hoses out of the plastic clamp before removing the clamp assembly altogether. The clamp (as well as the two hoses can be seen in the volvo diagram below). 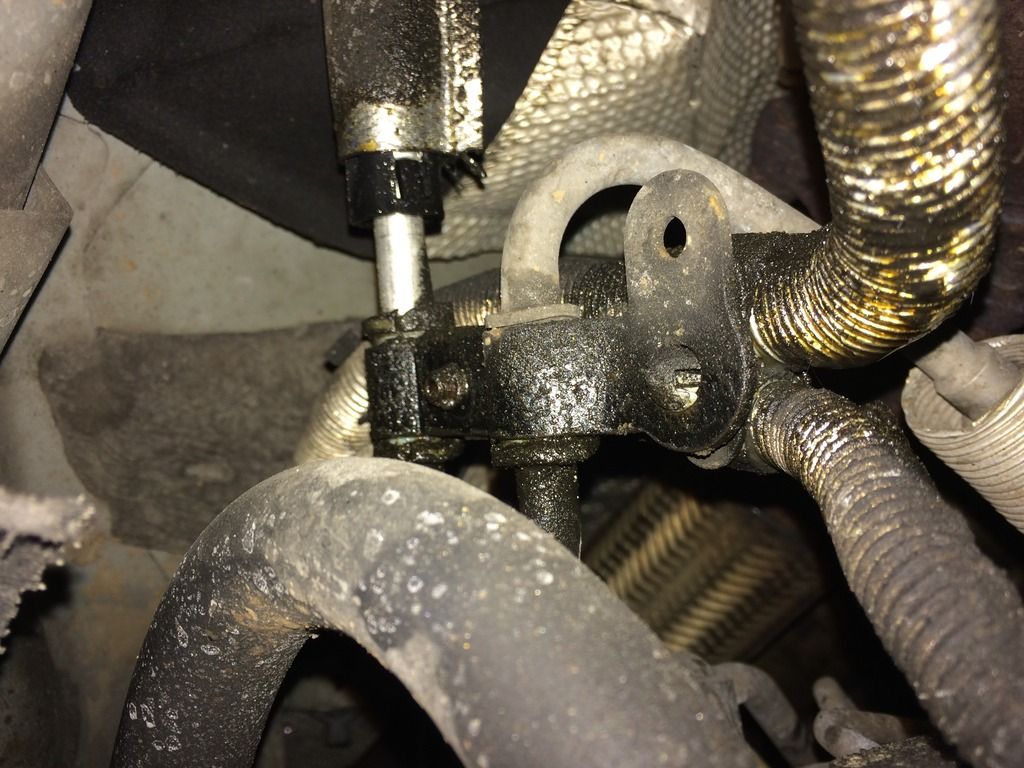 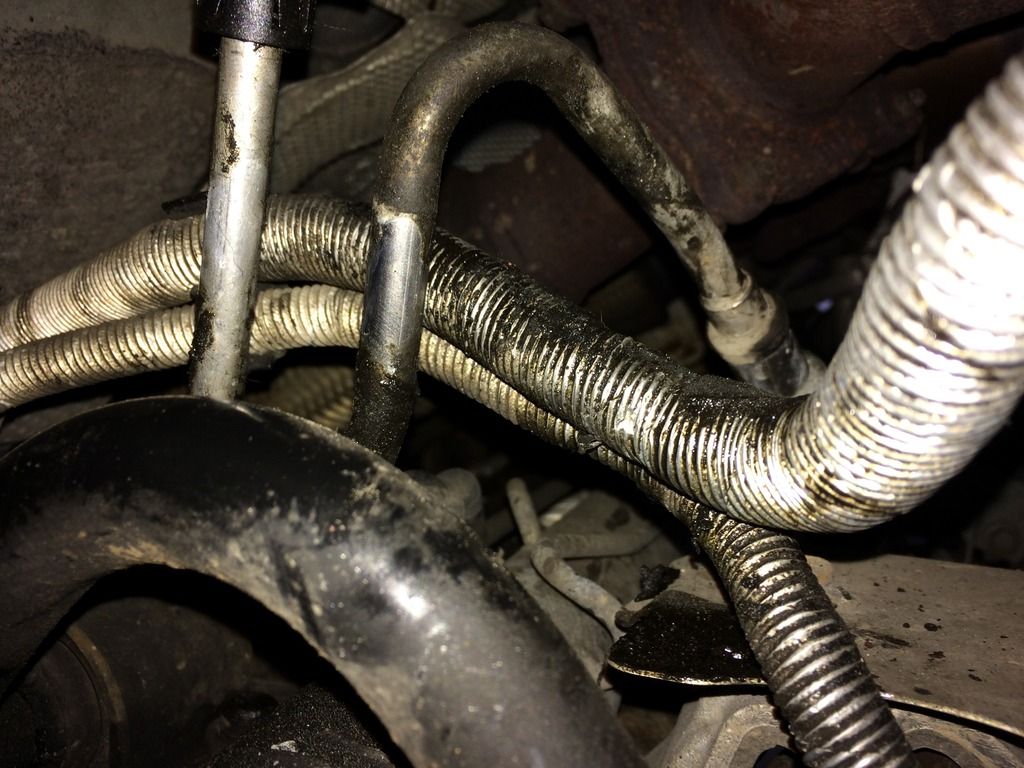 Step 8: Remove 2x 10mm nuts holding return hose to engine block and fully remove return hose Do not replace the return hose yet you will need all the access you can get when working on the pressure hose!  Step 9: Remove air filter and battery in prep for removal of pressure hose See guide in attached link pages 4-8 for instructions on how to remove both: http://forums.swedespeed.com/showthr...ight=ac+clutch Step 10: Remove pressure hose Loosen 18mm bolt at power steering pump and pull hose out being careful to catch draining fluid  Loosen the 8mm bolt located on the back of the p/s pump. You will need a small ratchet to get in this tight space. You can see the gloved hand pointing at this bolt in pic above. Head down below and take a picture of the location where the pressure hose gets inserted vertically up towards the pump. This will save you from staring at the undercarriage trying to remember where to fish the new one up. Reach up high from underneath until you find the bracket with the 8mm bolt. You will need to do this part almost blindly. The bolt faces the drivers side (LHS). Remove bolt and note that it is longer than the others. The pic below shows the location of this bolt not the 8mm wrench fastened to it. Note also that you wont have a nice view like this this photo was taken by lifting my phone up into the opening near the rear LHS of the engine. 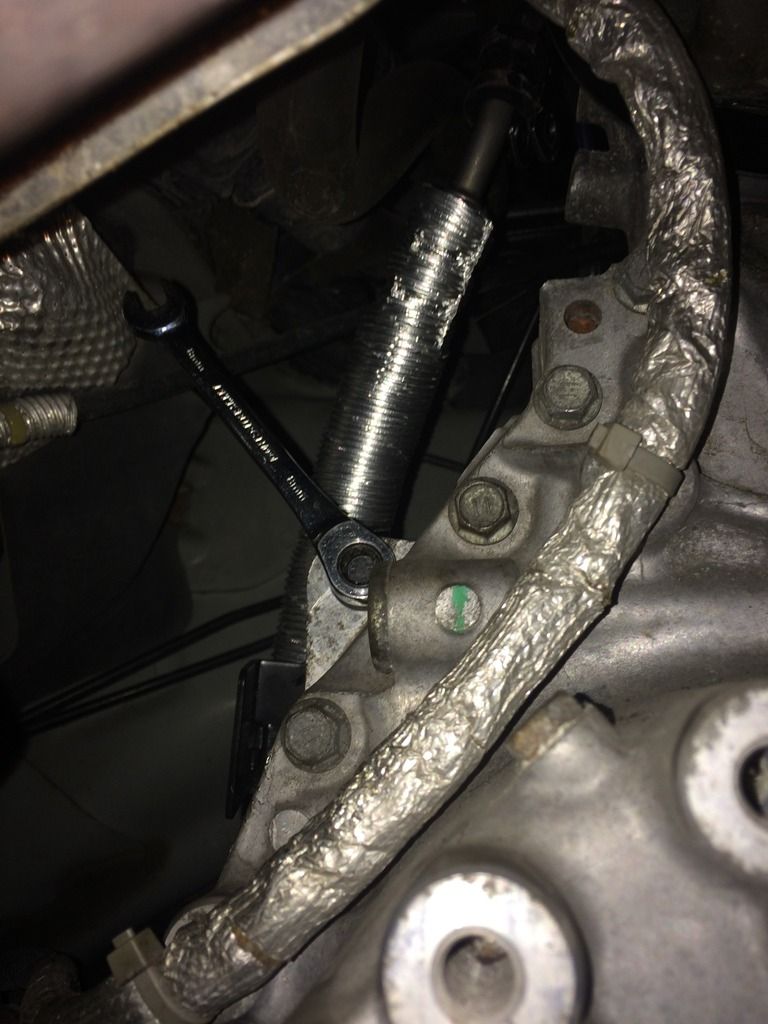 Remove the two cables from the starter (10mm nut and 13mm nut) and cut the two cable ties holding starter cables to the bottom of engine block so that pressure hose can be removed 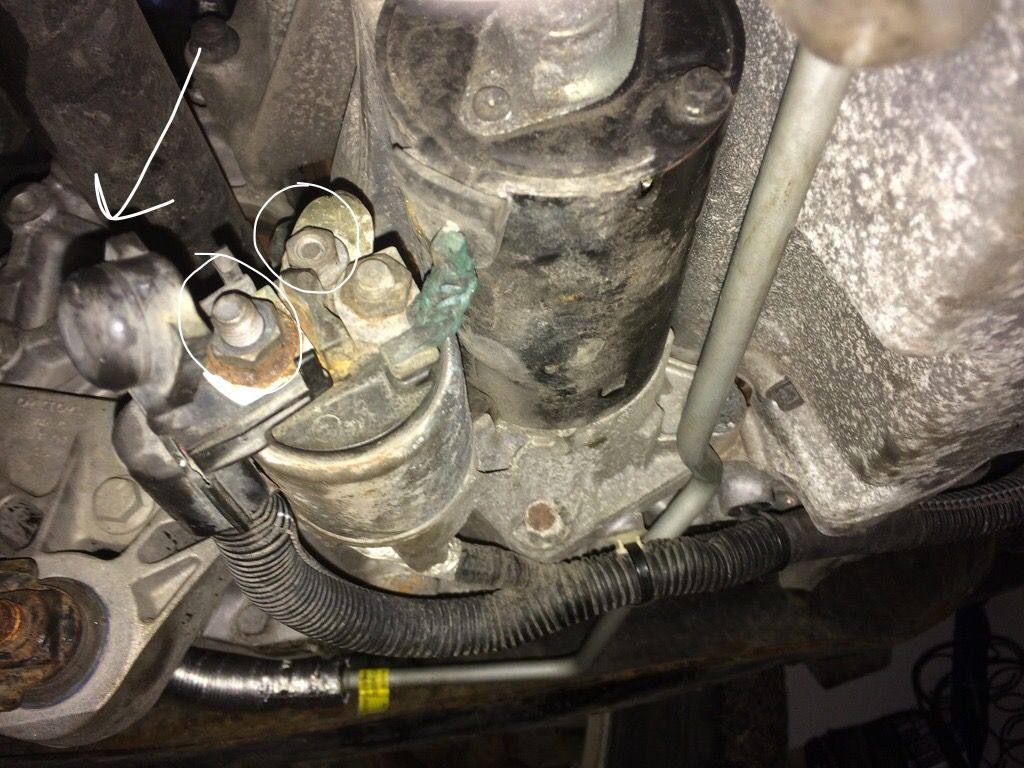 Remove the 13mm bolt and the 8mm bolts which support the pressure hose on the underside of the engine Last but definitely not least pop loose the quick-connect fitting on the pressure hose where it connects to the rack. In my case this was the most difficult part of the job by far and calls for its own set of instructions. See below. Step 10B: Getting the quick-connect on the pressure hose to disconnect Volvo calls for the use of a special tool (981-4047) to pop the quick-connect fitting off. I had no luck using it or anything similar to it. I tried using different variants of the tool pushing one way and then the other but still no dice. The image below shows the two special tools called for as part of the job. 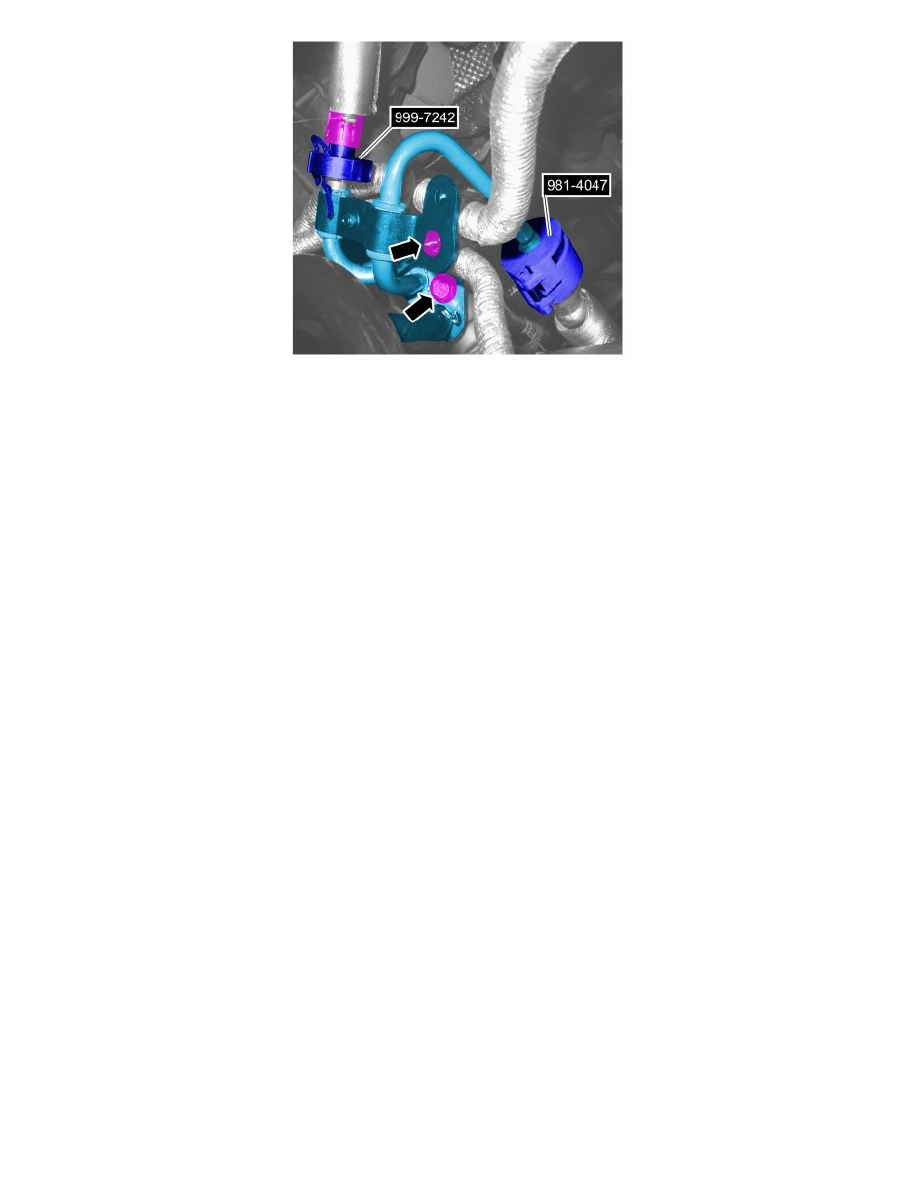 I finally caved and visited the local dealership and offered to pay for advice if I needed to be able to speak to a knowledgeable mechanic. Bless Volvo Metro West in Toronto, Canada for allowing me to speak with Mike, a senior service technician. Mike basically shook his head when I showed him the special tool and he said that sometimes these fittings get so gunked up that the tool will not allow for its removal. Often, in the shop, this ends up being a two person job as the try to push something like the 999-7242 tool in past the rubber seal to force the connection open this of course can damage the rubber seal which in fact is part of the rack hose! His recommendation was to do whatever I needed to, to get that hose off, probably by destroying it altogether. I pondered my options and came down to 2 that seemed doable. In order to understand what you are up against you almost have the be able to see the new hose as well as the rack fitting. Im still a bit confused as to how the fitting works but I know DO know that it relies on the action of a small circlip similar to what is inserted in an axle where it enters the transmission. I BELIEVE that this circlip needs to be forced open in order for the quick-connect fitting to release. Below is a close-up pic of the inside of the new hose fitting as well as the old hose in-situ for reference. 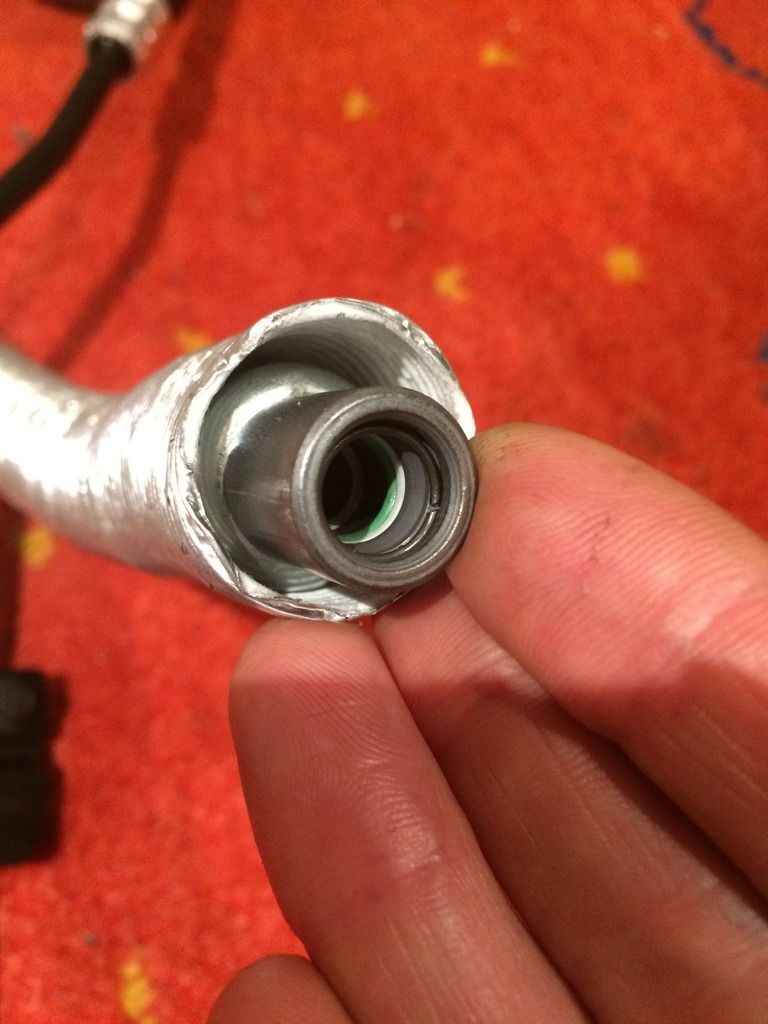 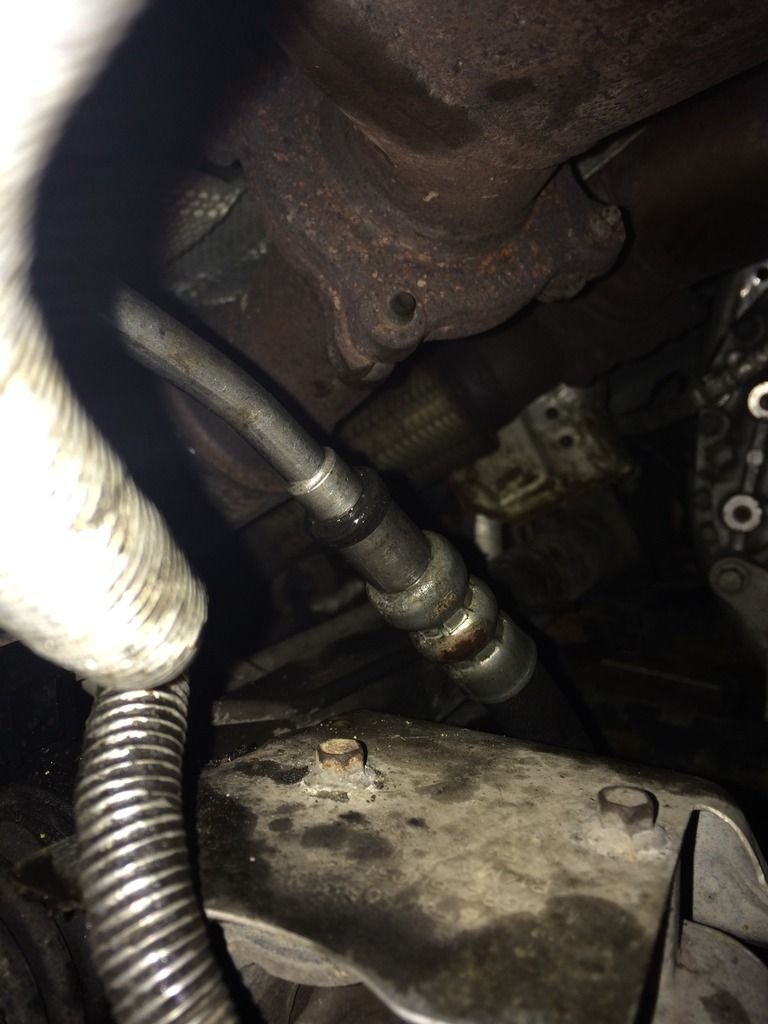 Option #1 was to take a dremel cutting wheel to the end of the fitting and very, very carefully cut it out praying that I would not damage the rack pipe fitting in the process. Option #2 was to take a pipe cutter to the end of the fitting placing in just the right place so that I would have direct access to the circlip within the pipe when I cut it open. I opted for option #2. I took a look at the new pipe and estimated that if I cut the pipe about 4mm from the end (basically as close as I could get the pipe cutter to the edge) I would gain direct access to the circlip. It took some doing but eventually it did cut through and behold there was the clip. Once I pulled out the circlip with a pick the remaining 4mm of pressure hose came right off. NOTE: you only get one try at this so make sure you get it right. Once the fitting has been cut, you will no longer be able to hold what is left, in place. Below are some pics that show option #2 in action. In the last picture you can sort of see the circlip still inserted in what was left of the pipe. I took a pick and pried the clip out and the rest of the pipe fitting fell right off. 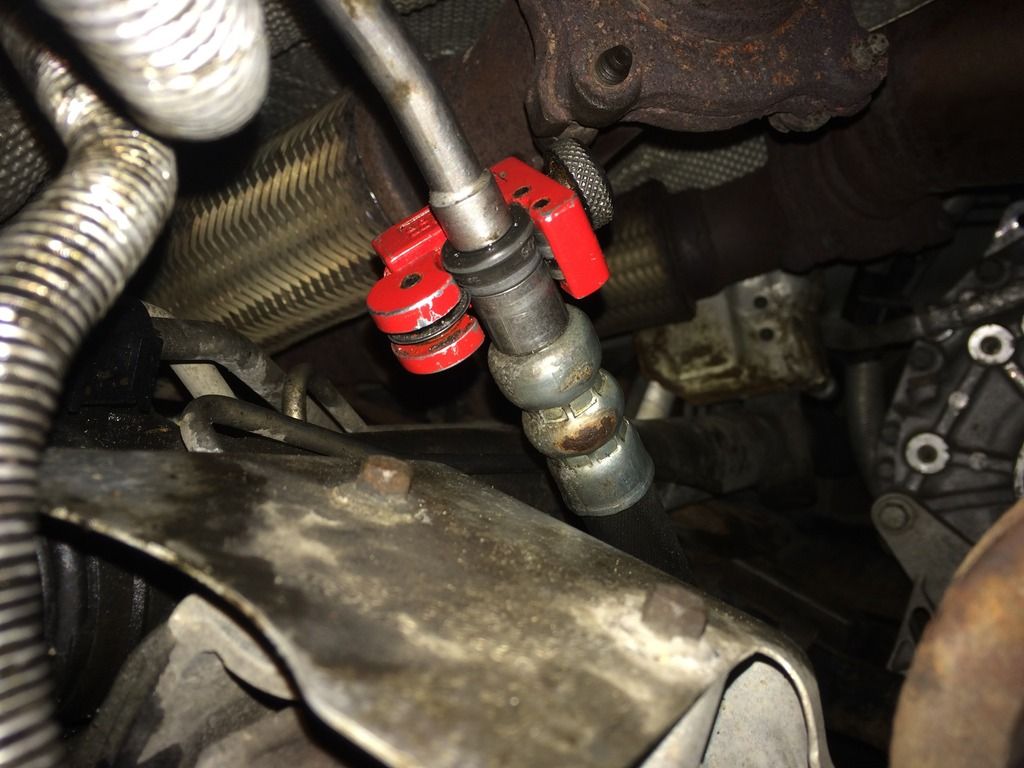 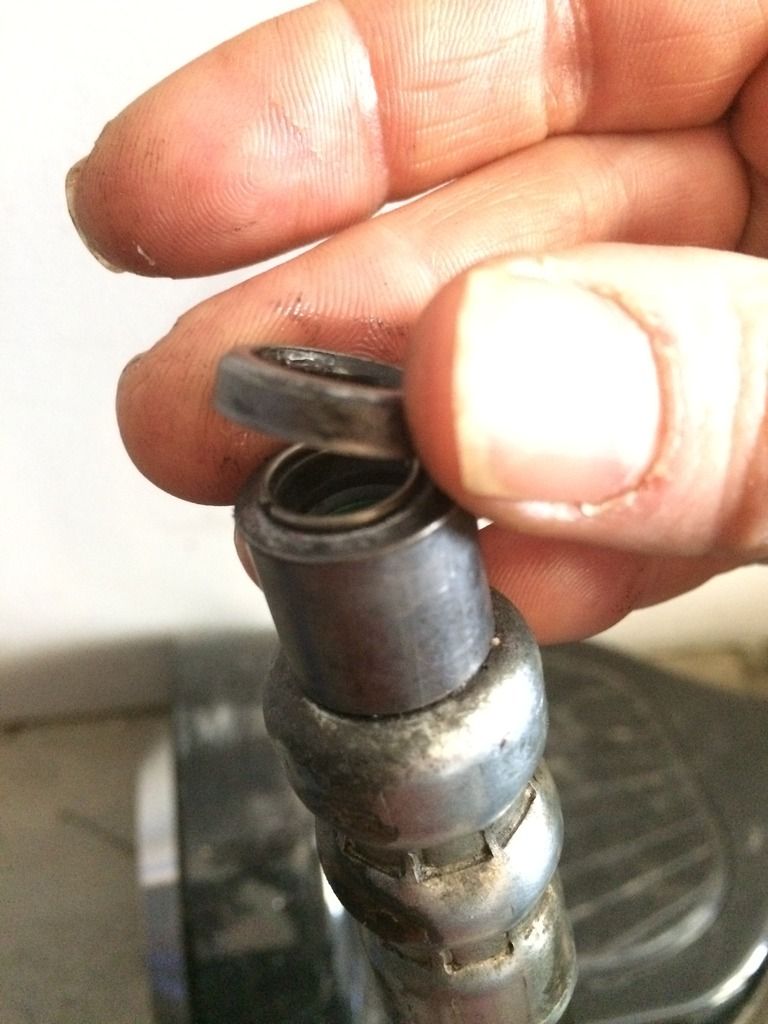 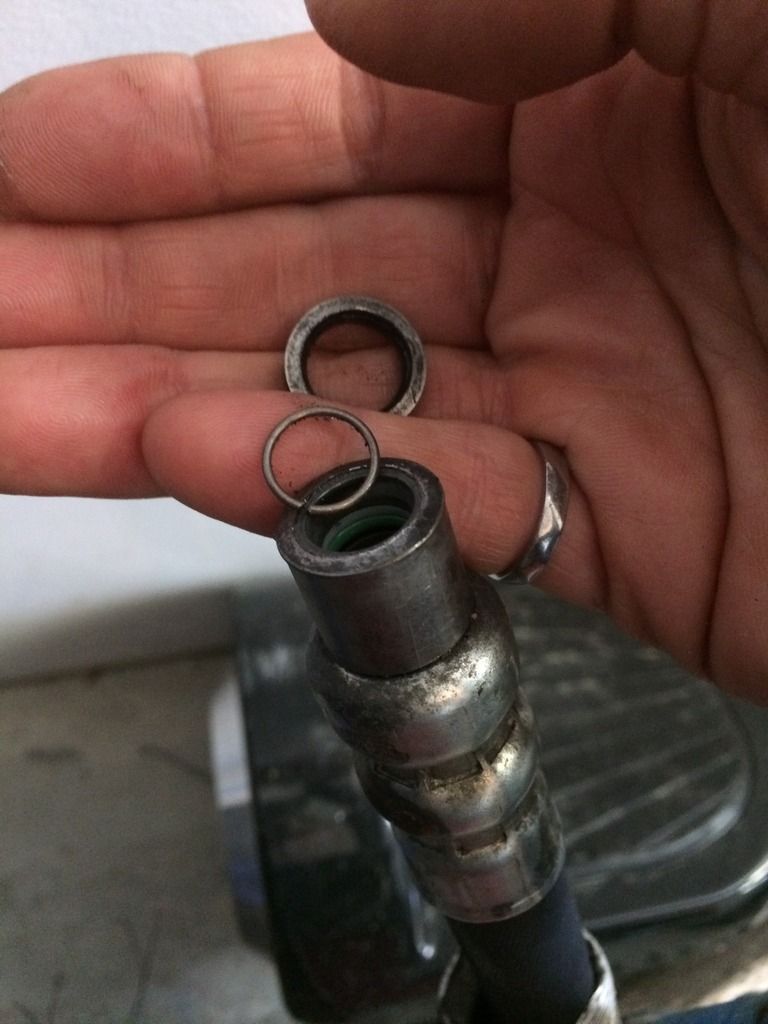 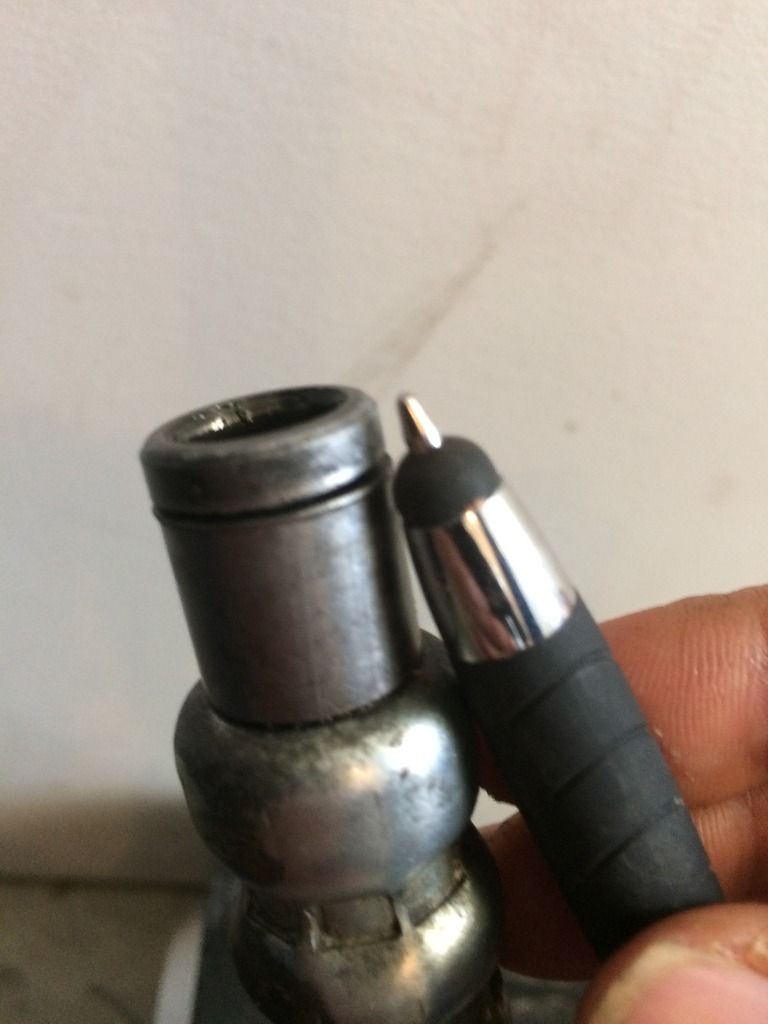 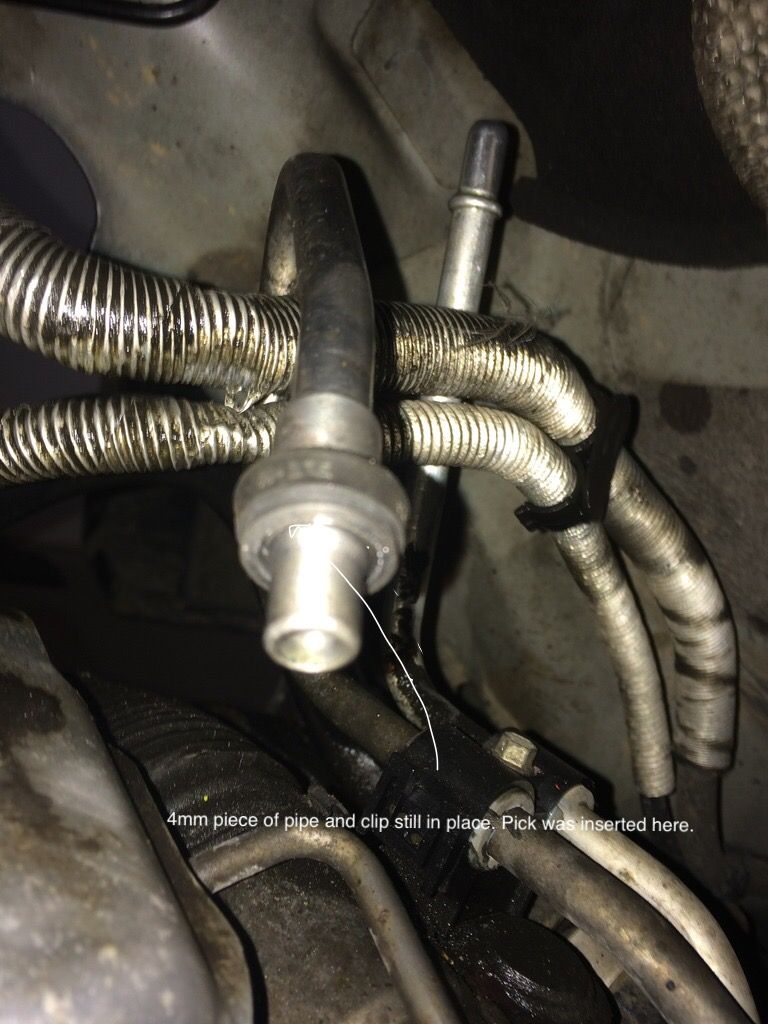 Re-installation is pretty straight-forward. No curve balls, no issues. Step 11: Install new pressure hose Start by lifting the pressure hose up towards the pump from underneath the vehicle. Then loosely install both 8mm bolts on the drivers side. Then carefully place the hose in the p/s pump and tighten to 30Nm. Go back and tighten the 2x 8mm bolts. Re-install the two bolts on the underside of the engine (13mm and 8mm) Re-connect the two starter cables and secure with zip-ties Re-connect the quick-connect fitting Step 13: Install new return hose Step 15: Re-install wheel well cover Step 16: Re-install under-carriage cover Step 17: Re-install the air filter assembly and battery Step 18: Refill and bleed the power steering system With engine off, turn the steering wheel between both end positions repeatedly 10 times. Fill with fluid if necessary. Make sure you monitor fluid level throughout having a second person assisting is preferable. Apply the parking brake. Start the engine. A: Turn the steering wheel slowly to the right. Hold it in the limit position for a maximum of 2 seconds. B: Turn the steering wheel slowly to the left. Hold it in the limit position for a maximum of 2 seconds. Switch off the engine, wait 5 minutes and repeat steps A and B 10 times. Repeat the operation. Switch off the engine, wait 5 minutes and repeat steps A and B 10 times. Keep checking fluid level throughout process.
__________________
2003 V40 1.9T B4204T4, 197,000miles (sold but alive!), 2004 S60 2.5T, 160,000miles, 2010 V70 3.2, 125,000miles, 2002 V70XC 2.4, 175,000miles  Click here for my x40 and V70 P3 repair guides |

|

|
| The Following 3 Users Say Thank You to pierremcalpine For This Useful Post: |
|
| Currently Active Users Viewing This Thread: 1 (0 members and 1 guests) | |
|
|


 Linear Mode

