
|
|||||||
| S40 / V40 '96-'04 General Forum for the Volvo S40 and V40 (Classic) Series from 1995-2004. |
 Information
|
|
GUIDE: Refreshing a headlight switchViews : 2740 Replies : 7Users Viewing This Thread : |
 |
|
|
Thread Tools | Display Modes |
 Jan 30th, 2012, 10:49
|
#1 |
|
Senior Member
Last Online: Oct 20th, 2013 20:24
Join Date: Aug 2007
Location: Derbyshire
|
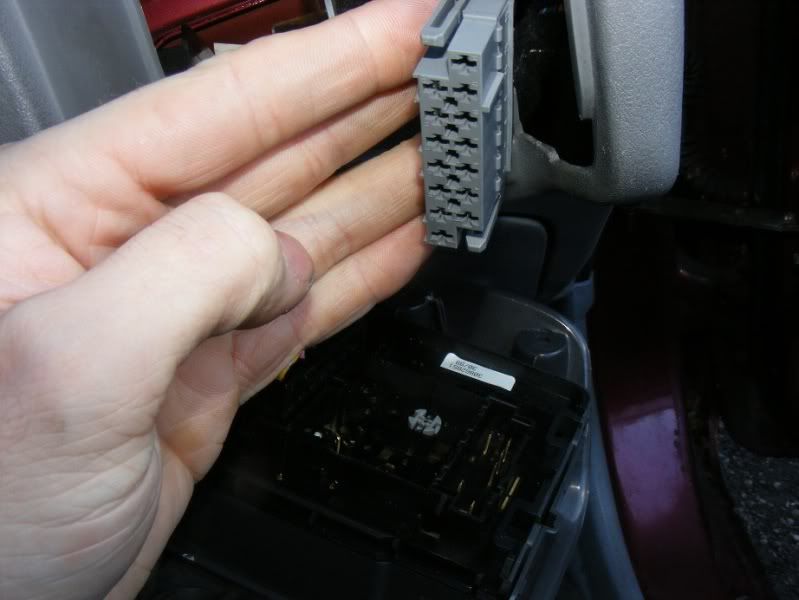
Whilst fault finding on my car I needed to rule out my headlight switch as a problem, whilst this is by no means a service item, a few people have commented about switch contacts causing issue so here's how to get to it and clean it
Step 1 - There are two posidrive screws that hold the base of the unit in place, remove the 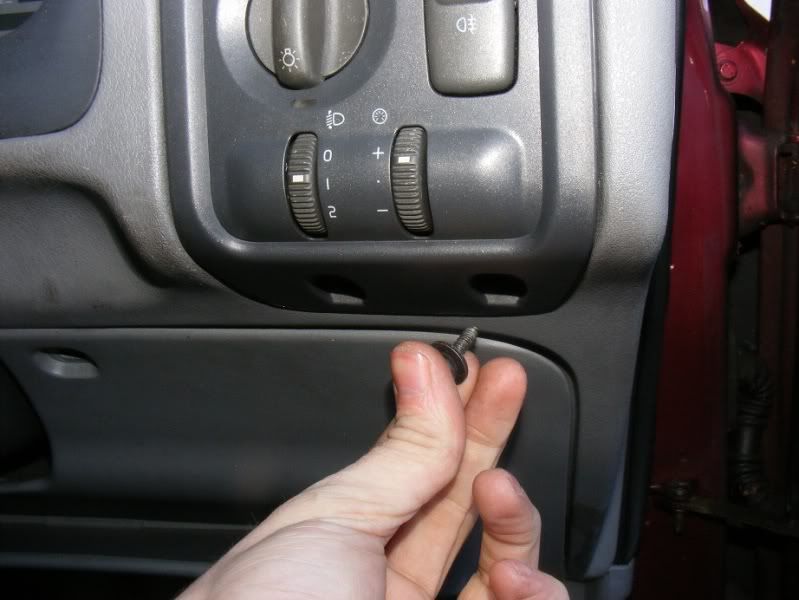 Step 2 - Gently ease the unit forward, there should be little/no resistance 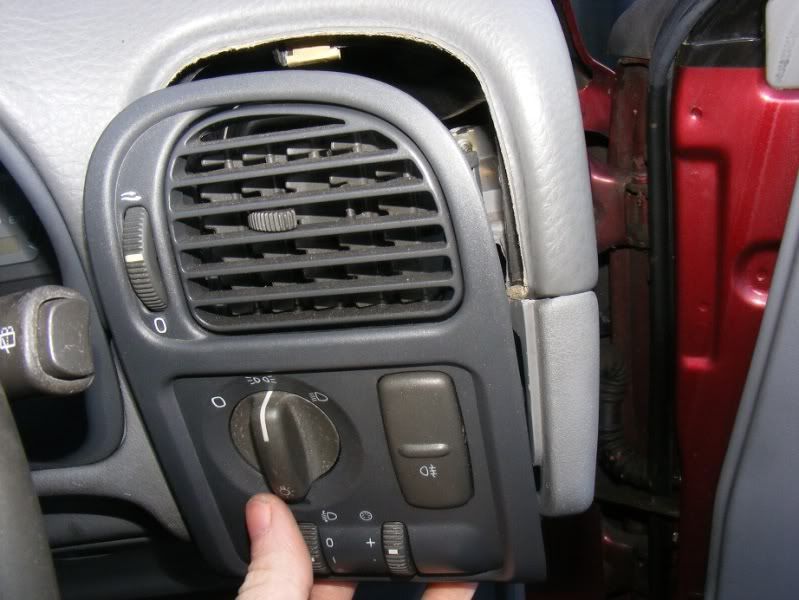 Step 3 - Note there should be a piece of plastic running from the tube you can see at the back to the little semi circle where my finger is pointing. This just slides out normally 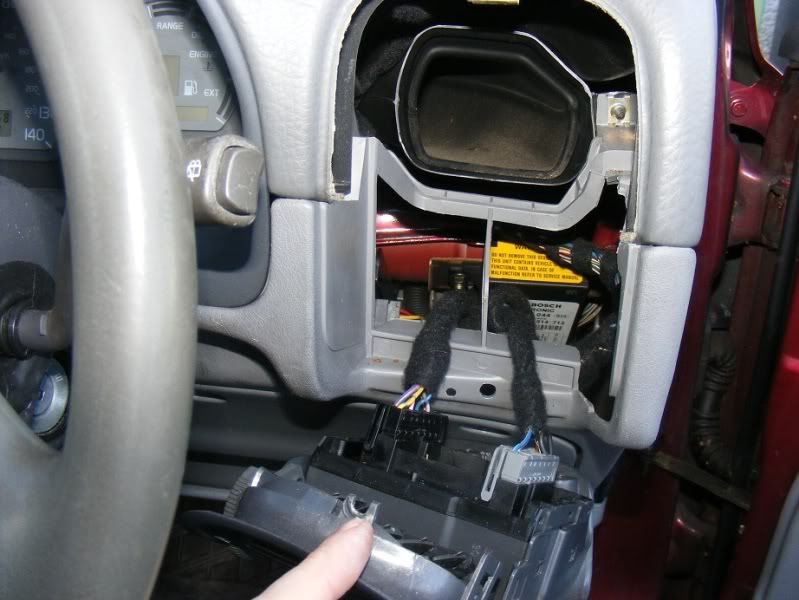
__________________
Click here for guides |

|

|
| The Following User Says Thank You to JSeaman For This Useful Post: |
|
Jan 30th, 2012, 10:50
|
#2 |
|
Senior Member
Last Online: Oct 20th, 2013 20:24
Join Date: Aug 2007
Location: Derbyshire
|
Step 4 - For the two multiplugs, simply lift the tab and pull the connector away
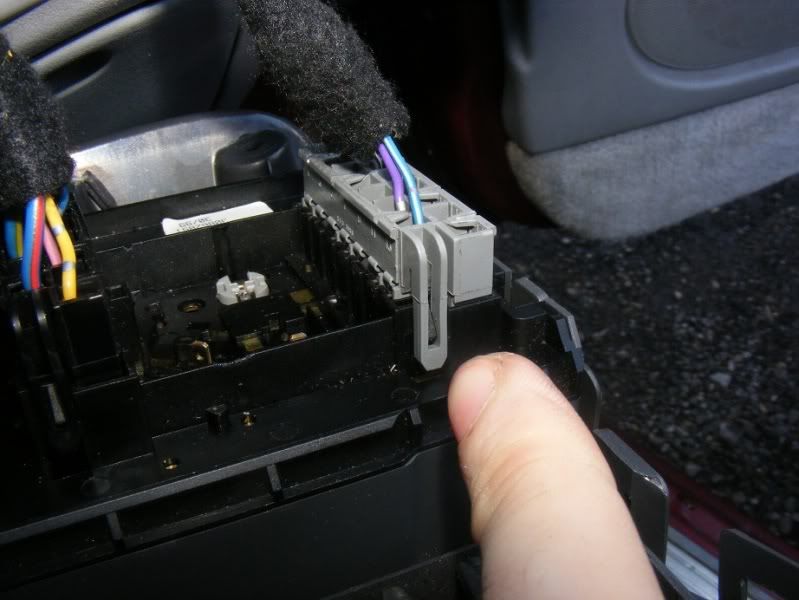  Step 5 - Depress the 4 grey tabs and slide the switch mechanism out of the surround 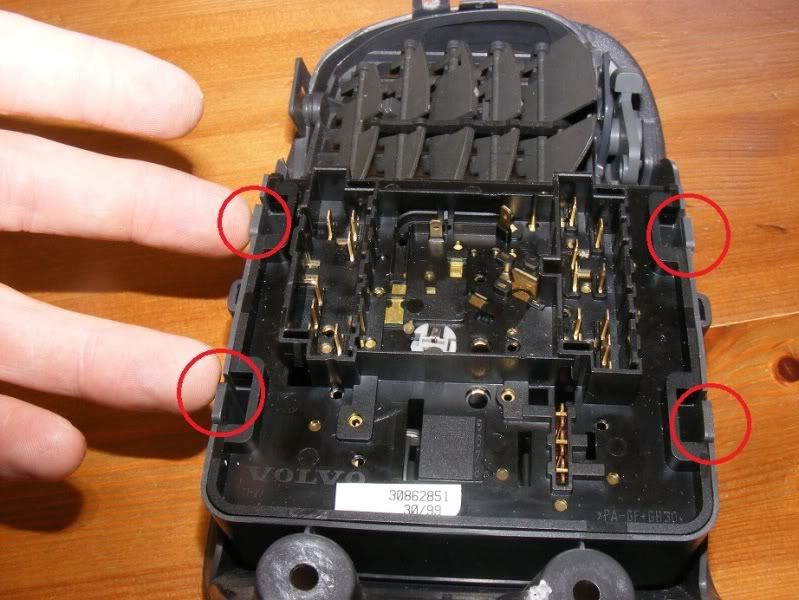 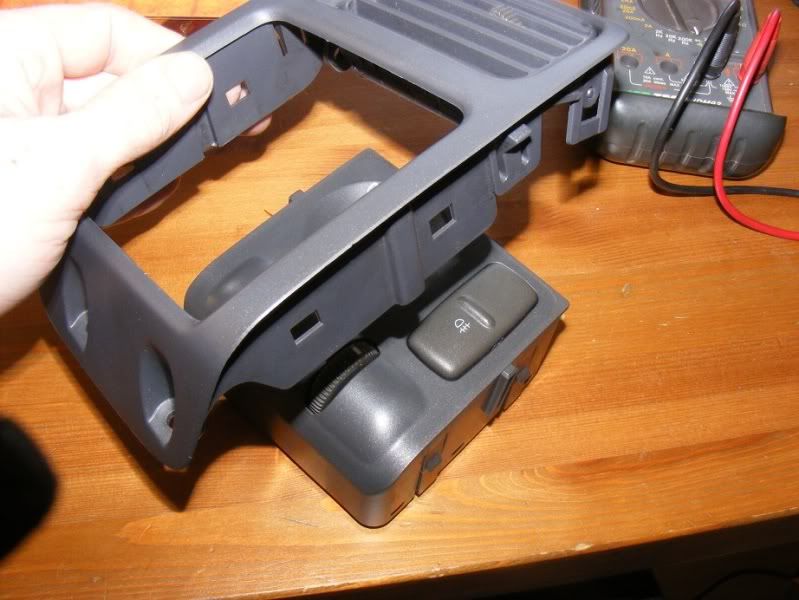
__________________
Click here for guides |
|
|
|
|
Jan 30th, 2012, 10:51
|
#3 |
|
Senior Member
Last Online: Oct 20th, 2013 20:24
Join Date: Aug 2007
Location: Derbyshire
|
Step 6 - There are now 6 tabs that lock the unit together, very gently ease each one back and allow the inner piece to pop up a very small amount. Once you have released all 6, the unit will separate easily. Note that if you are forceful you will probably break the plastic, a flatblade screwdriver and gentle care or even a fingernail will suffice
 Step 7 - Remove the cover and you will have access to the switch contacts 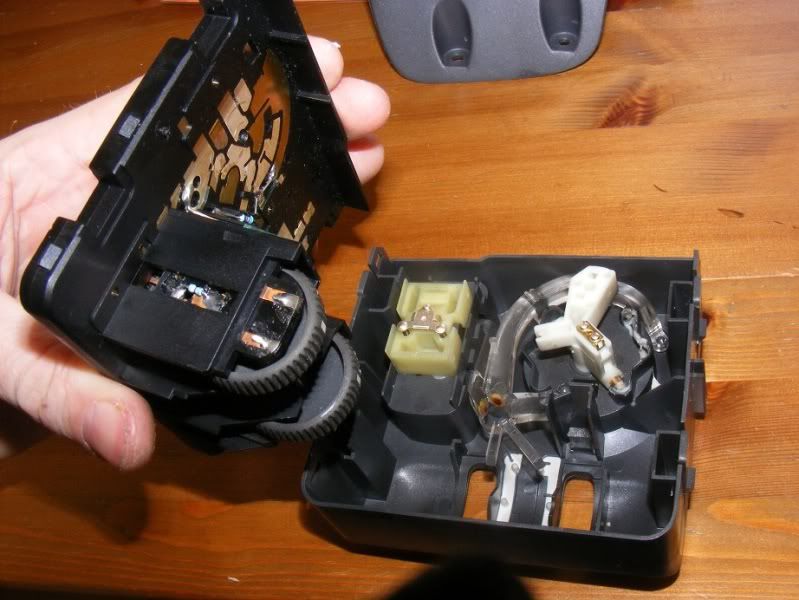 Step 8 - Clean up the two contacts on the switch itself 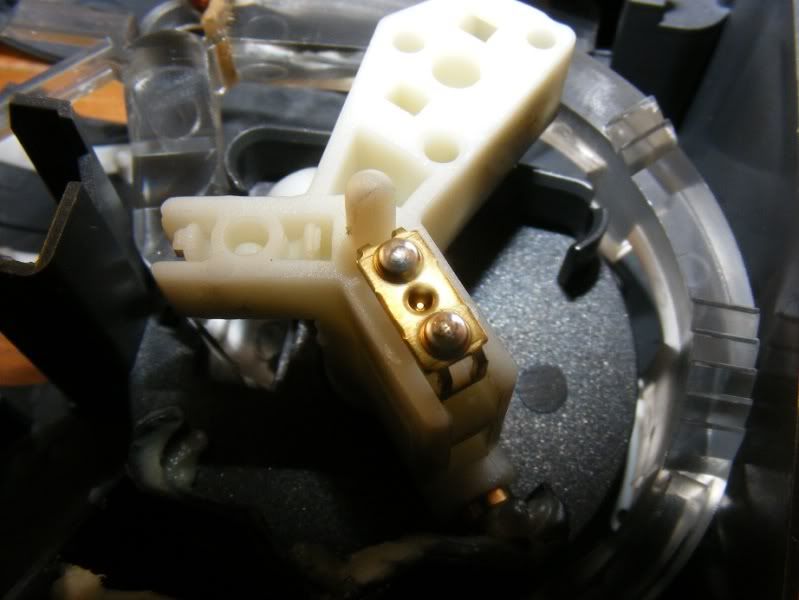 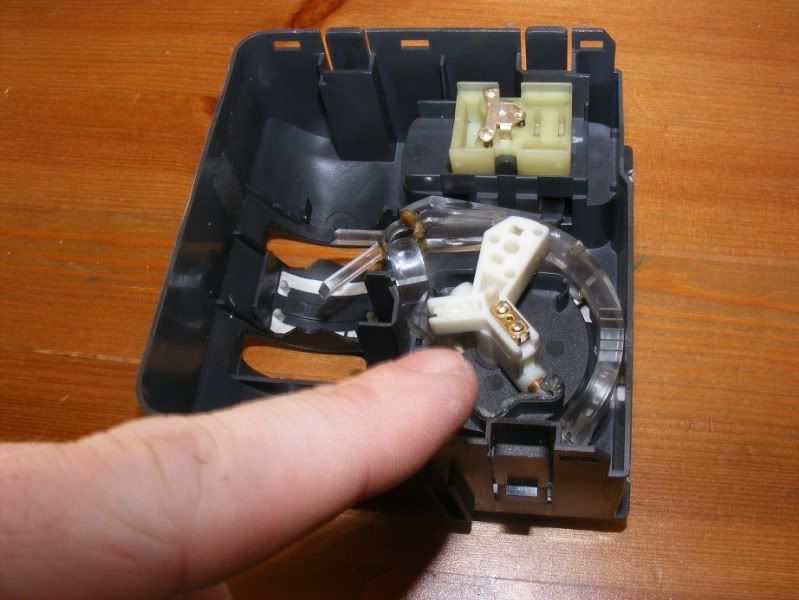
__________________
Click here for guides |
|
|
|
|
Jan 30th, 2012, 10:52
|
#4 |
|
Senior Member
Last Online: Oct 20th, 2013 20:24
Join Date: Aug 2007
Location: Derbyshire
|
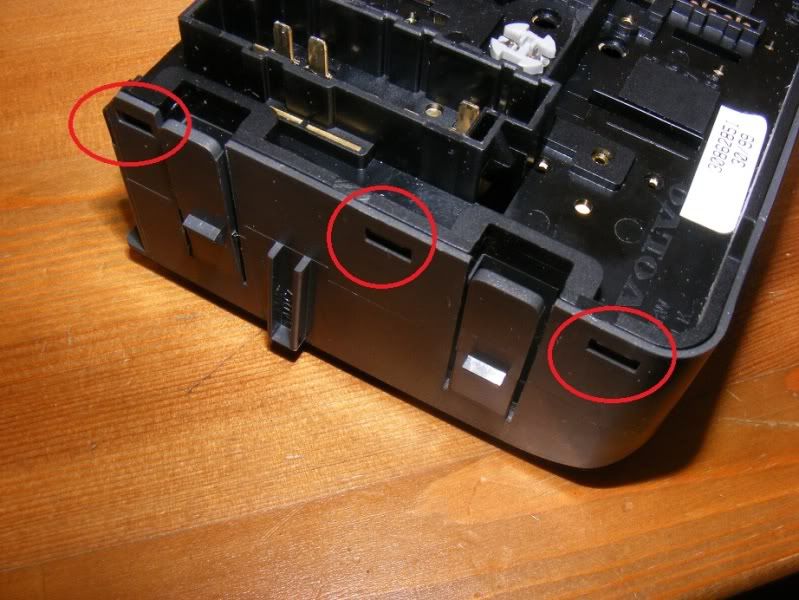
Step 9 - Wipe off any signs of scoring where the contacts travel on the metal work. Also look for any signs of water ingress (green build up etc) which need to be gently removed
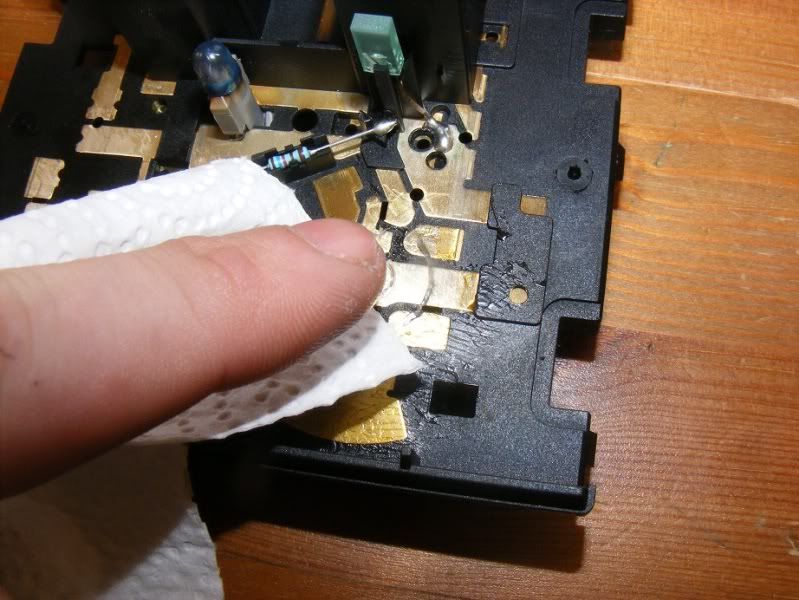 Step 10 - Once clean you can use electrical contact grease for longevity or simply refit dry 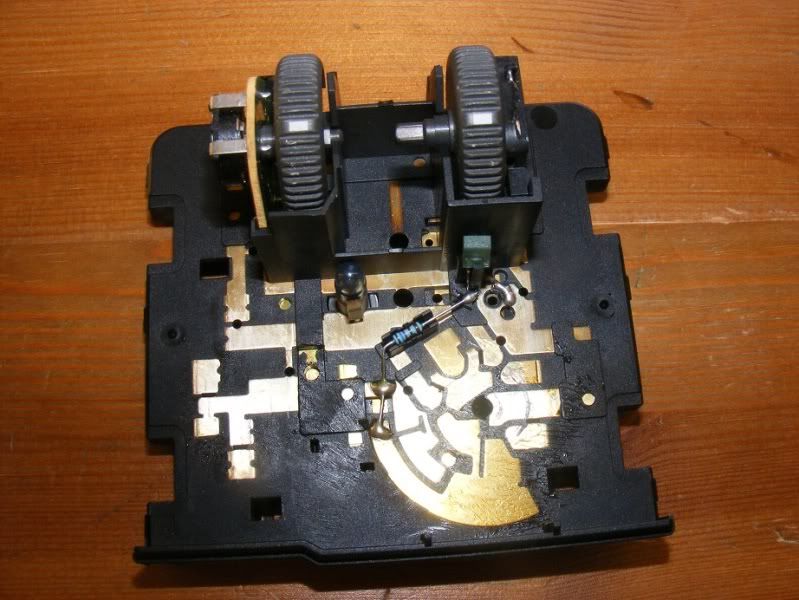 Step 11 - Refit into the surrounds and clip together the unit then pop the multiplug back on and afix with the two screws removed in step 1 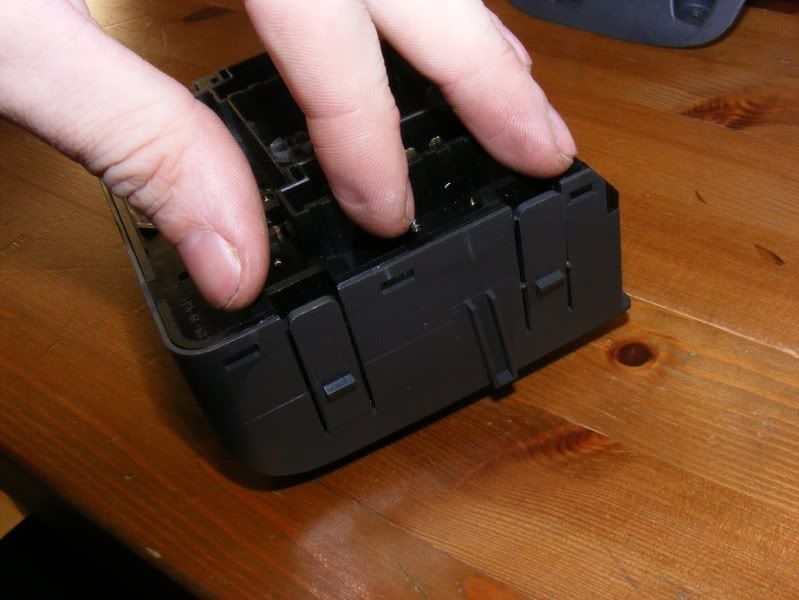 
__________________
Click here for guides |
|
|
|
| The Following 7 Users Say Thank You to JSeaman For This Useful Post: |
|
Jan 30th, 2012, 21:02
|
#5 |
|
1.8 not GDI, T4 1.9cd

Last Online: Oct 4th, 2014 21:34
Join Date: Aug 2010
Location: manchester
|
hi js, i think you'r missing two contacts on the rorty switch, i've got three of these on mine, look at step 8, did you take yours off for cleaning ?
Last edited by 40s; Jan 30th, 2012 at 22:11. |
|
|
|
|
Jan 30th, 2012, 22:39
|
#6 |
|
Senior Member
Last Online: Oct 20th, 2013 20:24
Join Date: Aug 2007
Location: Derbyshire
|
Nope, the middle one is just the fixing point on mine - you can also see from the wear grooves that there were only ever two
__________________
Click here for guides |
|
|
|
|
Jan 30th, 2012, 22:47
|
#7 | |
|
1.8 not GDI, T4 1.9cd
Last Online: Oct 4th, 2014 21:34
Join Date: Aug 2010
Location: manchester
|
Quote:
|
|
|
|
|
|
Jan 30th, 2012, 23:27
|
#8 |
|
Senior Member
Last Online: Oct 20th, 2013 20:24
Join Date: Aug 2007
Location: Derbyshire
|
Thanks a lot - it seems that Volvo change things a lot more than I was expecting between years/models, hopefully the principles will apply to all/the majority!
__________________
Click here for guides |
|
|
|
| The Following User Says Thank You to JSeaman For This Useful Post: |
|
| Currently Active Users Viewing This Thread: 1 (0 members and 1 guests) | |
|
|


 Linear Mode

