

|
|||||||
| S60 & V60 '18> / XC60 '17> / S90 & V90 '16> / XC90 '15> General Forum for the SPA-platform 60- and 90-series models |
 Information
|
|
'How To' Door Inlay Swap OverViews : 6020 Replies : 23Users Viewing This Thread : |
 |
|
|
Thread Tools | Display Modes |
|
|
#1 |
|
Events occur in real time
Last Online: Jan 24th, 2024 19:51
Join Date: Sep 2007
Location: Worcester
|
So, with my aim to swap out my ‘crossed brushed aluminium', decor inlays to ‘linear walnut’ ones, my parts order for an entire interior set of walnut has started to come through.
I am still waiting for the dash items and the central floor console parts, but the inlays for the 4 doors have arrived, so I set about swapping those over this weekend. For those that may be interested in how certain items are disassembled, or are contemplating doing such a task, I hope the following is of interest. When the other items arrive, I can do the same for those. Before starting: Make sure the ignition is off and the car key is well out of range of the car. I began with the two rear doors. These are straightforward and don't require the entire door cards to be removed. These inlays just carefully pry off, from the door hinge end first, and are held on with sprung metal clips along their length with a retaining 'lug' on their narrowest end. If the interior lighting option has been specified, there is a small white connector to unplug from the rear of the inlay. 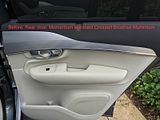 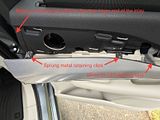 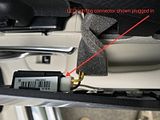 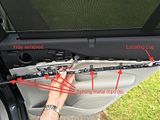 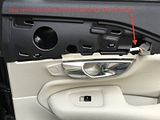 Unplug this connector and lay the inlay face down on a soft surface to work on its rearmost side. To remove the interior lighting LED strip from the rear of the inlay, carefully use a small flat bladed screwdriver to depress and release the tabs securing it along its length to the back of the inlay. The female plug socket can be released by pushing a small flat blade or similar into the slot between the connector and its mounting lug, whilst carefully lifting the plug socket off the mounting lug. 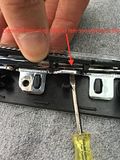 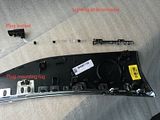 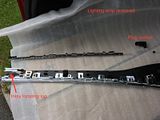 Place the entire lighting strip to one side-it gets fitted to the replacement door inlay in a reverse of the removal procedure. The lighting strip clips into place along its length and the female plug socket clicks into place onto its corresponding mounting lug. 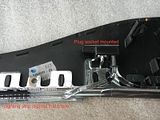 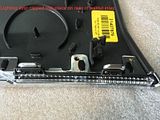 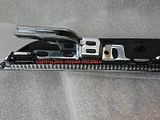 Once on, the replacement door inlay then can be refitted to the door card. Connect the white lighting plug connector, if fitted. Locate the lug on the narrowest end of the inlay into the door trim first, and slide it into place. When all of the metal spring clips line up with their corresponding holes in the door trim, press the inlay into place with the heel/palm of your hand. There should be a satisfying click or flush fit, to confirm the item is in place. 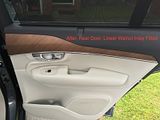 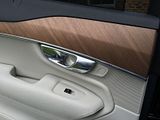 The front doors are very similar, but require a bit more work. I started with the front passenger side door first. 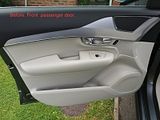 In the grab handle part of the door trim, there is a flexible inlay that needs to be removed first. Many of you may not have even given this part a second glance, but it very neatly hides the two Torx screws that are responsible for holding the entire door card in place. Using a clean, trim removal tool (I was using a Volvo trim removal tool, a throwback from a previous life, but many similar ones will suffice), carefully push back the leather trim and get behind the (hidden), edge of the flexible door handle trim piece. Once started, it becomes easy to secure the release of the trim piece from the handle. It is purely a vinyl/polypropylene trim that covers two T25 screws that are responsible for holding the door card in place.  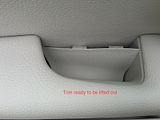 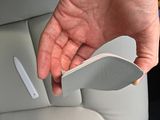 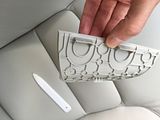 Remove the two screws and then literally 'pull up' the door card, using the grab handle. The card is secured by several plastic lugs all around the rear of the door trim which locate in several plastic receivers all around the door frame. It is a very simple up and down movement that secures the trim in place. The top of the door trim is a snug fit around the window. 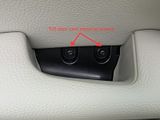 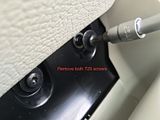 Once off, you will see the connections between the door card and the door itself amount to a cable for the door opening release, and one multi pin connector supplying all of the door's electrics. Both need to be disconnected. 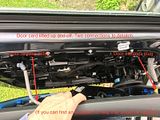 Release the two sprung tabs on the cable fitting, release the cable. By pressing the tab on the grey multi pin connector you can separate the two parts of the plug. If you have another pair of hands to help hold the weight of the door trim whilst you disconnect these two things, all the better. 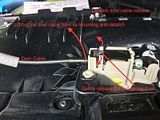 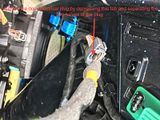 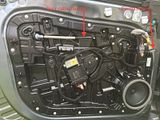 Place the door trim face down onto a clean soft surface. I was using the boot floor of the car. Unscrew the five T15 Torx screws which secure the inlay to the door card. 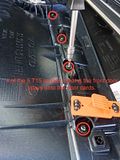 If interior lighting has been specified, unplug the small white connector that supplies this. I found snipping the cable tie that secures this plug's wire to the door trim gave me a little extra slack in unplugging this connector. Just remember to fit a new small cable tie on completion of the inlay swap over. With this plug disconnected and the 5 Torx screws removed, the inlay should push off the door trim. It may help to squeeze from behind, the sprung metal tabs that are also used to hold the inlay on to the door card (like the rear doors). As per the rear doors, remove the LED lighting strip. The replacement walnut inlays for the front doors, both came with cutouts in the speaker grilles for the seat/mirror memory module, regardless of whether this was a left hand or right hand drive car. Obviously with this being a right hand drive car, I only need one of the new inlays to have this cut out, the passenger side does not require it. This means I will need to transplant the original speaker grille from the original aluminium passenger inlay, over to the new passenger walnut inlay. 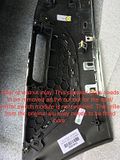 This involves a little more work and some patience to get the desired effect. Working on the rear of the passenger side inlay, unclip the shiny metal tabs that secure the chrome metal frame to the speaker grille. In hindsight, I realised that this frame doesn't actually require removal, but I felt it was better out of the way from the heat tool used in the next step. 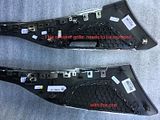 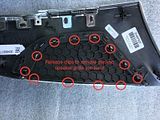 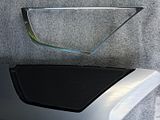 It can be seen that the grille is 'plastic welded' onto the rear of the inlay. It doesn't just clip on, unfortunately. Its securing tabs have been melted over during manufacture to provide a secure mounting. Using a Dremmel gas powered soldering iron with a blade attachment, I heated up the 'melted welds', and carefully removed the grille from the inlay. 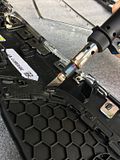 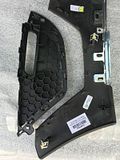 With a sharp scalpel, I cleaned up any molten plastic from the grille mounting points and transplanted this onto the back of the new walnut inlay, after first removing its own grille, in exactly the same way. When the transplanted grille is in place on all of the locating tabs, heat up the plastic mounting tabs and remake the plastic welds. When the grille is nice and secure, clip into place the metal grille frame. 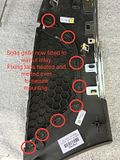 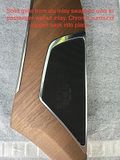 Clip into place the LED lighting strip as done on the previous doors. Secure the walnut inlay to the door trim, remember to reconnect the lighting plug if this is fitted, add a new cable tie to the plug's wires if you cut it, and fasten the inlay with the five Torx screws you removed. 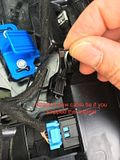 Fitting the door card to the door frame. Reconnect the door release cable to the fitting in the reverse of its removal. Reconnect the door's grey electrical plug. Again, another pair of hands can be handy for this part. Fit the door card to the door frame. Start at the top by the window surround where the fit is closest. Hold the entire door card flat against the door frame and allow the trim to drop downwards by an inch or so, imagine all of the locating lugs fitting into their respective receivers. Run your hand around the join between door card and door itself to check for any inconsistencies with fitting gap. The two Torx holes should be aligned in the door grab handle area. Re fit these two T25 screws. Refit the vinyl trim piece that covers these screws. 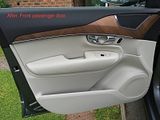 Driver's door. Same as the passenger side door only on this one, there is the seat/mirror memory module to fit. This inlay already has the cut out in the speaker grille so there is no need for any speaker grille swapping to take place. 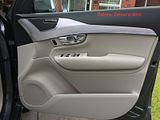 Once the door card is off and laid out flat on a clean, soft surface, unscrew the five T15 Torx screws from behind and disconnect the LED lighting white plug, as before. 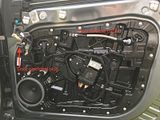 On this door you will also need to disconnect a blue electrical plug which feeds the seat/mirror memory module. 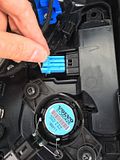 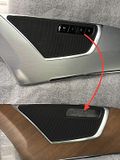 Peel off and keep safe, the anti rattle material tape that is wrapped around the module and release the 4 sprung clips that secure the module to the door card. This fits to the new walnut inlay in exactly the opposite way as removal. Clip it into place, re wrap the material tape pieces and reconnect the blue electrical plug. 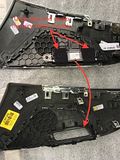 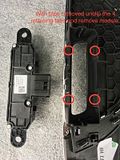 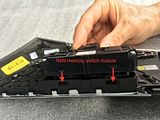 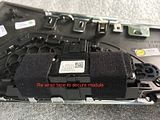 Fitting of the inlay is just the same as described before. Remember any LED plugs and cable ties if you snipped them.  Refitting of the door card to the door frame is the same as described before. 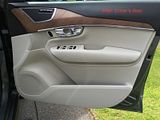 That's all 4 doors done. You now know everything has been done properly and you will probably have learned a thing or two about your new truck too! Looks great doesn't it! Part numbers used: R/O/S 31407879 R/N/S 31407869 F/O/S 31407858 F/N/S 31407843
__________________
2020 XC40 T4 AWD Inscription 2017 XC90 D5 PP Momentum (Sold) 2007 V70 D5 SE 6 speed manual (Sold) 2005 S40 2.0D SE (Sold) Last edited by Lozza; Jul 3rd, 2016 at 16:56. |
|
|

|
|
|
#2 |
|
Premier Member
Last Online: Apr 2nd, 2023 10:37
Join Date: May 2016
Location: Yorkshire
|
Wow great sharing.
Can I ask what your view was of the overall quality of the car as this can become clearer when you take something apart. I see China on some bits! Last edited by neon; Jul 3rd, 2016 at 15:53. |
|
|

|
|
|
#3 |
|
Events occur in real time
Last Online: Jan 24th, 2024 19:51
Join Date: Sep 2007
Location: Worcester
|
Thanks Neon. I was very impressed if I'm honest. Things were screwed and clipped together nicely, trim went back as it should have - always a tell tale sign when things don't go back the same as before or deform.
China - I mainly saw Sweden on the trims and panels. No more 'FoMoCo' as on previous Volvos. China appears on everything from Vauxhalls to BMW's, manufacturers will source globally. I'm really not concerned.
__________________
2020 XC40 T4 AWD Inscription 2017 XC90 D5 PP Momentum (Sold) 2007 V70 D5 SE 6 speed manual (Sold) 2005 S40 2.0D SE (Sold) Last edited by Lozza; Jul 3rd, 2016 at 15:52. |
|
|

|
|
|
#4 | |
|
Premier Member
Last Online: Apr 2nd, 2023 10:37
Join Date: May 2016
Location: Yorkshire
|
Quote:
Last edited by neon; Jul 3rd, 2016 at 15:59. |
|
|
|

|
|
|
#5 |
|
Events occur in real time
Last Online: Jan 24th, 2024 19:51
Join Date: Sep 2007
Location: Worcester
|
I agree, it has been a much mentioned statement on 'the new dawn' for tomorrow's Volvos.
Volvo do have plants in China (like many manufacturers), which are building and selling to their home market. The 1st gen XC90 is now built and sold there badged as 'XC90 Classic'. Get behind a modern JLR product, Audi, Mercedes etc. and their make up is far more than components from their home nation.
__________________
2020 XC40 T4 AWD Inscription 2017 XC90 D5 PP Momentum (Sold) 2007 V70 D5 SE 6 speed manual (Sold) 2005 S40 2.0D SE (Sold) |
|
|

|
|
|
#6 |
|
Premier Member
Last Online: Yesterday 17:30
Join Date: Feb 2016
Location: Yorkshire
|
Great post, thanks for that. The walnut trim is a big improvement.
I reckon the issue with having to swap over the grille is to do with the different Decor Panel option packs. They are:
It's got me wondering if my dealer knows about this. Do you happen to have the part numbers that you got? |
|
|

|
|
|
#7 |
|
Events occur in real time
Last Online: Jan 24th, 2024 19:51
Join Date: Sep 2007
Location: Worcester
|
Thanks! I suspect you could be right. Different markets, different models and specs, different audio systems with different grilles.
They can only make so many parts and combinations. I've added the part numbers I used to the end of the post.
__________________
2020 XC40 T4 AWD Inscription 2017 XC90 D5 PP Momentum (Sold) 2007 V70 D5 SE 6 speed manual (Sold) 2005 S40 2.0D SE (Sold) |
|
|

|
| The Following User Says Thank You to Lozza For This Useful Post: |
|
|
#8 |
|
Member
Last Online: Oct 17th, 2016 19:06
Join Date: Jul 2012
Location: Thame
|
I have absolutely no intention of doing this myself but found your write up fascinating. Great to se the inside workings and I must say the finished inlays real look the part - well worth the effort.
Thanks |
|
|

|
| The Following User Says Thank You to Mezza For This Useful Post: |
|
|
#9 | |
|
Premier Member
Last Online: Apr 2nd, 2023 10:37
Join Date: May 2016
Location: Yorkshire
|
Quote:
|
|
|
|

|
|
|
#10 |
|
Events occur in real time
Last Online: Jan 24th, 2024 19:51
Join Date: Sep 2007
Location: Worcester
|
You can find the country of origin on all kinds of components, electronics, switch modules, absolutly all sorts. To see China on a door tweeter is the least of my concerns.
Don't for a minute think you'll see Germany on every part of your Mercedes.
__________________
2020 XC40 T4 AWD Inscription 2017 XC90 D5 PP Momentum (Sold) 2007 V70 D5 SE 6 speed manual (Sold) 2005 S40 2.0D SE (Sold) |
|
|

|
 |
| Currently Active Users Viewing This Thread: 1 (0 members and 1 guests) | |
|
|